PC "Taxpayer PRO"
PC "Taxpayer" - designed for accounting, preparation of accounting and tax reporting to the Federal Tax Service, Pension Fund of the Russian Federation, Social Insurance Fund, Federal Social Insurance Fund in electronic form on magnetic or paper media in approved forms and formats, including for transmission via telecommunication channels (TCC) with an electronic digital signature (EDS).
download latest version
2019.11.18
Calendar
| 28 | 29 | 30 | 31 | 1 | 2 | 3 |
| 4 | 5 | 6 | 7 | 8 | 9 | 10 |
| 11 | 12 | 13 | 14 | 15 | 16 | 17 |
| 18 | 19 | 20 | 21 | 22 | 23 | 24 |
| 25 | 26 | 27 | 28 | 29 | 30 | 1 |
What's new?
A PROJECT of reporting in the SZV-TD form has been implemented - electronic work books (the project has not yet been approved). Reporting is planned to be submitted to the Pension Fund on a monthly basis starting in 2020
Accounting: In the Purchases and Sales section, a new “Analytical report on sales” has been added for any time interval by customers and/or product (services) with a large number of settings
In the "Salary statements" mode, the ability to print a list of statements has been added
In the settings on the “Taxation” tab for IT organizations (tariff 06), starting from 2019, the date for receiving accreditation has been added. When filling out this date, the calculation of contributions at a preferential rate is made not from the beginning of the quarter, but from the month of receipt of accreditation
In printed forms for pay slips, a new document has been added - a log of the issuance of pay slips
The ability to upload documents from the seller (invoices, UPD, Acts, TORG-12, etc.) into the program information base via electronic document management (EDF) according to approved formats (Accounting-EDO menu) has been implemented.
When calculating/recalculating vacation and vacation compensation, printing of a non-unified form for calculating average earnings has been added
New indicators in the "Counterparty Monitoring" section. Improved stability.
Added a new mode: "Salaries and personnel -> Calculation of dividends"
The ability to import from Bukhsoft Simplified System software has been added to the "Import from Bukhsoft programs" mode
Import of data from BukhSoft software products has been implemented. Menu "Settings and service", "Import, export", "Import from Bukhsoft programs"
Implemented output of form P-4 (statistics) to magnetic media
Frequently asked questions when working with the Taxpayer PC
Select the question you are interested in
hint by pressing F1 key user manual.
Answer:
The easiest way is to copy the entire folder with the program to a new computer, and then install the program on the new computer in the copied folder; during installation, administrator rights are required (Run the installation with the right mouse button and select “Run as Administrator”).
Answer:
For the program to work correctly in network mode, it is necessary to install the program both on the computer on which the database will be stored (Server) and on the client computer. Then enable network mode, open network access to the folder with the program on the server, register the network path on the client sites, and run the program not from the server over the network, but directly from the computer on which the employee will work. To set up work over the network, we strongly recommend that you read the corresponding item in the program help (accessed by pressing the "F1" key in the program).
Answer:
The program does not erase data without a command, and when updating, the database is not affected and is not involved in the update process at all. Most likely, the installation path was changed during installation. In this case, you need to check where the program was installed and the location of the previous version, and then install the update again in the directory where the previous version is located. After a successful update of the program, the database(s) will be picked up automatically. Or use the “Update” button in the program, in which case the updates will be installed themselves into the current installation folder.
Answer:
In the program, click “Updates”, check the KLADR box and click download and install, after downloading, answer “Yes” to the question.
Answer:
Update Internet Explorer to the latest version, but not lower than 8.0.
Answer:
Most likely, in the “Output Direction” item there is another drive/directory. If you need to output to a floppy disk, then the path should be A:\. You can also use the Browse button to locate and select the drive/directory for output
Answer:
At the moment, we do not recommend doing this, the fact is that during installation, the necessary components of the program are registered for correct operation; if you try to work in the program without installing it on your computer, then frequent errors and crashes are possible.
Answer:
You can maintain more than one database (more than one organization) in the program; there is no need to additionally install the program on your computer. To do this, go to the “settings and service” menu, “Select database (My organizations)”. In the list that opens, you can add, delete and select exactly the database that you need to work at the moment.
Answer:
This message is an assumption that occurs after a number of possible reasons, such as a sudden power outage, restarting the computer, incorrect termination of the program, changing the attributes of the program files. As a rule, all this is not critical moments. If such a message appears every time you enter the program, go to “settings and service”, “backup copy”, “backup copy + database disinfection”. If this does not help, check the program file attributes and antivirus settings. If this does not help, contact technical support.
Answer:
Yes, such a function is provided, but first you need to familiarize yourself with the Readme2.txt file (if we are talking about income) which is located in the root of the program. It is also possible to import files into the program in approved structures - 2-NDFL, individual information for the Pension Fund of the Russian Federation, reporting.
Answer:
All data starting from 2011 is stored in the database; to switch to another year, you need to select the desired one by clicking on the down arrow located after the year, for example in personnel data.
Answer:
If after the calculation you change some data, then the calculation must be carried out again on the statement; while in the statement, click the “Group Operations” button, recalculate, check the box and click OK.
Answer:
The summary, which opens in the “Reporting, taxes and contributions” mode, displays data for all employees who are present, while the summary in a certain statement will contain data only regarding this statement and only about those employees who are included in it.
Answer:
Backup occurs when you select “settings and service”, “backup copy”, “backup copy + database disinfection”. If you need to restore the database to the state of an earlier moment, you must select the “Restore from archive” item in the same menu “settings and service”, “archive copy”, you can immediately set the frequency of creating an archive copy, the item “frequency of the archive copy”.
Answer:
You need to go to “Directories”, “Economic”, “Types of statements”. Click the green plus sign at the bottom left... We create, for example, a statement of dividends, pay attention to the correct setting, on the right, where automatic inclusion in the statement, there should be a checkmark next to dividends and income tax, or any other charges/deductions that , in your opinion, should be present for all employees.
If you did not find the answer to your question in this section, do not forget that in the program for each section you can call hint by pressing F1 key, on your keyboard. You can also use detailed user manual.
Good afternoon dear friends! Today I want to tell you how to update the Taxpayer Legal Entity. This procedure is very important; the Federal Tax Service is constantly changing forms and report templates. Therefore, if you do not update the program in a timely manner, your report may simply not be accepted. Your report may be drawn up correctly, but because you have an old form, the tax office may simply reject the report. Let's get started!
How to update Taxpayer Legal Entity
If you are unable to solve this problem yourself, then you can go to the section and our specialists will help you.
Now let's find out which version we have. We launch the program and look at the program version in the header.
The version of the program is written after the words “Taxpayer Legal Entity”. In this case, I have version 4.57. And the latest version is 4.57.1. So we need to update the Taxpayer.
How to correctly install versions of Taxpayer Legal Entity
Now a very important moment!!! In order for the update to be correct, the sequence of versions must be followed. The first step is to install the full version. Then, an additional version. The full version always consists of three digits. In this case these numbers are 4.57, the next full version will be 4.58, then 4.59 and so on. Additional versions consist of four digits. For example, now we will install version 4.57.1, then there will be 4.57.2, then 4.57.3 and so on. It happens that there are no additional versions at all or, on the contrary, there are many. Recently it happened that there was version 4.56.6. That is, there may be many additional versions, or there may not be any at all.
Now let’s look at which version to install on which. First of all, we always install the full version, then additional ones. For example: you have version 4.56.3, and now the latest is 4.57.1. This means that first of all we install version 4.57. Then we launch our “Taxpayer Legal Entity”, the database is re-indexed and only after that we install 4.57.1.
If you start installing version 4.57.1, and you have version 4.56.3, then the “Legal Taxpayer” program will not update for you, or it will not update correctly!
Even if you have version 4.54.1 or 4.56, you can safely install a higher version, such as 4.57. That is, the higher FULL version can be installed on ANY previous one.
Now let's look at additional versions.
How to correctly install additional versions of Taxpayer Legal Entities
Let's look at everything again using examples. Now we will install version 4.57.1. In the future, version 4.57.2 will be released (or maybe not).
Let's assume that we currently have version 4.56.1. So we install version 4.57 first, and then 4.57.1. But remember! After installing each version, you need to run the program so that the database is re-indexed; only after re-indexing can you update the program further.
Now let's look at another option. You have version 4.57, and the update is 4.57.3. In this case, you do not need to install versions 4.57.1 and 4.57.2, but immediately install version 4.57.3. Is everything clear? If not, then questions in the comments.
Step-by-step instructions on how to update your Legal Entity Taxpayer
Theory is over! Now let's move on to the update process!
I have version 4.57, the latest version is 4.57.1. Download the latest update here. Let's unpack it. If you don’t know how to unpack a file, then read my article here.
Now we will definitely close the taxpayer legal entity program. Make sure a hundred times that you close the program. Otherwise you will lose all your data!
Let's launch the update. We see the “Welcome” window. Just click “Next”.


Now the most important step. We need to choose which folder to install the updates in. Right-click on the program shortcut and select “File Location”.

The folder with the Taxpayer will open. Let's look at the path. My Taxpayer is located at the path “C:\NP LE\INPUTDOC”.

You may have a different path! In the update program, we need to specify this path, only without the “INPUTDOC” folder. Here I have the path “C:\NP LE\INPUTDOC”, which means during the update process I specify the path “C:\NP LE”. After specifying the path, click “Next”.

After this, the update process will begin. After the update is completed, a window like this will appear. Just click “Finish”

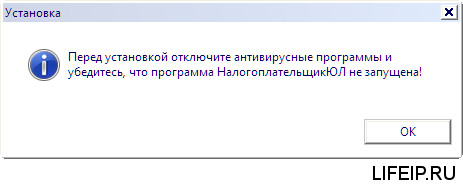
Immediately after the update, a window like this may appear. There is no need to panic, just click “This program is installed correctly.”

Now we launch our Taxpayer Legal Entity and see the re-indexing that I told you about. Just wait, without pressing anything, and without turning off the computer and the program, otherwise everything will break!

Now look at the program header again to make sure that the update was completed correctly and the latest version is installed.

We see that I now have version 4.57.1. So the update went well and correctly!
If you need the help of a professional system administrator to resolve this or any other issue, go to the section and our employees will help you.
Now you know how to update your Legal Entity Taxpayer.
If you have any questions, ask them in the comments! Good luck and good luck to everyone!
To be the first to receive all the news from our website!
Taxpayer of Legal Entities is a program that helps entrepreneurs, businessmen, and individuals in preparing reports to the tax authorities. The program is supplied free of charge and can be used by any individual or legal entity.
Regardless of the version of the Taxpayer Legal Entity, its installation on the computer’s hard drive occurs in several stages, which we will fully describe in the version that is current at the moment.
In order to use the program, first of all, you need to download it (relevance - September 2019):
STAGE 1
Launch the program by double-clicking on the downloaded installation file.
Windows will most likely ask you if you agree to open the executable file, click yes or OK.
Read it carefully, check the menu item
“I accept the terms of the license agreement” and the “Next” button below.
Accordingly, if you do not accept the program license terms, the installation will not continue.
STAGE 2

Type of installation. Here you are asked to choose to install the full version or the client part of the program. If this is your first time installing Taxpayer Legal Entity, it is better to select “full installation” and click “next”.
STAGE 3

Destination folder
At this stage of installation, you are asked to select the location where the program will be located. We do not recommend storing important work files on the same disk on which the system is installed. In most cases, Windows is located on the C drive, which means it is better to select another drive to install the program, of course, if it is available.
This is done so that if Windows loses its functionality (and this happens), the program’s working files are not damaged and remain safe on another drive.
If you don’t have a logical drive other than C on your computer, you will have to select a folder there, or leave the default path: C:\Taxpayer Legal Entity\
Click next.
STAGE 4

Everything is simple here: click “Install” and the program performs manipulations without your participation, installing files in the folder selected at the previous stage.
STAGE 5

After the files are successfully installed into the directory, a window should appear as in the picture above. This means that the installation was successful and the program is ready to launch.
You can check the box with the description “Run a program” if you want to use it immediately after installation.
Click “ready”. The installation of the Legal Entity Taxpayer program is complete.
If you minimize all active windows, you will see a program shortcut on the desktop:

Now, to use the program, you need to double-click on it and the program will open.
Setting up Taxpayer Legal Entity after launch
As soon as the program launches for the first time on your device, it will offer to configure itself. A window will pop up called “Adding a taxpayer”:

Here you need to select from the fields presented, according to what reports you are going to generate: an entrepreneur, a legal entity or an individual. The choice of Foreign organization and Separate division is also available.
We will outline the further steps for the Individual Entrepreneur, since the majority of our visitors are individual entrepreneurs.
So, by selecting “Individual Entrepreneur” and clicking “OK”, we are offered to configure the individual entrepreneur’s data for use in further reports and documents.

Fill out the fields in any order. A sample of how to fill them out is shown in the screenshot.

We select line 05: Individual entrepreneur who does not make payments to individuals.
Pay attention! Each square framed by a dotted line is a function button. You can click on it, an additional window will open, which is designed to select information entered into the corresponding field. It is available for almost every field, except for “when and by whom the passport was issued,” “stay address” and “place of birth.”
Once you have filled out all the required fields, click “Apply” and “OK”.
Remember: you can edit the entered information at any time by simply clicking on the person registered in the program, whose name is in the upper right corner under the menu:

This completes the installation and initial configuration of the Taxpayer. Be sure to save the page so you can easily find it when needed.
General notes................................................... ...................... 1
Select taxpayer................................................................... .. 1
Add a new taxpayer.................................................... 2
Taxpayer Creation Wizard.................................................... 2
Select reporting period................................................................... ......... 6
Create a new reporting period................................................................... ...... 7
General notes
All reporting in the program is distributed by taxpayer, and for each taxpayer - by reporting period.
Therefore, before you start working with reports, you must select the appropriate taxpayer and reporting period. When choosing a reporting period, you also select the appropriate type of reporting (accounting and tax reporting, 2-NDFL or reporting in the Pension Fund).
Select taxpayer
To select a payer, click the button on the toolbar or execute Main menu\Operations\Select payer.
Once you have executed this command, the window " Specify taxpayer» with a list of payers for whom you have already generated reports in SBS++.

From the list, select (
To do this, click<Ins> and in the menu that opens, select one of three items:
§ Add a new taxpayer – This is the first time you are generating reports for this payer, and his card is not in the directory.
§ Select from the directory of organizations – , Select from the directory of individuals – you have already worked with the reporting of this payer and its card is already in one of the specified directories.
Two words about SBiS++ reference books. Directories store information that can be used repeatedly. The directories “Organizations” and “Individuals” are intended for storing information about taxpayers. At the same time, the "Organizations" directory is intended for taxpayers - organizations (legal entities), and the "Individuals" directory - for taxpayers - individuals (this directory stores both cards of individual entrepreneurs and cards of individuals who are not individual entrepreneurs).
The details entered into the taxpayer’s card are automatically used when generating tax and accounting reporting, reporting to the Pension Fund and when sending reports by email.
You can create an account card for a taxpayer by opening the directory and adding a new entry to it ( ) or using the Taxpayer Creation Wizard, if at the stage of selecting a taxpayer you select the “Add new taxpayer” command.
Add a new taxpayer
So once you have selected “Add New Taxpayer”. starts Taxpayer Creation Wizard in order to help you fill out an account card for the new payer and save it in the appropriate directory. Next time, when choosing a taxpayer, you will already be able to select from the directory.
Taxpayer Creation Wizard
All necessary instructions for working with the Wizard are provided in the Wizard itself, in the form of comments next to the field names or in tooltips. A tooltip is the text that appears when you hover the cursor over any element of the dialog box.
Therefore, we will limit ourselves to only describing the general rules for entering data and steps that may cause difficulties.
Moving around the Master
In the starting window of the Wizard and all subsequent windows - “steps” of the Wizard, there are three buttons:
§ Cancel– this button is used to exit the Wizard (the Wizard window will close). If you clicked this button at some point in the Wizard, all the data you entered will not be saved.
§ <Назад – button to go back one step. In this case, all entered information is saved. If you want to return to previous steps and correct information that you entered in any of the previous steps of the Wizard, click the button<Назад». После того, как исправления внесены, нажимайте кнопку «Далее>» until you return to the step at which you interrupted entering information.
General rules for filling out fields
1. Only those fields that are open are intended for data entry. In fields that are shaded, data entry is not possible or required.
2. The Wizard has fields that are required to be filled in. If you have not entered information in such a field, the program will not allow you to proceed to the next step: after clicking " Next>» a corresponding warning will appear. For example:

In this case, in the message window, click " OK" and fill in the field required by the program. Then click " Next>».
3. In the fields that are filled in from a directory or list, there are special buttons that serve to go to the corresponding directory or list. When filling out such a field, you should click on the button and then in the directory (or list) that opens, find and select (click
https://pandia.ru/text/78/346/images/image005_98.jpg" width="19" height="19 src="> Button to go to the classifier or reference book.
https://pandia.ru/text/78/346/images/image007_88.jpg" width="402" height="257">
The selection of the responsible person is based on employee directory.
The employee directory opens automatically immediately after pressing the button. In the directory, find the card of the corresponding employee and select it (
To do this, click<Ins> and further in the dialog box that opens “ Employee» enter Full name employee, indicate his gender, date of birth and residential address, indicate the details of the employee’s identity document. If you will generate information in the Pension Fund, enter the number of the insurance certificate in the Pension Fund.
Then in the employee card, go to the “ Additional data» and indicate the employee’s place of birth and his position (if required). To add a position, place the cursor in the position table and click<Ins>. Next, in the list of positions that opens, select the one you require (<Enter>). If a suitable title is not in the list of positions, add a new position to the list (<Ins>) and in the dialog box that opens, enter the job title (this is enough) and click “ Save" For a description of the fields in the employee card, see Program Management (chapter “Directories”).
Field " WITH…» – is intended for entering the date from which the employee performs the specified position. This field is optional.
Setting up digital signature and account.
A dialog box with fields for setting up digital signature and account appears in the Wizard only if you have chosen the reporting method " Using electronic communication channels».

If you see this window on the screen, prepare a floppy disk with the taxpayer’s digital signature and a list of account settings values for sending reports through a specialized telecom operator. For subscribers of the specialized telecom operator Tensor, the account settings are given in the brochure that you received when purchasing the program.
If you are not ready to make these settings at this time, Check the box next to “Set up later” and click “Next>”. You can make these settings later. The necessary instructions are given in the chapter “Working with email”.
If you want to enter the settings together with the Wizard, Insert the floppy disk with the taxpayer’s digital signature into the computer’s disk drive, and click the “ Load from secret key container" As soon as you click this button, a window will open with a list of secret keys. Select (
In the “Certificate” window, click the “Save” button, after which the window will close and you will return to the Wizard. The details of the selected certificate will appear in the appropriate fields. Check the details of the signature key - to send reports, it is necessary that the key corresponds to the given payer and is valid (not revoked).
Then set up an account that will be used to send completed reports to the tax office through a specialized telecom operator. If the taxpayer is a subscriber of the specialized telecom operator Tensor, enter the settings from the instructions that you received when purchasing the program. If you use the services of another telecom operator, enter the settings following the instructions in the “Working with email” chapter.
After the payer card is created, it is stored in the corresponding directory (directory of organizations or individuals). You can open it at any time and edit the information entered using the Wizard. To do this, go to Main Menu\Directories\Organizations (or Individuals), then find and open the card (
Select reporting period
The reporting of each taxpayer is distributed by reporting periods and by main types of reporting.
The program supports three types of reporting:
§ accounting and tax reporting,
§ form 2-NDFL,
§ reporting to the Pension Fund.
To select a reporting period:
1. Click the button on the toolbar or do Main menu\ Operations\ Select reporting period. After this, the window “ Specify period» with a list of periods that you have already created.

2. Select a period from the list (<Enter>). If the required period is not in the list, create a new reporting period (see the paragraph just below the text) and then select it.
As soon as the period is selected, the period selection window closes, and the register of reporting forms opens with the taxpayer’s reporting corresponding to the selected period. The name of the selected period appears in the " Period» on the Electronic Reporting toolbar.
Create a new reporting period
To create a period, in the period selection window, click<Ins>, – a menu opens with a list of reporting types. Select the appropriate item from the menu:
§ Accounting and tax reporting– to generate reports, queries or messages about bank accounts.
§ 2-NDFL– for generating 2-NDFL certificates.
§ Reporting to the Pension Fund– to generate information in the PF.
After you have selected one of the items, a reporting period window opens with fields for entering settings.
Next we will look at setting up a new period for Accounting and tax reporting. Setting the period for 2-NDFL happens in a similar way. Setting the period for Reporting to the Pension Fund discussed in the chapter “Reporting in the Pension Fund”.

§ End date– end date of the reporting period (DD. MM. YY – day, month, year). If you generate current reporting, click in this field<Ins>. As a result, the current date appears in the “Date” field, and in the “ Name" – name of the period: " Reporting for<текущий месяц, год> " If necessary, you can always open documents generated this month.
per quarter, enter in the field " End date» last month of the quarter. You can enter the date directly from the keyboard or using the Calendar (to go to the calendar, press the button). In this case, the name of the period will appear in the “Name” field: “ Reporting for<месяц>and in general for<текущий квартал> " For example, if you entered “03/25/05” in the “Date” field, reporting will be saved for the period “ Reporting for March and for the first quarter of 2005»
If you need to generate reports per year , in the field " End date» enter the last month of the year. The name of the period will appear in the “Name” field: “ Reporting for December and in general for IV quarter" (Reporting for the last quarter and for the year as a whole).
§ Name– filled in automatically, depending on the set date. The name of the period is not used in printed forms, but serves only for access to documents in the program.
§ Accounting data changed during the reporting period– if the accounting data has changed in this reporting period, set the flags next to the corresponding names of the responsible persons. Setting the flags adds additional sheets to fill out in reports that require such information.
Once you have selected the date, save the data (“ Save"). The period selection window closes, and the name of the period you created appears in the list in the “ Specify period».
Select (<Enter>) this entry. The selected period appears in the " Period» on the toolbar in the working task window.
And tax reporting on magnetic media by the taxpayer and transmission of reporting to the tax authorities in electronic form on magnetic media.” The program has been developed Branch of Russia in the Chuvash Republic, designed to work in an environment Windows.
In the program the following tasks were implemented:
– Tax and reporting;
– Invoice journal;
– Journal of accounting of registers of invoices for petroleum products;
– Documents on ;
– Documents for opening/closing bank accounts;
– Documents for registration of gambling business objects;
– Documents for registering taxpayers according to;
– Documents for registration and registration of taxpayers;
– Documents for registration and registration of foreign organizations;
– Documents for registration and registration of non-profit organizations;
– Requests for information statements;
– Requests for information services;
If problems arise when installing the program (or when working with the program after installation), it is recommended to look at the entries in the program related to the program. . Typically, the log will indicate which component of the program is failing (see).
To open:
– right click the icon My computer;
– from the window that opens, select Control;
- in the window that opens Computer management open Utilities –> Event Viewer –> Application;
– view all messages related to the program .
Program update
Make sure the program not running at the time of installation;
– run the update file ( idw****.exe);
– if necessary, specify the folder in which the program is installed ;
– when starting the program Re-indexing will begin and the descriptions of the reporting forms will be updated.
To save information, open the menu Service –> Saving information –> V window Saving information select the type of information saving - full or selective (full by default) using the button «…» select a folder to save information (default is C:\Program Files\Taxpayer Legal Entity\INPUTDOC\BACKUP\), press the button Continue. A dialog box will appear Saving information, which will display the process of saving information. When a message appears The process of saving information is completed click the button Ready.
Data recovery
To restore information, open the menu Service –> Data recovery –> in the dialog box Data recovery using the button «…» select the folder in which a copy of the work information is stored (by default, the folder in which the information was last saved is selected), click the button Continue –> Ready.
Working with the program
If the program was installed correctly (without freezing) and all reporting forms were accepted, then working with it is not difficult.
If something in the program does not work with reporting, check in the drop-down list (top right) that the reporting period is selected correctly.
Reindexing
After an abnormal termination of the program, re-indexing may be required. To do this, open the menu Service –> Reindexing –> in the dialog box Reindexing select what you want to reindex (default is selected Directories, forms), press the button Execute.
Acceptance of reporting forms
Report forms are received automatically when installing or updating the program. To receive missing reporting forms, open the menu Service –> Acceptance of reporting forms –> in the dialog box Acceptance of reporting forms By default, the type of receiving reporting forms is selected from local folder(you can choose from the Internet), press the button Continue. In the next dialog box you need to indicate where the archive file with a description of the reporting forms is located (by default in the folder C:\PROGRAM FILES\TAXPAYER ENTITY\INPUTDOC\). Click the button Continue.
Contents of archives with reporting:
a0000001.cab– tax reporting;
a0000008.cab– documents on;
a0000011.cab– income certificates (form 2-NDFL);
a0000013.cab– documents for registration of gambling business objects;
a0000014.cab– documents for registration of taxpayers on ;
a0000015.cab– documents on registration and registration of taxpayers;
a0000022.cab– documents on registration and registration of foreign organizations;
a0000032.cab– documents on registration and registration of non-profit organizations;
a4071001.cab– balance sheet, tax returns (, excise taxes, land tax, property of organizations), statement of changes in capital, statement of cash flows, etc.;
a4071015.cab– Application for amendments to personal information. entrepreneur, content V USRNIP(f. P24001);
a4072001.cab– tax returns, reports, statements, etc.;
a4072015.cab– applications for registration.
Acceptance of Russian address classifier ( KLADR)
Download files KLADR (BASE.ARJ, BASE.A*), copy them to one local folder;
– in the program select menu Service –> Receive directories –> Receive address classifier;
– in the dialog box Address classifier reception (KLADR) set the switch From local folder -> Continue;
– in the next window, click the button «…» ;
- in the window Selecting the KLADR archive file specify the archive file with the address classifier ( BASE.ARJ) –> Select –> Continue;
– in the window with the message “Reception of the address classifier is completed”, click Ready.
Installing the program in Linux
– install wine 0.9.52 (or higher);
– copy Cyrillic windows-fonts micross.ttf, sserife.fon, tahoma.ttf to the fonts folder wine(usually this is the folder .wine/drive_c/windows/fonts in the user's home folder);
– copy windows-program extrac32.exe (windows\system32) to a folder system32 wine(usually this is the folder .wine/drive_c/windows/system32 in your home folder);
– run the installer idw*.exe– for example, in UBUNTU To do this, select the item open in Wine Windows Emulator;
– file rvcgnivc.ru/download/idw/other/linux/ooffice copy to folder command(usually this is the folder .wine/drive_c/windows/command in the user's home folder);
– file rvcgnivc.ru/download/idw/other/linux/ooffice.reg import in the program regedit(usually this is the folder .wine/drive_c/windows/regedit.exe in your home folder ).
Tax returns for personal income tax 3-NDFL And 4-NDFL
Starting from version 4.11, tax returns for personal income tax 3-NDFL And 4-NDFL excluded from the program .
To include them in the program Taxpayer legal entity:
– close all program windows except the main one;
– select a menu item Service –> Reception of reporting forms;
– select from local folder –> Next;
– click «…» , select file a0000049.cab –> Select;
– check the box receive archived descriptions of reporting forms –> Next;
– wait for the data to unpack, select the desired form –> Select;
– exit the program;
– launch the program, select the menu item Documents –> Documents on personal income tax.
Notes