140. You may need this if you need to install a pre-configured Linux versions on a large number of computers of the same type, for example in a classroom, or to create a backup image of the system. I will install CloneZilla SE on a server running Debian Etch. You can clone any Linux distributions, which ones you have.
Preliminary Note
The Debian server on which CloneZilla SE will be located is located in local network 192.168.0.0 (mask 255.255.255.0) and has an IP address of 192.168.0.100.
Installing CloneZilla SE
First, let's import the GPG key for DRBL (Diskless Remote Boot in Linux, needed for network boot(PXE) client machines later) and add the CloneZilla repository:
Wget -q http://drbl.sourceforge.net/GPG-KEY-DRBL -O- | apt-key add -
Let's open /etc/apt/sources.list ...
Vi /etc/apt/sources.list
And add the DRBL/CloneZilla repository:
[...] deb http://drbl.sourceforge.net/drbl-core drbl stable [...]
Let's launch
Apt-get update
Install DRBL and CloneZilla:
Apt-get install drbl
Let's launch
/opt/drbl/sbin/drbl4imp
to configure DRBL and CloneZilla with default options, which work correctly in most cases:
**************************************** ***. This script is for those impatient, it will setup the DRBL server by the default value which might not fit your environment. Are you impatient? <-- ENTER**************************************** ***. Ok, Laziness is a virtue! Let us setup DRBL server with the default values!!! Press "Enter" to continue... <-- ENTER
[...]
Starting the NAT services for DRBL clients... done! ip_forward is already on. The GDM or KDM config file is NOT found! Skip setting the DM! Maybe you will not be able to make this DRBL server as thin client server! Clean all the previous saved config file if they exist...done! Turn on the boot prompt for PXE client...done! Turn off the thin client option in PXE boot menu...done! Modifying /tftpboot/nbi_img/pxelinux.cfg/default to let DRBL client use graphical PXE boot menu... done! Full DRBL mode. Remove clientdir opt for label drbl in pxelinux config... Setting drbl_mode="full_drbl_mode" in /etc/drbl/drbl_deploy.conf and /etc/drbl/drblpush.conf... done! Full clonezilla mode. Remove clientdir opt for label clonezilla in pxelinux config... Setting clonezilla_mode="full_clonezilla_mode" in /etc/drbl/drbl_deploy.conf and /etc/drbl/drblpush.conf... done! You have to use "/opt/drbl/sbin/dcs" -> clonezilla-start to start clonezilla serivce, so that there will be a clonezilla menu when client boots ************** **************************************. Adding normal users to group "audio cdrom plugdev floppy video"....... done! **************************************** ***. Updating the YP/NIS for group... Note! If you add new or remove accounts in the DRBL server in the future, remember to run the following command again, so that some group (EX:plugdev) will be updated: tune-debian-dev-group-perm -g "audio cdrom plugdev floppy video" -e ******************************************** *********. Enjoy DRBL!!! http://drbl.nchc.org.tw; http://drbl.name NCHC Free Software Labs, Taiwan. http://free.nchc.org.tw *************************************** **************. If you like, you can reboot the DRBL server now to make sure everything is ready...(This is not necessary, just an option.). **************************************** ***. DRBL server is ready! Now set the client machines to boot from PXE or Etherboot (refer to http://drbl.sourceforge.net for more details). NOTE! If Etherboot is used in client machine, version 5.4.0 or newer is required! PS. The config file is saved as /etc/drbl/drblpush.conf. Therefore if you want to run drblpush with the same config again, you may run it as: /opt/drbl/sbin/drblpush -c /etc/drbl/drblpush.conf server1:~#
That's all.
Creating a Linux Image
To create an image, we first need to run CloneZilla on our Debian server and tell it where we will store the images and then set the system we need to boot from the network.
Run the command
/opt/drbl/sbin/dcs
in Debian and select All Select all clients :


Check Later_in_client Later input image and device name in client :

On the next two windows, simply press Enter, leaving the default options:


To be continued...
The original is on howtoforge.com 319
Almost all people will sooner or later have to renovate their apartment. It’s better to prepare for it in advance; for this I recommend visiting the website of the Moscow construction team. Very interesting articles on the topic of repair, photo gallery and much more.
Very often, especially among inexperienced Linux users, as a result of installing new kernels, drivers and other experiments, the system becomes inoperative, and it can be extremely difficult to revive it without the proper skills. Don’t be discouraged, in this case, system recovery from backup copy. The problem is that everyone has heard about backup, but not everyone understands how it works.
In this article, I will look at a simple way to create a system backup and then restore it using the tool Clonezilla Live.
First, download the image iso from the official one.
For example, stable image .We create a bootable USB flash drive using any usual method. You can use or more advanced . If you installed the system from a flash drive, this process should be familiar to you; we will not dwell on it.
By creating a bootable USB flash drive Clonezilla Live, boot from it, setting the priority of our flash drive in Bios. As a result, the following screen should open in front of us:

Click Enter, select Russian language:

Choose "Don't touch the layout":

Choose "Launch Clonezilla":

Then select device-image, for working with disks and partitions:

Then select local-dev, because we will save to a local device, and not to a remote server:

Next comes the crucial stage - you need to select a hard drive or other storage device, to which (and exactly on which) we will keep a backup copy, in my case it will be a flash drive(different!) because I used a virtual machine to take screenshots. In your case, it could be anything - either a flash drive (for the first time, preferably), or separate hard drive partition, usually used as "file dumpers", or a separate physical hard drive if available, or even an NTFS partition containing your Windows if it is installed as a second system. If you want to use a flash drive, insert it in response to this prompt (in yellow), if not, just press enter:

So, based on the considerations above, we select a device for storing backups (or, as it is loudly called in Clonezilla, Image repository). In my case, as was said, this is a flash drive:

Note: The words "repository" and "images" should not mislead you. Repository, in this case, it’s just a “storage”, and image- this is just a folder where a copy of your system will be compressed by the archiver.
Choose directory on the device, in which we will save the image, I prefer the root one, so as not to get confused:

Then there will be a short media check, when finished just press Enter:

Next, the selection of settings wizard mode will open, select Beginner(for beginners):

Next, select
or savedisk, to save the entire disk,
or saveparts if we want save partitions
I chose saveparts, since in reality we are most often interested in copying the Linux partition/partitions. Note: Copying the entire disk is usually not necessary unless you want to "storage" a partition on the same disk is selected, it will not be possible at all:

Enter name of the copy being created eg based on date:

Then select our ext4 partition (or partitions), which we will make a copy of (marks in the list preceded by a space, I got the only item on my virtual machine):

Then we indicate whether we will check disk before creating a backup:

And will we check the image after creation:

This is almost all over. Questions will be asked, we will answer ALL of them. y and click Enter:


And now the backup will go:

When checking the image, if it was selected, a similar window pops up again:

All you have to do is wait for the work to complete and restart the computer following the instructions Clonezilla.
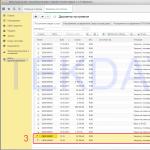
Backup files in the file manager look something like this:

Restoring from a backup using Clonezilla
Restoration occurs according to the same general principle - first we specify the “repository”, Where lies the image, then select the image itself, and finally we indicate target partition on the disk on which we will “deploy” this image.
So, let's download Clonezilla, do everything as in the previous paragraph and get to the disk selection screen where the backup is located:


Many professional backup programs, in addition to the function of backing up individual files, also provide the ability to create exact copies of partitions or even entire disks. In the latter case, redundancy is also often called cloning. It is used mainly in a corporate environment for deploying a customized operating system on several computers, but with the same success it can be used to transfer the OS and user files to a new computer, which is what we are actually going to demonstrate.
To create a disk clone we will use a free professional program Clonezilla. It is intended for backing up, cloning and restoring partitions and disks from images, while the created backup or disk clone can be stored on a second hard drive, removable media and a remote server (SSN, Samba, NFS, WebDav, S3 and Swift servers are supported) . Clonezilla is distributed as a bootable ISO image based on Linux; all backup (cloning) operations are performed exclusively from LiveCD.
So, to create a copy of the disk, we need the program itself and a second hard drive connected to the PC, which has an equal or larger capacity than the one being copied. There is also a new computer with an unpartitioned disk onto which we will deploy the cloned disk. Let's go to the developer's website clonezilla.org/downloads.php and download the ISO image with the program, not forgetting to select the processor architecture.
If you have AMD, in the “Select CPU architecture” item we leave amd64, if Intel, select accordingly i386.

Before you start cloning, it is advisable to prepare the system using the built-in console utility Sysprep. Go to the address in Explorer C:/Windows/System32 and run the executable sysprep.exe. The system preparation program window will open.

For cleaning action, select “Go to the system welcome window (OOBE)”, check the “Prepare for use” checkbox, select “Shut down” option for shutdown and click “OK”. After the utility has completed its work, the computer will turn off.
Note: Using the Sysprep system data reset utility is optional. It is used mainly when deploying Windows on corporate computers; in the case of a home transfer of the system to a new PC, it can be neglected, this will save you from the need to re-set user parameters.
After that, boot from the Clonezilla disk, select “Other modes of Clonezilla live” from the menu, select the appropriate screen resolution and wait for the wizard window to load.


To select settings, use the arrow keys, and to apply them, use the Enter key. Next, select the interface language.

We leave the layout as default.

In the next window, click “Launch Clonezilla”.

Then you will need to select the cloning mode. The choice of mode is not particularly important; we chose “directly from disk to disk or from partition to partition.”

Leave the settings level at default.

Select the cloning type “clone local disk to local disk”.


Then we specify the target disk on which the backup copy will be written. In Clonezilla it is labeled sdb.

Before starting the main operation, the program will prompt you to check the integrity of the file system. Whether we check or skip, it’s up to you to decide.

In the next window, indicate the action upon completion of cloning (reboot or shutdown the PC).

Press Enter and confirm all requests by entering Y (yes).

The cloning procedure will begin.


Approximately the same scenario is used to deploy a clone to a new computer. After connecting the backup disk to your PC, boot from Clonezilla and repeat all steps until you select the source and destination disk. Here we do everything the other way around. The source will be the disk with the copy, the destination will be a new disk on another computer. We confirm the actions by entering Y as described above. Once cloning is complete, turn on the computer.
The system will boot, but before that the devices will be prepared, and since the system data was previously reset by the Sysprep utility, you will also need to complete a number of basic user settings: select a language, accept the license agreement, create a new local account.


If the hard drive on which the image was restored is larger than the drive from which the copy was made, we recommend going to the disk manager and determining the resulting unallocated space, for example, creating a new volume in its place or attaching it to an existing partition. Naturally, we physically disconnect the second disk with the clone from the computer.
 That's all. We hope that the instructions provided will be useful to you.
Clonezilla, I don’t know how many people have heard about this mini OS, designed to work with hard drives; I personally became acquainted with it recently. I have a small fleet of computers, and basically they are all the same, 3x11 (33 computers in total), I had to rearrange everyone’s “favorite” Windows XP. The question arose of how to clone it to other PCs, the first thing that came to mind was, of course, Acronis True Image, I created a disk image without any problems, copied it to the computers on which it will be deployed, created a bootable USB flash drive with Acronis True Image (using this site http://flashboot.ru/ necessary files from it Acronis utility and image. But to my regret, it did not load on all computers, not because of crooked hands, if anything. I started googling, came across http://clonezilla.org/
Naturally interested, I downloaded it. Small manipulations in unetbootin? which I suppose is not worth describing here, anyone can figure it out.
1. From the list of distributions you need to select Clonezilla
2. Next, indicate where your image is located.
3. Select your flash drive
4. Click ok
5. The program will ask a couple of idiotic questions during the installation process.
The entire flash drive is ready and the information will most likely be saved on it; in my case, it remained untouched.
Well, now the main surprises are what I learned without reading the manuals about this miracle distribution.
You can:
1. Create an image of a hard disk or partition.
2. Format the file system of the partition to ntfs.
3. Deploy the image to the partition.
4. Clone a partition in real time to a remote computer.
I don’t know what else she can do, but that’s enough for me for now.
I will describe option 4, what to do and how to do it.
1.Insert the flash drive into the computer (the source from which we will clone the partition)
2. Reboot it or turn it on, launching the boot selection menu (F12, F8, F2, Esc) is different for each manufacturer.
3. Select 1 item Clonezilla live.
4. Select a language en_US.UTF-8(there is no alternative like ru_RU)
5. Don't touch the keyboard layout Don't Touch keymap
6. The system is loaded, you can start cloning.
7. write sudo -i(this is how we get root rights) (if we booted from an image recorded on a CD-ROM, then we will be prompted to immediately launch clonezilla and this and point 8 can be skipped)
8. write clonezilla and we start a pseudo graphical interface.
9. Choose Device-Device
11. Well, now the most interesting thing, we choose how and where we will clone.
There are options:
1. From local disk to local disk.
2. From local disk to remote disk.
3. From local Partition to local partition.
4. From local partition to remote partition 
We choose 4th item: part_to_remote_part
12. After this, we will be asked to set up a network; how can we clone a partition without a network? I had DHCP and had no problems, I don’t know about you. 
Let's see what happens if we configure static: 
In the future, everything is perfectly configured with IP, Mask, Gateway and DNS.
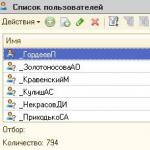
12. After the network is configured, we need to select the partition from which we will clone. clonezilla will detect all the partitions that exist on your local computer and give you a choice.
13. After you select it, a couple of questions will be asked, answer Yes.
14. And finally you will be shown a message:
clonezilla is ready for cloning, run clonezilla from a CD-ROM or flash drive on the remote computer and enter the following commands
sudo su -
ocs-live-netcfg
ocs-onthefly -s IP_SOURCE -t HDD_PART
The first command will give you root rights,
The second command will configure the network on the remote computer.
The third command will start cloning from a remote computer, -s IP address of the computer on which clonezilla is running, ready to give information about the local partition, -t source where the received information will be cloned.
The cloning speed mainly depends on the network, I cloned at a speed of 1GB per minute)
After cloning is completed, you can safely reboot and work)
P,S,
Backup files.
Greetings, dear friends, acquaintances, random passers-by, miscreants and other individuals reading this material. Today we will again raise the topic of backup, namely, we will talk about how to create copies of hard drive partitions. Surely you remember that this question has already been raised in an article entitled ""...
And in general, the topic itself is not new, because a certain number of articles on this project have already been devoted to it. There were also articles about creating backup copies, for example, using 'bat nicknames, - , - which help almost manually create backup copies of the necessary data, and later I talked about a program for automatic backup - namely, - in the article –
But, given that the long-suffering Acronis has strongly slipped onto commercial lines, and not all software can make and restore copies of partitions outside of a loaded system, and just as part of broadening one’s horizons, today I want to tell you about this.. mmm.. a software package like CloneZilla, based on Linux. This, so to speak, program will be a little more difficult to work with than Acronis, but, in the end, the free nature and extra experience in working with such software should outweigh all the difficulties.
Overall, it is important to simply follow my instructions and be extremely careful - then everything will work out. I apologize in advance for the very dubious quality of... uh... "screenshots". This is how it happened :(
How to take a snapshot of a Linux and Windows partition or disk
First, we need to download the distribution package of the program, namely, its image for burning to disk. This can be done. Next, we need to write the downloaded file to disk. This can be done using the SCD Writer program, which you can download.
After downloading, unpack the archive and run the program, it’s just a matter of small things:

As a result of this process, you will have a ready-made disk with the program. To do this, you need to go into the BIOS (the DEL button or one of the F2-F12 rows at the VERY early stage of booting the computer). Actually, if such a blue or blue-gray screen appears, then you, as they say, have found yourself in this most terrible BIOS.
“Welcome to the BIOS” or “Where did I end up?”
We got... well... into the heart of the computer. In order not to break anything, we walk through the sections carefully. We are interested in only one option - boot priority. Next, I will tell you where and what you need to click to boot from our disk. Many computers have different BIOS, so the settings of one BIOS manufacturer may be completely different from another. But that's not so bad. Even different versions of the same BIOS manufacturer have different settings. Therefore, I will only describe the most common options.If you see the “Boot” tab, then go to it and look at 3 fields there (they go in a row) first, second, third boot device respectively. We put CD in the first field, HDD in the second, and we are not interested in the third. We go back and exit the BIOS (f10). Don't forget to save your changes. After this, the computer will restart.
Go to Advanced BIOS features (if there is none, then BIOS features) and look for either the Boot Sequence field or 3 fields (they go in a row) First, Second, Third boot device respectively. If we have Boot Sequence, then we set it like this: CD, HDD, floppy (or by disk labels, for example D, C, A). If we have three boot device fields, then we set them as in the previous paragraph. We go back and exit the BIOS (f10). Don't forget to save your changes. After this, the computer will restart.
If at the stage above you did everything correctly, then after saving the settings and exiting . When it happens, you will see something like the following window (I apologize for the quality of the photos, it was not possible to do better):

Next, we actually need to decide on the launch parameters. If you have a small amount of RAM (up to 1Gb), then it makes sense to use the first line, namely “ CloneZilla live (Default settings, VGA 800x600)”, if there is enough memory, then select “ Others modes of Clonezilla live”, and there is a third line, namely “Clonezilla live (To RAM..)”, which will allow the program to load into memory and not depend on the CD/DVD ROM, i.e. work faster.


After downloading, you will need to select the program language. I think that Russian will suit us :) On the next tab they will offer to change the layout. In most cases this is not required, so feel free to select the “ Don't touch the layout”, and on the next tab select the item “ Launch Clonezilla”.


- Burning/recovering partitions/disks from an image
- Write/restore from disk to disk, from partition to partition
In this example, we will consider the first option, because it is more complicated, more interesting, and also because the second involves cloning a partition/disk, that is, if you, say, want to create a backup copy of a disk with the system on another physical disk, then the data the other disk will be overwritten, and it will become a complete copy of the first one, i.e., in order to consider this option, you will need a clean hard disk or partition, and therefore for now we will consider the first point. On the second, you can practice on your own. Select “ device-image work with disks or partitions using images”.
 I
I
On the next tab, you will need to select the image repository, i.e. the disk ON WHICH we will save the image of a particular partition/disk. I chose the largest single one, i.e. physical, of all the disks available to me now. You can choose either an external or any other disk yourself, as long as it has enough space for the image of the disk/partition that you are going to copy.

On the next tab you will be asked in which folder we want to save the image. I chose the root of the disk, i.e. / . You can choose a folder convenient for you.

Next, we will need to decide how much we want to customize. In fact, the expert level is only needed if problems arise, and the initial, also automatic, level is suitable for most people and cases. For now, choose the first one, i.e. “ Beginner: Entry level" If you have problems creating a backup, write to me and we will use the second option. If you wish, you are also very welcome to “play” with the expert settings yourself after finishing the lesson, but only carefully and reading all the tips.

Next, we need to choose whether we want to copy the entire disk or one/several of its sections. Choose what is closest to you. Within the framework of the article, I used the second point, i.e. “ Save_local_partitions_as_image”.

On the next tab, specify a name for the image. I leave it as is, because the date is indicated there, which is convenient.

Now the most important thing is to select the disk or partition (in my example, partition) that we will copy. You can select several. The selection is made by pressing the SPACEBAR key, upon pressing which the symbol * appears next to the disk or partition, which means that the disk/partition is selected. When you finish making your selection, click OK.


On the next two tabs you will be asked about the need to check and restore the file system, as well as the final created image. I'm used to refusing so as not to waste time, i.e. select “ Skip checking/repairing source file system” and, further, “ No, skip checking the saved image”.

After all this, a process will start that mounts devices and takes care of other things needed by the program. Here you will need to make sure that the correct disk or partition is indicated in yellow, enter y on the keyboard and press the Enter button, after which the copying process will start.


All that remains is to press, as asked, Enter, then enter 1 and Enter again. The computer will need to restart. Don't forget to indicate booting from your hard drive, because previously we set booting from a CD/DVD drive.
That's it, the backup is ready. You can be happy.
Now all that remains is to learn how to recover from the image.
Restoring from a backup image
Actually, it’s much easier to recover from the image.
We boot again from the disk with the program, only this time we select the item “ Restore image to local disk" or " Restore the image to local partitions”, depending on whether you saved a partition or a disk.


Next, select the image file to restore and VERY carefully select the disk/partition where you will restore the contents of this image. Be careful because all information on the disk or partition (depending on what you are restoring) will be replaced by the contents of the image.

After checking everything three times, put y and click OK. Then do it again, because... they will ask you again and again you will have to put y and click OK.

We wait for the end and - voila - everything is ready!


All that remains is to press, as asked, Enter, then enter 1 and Enter again. The computer will need to restart. Don't forget to indicate booting from your hard drive, because previously we set booting from a CD/DVD drive.
That's it, the backup copy has been restored from the image.
Something like this :)
Afterword
These are the pies. Be sure to be attentive and careful, especially the first time... Well, then you’ll get better at it, and this thing will be quite a good tool in your arsenal. Not Acronis, of course, with its interface, but also quite a powerful thing, especially if you learn to use all the capabilities of this CloneZilla. And no failures will be scary - you can always restore from a backup copy.
I hope that the information was useful to you. As always, write comments with questions, suggestions and all that stuff.
Stay with the project - you are always welcome here;)