Perhaps the icons on your desktop are too small or large, we will help you figure it out. how to change screen resolution and adjust the size to the user's wishes. Resolution matters in terms of grain, placement of active elements, quality of image display/animation, and other computer manipulations.
Today, the seven remains one of the most popular systems, so for it we will first consider the methodology:
- Installation is performed via RMB on the desktop.
- Then you should select the “Screen Resolution” option.

- Next comes resizing.
- When ready, click on Save.
For Windows 10
The most accessible way to change the resolution is to use the modernized settings interface, where there is a Screen section. To go to it you need:
- Right click on the table and activate the “Screen Options” item.
- Go to additional options.

- In this section, you can select the appropriate resolution and save its selection.
Read also: How to activate Windows 7? The answer is in this article
An alternative option is to use the Control Panel.
- Through Start, go to the Control Panel and activate the Screen item.
- In the menu on the left, you should select “Resolution settings” and set the optimal parameter for each device.

- Click Apply to view the changes, click Save to make your final selection.
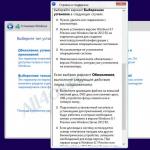
The change procedure is similar to previous versions of the system; just right-click on the desktop and activate the “Screen Resolution” option. Next, you should expand the Resolution menu, which presents a selection of different display methods available for your monitor. If multiple screens are synchronized, it is recommended to set the resolution for each separately.

If you don’t know the appropriate value, you can move the slider in different directions and watch the elements change. The system determines the optimal value for the computer based on technical parameters and marks the item with the message “Recommended.”
If you increase the resolution, the interface will have more space and all elements will be smaller. This action improves picture clarity and reduces the visibility of pixels. On the contrary, when the value is lowered, the icons increase in size; if they are difficult to view from afar, the resolution is reduced by 1-2 positions.
After setting the value, all that remains is to click Ok, in this case the action will be applied, the user will have the opportunity to view the result, only then click Save.
Read also: Optimizing Windows 10 - detailed description at this link
You can change the resolution through the home screen:
- You need to open the Charm panel in the lower right corner and go to Settings.
- Click on PC and Hardware.
- Select Screen.
- Adjustment is made to the desired size.
- Save your actions by clicking on the appropriate button.
For Windows XP
A simple way to achieve your goal:
- Right-click on the Start screen and activate the Properties option.
- In the new window, you should go to the Settings tab if another page is open.

- By moving the slider, the optimal indicators are determined and click OK to view the changes.
- Save is clicked only after the final selection.
How to change the screen resolution in the game
The easiest way for a novice user to change these settings is to go into the game and this setting is almost always available in the parameters section. It is enough to select the right choice from the listed options and enjoy excellent quality.
From time to time, a problem occurs that after changing the resolution, the program stops starting or always appears with a black screen, although there is sound and you can perform some actions. Also, in a number of other situations, it is necessary to change the resolution without logging into the game.
Read also: What to do if the tablet freezes? Look
How to change screen resolution without entering the game
Methods for achieving the goal exist, but the main difficulty is that each game is programmed differently, so there is no universal method.
There are 4 main methods for achieving the goal:
- You need to change the settings in the game files. For settings, a separate file is always created with the name Config, Settings or UserProfile and other descriptive names. They contain basic user settings. The files themselves are contained in the directory with the game, mainly at the top level of the hierarchy, but sometimes you additionally have to go to the BIN or others folder.
- To change a file, you need to open it using a text editor, usually a standard notepad is enough. This is done by right-clicking on the file and hovering the cursor over “Open with”.
- You should search the text by holding Ctrl+F and entering the word – Resolution.

- The found line indicates the extension separated by a space; it should be replaced; if the line is missing, it should be added.
- You need to specify a value lower than what is allowed on the monitor, usually for desktop PCs - 1920x1080 or 1280x1024. For laptops, 1366x768 or 1280x720 is often found.

- Some games have an additional launcher near the launch file that allows you to set settings even before launching the game; it is worth checking for the presence of such a file with the .exe extension.
- Using the file properties, you can set the value 640x480 - this will allow you to start the game if any failures occur, and set an adequate value inside it.
- To perform the procedure, you should find the file from the game and right-click, then select “Properties”.
- Then you need to go to the “Compatibility” tab.
- Set a selection next to “Use screen resolution 640x480”.

- The changes are applied and the game is attempted to start.
- You can change the required values through the registry, but due to the lack of standards for the location of the game, it is difficult to say where the parameter will be located. It is advisable to find information on the forum, you can also use the search and brute force method to determine the location. Usually the name of the parameter indicates the purpose of its use. After finding the file, double click and change the value.

An incorrectly set resolution will cause a lot of inconvenience during any actions, especially difficult to play normally. The methods in the article are designed to eliminate the problem at the system and individual application level.
If you still have questions on the topic “How to change screen resolution? Step-by-step instructions", then you can ask them in the comments
Very often users are faced with a situation where the monitor displays a “save mode”, “out of range” or “unsupported resolution” message, or «
»
.
This means that the video card settings have set a resolution that the monitor does not support.
On many forums and websites you can find the following advice:
“To change the screen resolution, you need to press F8 when loading Windows and set some minimum resolution, then reboot in normal mode and enjoy life.”
But, as practice shows, this does not always work.
I want to share 100% way to reset screen resolution on computer.
In order to reset the screen resolution, you really need to boot the computer in Safe Mode, but let's go point by point.
- When loading Windows, press F8;
- Select the item “boot the computer in Safe Mode”;
- Press the Windows + Pause key combination (we get into the properties of my computer), go to the Hardware tab, click the Device Manager button;
- Expand the list of Video adapters;
- Select your video adapter, call up the context menu and select Disable (Windows may ask “Do I need to remove drivers?” You can answer “no”, but sometimes it is necessary);
- Reboot the computer in normal mode;
- And now you don’t need to do anything, we see a miracle, Windows will re-detect the video adapter and reset the monitor screen resolution.
This method has helped out many times.
There is another way to reset the screen resolution - return the old monitor or reinstall Windows :) Why are you laughing, on many forums I have seen advice about reinstalling Windows! Just imagine, a 5-minute problem can be solved in a few hours.
How to boot Windows 10 into Safe Mode to reset your graphics card
In the comments they asked the question (stated): " In Windows 10 it is impossible to boot into safe mode without first enabling this option in the OS itself , and since it is impossible to enable this option without a working monitor, your advice for Win 10 users is not relevant. Any other thoughts that would be suitable for Win 10?
PS: I don’t have another monitor at hand, nor do I have a built-in video adapter. "
This is not entirely true... Yes, you can actually enable the boot menu only from the “working” Windows 10. But the boot menu, where there will be “Boot in Safe Mode” (Safe Mode), can be called up several times by rebooting the computer with the Reset button on the system unit. Windows 10 will understand that for some reason it cannot boot and will offer various recovery options. Once you boot into safe mode, you can perform all the necessary steps to reset the screen resolution in Windows 10, which are described above.
FAQ
Q: how to reset screen resolution via bios
A: information about screen resolution settings is stored in the operating system configs; you cannot reset the screen resolution through the BIOS
On Windows 7. Honestly, this is a very broad question that covers almost every element of computer graphics. There are computer games, pictures and photographs, display of web pages, and system settings. In general, there are a lot of objects subject to scaling. And that is why we will discuss each moment with you separately.
Pictures
So, the first thing we can discuss with you regarding how to adjust the screen resolution on Windows 7 is changing the scale of the picture displayed on the monitor. Everything here is extremely clear and simple.
The first step is to open the graphic file. Now just roll the mouse wheel. In the direction “towards you” - the scale will decrease, “from yourself” - it will increase. In this case, the resolution in the system settings will not change.
In addition, you can increase the size of the picture. To do this, you will need to resort to the help of some third-party program. For example, "Picture Manager". Open the picture for her, select “edit” - “resize”. Set the required numbers and save the changes. That's all the problems. True, changing the screen resolution applies to Windows 7 in a slightly different sense. And now we will see with you what else we can talk about.

For games
For example, we can talk about displaying graphics in a game. After all, this is where many users wonder how to adjust the screen resolution on Windows 7, without affecting the system settings. It's very inconvenient. Especially when you have a lot of different shortcuts on your desktop.
Special game settings come to the rescue. They allow you to figure out how to create your own screen resolution in Windows 7 and set it only for the period of playing a particular application. Launch the program and then select "options" or "settings" there. Next you will have to visit the graphics settings. There you will find the item we need. That's what it's called - screen resolution. Set the appropriate values in it, and then save all changes. That's it.
However, there is one more trick regarding games. He will help answer how to adjust the screen resolution on Windows 7, and one that is not in the toy’s settings. Launch windowed mode, and then simply stretch our game “around the corners” of the window. When you achieve the desired result, simply go to game mode. Nothing difficult or special. But you can set the resolution that is convenient for you. But there are at least two more meanings that apply to the question: “How can I change the screen resolution in Windows 7?” And now we will get to know them.

Browser
Sometimes this question may be asked by users because they want to change the display scale of pages on the Internet. Sometimes this is very useful. So let's try to figure out how this is done.
There are several options for the development of events. To begin with, you can try to open it, find the “scale” there, and then set the desired display numbers. They will be indicated as percentages. 100% is the norm, values lower - reduce the scale, and higher - increase. Save the changes - and all problems are solved.
You can also press Ctrl and then “+” or “-” located on the right numeric pad of the keyboard. This combination serves to enlarge the image and reduce it, respectively. In addition, you can cope with the question posed using the mouse. To do this, hold down Ctrl and then roll the mouse wheel. “Toward” - reduces the resolution, “toward” - increases. Nothing difficult, right? Only now we have reached the most important point for a computer. Namely, we’ll try to figure out how to adjust the screen resolution on Windows 7 relative to system settings.

For system
True, this question will not take up much of your time. After all, the operating system is simplified to the maximum. If you suddenly need to change the screen resolution of your monitor, then just click on the free space on your desktop. Do this using the right button.
You will see a long list of functions performed. Find “screen resolution” in it and select this item. In the window that appears, you should find the parameter of the same name, and then simply move the slider up or down, depending on the desired result. Want to reduce the size of your icons? Then you will have to move the slider up. Increase? A downward movement will do. Save the changes, confirm them - and all problems are solved. Now you know how the scale changes on Windows 7 in every sense.
What should you do if you bought a new monitor, and the optimal resolution, which is determined by the screen matrix, is not in the list offered by Windows?
A photographer I know needed to buy a new decent monitor for photo processing. His choice fell on the huge 27-inch DELL UltraSharp U2715H. This monitor was successfully purchased and the process of connecting it to the laptop began. The laptop was quite old - Lenovo G580 with an Intel Core i5-3210M processor installed, an integrated Intel HD Graphics 4000 video card and a discrete NVIDIA GeForce 610M video card. The Windows 7 64bit operating system was installed from the factory and has never been reinstalled.
The monitor was connected via an HDMI cable. A new monitor was selected as the main display. The standard resolution of the DELL U2715H monitor specified by the factory is 2560x1440px. But when I selected it from the list of available resolutions, this did not appear. The highest resolution was 2048x1152 pixels.
Installing drivers on the monitor itself did nothing. Video card drivers were updated with an error. It was decided to reinstall the entire system, from scratch, a clean, non-factory one.
After installing clean Windows 7 64-bit, the latest drivers were installed on all laptop devices, except for the integrated and discrete video cards. The driver for the new monitor was also installed. Installation of the latest drivers from Intel and NVidia ended with the error that no devices were found in the system. But Windows Update offered the necessary drivers as updates.
Intel HD Graphics 4000 video card drivers, version 10.18.10.4276, were installed
and NVIDIA GeForce 610M video cards, version 384.94
After that, new options appeared in the video card settings. Namely, when you right-clicked on the desktop, the item appeared in the submenu Graphics options for Intel video card. The item was selected Graphics options → User Permissions
Launch has begun Intel HD Graphics Control Panels
A warning appears that further actions may lead to hardware problems.
Despite the fact that “Yes” was selected, I want to warn you that this can really be dangerous for your computer. Incorrect setting of the screen refresh rate or too high a monitor resolution can lead to physical damage to the video card or other hardware parts of the computer. We understood the risk and, moreover, were mentally prepared to replace the laptop with a more powerful one.
After the Intel HD Graphics Control Panel has been launched, on the left side we select the monitor we need - in this case, the DELL U2715H. Then we indicate the resolution we need, refresh rate and screen color depth.
Save the specified parameters
With the initially specified ideal options for this monitor being 2560x1440px, 32bit and a frequency of 60Hz, we ended up with a completely blank screen. After a few seconds, the video card’s operating mode automatically returned to its original state.
The frequency was reduced to 30Hz - and oh, miracle! Our monitor began to work in the specified mode. Gradually raising the frequency, we obtained a maximum operating value of 49 Hz.
Now we need to make sure that this mode persists after a reboot. On the desktop in the submenu select Screen resolution. In the window that opens, click on the link Additional options
On the tab Adapter click on the button List of all modes
and we see at the very bottom all the user permissions we created. We point to the maximum working value - in our case it is 2560x1440px, 32-bit, 49 Hz.
Click OK
After this we can increase the maximum screen resolution, which is now marked as recommended
That's it, now we have a working monitor at its optimal settings.
The monitor has been working great for the second month, the colors are excellent, the laptop copes well with Photoshop CC 2017 64-bit, Adobe Photoshop Lightroom CC. According to the photographer, there are no freezes.
The poor quality of the matrices in mainstream monitors makes it difficult for users to accurately identify details and colors in photographs, printed designs, or other images. But everything is not so hopeless. There is no need to run to the store for a new one. How to adjust your monitor to improve image quality?
First of all, we need to take into account that we are talking about a consumer approach. Professionals are guided by completely different tasks and opportunities. And their requirements differ from everyday ones. Professional decisions require serious costs, which are unlikely to be justified if your earnings do not depend on the quality of the image.
Why adjust your monitor?
A monitor can be good or bad, but more often it turns out to be incorrectly configured. Many of us have noticed the difference in colors on our TV and those of our parents or friends.
You should also understand that a person has individual vision characteristics, so everyone perceives the image differently. In addition to the visual characteristics of the person himself, monitor settings should also be taken into account.
Default computer settings, standard drivers, use of inappropriate color profiles, standard cords, or incorrect screen placement all have a certain meaning. Therefore, you should not rely solely on images on the Internet.
Photographers often show portfolios to potential clients on their laptops, which are set to the appropriate settings. But photos may look different on a different monitor. Therefore, you should not rely on the monitor to assess the quality of pictures. The only way to universally check quality is to print photographs.
How to properly set up a monitor - where to start?
Before setting up your monitor, you should remove possible obstacles to normal color reproduction (with maximum shades for this monitor) and full color perception. First of all, you should place the Monique in a place where there will be no interference from outside lighting. Look around the room - it is optimal that there are no windows in the chosen place, and that the lamp light does not fall directly or at an angle.
Designers also use special curtains that help limit glare and side light. For ordinary users, such curtains may be overkill, but you can at least place them on the table so that no light enters the screen.
Let's consider an image specially created to evaluate the quality of the picture on the monitor. This image contains 2 halves - white and black. Each half is marked with numbers 1-5. If the matrix is of sufficient quality and well configured, you can see all the numbers from this list. Owners of a mid-level monitor can see numbers 1-3. If only numbers 1-2 are visible, or it was not possible to notice them at all, the problem must be solved - this is what our article is intended for.