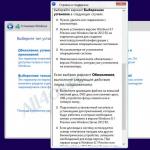
The massive transition to UEFI (Unified Extensible Firmware Interface) has already begun. Microsoft requires this interface to be used on all computers that will ship with Windows 8. More precisely, we are talking about UEFI with the Secure Boot feature. At the same time, only “eight” can work on such PCs without problems: neither Windows XP nor “seven” can be installed on a UEFI machine without additional manipulations. You won't be able to boot from a Linux Live or Windows flash drive either. What exactly can happen if you try to start from the installation flash drive on a Sony VAIO laptop is shown in the picture above. And the problems with UEFI don't end there. Each hardware manufacturer configures UEFI at its own discretion, thereby creating unnecessary difficulties for the user. The IdeaPad laptop from Lenovo was not able to recognize the same flash drive as boot media at all. At the same time, Lenovo has nothing to blame: the fact is that the bootable flash drive is formatted in the NTFS file system, and UEFI does not support booting from such media. If you connect the same drive to an EliteBook laptop from HP, it will boot without problems and allow you to install Windows. The problem is that all the data on the EliteBook disk would be deleted after installation.
Everyone configures differently
Are you confused? No wonder: UEFI with Secure Boot establishes new rules for installing and booting operating systems, and hardware manufacturers interpret these rules in their own way, which creates additional difficulties for the user. Therefore, in this article, we set ourselves the goal of clearing up the confusion around UEFI. Using laptops from major manufacturers as an example, we will tell you how UEFI works, what role the Secure Boot function plays, how to bypass the “traps” set by the new interface, and what you need to use bootable flash drives without fear of any destructive consequences.
How UEFI works
UEFI boots strictly according to the established rules. If the OS does not support UEFI, BIOS emulation mode is activated. The process of booting a BIOS-based PC is quite simple: after pressing the power button, the BIOS starts, which checks the status of the hardware and loads the firmware - simple drivers for individual hardware components. The BIOS then searches for the OS bootloader and activates it. That, in turn, loads the operating system or displays a list of available operating systems.
UEFI-based computers boot in a similar way only until the boot options are searched. After this, everything happens differently. UEFI has its own OS bootloader with integrated launch managers for installed systems. For it, a small partition (100–250 MB) is created on the disk, formatted in the FAT32 file system, which is called Extensible Firmware Interface System Partition (ESP system partition). It contains drivers for hardware components that can be accessed by the running operating system. The general rule is that with the exception of DVDs, UEFI can only boot from media formatted with the FAT32 file system.
UEFI is a complex mechanism
ESP has its advantages: thanks to UEFI drivers and the OS loader, Windows starts faster and responds more adequately to critical driver errors. But the UEFI interface also imposes restrictions: it allows you to install the OS only on hard drives that are marked according to the GPT standard. The latter is not supported by any BIOS version, since, unlike the traditional partitioning scheme (MBR), it uses 64-bit sector addresses. In addition to Windows 8, the UEFI interface is supported only by 64-bit versions of Windows Vista and 7, as well as Linux with kernel 3.2 and higher. Moreover, for PCs certified to work with G8, Microsoft requires the use of the Secure Boot option. In this mode, UEFI only launches verified OS bootloaders that contain Microsoft digitally signed drivers.
Along with Windows 8, only the Shim bootloader (Linux) has drivers with the necessary signatures for Secure Boot. They are not available in other OSes. Therefore, if you want to install Windows 7 or Vista on such a computer, in addition to G8, you need to open the UEFI menu and disable Secure Boot. If you choose a non-UEFI compatible OS as your second OS, you will need to use the Compatibility Support Module (CSM), which can be enabled in UEFI. Unfortunately, manufacturers use different versions of UEFI, and it can sometimes be difficult to figure out how to disable Secure Boot and enter BIOS emulation mode. We will consider these questions further.
UEFI based PC boot process
Depending on the configuration, UEFI either boots the computer itself or goes into emulation mode of the standard BIOS. Only after this does the Windows Boot Manager start.
Installing Windows on a PC with UEFI and Secure Boot
On a PC with Windows 8 based on UEFI Secure Boot, other versions of the OS can be installed only under certain conditions. The user must select the correct boot mode in advance and prepare the installation flash drive accordingly.

Enabling BIOS emulation mode
Complete confusion: the method for entering BIOS emulation mode depends on the UEFI version. On Sony VAIO (1) you need to activate the “Legasy” option, on ASUS Zenbook (2) - “Launch CSM”.

UEFI setup
Each manufacturer uses its own version of UEFI in laptops and ultrabooks. However, it does not provide access to all the necessary functions. Often, when loading a PC or laptop, the display does not display the name of the button that can be used to open the UEFI settings menu. We suggest doing the following: in the Metro interface, go to the “Options | Change PC settings” in the sidebar and activate the “General | Special download options." After the restart, the OS boot manager will appear, which will allow you to open the UEFI menu. The exception is HP's UEFI, which does not have this option. The following will help: while loading, hold down the "Esc" key. In any case, you must first find out which button allows you to enter the UEFI menu. If you change the boot mode to CSM or Legasy BIOS to boot from a rescue flash drive, you must switch back from CSM to UEFI after the recovery operation, otherwise Windows 8 will not start. But there are exceptions here: Aptio Setup Utility on ASUS computers activates UEFI automatically in the absence of BIOS-compatible bootable media, so you just need to disconnect the flash drive.
Disabling Secure Boot will be required if, in addition to G8, you want to install a 64-bit version of Windows Vista or 7. Sometimes the so-called hybrid mode is supported, as in devices from HP, in which UEFI can boot from all bootable media and, if necessary, switch to BIOS mode. In the widely used UEFI version InsydeH2O, this depends on whether the laptop manufacturer has provided the ability to disable Secure Boot or not. In the Acer Aspire S7, this function is not available, and to deactivate it you need to switch from UEFI to BIOS mode and back.
Difficulties with recovery
With the advent of UEFI, manufacturers changed the way they work with the OS recovery system. The “Alt+F10” keyboard shortcut, which was previously used, for example, in Acer models, no longer works or is assigned to other functions. And the “F9” button loads on the new Zenbook not the ASUS Preload Wizard, but the Windows 8 recovery program with an extended boot menu.
The VAIO Care recovery mode in Sony laptops can be opened in a similar menu by selecting the “Control Panel | Troubleshooting | Recovery". But if you start the OS boot manager and select “Diagnostics | Restore" or "Restore to original state", the device will ask you to insert the original Windows 8 disc, which is not included in the package. On Acer models, backup is performed using a pre-installed Windows program, and restoration from a backup is carried out from an external USB drive. However, you must first go to the UEFI menu and specify such a disk as a boot one.
Going to the UEFI menu from Windows
If Windows 8 Advanced Startup is enabled, you can access the UEFI Firmware Options (3) menu by selecting Diagnostics (1) and Advanced Options (2).

Useful UEFI Features
Each laptop manufacturer uses different versions of the UEFI interface and implements it in the system in accordance with their ideas. The table, broken down by model, will show you where the main UEFI features are located.

Solving the problem: disabling Secure Boot
In some cases, Secure Boot cannot be deactivated directly. In Acer Aspire S7, for example, this function is not available. But if you switch to “Legacy BIOS” (1) and back again (2), Secure Boot will be disabled.

In hybrid mode, everything is possible
HP's version of the UEFI interface supports hybrid mode, in which, depending on the boot media, one of two modes is launched - either UEFI or CSM. In this case, the Secure Boot function is disabled automatically.

Run from a flash drive
Old flash boot and recovery media only work in BIOS mode. We will make them UEFI compatible.
USB flash drives have recently become increasingly used as bootable media for restoring or installing Windows. This is due to the fact that modern laptops very rarely have optical drives installed. If you have examined the UEFI settings on your computer, it is recommended that you also upgrade your flash drives. With the advent of UEFI, all existing bootable flash drives can no longer be used in the usual way. For example, if you created a bootable USB media using UNetbootin, you will need to start your PC in CSM mode. The same applies to all old flash drives, since the developers of Linux Live distributions (for example, GParted) only began to add a bootloader with UEFI support and Secure Boot functions in the latest, most recent versions of their applications.
The simplest method is to disable Secure Boot in UEFI, then use the free Rufus program to create a UEFI-compatible flash drive, and then copy the latest version of GParted to it.
The Microsoft program is outdated
For bootable USB drives running the Windows operating system, slightly different rules apply. To be UEFI compatible, they must be formatted with the FAT32 file system. Many users, even for Windows 8, create bootable drives on flash drives formatted using a program from Microsoft, part of the “seven”. However, this application formats the drive with the NTFS file system by default, making the system on the drive subsequently impossible to install on a computer with UEFI. To avoid waiting for an updated program from Microsoft, you can create a bootable drive manually. To do this, first format the USB flash drive using a free utility. Then open the ISO image in Windows 8 and copy the files it contains to the media.
But in order for a UEFI-compatible flash drive with 64-bit Windows 7 to boot without any problems, you will need to copy the UEFI boot loader to the desired directory on the flash drive. To do this, using the free 7-Zip archiver, find the Install.wim archive file in the ISO image that contains the Windows 7 installation files in the Sources folder and open it. After that, copy the bootmgfw.efi file from the 1\Windows\Boot\EFI directory. Then save it to your flash drive in the efi\boot directory and rename it bootx64.efi. After this, you can work with the USB drive in UEFI mode, and you will be able to install Windows 7 from it without any problems.
Creating bootable flash drives based on Live systems
To be compatible with UEFI, flash drives must be formatted in FAT32. For example, the UNetbootin (1) program creates bootable drives based on Linux Live distributions, formatting them in FAT. However, the Rufus utility (2) offers a more correct option.

Flash drive for OS recovery on PC with UEFI
Flash drives based on recent Live systems, such as GParted, can easily access UEFI PCs, since their built-in tools - such as GPart (1) and TestDisk (2) - can work with GPT partitions.

Formatting a bootable USB flash drive with Windows
The 64-bit version of Windows 7 can also be installed on a PC with UEFI. If you want to perform this operation from a USB drive, you need to format it using the Windows DiskPart program as a FAT32 file system and make it bootable.

Removing the UEFI Boot Loader
A UEFI-compatible flash drive running Windows 7 additionally requires a UEFI boot loader - bootmgfw.efi. It must be manually copied from the install.wim archive to a flash drive using 7-Zip or any other archiver.

Source
Instead of the BIOS that is familiar to many at the moment, new motherboards for desktop computers and laptops are increasingly equipped with modern UEFI. Installing Windows 7 on such hardware is undergoing a number of changes. This factory software, unfortunately, is being implemented rather slowly and is currently not ready to replace the BIOS on the vast majority of motherboards, which entails a number of incompatibilities and problems with loading in the new mode. Most often, questions arise from people who want to install Windows 7 instead of the eighth version of the system that comes with the laptop they just purchased.
Is it worth switching to UEFI?
The main reason for switching from BIOS to UEFI was the lack of functionality, which is no longer enough for professional work computers that contain voluminous documents and require maximum performance of all components. It is worth noting that when loading the drive in UEFI BIOS mode, installing Windows 7 by default will not be possible on old MBR partitions. But there are two options for solving the problem.
The first is to copy all important data to an external or optional internal drive. The second is more labor-intensive and will require converting partitions using bootable flash drives or disks with utilities like Paragon, but will allow you to save all existing data, with the exception of the local disk with the system itself. In order to draw a conclusion about the advisability of installing a system under UEFI on your PC, you need to understand what advantages the new type of pre-installed software has in comparison with the previous one.
Old but effective BIOS
You can start your consideration with the Basic Input-Output System - BIOS, since this will be a logical sequence regarding the release time. The functions for which it is responsible are generally clear from the name. Basic software didn't appear overnight. As computer components developed, the BIOS itself progressed accordingly, thanks to which today people can use its wide functionality. Of course, core software alone could not meet all hardware needs. For this reason, programs and drivers were developed in parallel, configured directly in the operating system itself. However, the BIOS is responsible for such operations as initial hardware identification and determining the device from which to boot. It is very obvious that UEFI has similar functionality, installation of Windows 7 and its correct operation on which will necessarily require the options described above.
Multifunctional UEFI
What is UEFI? If we decipher the abbreviation and translate it into Russian, the innovation is called Extensible Embedded Software Interface. The development of the system was started by Intel back in 2001 and was highly specialized in server equipment. UEFI was created due to the inoperability of Itanium processors with old firmware, since the kernel of the server computer needed significantly expanded functionality. Ordinary users saw the new product only in 2006 on board computers developed by Apple. Later, the innovation began to appear in the products of other companies, as indicated by the first word Unifed in the abbreviation. Among them there is both Microsoft, with its contribution to UEFI, under which the installation of Windows 7 was optimized by the company, and other software and hardware developers.
Advantages of UEFI when installing systems from Microsoft
Thanks to the innovations, it is now possible to install Windows 7 on huge hard drives. GPT UEFI BIOS supports by default, and the system will be placed under such a partition table. It is worth clarifying that the words “huge size” mean drives with a capacity of more than 2Tb. The old system only supported hard drives whose space did not exceed this mark. This is explained by the fact that the BIOS used the MBR partitioning to work with the drive, which contained the size of each record of 32 bits. From the calculations, a figure of 4 billion sectors is derived, which is exactly 2Tb. Even now, such a volume may seem excessive to some, but many 3D designers, not to mention employees using server equipment, have long needed such capacity. Thanks to UEFI BIOS, installing Windows 7, 8 and 10 can now be done on hard drives with a sky-high capacity of up to 8 billion TB.
Compatible with various equipment
Modern motherboards are equipped with software that supports both old hardware with MBR and new hardware with GPT partitioning. Now the user can choose the option that is most suitable for his computer. This was made possible thanks to UEFI dualbios support. Installation of Windows 7, 8 and 10 on such equipment will be available in two modes simultaneously, the choice of one of which is made by the user directly when booting from the drive.

Visual interface
Some developers not only introduced changes to the code, but also completely redesigned the interface, allowing for faster user interaction. Also another advantage was the ability to control UEFI elements using a computer mouse. This makes installing Windows 7 even more convenient and easier. You only need to get used to the new visual style once, and the desire to return to computers running BIOS completely disappears. Also, in the future, developers promise to create additional utilities for UEFI, to the point that applications will be released that provide access to the Internet without Partially this task has already been completed, since the pre-installed software is updated via the network protocol.
Additional protection for Windows
Another important point is the so-called secure installation of Windows 7. GPT UEFI is a new standard that will enhance protection on the Microsoft operating system. The utility can significantly reduce the chances of information loss and leakage. This option is enabled by default in the software, but can be easily deactivated in the settings if desired by the user.
UEFI Speed and Orientation
Thanks to the redesigned basis, UEFI can significantly speed up Windows boot times. It has become much easier to navigate the new interface thanks to bright and visually understandable content. Each category has an icon similar to those found in the operating system itself. There was also a utility section that had not been used until now. There are applications that allow you to view additional properties of your computer, such as installed hardware, temperature of elements, and much more. Of course, the specific set of utilities depends on the manufacturer and type of motherboard.
Transition from MBR to GPT
When switching from a system installed under BIOS to MBR disk partitioning, you should immediately think about saving important information. If this is not required, you can proceed directly to the installation. But in the case when there is data valuable to the user on the computer, it will be necessary to archive it or repartition the disk using specialized software.

Preparing USB with Windows 7 for installation on UEFI
Having studied the basics of working with new software and deciding whether it is advisable to work under it on current equipment, you need to start preparing for the process. Installing Windows 7 via UEFI will require certain skills in writing the system distribution itself. Users accustomed to using flash drives will need to be equipped with the latest version of Microsoft windows and one of the programs for burning the distribution to USB. As an example, one such program called Rufus will be presented.
After downloading the latest version of the application, you will need to select a flash drive with a minimum capacity of 4Gb. You must run Rufus as an administrator with “UAC” access rights confirmation. Going to the “Device” section, you will need to click on your flash drive to subsequently write the distribution kit to it. If you want to install the system with MBR or GPT disk partitioning, you must check the appropriate box. It is recommended to leave the default file system FAT32. At the next stage, you will need to select the ISO image of the system that was previously downloaded or purchased in a boxed edition and click the “Start” button. After the process is completed, the bootable USB flash drive for UEFI will be completely ready.
Booting from a drive in UEFI mode on various hardware
Of course, first you need to boot correctly, since this is strictly required by the UEFI installation of Windows 7. Gigabyte develops motherboards with Dual UEFI BIOS. On such equipment, before starting the process, you will need to go to the settings using the F9 key and select the appropriate operating mode. Similar steps can be performed on most motherboards from other manufacturers.

Fast boot in UEFI mode is also often used. To do this, you will need to call up the boot device menu and select a flash drive with the required mode tag attached (Lagacy does not have it).
If the user does not use the new BIOS, the desktop computer has the ability to completely deactivate it. It is worth noting that Lagacy Boot cannot be disabled in the settings, even when UEFI is being produced. Acer is one of the developers who has completely removed the ability to deactivate any of the modes on their laptops, resulting in the need to use only fast boot to select.

It is very interesting that at first the new built-in security tools and partly GPT markup, when installed in the mode described above, blocked pirated cracks for the Microsoft operating system. Nevertheless, the hackers were quickly able to make corrections to their Windows 7 activator, the UEFI mode in which was already fully taken into account.

Having loaded with the method required by the user, further steps to install the system do not change.

The only thing worth noting is that when partitioning a disk, windows will now create a slightly larger number of additional partitions.
Today, the BIOS system is considered outdated, and is gradually being replaced by a new version - UEFI. With it, installing the operating system takes on a different character, so many users encounter a number of problems during the process. In fact, there is nothing particularly complicated; I think that after the instructions given below, even a not very experienced computer user will be able to make friends with the UEFI BIOS specification. Actually, what to do if your computer has uefi bios, how to install windows 7 in this case, will be discussed further.
Creating a bootable USB flash drive
First of all, it is necessary, and for this purpose I will use the Rufus utility. You, in turn, can use any other program, for example, WinToFlash or WinSetupFromUSB. So, here's what we do:
- The Rufus utility must be downloaded from the developer’s website of the same name and then launched.
- Set the name of the flash drive, select the file system (FAT32), system interface (UEFI), and finally select the path to the ISO image next to the “Create bootable disk” option.
- After clicking on the “Start” button, the process of preparing a bootable flash drive will begin, which will take some time.
- Reboot the system, click or.
- In the control menu, click – “Advanced” – “Download” – “USB support” – “Full initialization”. Also open the "Secure Boot" menu and select "Windows uefi mode".
- In the CSM section, set “enabled” in the “Startup” item, and in “Boot device settings” – “only uefi”. For the “Boot from storage devices” option, click “both, uefi first”.
- In boot priority, specify your bootable USB flash drive first, and put the HDD in second place.
Installing Windows 7
After correctly following the above instructions, you need to restart the computer, which in turn. You are required to accept the license terms and choose to install the operating system completely. Next, open the command line using the + button combination, then write the commands that you see in the screenshot in the same sequence.

These steps will begin installing Windows 7 on your computer. During the process, the system will reboot several times, and at the end you will need to complete formalities, such as specifying the computer name, time zone, etc. After all drivers are automatically loaded, you can start working with your computer.
As you can see, nothing complicated, the main thing is to strictly follow the instructions. I hope everything works out for you!
Recently, many motherboards, instead of the usual bios firmware, have an improved version called uefi. The program interface supports language selection, allows the use of new types of hard drives with a capacity greater than 2 TB, and contains other improvements. If you have the latest uefi bios firmware installed on your computer, then we will tell you how to install windows 7 in a few steps.
Advantages of uefi firmware over bios program
The advantage of uefi firmware is its extremely effective acceleration of loading of your operating system. In addition, uefi bios makes it easier to restore information, install updates, and have other advantages. Experienced users understand the difference between MBR and GPT disks, but you may want to keep your head down. Just remember that uefi is the real near future, and bios is obsolete.
An unpleasant feature of the uefi firmware
The saddest feature of this program is the inability to migrate from an installed Windows 8 operating system to a new computer. So if you have 8 pre-installed, then you won’t be able to install 7 so easily. This is due to the presence of a mandatory protocol that Microsoft now requires from all licensed versions of Windows - loading Secure Boot, which is absent in Windows 7 and is not provided in previously released versions of the OS. This can be solved by disabling this option in the program menu. Go to the Security section, disable Secure Boot.

Don't forget to turn on compatibility mode! The route is as follows: Advanced tab - System configuration - Boot Mod (maybe OS Mode Selection).

We set the found option as follows: change UEFI OS (or UEFI BOOT) to “CSM Boot” or “UEFI and Legacy OS”, “CMS OS”.

Before you begin, you either need to create a bootable USB flash drive yourself or have a licensed installation disk with this system. We recommend that distribution kit owners start reinstalling immediately, because the method of working with a bootable USB flash drive is described below in the instructions. The installation disk will not cause any problems.
Now let's configure uefi for installation from a flash drive.

Windows 7 has been very popular since its release. Subsequent versions of the operating system from Microsoft were met with mixed reactions by users, and this is especially true for the eighth edition. Although the “ten” still has a fairly large number of fans, many want to know how to install Windows 7. This is not as complicated a process as it might seem, and most users will be able to install this OS on their computer or laptop themselves.
Preparatory stage
Every PC owner should remember that the OS can be completely reinstalled or the existing one can be updated. If your computer is unstable, then you should choose the first option. Since this process involves formatting the system disk, it is necessary to transfer all important files from it to another partition. Otherwise they will be destroyed.
To install Windows, you must have a boot disk or flash drive. The user must also understand what operating system bit depth should be installed. Determining this is quite simple - if the PC has 4 GB of RAM or more, then Windows 7 64-bit is selected. When there is less RAM, then you should opt for the 32-bit edition.
In addition, you should make sure that all the necessary drivers are available. If the OS will be installed on a laptop, then they should first be downloaded from the manufacturer’s website. When purchasing a desktop PC, discs are included with the motherboard and video adapter. They contain all the drivers necessary for the normal operation of the computer.
It remains to decide which version of the operating system will be installed. Total company Microsoft offers six editions of this OS:
 After carrying out the preparatory activities, you can answer the question of how to install Windows 7 yourself from the Internet. We should immediately warn you that this OS does not support USB 3.0 ports. To be able to distinguish the standard from earlier ones, they are painted blue. If the installation will be carried out from a flash drive, then it must be inserted into USB 2.0. It is also worth remembering that new PCs are equipped with a UEFI BIOS and the process of installing an operating system on them has some features.
Computers with old BIOS
If the BIOS supports the Boot Menu, then after rebooting the PC you need to call it. To do this, one of the keys is most often used - F8, F2, Esc, F11. In the window that appears, select the desired device.
However, this method is not suitable for all computers, and in such a situation it is necessary to change the boot priority in the BIOS manually. To do this, you need to restart the PC and press the Del key when the logo appears. Some motherboards and laptops use different buttons.
Actions after entering the BIOS depend on its version:
- Phoenix-Award - the “Advanced BIOS Features” section is selected, and in it there is a line “Hard Disk Boot Priority” or “First Boot Device”. Then use the arrows to select the desired device, for example, USB-HDD for a flash drive.
- AMI - on the top panel you need to find the “Boot” tab and go to the “Boot Device Priority” section. Having entered the line “1st boot”, press “Enter”, and then use the arrows to select the desired device.
After completing these steps, you will need to save the settings and restart your PC. If everything was done correctly, the OS installer will start loading. The further sequence of actions looks like this:

After this, a window for selecting HDD partitions appears, and the user is faced with the question of which disk to install Windows 7 on. The first is intended for storing system backups and has a size of about 100 MB. The second one should be selected and it must be formatted before installing win 7. To do this, follow these steps::
- Click on the “Disk Settings” line.
- Having selected the desired partition, press the “Format” button, and then “OK” to confirm the operation.
When the formatting process is complete, you need to select the partition again and click on the “Next” button. After this, you can wait 20 minutes for the installation process to complete, and the PC will automatically reboot several times. After installing the operating system, you need to select system operating parameters and install drivers.
Machines with UEFI BIOS
And now about how to install Windows 7 on new PCs yourself. Login to UEFI is done using F2 or Del. Then you need to go to the “Boot” section and change the “Secure Boot” value to “Disable”. As a result, a new item should appear - “OS Mode Selection”. In it you should select “UEFI and Legacy OSТ” and save the changes made by pressing the F10 key.
 The PC will begin to reboot, and at this moment you need to log into UEFI again. Then, in the “Boot Device Priority” menu, select the desired boot device. If you previously installed “eight” or “ten” on your computer, then some problems may arise. This is because recent versions of Windows format the hard drive using the GPT partition table standard rather than MBR. For the “seven” to work, the second format is required. To solve the problem, you will have to use a step-by-step guide.
In this case, you should select the disk where the user wants to place the OS, then set the OS language and click on “Full system installation”. The next step is to open the command line using the keyboard shortcut “Shift + F10”. After her appearance the required order of entering commands is as follows:
- diskpart;
- seldis 0;
- clean;
- convert gpt;
- exit;
- exit.
After clicking the "Update" button, the installation can continue. Upon completion of the process, you need to set the system operating parameters and install drivers.
Don’t be afraid to install the OS yourself, because this is not the most complicated process and you don’t have to pay money to a specialist to do it.