Technical support for users of your own software product, administration and control of a corporate network - all this requires remote control of the client’s computer. And the field of software products for remote access is not empty: tools are provided both by the Windows 7 operating system itself and by numerous third-party programs. Built-in tools are good for their accessibility, third-party tools have an intuitively simple interface, “tailored” for ordinary users. Having analyzed the principles of operation, the pros and cons of each method, you will be fully armed, and the network and users will be under control.
Setting up Windows 7 Remote Desktop
Remote Desktop is available in Windows 7 Premium edition and higher. You will need it if you need to work with it on computers running Windows 7 Home Edition (the cheapest), provide support for multiple remote desktops - to connect to several computers at the same time - or change the port address used by the RDP service. To do this, you will need non-trivial settings that can be made to the system using the system registry editor or third-party programs. But it is better to spend a little of your time than a large amount of money on buying a new operating system.
Remote Desktop Port
The RDP service, whose functions ensure the functionality of the remote desktop, uses port No. 3389 as standard. The likelihood of hacker attacks on this port is very high, so to increase the level of network security, the port number can be changed. Since there are no settings for this in the Control Panel, you will have to use the system registry editor.
- From the command line, run Registry Editor with system administrator rights.
Launching Registry Editor to change the RDP port address
- In the editor window, navigate to HKEY_LOCAL_MACHINE\System\CurrentControlSet\Control\TerminalServer\WinStations\RDP-Tcp\PortNumber. A list of registry branch variables will be displayed on the right side of the window.
The required variable is hidden deep in the depths of the system registry
- From the context menu, select “Change” and enter the new port address, first making sure that the value entry mode is decimal.
Switch the number system to decimal and enter a new port address value
- Now, to connect to a computer, you will need to enter not its network name, but an address with a port number, for example, 175.243.11.12:3421.
Changing the port address from the standard 3389 to a custom one will not allow the Remote Assistance service to work on computers running Windows XP. Take this into account if you have any on your network.
Remote Desktop in Windows 7 Home Premium with support for multiple remote desktops
To encourage users to spend more money, Microsoft has severely limited the capabilities of its Remote Desktop service depending on the OS version. For example, in “Home Advanced” and below there is no ability to connect remotely at all, and in any others the number of sessions is limited to one, that is, you will not be able to connect remotely to two or more computers at the same time. The manufacturer believes that for this you should purchase a special edition server version of the system (Terminal Edition).
Fortunately, caring enthusiasts have worked to resolve this difficult problem. The result of their efforts is the RDP Wrapper Library software package. Once installed, it injects itself as an intermediary between the Remote Desktop Service (RDP) and the service manager, and then tricks them into emulating the network presence of Windows Server Terminal Edition and enabling the RDP service on computers running Windows 7 Home.
The program is available for download from the author's page and is completely free. After downloading and running the installer, all settings are made automatically, including making changes to the firewall rules.
RDP Wrapper Library - installation is automatic
The included RDPConf.exe utility will allow you to enable or disable remote access on the fly, change the number of simultaneous access sessions and the port number for accessing the RDP service.
Using Rdpwrapper you can configure remote access settings
How to allow or deny remote access
All options for allowing or denying remote access to your computer are located in the “Computer Properties” section of the Control Panel. You can enable or disable remote control in just a few steps. Don't forget that to make these changes you must be logged in with an account with administrator rights.
- Press the Win+Pause key combination to display the system properties window.
The Win+Pause keys will help enable “System Properties”
- In the left column of additional actions, click on the “Setting up remote access” link.
- The following control settings are available in the dialog box that opens:

- It should be noted that for remote control to be possible, the user account opening such a session must have administrator rights. To provide remote control to a regular user, you should add his name to the list of permissions, which can be accessed using the “Select users” button.
If the user you want to grant remote access does not have administrator rights, you can add him in this dialog box
Video: how to allow remote access to your computer
Remote Desktop Connection
Connecting to a remote desktop is very simple. Naturally, before this you need to enable all the necessary permissions on the client machine and create a list of users on it who will be allowed remote control.
- Call up a standard command line dialog and use it to run the mstsc.exe utility.
Calling a remote desktop client program
- On the “General” tab, enter the name of the computer to connect in the top column of the dialog box, and the user name in the bottom column (if you need a name different from the one under which you logged in). Don't forget that the user account must have administrator rights.
Entering the computer name on the network for remote control
- In the “Interaction” tab, select the planned connection speed based on the capabilities of your network. If you find it difficult to choose settings, leave them on automatic. The system will test the channel speed and select the optimal values.
Select the channel speed based on your network capabilities
- If everything was done correctly, and remote access is allowed on the client machine, you will see a window for entering your username and password. Enter the username and password of the client machine.
- After clicking the “Connect” button, a window with the desktop of the remote PC will appear. It can be expanded to full screen and create the complete illusion of working on a client machine.
Avoid working in high-resolution video modes: this will create a large load on the network, and the interface of the remote PC will be displayed jerkily. The ideal option is a resolution of 1280x1024 pixels and a color depth of 16 bits.
What to do if remote desktop does not work
Problems connecting to a remote computer can be caused by many reasons. Among the most common, the following should be noted:
- on the client machine, permissions to access the remote desktop and remote assistant are not enabled in the settings;
Make sure your settings allow remote access to your PC
- the account with which you are trying to access remotely does not have administrator rights;
Make sure your account has administrator rights
- your computer and the client computer are not part of the same workgroup or domain on the local network;
The slave and master computers must be members of the same workgroup
- the local network router used by both computers blocks port 3389, through which Windows 7 remote control services communicate;
Enabling a firewall in a router without additional configuration blocks most ports
- Outgoing requests from Remote Desktop Services are blocked by the antivirus package.
The Remote Desktop Service may be blacklisted in your antivirus package
remoteapp is disabled
A message about disabling remote access often awaits the user when trying to connect to it, and a dialog box also appears that can confuse an inexperienced user.
Licensing service error will prevent you from starting a remote desktop session
Meanwhile, everything is very simple: the rights of the user who is trying to “raise” a remote desktop session are not enough to change the system registry section responsible for licensing. The error is corrected in two stages.

Why is the remote desktop slow?
Uninterrupted operation of a remote desktop access session requires a high-speed channel, the lion's share of which is consumed by the transmission of the remote desktop image itself. Depending on the operating resolution on the client machine, the traffic can be so dense that it will overwhelm the average office 100-megabit local network. But on the network, in addition to two communicating PCs, there are also clients. To prevent network collapse, the remote access program begins to reduce the number of transmitted frames (frames) per second.
If at 60 frames per second you see a smooth, smooth picture, then at 30 the interface will be displayed with noticeable jerks. Further reducing the screen refresh rate will make the work unbearable: you will not even be able to accurately position the mouse cursor on interface elements. To prevent this from happening, you should optimize both the network connections of the slave and master computers, as well as the screen settings of the client computer.

Remote access to Windows 7 components
In addition to managing a remote desktop by emulating the keyboard and mouse of a client computer, Windows 7 remote access tools also allow you to remotely run programs and system commands from the command line interface, manage the system registry and firewall, as well as restart or shut down the slave PC . This requires fewer network and system resources than remote desktop management and can be done without the user being aware of the computer.
Remote command line
For the needs of system administrators, Microsoft has developed a special service utility. By interacting with the remote access services of the operating system, it allows you to access the command line interface of any computer on the local network, run programs on it, and even remotely install programs before launching them. The utility is called PsExec and is available for free download from the official Microsoft website as part of the PSTools package.
Download the utility from the server, run the installer executable file on the computer from which control will be carried out and, having agreed with the text of the license agreement, carry out the installation.
Install the PSExec utility
Now you can call the utility from the command line and use the full range of its wide capabilities.
Let's take a closer look at the command syntax and additional parameters for its launch: psexec [\\computer[,computer2[,…] | @file][-u user [-p password]][-n s][-l][-s|-e][-x][-i [session]][-c [-f|-v]] [-w directory][-d][-<приоритет>][-a n,n,… ] program [arguments].
Table: psexec command launch options
| Parameter | Description |
| computer | Tells PsExec to run the application on the specified computer or computers. The computer name is not specified - PsExec will run the application on the local system. If instead of the computer name the asterisk character (\\*) is specified, then the PsExec program will launch the application on all computers of the current domain. |
| @file | Tells PsExec to run the application on all computers listed in the specified text file. |
| -a | The processors on which the application can run are separated by commas, with processors numbered starting from 1. For example, to run the application on processors 2 and 4, enter “-a 2,4” |
| -c | The specified program is copied to the remote system for execution. If this parameter is not specified, then the application must be located in the system folder of the remote system. |
| -d | Indicates that there is no need to wait for the application to complete. This option should only be used when running non-interactive applications. |
| -e | The specified account profile is not loaded. |
| -f | The specified program is copied to the remote system, even if such a file already exists on the remote system. |
| -i | The launched program gains access to the desktop of the specified session on the remote system. If no session is specified, the process runs in a console session. |
| -l | When the process starts, the user is granted limited rights (the rights of the Administrators group are overridden and the user is granted only the rights assigned to the Users group). In Windows Vista, the process starts with a low level of trustworthiness. |
| -n | Allows you to set the connection delay to remote computers (in seconds). |
| -p | Allows you to specify an optional password for the username. If this parameter is omitted, you will be prompted to enter a password and the password will not be displayed on the screen. |
| -s | The remote process is launched from the system account. |
| -u | Allows you to specify an optional username to log into the remote system. |
| -v | The specified file is copied to the remote system instead of the existing one only if its version number is higher or it is newer. |
| -w | Allows you to specify the working directory (path inside the remote system) for the process. |
| -x | Displays the user interface on the Winlogon desktop (local system only). |
| -priority (priority) | Allows you to set different priorities for a process:
|
| program | The name of the program to be launched. |
| arguments | Arguments to be passed (note that file paths must be specified as local paths on the target system). |
Examples of the PSEXEC utility
The procedure for working with the PsExec utility is as follows:
- Launch another computer's command prompt using the psexec \\ command<сетевое имя компьютера>cmd.exe.
- Open any program on the remote computer. If the program is not on the slave PC, it will be copied from the administrator's machine. To do this, enter psexec \\<сетевое имя компьютера>-c test.exe, where test.exe is the program to be executed remotely.
- If the program you want to execute remotely is not in the system folder, specify its full path when running the psexec \\ command<сетевое имя компьютера>-c c:\program files\external_test.exe
Video: PSTools - a set of console system administrator utilities
Remote registry
In order to be able to remotely edit the registry, you must first activate the corresponding services on the client computer. This is easy to do if the account has administrator rights. To do this, launch the Service Manager snap-in from the command line window and select the “Remote Registry” service from the list in the main window. Click the Start button on the top control panel.
The Remote Registry service must be running on both client PCs and the administrator's computer.
Now you can connect to the registry of a computer on your local network remotely.

The registry branch of the remote PC will appear in the registry editor window and you can edit it as easily as your local registry.
Remote firewall management
Unfortunately, there is no convenient graphical tool for remote firewall management. Therefore, all manipulations will have to be performed using the command line. First you need to connect to the remote PC using the Telnet service. If the Telnet client is not installed, you need to add it through Add/Remove Windows Components.

Now you need to establish a communication session with a remote computer via the telnet protocol.

Once the connection is established, you can remotely manage the firewall on the remote computer using the netsh command. The following commands will be available to you:
request firewall rules. You can find out the Windows Firewall configuration on a remote PC using the command netsh advfirewall firewall show rule name=all;
enable or disable the firewall with the commands “netsh advfirewall set allprofiles state on” and “netsh advfirewall set allprofiles state off”;
return to default settings using the netsh advfirewall reset command;
opening a port is perhaps the most common task that will need to be performed. For example, you can open port 2117 for a torrent client to work like this: netsh advfirewall firewall add rule name="Utorrent rule" dir=in action=allow protocol=TCP localport=1433;
allowing incoming and outgoing requests to an arbitrary program using netsh advfirewall firewall add rule name="Allow Miner" dir=in action=allow program="C:\Bitcoin\miner.exe";
allowing remote management using the Windows console: netsh advfirewall firewall set rule group= “remote administration” new enable=yes.
Once you have completed the necessary settings, be sure to close the Telnet session with the quit command.
Remote reboot
The standard OS shutdown command allows you to shut down or restart any computer on the local network if it has permissions configured for Remote Assistance and Remote Desktop. From a command prompt window, run the command in the format shutdown / /m \\computername /c “comment” and press Enter.
Table: shutdown command parameters
| /s | Ending the remote PC session. |
| \\Computer_name | Name or network address of the remote PC. |
Users, wondering how to remove remote access to a computer in order to protect themselves from external attacks, install third-party programs, not even suspecting that the bulk of all hacks occur due to standard Windows settings. By default, the operating system allows remote connections to the computer. Trying to make things easier for users, Windows developers have included in the system the ability to remotely configure and provide assistance. Such help is only suitable for large corporations that have a system administrator who can fix computer problems in seconds while being in another location. For home users, remote access can only make the job easier for attackers eager to hack someone else's system.
How to get to the remote access setup menu?
In just a few minutes, any user can independently remove remote access to a computer.
- For users working under an administrator account, you must perform the following steps sequentially - “Start”, select “Control Panel”. In the window that appears, select “System”.
- For users working under a different account or who do not have account information, you need to open the System window with administrator rights. Click the “Start” button, “All Programs”, “Accessories”. Having found “Explorer” in the list, run it “with administrator rights”. To do this, hold down the Shift button on the keyboard with one finger and right-click on the “Explorer” icon. If the user operates the mouse with his left hand, then he needs to press the left mouse button. In the list that appears, select the “Run as administrator” field. In the window that opens, in the panel on the left, find and click on “+” to expand “Control Panel”, then “All controls” and select “System”.
Disabling remote access in the system menu
Once in system management, before removing remote access to the computer, you need to find the corresponding section. On the left side of the panel, click “System Protection”. On the bookmarks bar at the top, select “Remote access”. In the “Remote Assistance” section, uncheck the box next to “Allow connection”. In the “Remote Desktop” menu, check the box next to “Do not allow connections.” Click “OK” and close all system windows. Restart your computer through the Start menu. After rebooting, you need to check whether the changes in the system are saved. To do this, you need to re-enter the system properties and make sure that remote connections are not active. If nothing has changed, you need to carefully study the instructions on how to disable remote access, paying attention to obtaining system administrator rights.

Pitfalls of VPNs
All Windows users should make sure that the computer is not part of a virtual private network, with the exception of situations where the provider provides Internet services only through a virtual network, which is indicated when connecting. You must open the “Control Panel” with administrator rights and select “Network Center”. Select "Change adapter settings." Before you remove remote access and virtual private networks in Windows 7, you need to find out which connection is used to operate the Internet, otherwise you can cut off your access. If there is more than one connection in the list, before deleting it is better to first disconnect it and select the “Disconnect” menu. If the shutdown does not affect the operation of the Internet, you can delete the icon.

Another loophole - remote windows registry
Questions related to how to remove remote access to a computer are answered by simply disabling Remote Assistance, but few people remember about the remote registry. But, if you think about it, by connecting remotely to the registry, you can write any commands in it that, when the system is rebooted, will not only re-enable the assistant, but also cause additional damage to the computer. With administrator rights in the control panel, you must select the menu “Administration” - “Computer Management”. In the left panel of the snap-in that opens, select “Services and Applications” and launch “Services”. In the list of services, find “Remote Registry” and right-click on the inscription. Select properties. In the “Startup type” field, select “Disabled”. Save and restart the computer through the “Start” button.

Disable remote access using the command line
Users who have become familiar with the powerful Windows Command Line tool will definitely be interested in how to remove remote access to a computer without unnecessary transitions between operating system windows. There are two ways: entering commands yourself or using an executable file with the .bat extension.
In the executable file, it is recommended to write pause after each command, since without completing work with one service, the command is transferred to another service, which can cause an error in the system with a refusal to execute. If, after disabling the necessary services, you do not want to restart the computer, you can immediately stop the services from the command line.
fb.ru
Windows 7 Remote Desktop
Remote Desktop in Windows 7, as its name suggests, is a service that allows you to connect to your computer's desktop remotely over a network. If you think that this function is needed only by administrators, then you are mistaken. For regular users, remote desktop may also be useful:
- If you need to use a program that cannot be installed at work. You can connect to a home computer on which programs are installed
- You forgot a document at home that you need to find on your computer. Of course, you can search for a document directly on a shared folder on your home computer, but there is one difficulty here - searching on a remote folder, with a slow connection, is very ineffective.
- If you have your own servers, you can set them up from anywhere on the planet where there is Internet access.
In order to enable remote desktop in Windows 7, you need to follow these steps:
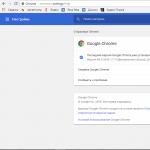
Go to the Start menu - Right-click My Computer - select Properties from the context menu.
In the system information window that opens, on the right side, click Remote access settings.
The System Properties dialog box has opened, Remote Access tab. Here, in the Remote Desktop section, you need to set the radio switch to the Allow connections to your computer position. There are two options for enabling Remote Desktop:
- Allow remote connection to your computer from any computer on which the Remote Desktop client is installed. This option is less secure, but you can connect from computers that do not have Windows installed, such as Linux or iOS.
- Another option for enabling Remote Desktop is to allow connections only from computers that use RDP with Network Level Authentication support, that is, Windows 7 and later.
I will include a less secure method, since I use Ubuntu Linux on my laptop, and if you plan to only use Windows 7 and newer, use the second option.
If it is not possible to be physically near the computer, a remote desktop connection can be enabled remotely, namely, by connecting to the remote machine using the registry editor and changing the appropriate settings. This procedure is relevant for computers that are members of the domain.
Once you have enabled Remote Desktop, it is very easy to connect to it. Windows Remote Desktop allows you to connect not only to Windows users, but also to other operating systems:
- Windows comes with the Remote Desktop Connection program (mstsc.exe)
- In Linux, an RDP client needs to be installed, for example Remmina, RDesktop and many others.
To connect to a remote desktop from Windows 7, you need to open the Start menu - All Programs - Accessories - Remote Desktop Connection, or type mstsc.exe in the search bar.
In the Remote Desktop Connection dialog box, in the Computer field, enter the Name or IP address of the computer on which you enabled the remote desktop. Click the Connect button.
In the dialog box that appears, enter your username and password.
Please note: You must enter the username and password of the user of the remote machine, not the one from which you are connecting.
That's it. You see the remote desktop and can work on the remote computer as if you were sitting at it.
Another small note - you may notice that the remote desktop does not display all desktop visuals. This is due to the default settings for the remote desktop client. If you work on the same local network and the connection speed is 100 megabits or more, you can change the settings. To do this, before connecting to the remote desktop, click the Show options button.
Then go to the Interaction tab and specify the speed of your network connection, according to which the optimal parameters will be determined.
profhelp.com.ua
How to allow remote connection to a computer in windows 7/8.1/10
Enabling a remote connection to a computer is very simple. Start-Right click on the My Computer icon in Windows 7 or This PC in 8.1, properties. Setting up remote access.

How to allow remote connection to a computer in Windows 7-8.1-10-01
Check the Allow remote connection switch.

How to allow remote connection to a computer in Windows 7-8.1-10-02
If you wish, you can immediately add users or a group to whom this can be done using the Select users button.

How to allow remote connection to a computer in Windows 7-8.1-10-03
In addition to the “classic” way to enable Remote Desktop support on a desktop computer with Windows 7 or a server, you can also do this:
In the registry key HKEY_LOCAL_MACHINE\SYSTEM\CurrentControlSet\Control\Terminal Server you need to add the fDenyTSConnections dword key with the value 0.
"fDenyTSConnections"=dword:00000000
Nov 22, 2014 00:13 Ivan Semin
pyatilistnik.org
Standard Windows tool for remote access via RDP within a local network

The Windows system has been providing the ability to implement remote access via the RDP protocol for a long time. This standard tool appeared in the version of Windows NT 4.0, released in 1996. It was more or less functionally modified in the Windows XP version, and found its completeness already in Windows 7. Versions Windows 8/8.1 and 10 inherited remote access via the RDP protocol from Windows 7 without functional changes.
Below we will take a closer look at the operation of remote access via the RDP protocol in versions of Windows 7, 8.1 and 10.
7. Connection settings
1. Remote access via RDP protocol
Connection using the RDP protocol is carried out between computers located on the same local network. This type of connection is intended primarily for IT specialists who maintain company computers integrated into their production network. Without leaving their workplace, connecting remotely to the computers of enterprise employees, system specialists can solve problems that do not require intervention in the hardware of the machines and carry out preventive measures.
Connecting to a remote computer using the RDP protocol is also possible outside the local network, over the Internet. But this will require additional steps - either forwarding port 3389 on the router, or combining it with a remote computer into a single VPN network. In view of this, connecting to a remote computer over the Internet is much easier using other software tools that do not require unnecessary actions. This is, for example, the standard Windows utility “Remote Assistance” for providing computer assistance over the Internet. It works on the principle of sending an invitation file to the user who will provide computer assistance. Its more functional analogues on the Windows software market are programs like TeamViewer.
RDP is also used to connect to Hyper-V virtual machines. A remote connection via RDP can offer more opportunities than the standard connection window of a standard hypervisor. The Hyper-V connection window does not provide sound playback in the guest OS, does not see connected USB storage devices, and cannot offer more connection with a physical computer than pasting text copied into it. Whereas an RDP connection can provide the virtual machine with visibility of various devices connected to the physical computer, a better image of the guest OS desktop, work with sound, etc.
To connect via RDP, the remote computer must meet the following requirements:
- It must have a password-protected account;
- The system must allow remote connections;
- If you do not want to change your access data every time you connect with a constantly changing dynamic IP address, you must assign a static IP address in the network settings.
Remote access is only possible on computers with Windows Pro, Enterprise or Ultimate editions installed. Home versions of Windows (Home) do not provide remote access via RDP.
2. Password on the remote computer
If you are working on a remote computer using a Microsoft account, and using a short PIN code instead of a long password, when connecting via RDP, you must enter that same long password, and not a four-digit PIN code.
If an unpassword-free local account is used on the remote computer, and there is no special need for a password, such as when connecting to Hyper-V virtual machines, you will have to create at least a simple password like “777” or “qwerty”.
3. IP address of the remote computer
When connecting via RDP, you will need to enter the IP address of the remote computer. The internal IP address is visible in the system network settings. But in versions of windows 7, 8.1 and 10 these are three different paths. In Windows 7, this is a section of the Control Panel, and in Windows 8.1 and 10 this is the Settings application, with its own organization inherent in each version. Therefore, we will find out the internal IP address in a universal way suitable for each of these systems - through the command line. The shortcut to launch the command line in Windows 7 is available in the Start menu. In Windows 8.1 and 10, the command line is launched from the context menu on the Start button.

In the command line window, enter:
After pressing Enter, we will get a summary of the data, where the internal IP address will be visible.

4. Allowing remote connections
Permission to connect remotely in Windows systems is usually initially disabled. In any case, this definitely applies to licensed assemblies. The ability to connect via RDP on a remote computer is activated in the system settings. We need the "System" section. In the Windows 7 version, it can be accessed by searching the Start menu. And in Windows 8.1 and 10, you can get to the “System” section from the context menu on the “Start” button.
You may be interested in: Looking for vulnerabilities in Windows 10 - getting money

Click “Remote Access Settings”.

In the system properties window, you must set the option to allow remote connections to active. There is no need to remove the authentication option. To apply the changes, click “Apply” below.

Such settings will open the path to a remote connection, but only for the administrator account. Regular account users are not allowed to provide their own computer for remote control. The administrator can give them this right.
Below the option to allow remote connections there is a “Select users” button. Let's press it.


In the field below, enter the name of the user who is allowed to connect to him via the RDP protocol. For local accounts, this is their name, and for Microsoft accounts, this is the email address used for authorization. Click "Ok".

That’s it – now this user’s account will be accessible from any computer within the local network.
5. Connect to a remote computer
All necessary actions on the remote computer have been completed, let’s move on to the main computer from which connection and control will be carried out. You can launch the standard RDP connection utility by finding its shortcut using a search within the system. In Windows 7, this is a search in the Start menu.

In versions Windows 8.1 and 10, press the Win+Q keys.

A small connection window will appear. In the future, it will be possible to connect to remote computers using exactly this abbreviated form. But for now, click “Show options”.

In the “Computer” field, enter the IP address of the remote computer. In the field below - “User” - accordingly, enter the user name. If a Microsoft account is connected to the remote computer, enter the email address.

If you work on your computer using a regular local account, the username must be entered in the format:
Computer\User
For example, DESKTOP-R71R8AM\Vasya, where DESKTOP-R71R8AM is the computer name, and Vasya is the user name of the local account.

Below the username there is an option to save authorization data on a remote computer. Connection parameters - IP address, username and password - can be saved as a separate RDP file and used to open it on another computer. Click “Connect”, and then “Connect” again in a new window.

Enter the password for the remote computer account.

Click “Yes” in the certificate error window.


We will get more settings for connecting via the RDP protocol in the utility window initially, before establishing the connection.
6. Connect to another account on a remote computer
Below the column for filling in the user name of the remote computer, if the “Always request credentials” checkbox is not checked, options for deleting and changing access data are displayed. By clicking the “Change” option, in addition to the authorization form in an existing account on a remote computer, we will see the ability to connect to another account that is present on the same computer.

After entering a new username and password, the authorization data for a specific IP address will be overwritten.
7. Connection settings
In the opened window for connecting to a remote computer, we will find tabs with customizable parameters. The first two concern the convenience and functionality of remote access.
“Screen” – in this tab you can set the screen resolution of the remote computer; the utility window will open with this resolution after connection. If accessing from a weak computer, you can set the resolution to low and sacrifice color depth.

“Local resources” - here, in order to save system resources, you can disable sound playback on the remote computer. Or, on the contrary, you can also install audio recording from a remote computer. In the column of local devices and resources, after clicking the “Details” button, we can, in addition to the active printer, select devices of the main computer that will work on the remote computer. These are smart cards, separate hard drive partitions, flash drives, memory cards, external hard drives.

An obstacle to using the RDP protocol may be its blocking by antiviruses. In this case, the RDP protocol must be enabled in the settings of antivirus programs.
Hello! We continue to disassemble the Windows 10 operating system! Today you will learn how to set up remote access on a Windows 10 computer. You can allow or disable remote control of the computer. You can limit the time you use Remote Assistance. To set up remote access, open the Start menu at the bottom left of the screen. In the window that opens, in the list of all applications, at the bottom of the list, open the “Windows System” tab. In the list that opens, click on the “Control Panel” tab.


Next, the “System Properties” window will open. Here you can allow or deny the connection of Remote Assistance to your computer. Click on the Advanced button to view additional options.

Allow or deny remote control of your computer.
You can set a time limit for how long an invitation can remain open.
You can set invitation generation only for computers running Windows Vista or later.
After changing the parameters, click on the - OK button.

How to launch remote assistant Instructions Read Here!!!
Still have questions? Write a comment! Good luck!
Setting up remote access Windows 10 updated: February 11, 2017 by Ilya Zhuravlev
info-effect.ru
How to remotely access your desktop in Windows 10 using the Quick Help app
 Microsoft is improving the Windows 10 operating system, not only fixing various problems, but also adding new features. With the “Anniversary” update of the operating system (version above 1607), a new application was added - “Quick Help”. It makes it easy and quick to give a remote user access to your computer if they are also running the required version of Windows 10.
Why do you need the Quick Help utility on Windows 10?
The Quick Help program is a built-in analogue of many other applications that offer approximately similar functionality, namely, providing access to a computer for another user over the Internet. The most famous program with similar functions is TeamViewer. However, it is not pre-installed in the operating system and requires configuration, while Quick Help requires a simple Internet connection to work.
The Quick Help utility may be useful to a computer user:
- When contacting operating system support. Microsoft employees, if the user is poorly versed in Windows 10, will be able to remotely connect to his computer and take the necessary actions to fix the error, diagnose or configure the PC;
- To transfer control of the computer to another user. For example, if an employee is at home but needs work materials, another person can turn on his computer and activate remote access mode through the Quick Help application, which allows him not only to view files, but also to transfer them in both directions.
You can think of dozens of situations when you need to gain remote access to your computer, and the Quick Help application allows you to do this in a few clicks.
How to remotely access your computer using Quick Help
Since this utility is built into the Windows 10 operating system, you don’t need to download anything to start working with it. You just need to launch it by clicking “Start” - “Accessories” - “Windows” - “Quick Help” or by starting to type “Quick Assist” in the search (for a non-localized version of the system).
When the program is launched, you will need to do the following:

How to use Quick Help on Windows 10
When the remote user allows access to their computer, the other user's "work area" will open. In the middle of the Quick Help utility window, the image that is currently displayed on the remote computer will be displayed. A number of tools and service information will appear at the top, including:

In addition to the indicated and obvious functions, it is also worth noting the ability to transfer files. A user who has gained remote access can copy a file on his computer, then switch to the remote PC screen and paste the previously copied file into the desired directory.
It is important to note that at any time, a user who is providing remote access to their computer can close the Quick Help application to turn off the broadcast.
OkeyGeek.ru
Quick Help feature for remotely accessing your computer in Windows 10
Windows 10 allows you to remotely control other computers running the same version of the operating system. This feature is built into the system and is easier to use than in previous versions of Windows. Without the need to install additional programs, we can control someone else's computer or ask someone to remotely restore our operating system via the Internet.
Built-in remote control feature in Windows 10
Remote control of other computers is useful in many situations. For example, if you have problems with the operating system and you cannot solve them yourself, you can turn to an acquaintance or friend, who also does not have to come to your home. It is enough to give him remote access to your desktop so that he can connect and manage it via the Internet.
Typically, for such purposes, the TeamViewer program is used, which allows you to control a remote PC. But for users who have Windows 10 with the Anniversary Update installed, it will be much easier to gain remote access without installing additional programs. Remote Desktop functionality is built into the OS, and Windows 10 makes it much easier to use than it once was in the form of so-called Quick Help.
Setting up remote access in Windows 10
But before we begin, let's pay attention to the following. This feature requires both users to have the Anniversary Update installed.
Connecting in Windows 10 works a little differently than with programs like TeamViewer. TeamViewer operates on the principle that the user who provides access to his computer must register and receive an ID and password for it. He then sends the received data to a friend whom he wants to give remote access to.
In Windows 10, everything is reversed - a user who wants to connect to a remote computer takes the first step by registering as an assistance provider. In this way, you receive a unique 6-digit code that is valid for 10 minutes. Then the one who needs remote support enters the code at himself, thereby initiating a connection between the two computers. Let's look at the connection process step by step.
Step 1 - Actions for a user who wants to control a remote computer
A user who needs access to a remote PC needs to go to the Start menu - Accessories and select the "Quick Help" option. After enabling this feature, you need to select the “Give help” option and sign in with your Microsoft account. Once logged in, a 6-digit code will be displayed.

The code is valid for 10 minutes and acts as a user ID required to connect to another computer. The code must be sent to someone who wants to provide remote access to their device.

Step 2 - Actions of the user who provides access to his PC
A user who wants to provide access to his computer needs to obtain and copy a 6-digit code. Then go to the Start menu - Accessories and select the "Quick Help" option. After enabling this option, you need to select “Get Help”.

A window will appear where you will need to enter the user ID to whom we want to provide remote access. After entering the 6-digit code, the connection process will begin. When a message appears asking if we want to allow other users to connect to our computer, select Allow.

Providing help in Windows 10
If 10 minutes have not passed and the code is still valid, then the connection between the computers will be established and the user from the first step will see on his screen the desktop of the person from the second step. Now you can control the mouse and keyboard and perform any operations on the remote PC.
As noted above, this function is primarily intended for receiving/providing quick help. If your friend has problems, for example, with viruses, Windows, or something doesn’t work out for him, instead of explaining it to him in Skype or another messenger, you should simply ask him for remote access and perform the appropriate actions for him.
The easiest way to connect to a remote computer
If you or someone you know has a different version of Windows or has problems installing the Anniversary Update, you will have to consider other connection options.
There are many applications and programs for remote desktop management. Some require fine tuning and are not very clear to novice users. However, there is one program that is very simple and amazingly effective.
We will talk about AnyDesk, which is very popular and stands out among similar programs. First of all, it is very easy to use, and the connection between computers is similar to a Skype call. The program does not require any settings (just dial the unique number of the user whose computer you want to connect to). In addition, the program is portable, which means that it can be run on any PC without installation, for example, from a flash drive.
After launching AnyDesk, the main window will open, divided into two parts - one concerns your computer, the second serves to seize control of another PC.
Your AnyDesk address is located in the “This workplace” section. It allows other users to connect to your computer. That is, in order for someone to gain remote access to your PC, give them this address. This address may also be needed if you need to connect to your home computer, for example, from work.
The “Other Workplace” section is intended for establishing a connection with a remote PC. To establish a connection, simply enter the address (identifier) of the remote computer and click on the “Connect” button. A window will appear on the remote PC with information that someone is trying to establish a connection with it. The user must allow the connection by clicking on the “Accept” button.
The remote desktop will appear in the AnyDesk window. Now you can run programs on it, view files and perform any operations.
Connecting to a home computer
To remotely access your home PC, you need to enable the uncontrolled access feature. This function allows you to make a connection without confirmation of the call by the receiving party.
On your home computer, go to the program settings, and then to the “Security” tab. In the “Access while away” section, check the “Allow uncontrolled access” option and enter a strong password in the field.
Now, when you try to connect to your home PC desktop from your workstation, you will be prompted to enter a password. After entering it, you will gain full access to your home PC.
InstComputer.ru
How to enable remote access to administrative shares in Windows 10
I encountered the problem that I cannot remotely connect to the default administrative shares (the ones with the dollar) on a computer with Windows 10 under a user who is a member of the local administrators group. Moreover, under the built-in local administrator account (it is disabled by default), such access works.
A little more detail about what the problem looks like. I’m trying to access from a remote computer the built-in administrative resources of a Windows 10 computer that is in a workgroup (with the firewall disabled) in this way:
- \\win10_pc\C$
- \\win10_pc\D$
- \\win10_pc\IPC$
- \\win10_pc\Admin$
In the authorization window I enter the name and password of an account that is a member of the Windows 10 local administrators group, to which an access error appears (Access is denied). However, access to shared network folders and printers on Windows 10 works fine. Access to administrative resources under the built-in administrator account also works. If this computer is included in an Active Directory domain, then under domain accounts with administrator rights, access to admin shares is also not blocked.
 The point is another aspect of the security policy that appeared in UAC - the so-called Remote UAC (User Account Control for remote connections), which filters the access tokens of local accounts and Microsoft accounts, blocking remote administrative access to such accounts. When accessing under a domain account, this restriction is not imposed.
You can disable Remote UAC by creating the LocalAccountTokenFilterPolicy parameter in the system registry
Advice. This operation slightly reduces the security level of the system. 
After downloading, try to remotely open the C$ administrative directory on your Windows 10 computer. Log in using an account that is a member of the local administrators group. An Explorer window should open with the contents of the C:\ drive.

So, we figured out how to use the LocalAccountTokenFilterPolicy parameter to allow remote access to hidden admin resources for all local administrators of a Windows computer. These instructions also apply to Windows 8.x, 7 and Vista.
winitpro.ru
How to set up Windows 10 Remote Desktop
Not every user knows how to properly connect a remote desktop and start working with it. Setting up such a useful tool makes working at the computer much easier. It is possible not to be at the location of the machine, but to control all important functions from a distance. This is especially true in large organizations and complex home network structures.
Therefore, we will consider the issue more carefully in the article below. Of course, you can also use special programs that implement remote desktop, but you still need to know about standard Windows 10 tools. After all, additional software is an extra load on axis resources, and the use of native utilities is already optimized. Setting up the desktop is not very complicated and is very similar to organizing the desktop in Windows 8. This is natural, because the 10th generation draws many positive aspects from previous versions.
Preparation
To implement this functionality, it is important to carry out preliminary preparation. It is important to configure the computers for successful communication. The connection within the desktop is carried out using the RDP protocol over one local network. At home, it’s a single router for all devices. It is also possible to implement a single table via a global network. To connect directly, you only need to find out the computer address (its IP). It is known that in a home environment such an address is constantly subject to change, so it’s worth making it static first:
- You should go to the control panel.
- Open Network and Sharing Center.
- Right-click on the local network connection and select Details from the context menu.
- Here we look at the IP address data.
- We exit the window and open Properties.
See also: Setting up tiles in Windows 10
- A list of components that support the selected connection will appear. Select Internet Protocol version 4.
- Click on the Properties button.
- Click OK, then OK again.
That's it, a static address has been assigned to the computer. If this is not done, then every time the IP is reset, the connection will be broken.
You can try to do this through a router. Almost all models allow you to assign a specific address to the equipment. Naturally, this topic is only for those people who are able to cope with such equipment. You can search for articles on the global network that will answer the question of how IP fixation is implemented in a particular router.
Permission
The remote desktop itself does not start on the Windows 10 operating system; it still needs to be allowed to connect via the RDP protocol:
- Go to the control panel and click on System.
- On the left there will be a list in which you need to select Setting up remote access.
The Settings window will open, in which you should click on Allow remote connections to this computer and Allow remote assistance connections to this computer. It is better to specifically register those users who will connect to the machine. It is also possible to specifically create a user for whom desktop settings will be relevant.
Connection
Now you don't need to install additional software to use the remote desktop. Just go to the search for Windows 10 or any other operating system to find the remote desktop control. After this, the connection utility starts.
To protect themselves from external attacks, they install third-party programs to access their computer, without even suspecting that the bulk of all hacks occur due to standard Windows settings. By default, the operating system allows remote connections to the computer. Trying to make things easier for users, Windows developers have included the ability to remotely configure and provide assistance to the system. Such help is only suitable for large corporations that have a system administrator who can fix computer problems in seconds while being in another location. For home users, remote access can only make the job easier for attackers eager to hack someone else's system.
How to get to the remote access setup menu?
In just a few minutes, any user can independently remove remote access to a computer.
- For users working under an administrator account, you must perform the following steps sequentially - “Start”, select “Control Panel”. In the window that appears, select “System”.
- For users working under a different account or who do not have account information, you need to open the System window with administrator rights. Click the “Start” button, “All Programs”, “Accessories”. Having found “Explorer” in the list, run it “with administrator rights”. To do this, hold down the Shift button on the keyboard with one finger and right-click on the “Explorer” icon. If the user operates the mouse with his left hand, this means that he needs to press the left mouse button. In the list that appears, select the “Run as administrator” field. In the window that opens, in the panel on the left, find and click on “+” to expand “Control Panel”, then “All controls” and select “System”.
Disabling remote access in the system menu
Once in system management, before accessing the computer, you need to find the appropriate section. On the left side of the panel, click “System Protection”. At the top, select “Remote Access”. In the “Remote Assistance” section, uncheck the box next to “Allow connection”. In the “Remote Desktop” menu, check the box next to “Do not allow connections.” Click “OK” and close all system windows. Restart your computer through the Start menu. After rebooting, you need to check whether the changes in the system are saved. To do this, you need to re-enter the system properties and make sure that remote connections are not active. If nothing has changed, you need to carefully study the instructions on how to disable remote access, paying attention to obtaining system administrator rights.

Pitfalls of VPNs
All Windows users should make sure that the computer is not part of a virtual private network, with the exception of situations where the provider provides Internet services only through a virtual network, which is indicated when connecting. You must open the “Control Panel” with administrator rights and select “Network Center”. Select "Change adapter settings." Before you remove remote access and virtual private networks in Windows 7, you need to find out which connection is used to operate the Internet, otherwise you can cut off your access. If there is more than one connection in the list, before deleting it is better to first disconnect it and select the “Disconnect” menu. If the shutdown does not affect the operation of the Internet, you can delete the icon.

Another loophole - the remote Windows registry
Issues related to access to a computer are resolved by a banal shutdown, but few people remember about the remote registry. But, if you think about it, by connecting remotely to the registry, you can write any commands in it that, when the system is rebooted, will not only re-enable the assistant, but also cause additional damage to the computer. With administrator rights in the control panel, you must select the menu “Administration” - “Computer Management”. In the left panel of the snap-in that opens, select “Services and Applications” and launch “Services”. In the list of services, find “Remote Registry” and right-click on it. Select properties. In the “Startup type” field, select “Disabled”. Save and restart the computer via the “Start” button.

Disable remote access using the command line
Users who have become familiar with the powerful Windows Command Prompt tool will definitely be interested in how to remove remote access to a computer without unnecessary transitions between operating system windows. There are two ways: entering commands yourself or using an executable file with the .bat extension.
In the executable file, it is recommended to write pause after each command, since without completing work with one service, the command is transferred to another service, which can cause an error in the system with a refusal to execute. If, after disabling the necessary services, you do not want to restart the computer, you can immediately stop the services from the command line.
In an age when you cannot do without computers, technical support workers are becoming more and more in demand. These people must not only be able to fix any problem, but also be able to explain how to do it to users who are often much less educated in computer terminology. It is in such cases that the Remote Assistance utility in Windows will be most useful.
"Remote Assistance" in Windows 7
The Remote Assistance program allows you to connect to the user’s computer from another device and independently perform the actions necessary for technical assistance. This significantly saves time on explanations and allows the system administrator to repair user computers from his workplace.
Enabling and disabling the utility
Connect the remote assistant as follows:
- Through the Start menu, go to system settings. To do this, right-click on the “Computer” item and select the “Properties” section in the context menu.
- Then go to the remote access settings by clicking the corresponding line in the left panel of the window.
- Make sure there is a checkmark next to the item that allows connection using the Remote Assistance service. If this checkbox is missing, check it.
- In additional settings, set the conditions for using Remote Assistance. It’s worth setting a deadline of several hours so that it doesn’t interfere with your work in the future.
This will enable Remote Assistance on your device. To disable it, you can go to the settings in the same way and uncheck the corresponding section.
Using Remote Assistance
It is the user's responsibility to invite a technical staff member for assistance. This is done as follows:
- In the Start menu, find the Windows Remote Assistance application and launch it.
- As an invitation, you can use access via email or through a specially created file. With the second option, you need to save the file to a folder that is accessible from both devices (this is the most optimal way, although, of course, you can transfer it to a storage device). Any file name is acceptable.
- After saving the invitation file, you will be able to receive a device access code. You will be prompted for this code when connecting to your computer.
- Now you or your system administrator must log in from the computer that will be used for assistance through Remote Assistance. Then you need to run the invitation file.
- The utility will ask you for your login information. This is where you will need to enter the code that the device owner previously received. Have him send it to you or tell you via voicemail.
- The user who needs help will be prompted to access their device. It must allow the connection for the connection to be established.
- After this, the connection will be established. The Assistant will be able to control your computer in real time and will see your desktop. Using a special panel, you can manage actions.
Some actions will also require confirmation. For example, when starting remote control, the user will be required to allow control of his desktop.
You can simplify the connection of the remote assistant via a local network by selecting the Easy Connect option.
Let's take a closer look at the meaning of each button for effective use of the program:
- Request control - this action requires additional confirmation from users. After it, you can directly control the user's desktop and files using the keyboard and mouse. This is the basic command and is used for most configuration and technical assistance.
- True size - clicking this button will expand the user's desktop to the full screen of your computer (if they are the same size). This is necessary for more comfortable work with the device.
- Conversation - this key enables voice chat between the Assistant and the user. It can be very useful to explain to the user the reason for the error or to clarify with him what exactly his problem is.
- Settings - clicking this button opens the Remote Assistance settings. There you can change the connection quality and other parameters. If the transmission is intermittent, try to more accurately specify your Internet speed in the settings.
- Help - this button will open you to technical help for the program, which discusses its capabilities in detail.
- Suspend - when actively managing someone else's desktop, this button stops the process and the user returns control over it.
Video: how to use Remote Assistance in Windows 7
Configuring the utility through the Group Policy Editor
Using a setting in Local Group Policy, you can create the “Remote Assistance” permission and use it on all computers on the local network without configuring each of them individually. It is worth considering that this setting is not available in the Home version of Windows 7. In other versions of this operating system, it is done as follows:
- Open the Local Group Policy Editor. To do this, in the Run window (Win+R), enter the command gpedit.msc and confirm the entry.
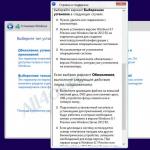
- In the local computer directory, go to the path: “Computer Configuration/Administrative Templates/System/Remote Assistance”. There, double-click on the “Request remote assistance” option.
- Set the remote assistance request settings to “enable” and accept the changes.
- Then open the “Offer remote assistance” item and also turn it on. In addition, in this window you must give permission to remotely control the computer in the lower settings window.
- Then, under the settings you were working on, click on the “Show” button. A window will open where you need to add a device from which remote assistance will be provided. It is enough to write the computer login in this window in the same form in which it is indicated on the local network.
Apply all the settings you have made, and remote access through the Group Policy Editor will be set. Now you can connect to all computers on the local network.
Connecting “Remote Assistance” without requesting access
Regardless of which of the methods listed above you configured Remote Assistance, when connecting, the user must still give you rights to this action. This is not always convenient and often wastes extra time. In this case, Microsoft technical support will claim that it is impossible to disable the corresponding request. However, a way was found to bypass their limitations.
To do this you need to make changes to two files:
- in the file C:\WINDOWS\PCHealth\HelpCtr\System\Remote Assistance\helpeeaccept.htm you must enter DoAccept() at the end of the LoadVariables group;
- in the file C:\WINDOWS\PCHealth\HelpCtr\System\Remote Assistance\Interaction\Server\TakeControlMsgs.htm at the end of the InitiateMsg group (but before return) enter onClickHandler(0).
You can make these changes using any text editor. And after this, the computer will no longer require access confirmation when connecting via Remote Assistance.
Problems using remote access
If you are unable to establish a connection using the Remote Assistance utility, check the following:
- Make sure you have a stable internet connection on both computers. If problems occur on either side, the connection may be interrupted. The ideal here is to connect via a local network, but if this is not possible, make sure that the Internet connection you are using is stable.
- Check whether the user follows your instructions and transfers data correctly. If the user does not accept the connection request, the connection will not be established. The same thing will happen if you enter the password incorrectly when connecting.
- Disable antivirus programs and try to connect again. At the same time, it is third-party programs that can block the utility; the Windows Firewall, by default, makes “Remote Assistance” an exception to the blocking rules.
If this does not help, then the solution is probably in one of the services. Go to the Local Group Policy Editor (gpedit.msc command) and check the status of the following services:
- “Remote Desktop Help Session Manager” - this service must be enabled. If it is disabled, then you should switch it to the “manual” position.
- “Remote procedure call” - this service is necessary for the correct operation of the previous one.
- “Remote Assistance Request” - this service must be enabled on the local network for Remote Assistance to work.
After you enable all the necessary services in local group policy, the problem of launching Remote Assistance will be resolved.
The Remote Assistance utility will help out an experienced technical support employee or system administrator more than once. After all, if you configure it once and fix the problems, you will be able to access the user’s computer in a matter of minutes and provide him with any necessary assistance.