Software products based on the 1C platform have many functions, both specialized and applied, that is, administrative. The core functionality (of course, depending on the purpose of the solution) concerns areas such as the purchase of goods, their sale, warehouse, operational and management accounting, accounting, CRM, and in the case of complex solutions - all together.
Naturally, one employee is not able to control all the business processes of an organization, even if they are automated. Therefore, 1C system administrators have to deal with tens and hundreds of users working with certain system functionality. Each of them has to set up special rights so that they have at their disposal all and only the documents, functions and reports they need at the same time. And here we begin to consider the applied or administrative functionality of 1C solutions, which specifically includes setting up user access rights.
User settings 1C 8.3
In 1C 8.3, special objects of the configuration structure - “Roles” - are responsible for user rights. Most typical configurations already have a certain list of standard roles created. You can use them when creating accounts and setting access rights for them. If the standard set does not suit you, then you can change it or add your own roles.
Each user can be assigned several roles that are responsible for specific rights. In order to configure 1C user rights, you need to find out what roles they currently have. This information can be obtained in two ways:
- Through the configurator. This option is suitable for any configuration;
- In some configurations through the "Enterprise" mode.
Launch your 1C database configurator under a user name with full rights and open the “Administration” -> “Users” menu. To find out the rights of a specific user, you need to double-click on the line with his last name and go to the “Other” tab. The roles that are available to the user will be checked. To add or remove a specific role, change the checkboxes and click OK.


If, after analysis, you realize that standard roles cannot fully satisfy the requirements for the delimitation of rights, then you need to change them. To do this, find the desired role in the configuration tree and double-click on it. On the left side of the window that opens, you will see a list of all configuration objects. On the right side, checkboxes indicate those actions, the rights to which are assigned to this role, in relation to the selected object on the left.

You can not only give and remove permissions for certain actions with configuration objects by checking and unchecking the boxes. In addition, the 1C platform has a very convenient mechanism built into it that is responsible for limiting user rights at the record level - RLS. It allows you to set a condition, only when fulfilled the user will see infobase data. Using RLS, user rights in 1C 8.3 can be configured so that, for example, each specific warehouseman will see information only for his warehouse.
Another way to add rights to an object to a user without changing standard roles is to create a new role. To do this, click on the “Add” button while in the “Roles” configuration branch and name the new object. In the window that opens, find the required configuration objects on the left, and set the necessary rights and restrictions on the right. After saving the new role, you need to update the configuration, go to the list of users and add a new role to certain users.
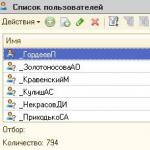
The responsibility of the 1C information base administrator is not limited to creating users and assigning rights. Employees may change, responsibilities may be redistributed, and administrators must respond quickly to all these changes. If an employee who performed certain functions in 1C quits, then it is necessary to disable the 1C user so that former colleagues do not use the account. The list of users, which can be opened in the configurator in the “Administration” menu, will help us with this.

Having opened the 1C user settings, you need to uncheck the boxes responsible for finding the employee’s name in the selection list and authentication. This way, you will prohibit logging in under the last name of the departed employee and save the access rights settings in case the employee returns. These settings will also be useful if all powers are transferred to a new employee - you will not have to configure the roles again.
It is also not recommended to completely delete a user because the system contains links to the responsible user in various documents. If you delete an entry, there will be broken links and confusion about who created specific documents, which can lead to confusion. It is much more effective to disable the 1C user from logging into the system, and in some cases completely remove rights (roles). Also, some companies have the practice of marking inactive users with a certain icon in the “Name” field, for example: “*IvanovaTP”.
In some cases, the 1C administrator may urgently need to “throw out” users from the 1C database. This can be done in two ways:
- Through "Enterprise" mode from a user with administrative rights. Not supported by all configurations;
- Through the application server using the console of a 1C server cluster.
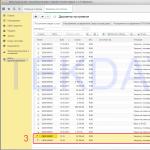
To use the first option, you need to go to “NSI and Administration”, open “Maintenance” and launch the “Active Users” form. We will see a list of active users and a “End” button at the top, clicking on which will forcefully terminate user sessions. In addition, in this list you can see the computer name and start time, which will help track down frozen sessions.

The second option for disabling active users requires more attention and responsibility, since most often the cluster console is hosted on the application server. If you have access to this server control panel, you can end the user session as follows:
- Open the cluster console;
- We go to the list of information bases and open sessions for the one we need;
- Find the required user in the list;
- Call the context menu by clicking the right mouse button, there will be a function - “Delete”.

In the 1C platform, developers have included a convenient mechanism for setting up rights and managing users. Therefore, the described capabilities are available to owners of all configurations, even those written independently. Another advantage is that it does not require deep knowledge of the 1C system. Any responsible and attentive administrator is able to cope with these operations.
1. Disabling users in the file version of 1C 8.
To disconnect users in the file version I created a *.bat file with one line
net session /delete /y
It disables all open shared files on the computer on which the database is located.
Next, I created a task (Windows Task Scheduler) that would launch this file at the appointed time.
You may ask, what about those sessions that are open on the computer? I also eliminated them by creating a new *.bat file with the line
taskkill /IM 1cv8.exe /f
True, it disables all running 1C on the current computer, but for me it was not so scary since the archiving was done at night and no one was working in the database, this batch file can also be added to the Windows Scheduler.
2. Disabling users in the client-server database.
Just like in the case of a file database, I used *.bat files.
I created two *.bat files, the first one disables the 1C Enterprise server, the second one turns it on very simply.
net stop "1C:Enterprise 8.2 Server Agent"
net start "1C:Enterprise 8.2 Server Agent"
Added two new tasks to the Windows scheduler, with a time difference of 15 minutes so that all frozen users can disconnect, these actions are similar to Starting the 1C Enterprise server and Stopping the 1C Enterprise server
3. Programmatic way to disconnect users in 1C
The task was to perform archiving daily at 22:30.
In this method, I didn’t bother, I created a new role “NeClose1C”.
Created a new procedure in a regular application module:
Procedure ShutdownUsers() Export If NOT RoleAvailable("Do Not Close 1C") Then If Hour(mop_PerformingOperationsOnServer.CurrentDateOnServer()) >= 22 Then // get the time on the server StopSystemOperation(False); endIf; endIf; EndProcedure
If NOT RoleAvailable("Do Not Close 1C") Then If Hour(mop_PerformingOperationsOnServer.CurrentDateOnServer()) >= 22 Then // get the time on the server StopSystemOperation(False); endIf; endIf;
ConnectWaitHandler("ShutdownUsers", "600");
The current date function on the server looks like this:
Function CurrentDateOnServer() Export
Return CurrentDate();
EndFunction
This way we get the date on the server, if the “Server” checkbox is checked in the properties of the common module, I only checked it.
It turns out that the current code cuts off users for two hours, but usually after midnight no one logs into the database.
If this article helped someone, I will be very happy.
When backing up infobases, users' work with the infobase must be stopped.
“Turn off 1C:Enterprise users”
Set the flag if you need to shut down users with the database before archiving.
Possible options for terminating users:
- “End sessions on the 1C:Enterprise server”
Option to disconnect users by forcibly disconnecting sessions on the 1C:Enterprise server. Available only for 1C:Enterprise client-server databases.
Important: do not confuse this user with the 1C:Enterprise database user and the “central server administrator” user.
In the 1C:Enterprise server console, cluster administrators are located at the following path: "Console Root" - "1C:Enterprise 8.3 Central Servers" - "(*)computer name" - "Clusters" - "Local cluster" - "Administrators".

"Cluster Administrator Name:"
Username "cluster administrator".
"Cluster administrator password:"
The user password is “cluster administrator”.
"A non-standard server agent port is being used"
Set this flag if the connection port to the server “Agent” is different from the standard one.
"Port:"
Connection port to the 1C:Enterprise server agent. Default is 1540.
To determine the server agent port, go to 1C Server, right-click on the computer name from the drop-down menu and select "Properties" - “1C:Enterprise central server parameters” - "IP port:".

- “Cause normal shutdown of users”
Option to disconnect users by calling the user shutdown mechanism built into standard configurations. This mechanism is based on the use of the “Blocking connections to the infobase” procedure.

The execution algorithm is as follows:
- Trigger user shutdown.
- Starting a task (archiving, testing and fixing, etc.).
- Start allowing users to work.
"Moment:"
The moment users complete their work.
- "Shut down before performing a task". Before each task execution, the user shutdown procedure will be launched.
- "Shut down only if you need to update the configuration". If the task is configured to perform an exchange for a peripheral base and a changed configuration is received from the central node, the user shutdown procedure will start. In other cases, the completion mechanism will not work.

The need to forcefully shut down a user mainly arises in the following cases:
- Updating the information base;
- Adding a new metadata object to the configuration;
- Carrying out preventive and repair work on the server;
- A hung user session is preventing the application from restarting.
In this article we will try to tell you how to end a user session, what tools an administrator has in his or her arsenal to complete this task, which termination options are provided by the file version and which by the client-server version of 1C.
It is important to remember that forcefully terminating a session may result in data loss. So, to avoid unpleasant situations, it is advisable to warn users in advance about the disconnection.
Closing sessions from the configurator
When changes are made to the database structure, dynamic configuration updates are no longer available. And an information window appears on the screen (Fig. 1).
The sequence of actions in this case is obvious:
- You must click the “End sessions and repeat” button;
- Wait for the database restructuring window;
- Click "OK".
It should be noted that changes made to the program code do not require users to shut down, but they will not work on that device without restarting the application on each specific computer.
Ending sessions directly from the program
Most standard 1C products, version eight, have a mechanism that allows you to easily terminate a user's work remotely and provide the administrator with exclusive access to the database. This is the “Blocking connections to infobase” processing.
You can find it at one of two addresses:
- In one of the submenus of the “Service” section;
- Going to the Operations->Processing section.
 Fig.2
Fig.2
The appearance of the processing is shown in Fig. 2.
Features of this processing:
- Checking and unchecking the box and clicking the Record button turns user blocking on and off, deleting sessions and preventing new connections from being created;
- The blocking end time cannot be empty or less than its start time;
- If the “Permission code” parameter is specified, it can be entered into the startup line to ignore the blocking by specifying “/UC” before the code;
- If you do not specify the “Permission Code”, then it will be difficult to get into the database before the blocking period expires (in the file version of work, you can try to delete the 1CVcdn file from the database folder);
- If instead of the parameter “/UC” and a password separated by a space, you specify “/CAllow Users to Work”, where C is Latin, you can completely disable blocking for all users;
- Clicking the “Active Users” button opens a window with a complete list of users (Fig. 3), from where you can open the “Registration Log” or end the session of each specific user.
 Fig.3
Fig.3
The two options above work fine in both file and client-server mode. Further we will consider cases typical only for server work.
Removing users from rdp
It is important to remember that disconnecting user sessions from servers is only possible if you have certain rights to do this.
When working from a remote desktop, you can end user sessions using the standard task manager. Simply interrupting sessions is a little incorrect, but quite effective.
The second option is to use the task manager - remote connection with the ability to control each specific session and exit the program according to all the rules. This method is long, and no one guarantees that while one user is logging out, the program will not be launched by any other worker.
Removing users via the server console
Having Administrator rights for a 1C server cluster, you must:

Very often, when working in server mode, hung user sessions are not visible through the platform tools; they can only be deleted through the console.
The most radical way to interrupt sessions
A situation where the above methods do not work is extremely rare. But if it occurs, there is another radical way to interrupt connections to the database: physically reboot the server.
Of course, users who did not have time to finish their work and save the data will be extremely outraged by such a shameless attitude, but it is fast and it is extremely effective.
To carry out routine maintenance in the 1C:Enterprise 8 information base, it is often necessary to obtain exclusive access to the database. For example, to perform a database backup or perform routine maintenance on the DBMS server (re-indexing, etc.), you must disconnect all active sessions.
Let's look at a simple way to disconnect users from an infobase using the standard functionality of the 1C:Enterprise server.
Standard functionality
Let me make a reservation right away that we will be talking about the client-server version of 1C:Enterprise 8. To disable sessions, let’s go to the server administration console. There we will find the required information base in the list:

By going to the information security properties, set the option “Session start blocking is enabled.” In this case, it may be necessary to enter the login/password for the infobase administrator account.

Don't forget to set the session lock period. You should also ensure that all background jobs must be stopped while sessions are blocked. This is done using the “Blocking of routine tasks is enabled” option.
If necessary, you can set the text of the message to users to whom they will be notified 5 minutes before sessions are blocked, as well as the permission code for entering the infobase during the session blocking period.
The permission code can be used to log into the infobase to perform routine maintenance while other sessions are inactive. You need to enter the permission code when connecting to the database using the parameters. For example, this is what the parameter passed to the server will look like if the permission code is "123456".

By logging into the database in this way, we will receive exclusive access to the information base. Other sessions will not be able to join us.
The notification to the user that sessions are blocked looks like this (depending on the message entered by the administrator). It appears every minute 5 minutes before the blocking period.

When the session blocking period begins, a notification appears first:
Afterwards the session ends.

Active sessions can also be disabled by removing them from the list of active sessions. This action is sometimes necessary to terminate hung sessions.

In practice, it is better to communicate about user disconnections in advance to reduce the risk of losing data entered by users but not yet saved.


