How to privatize territory in Minecraft (WorldGuard)
Any player, starting to play Minecraft on CaveCraft servers with a launcher and mods, thought about how to privateize a territory in Minecraft on the server (to protect it from other players or, conversely, to give access to other players).
In this article we will try to cover all the points regarding the issue of private territory in Minecraft, you will receive information:
- How to allocate an area for private
- How to create your own private region
- How to add and remove a player in your private
- What are regional flags and how to use them
- ..you will also learn other commands for interacting with regions and privates in Minecraft on our servers
On all our servers we use different versions WorldGuard plugin. Some functionality may not be available on some servers.
- Servers Modern (Minecraft 1.7.10+) - WorldGuard 6.1
- Magic Servers (Minecraft 1.7.10+) - WorldGuard 6.1
Selecting a grid and creating a private region
First of all, you will need a wooden ax, you can get it using the command - //wand.
A wooden ax cannot be used to cut down trees; it is only needed to mark out an area!
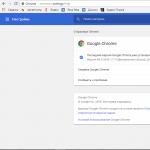
After entering the command //wand- You will see the following message in the chat:
We are beginning to allocate territory for the future private region. With the help right mouse button (RMB) You designate the first private point, and the second point - left mouse button (LMB).
In addition to the ax, points can be designated using the commands:
//hpos1(first point)
//hpos2(second point)
look at the block
//pos 1(first point)
//pos2(second point)
(Be careful! When using these commands, you must stand on the block, which you want to mark with a dot)

The area you have selected will be outlined with a green grid. You can reset the region selection after completing the private territory using the command - //sel.
You have successfully identified an area, but you are not satisfied with the height of your area? In this case, it is also necessary to expand the selected mesh in height (Y coordinate). You can expand or reduce the selected mesh in the following directions:
- north (n)- north.
- west (w)- west.
- south(s)- south.
- east(e)- East.
- up (u)- up.
- down (d)- down.
- Looking towards one of the cardinal directions.
- From the bedrock to the sky.
Hint: when specifying the selection direction, you can also use short names sides (indicated in brackets)
For example, //expand 10 up will expand the selected region upward by 10 cubes.

To reduce the mesh you have selected, use the command - //contract<кол-во> <направление>
For example, the command - //contract 10 down will reduce the region from top to bottom by 10 cubes.

You can find out the size of the grid you have selected using the command - //size
After you have allocated the territory you need, you need to register (create a region) and thereby privatize this territory for you.
To create a private region, use the command /rg claim<название региона> . As an example, we will name the region - cavecraft, in which case our command will look like this - /rg claim cavecraft
If everything is done correctly and the selected territory does not overlap with other regions, you will see the following message in the chat:

Adding a player to a region
Be careful! Do not add outside players, be careful and be attentive to the choice of region participants. Claims regarding griefing will not be accepted!
You can add another player to your own region using the command - /rg addmember<ваш регион> <ник игрока> - in this case, the player you specified is added as a participant. He will be able to interact with the region (build, break, open chests), but will not be able to manage the region.
Add another player to your region as the owner - /rg addowner<ваш регион> <ник игрока> - in this case, the player you specified is added as the owner. This gives all the possibilities for managing the region (add/remove other participants and owners, set flags, etc.).
There are also two similar commands, only with a different action - remove a member or owner:
/rg removemember<ваш регион> <ник игрока>
And /rg removeowner<ваш регион> <ник игрока>
This plugin is used to protect buildings on servers. If this plugin is installed on the server, each player will be able to protect the territory of his home - privately. A private is an area between two blocks that can only be changed by the owner of this private and the people he added to the private. With the help of this plugin, spawns on servers are also protected so that they are not plundered.
Each private can be configured, you can separately allow breaking blocks, but everything else will be prohibited, or for example, give everyone the right to open only chests. Regions have a lot of settings.
Basic commands:
/rg claim
/rg define
/rg redefine
/rg addmember
/rg addowner
/rg removemember
/rg removeowner
/rg flag
/rg remove
/rg migratedb - reduces the region by a given number from the player (you)
World Guard private territory is a plugin for multiplayer games Minecraft, which will help protect the territory. Now let's take a closer look at what it is and what commands it contains.
To start protecting a zone, you need to first select it. To do this we need a wooden ax - enter the command
Any territory you select will not have any complex shapes, everything will be very simple, a square or rectangle. An ordinary parallelepiped or, as it is also called, a cuboid. Selection occurs with only two points; in the picture, in fact, they are points A and G.
Standard selection method
With a wooden ax in your hand, you need to press the left mouse button (LMB) in one cube, in another cube, you need to press the right mouse button (RMB). These will be our extreme points, as you could see in the picture above. This method also has its drawbacks; you will have to dig holes of fairly considerable depth and install high pillars.
The following method will make your life a little easier. To do this, enter the command
//expand (length) (direction) and //contract (length) (direction).For example like this:
// expand 5 up will expand the selection up 5 cubes. // contra c t 5 up reduces the selection by the same 5 cubes from bottom to top.Directions
- down
A few clarifications. The up and down commands will expand the territory - up and down, respectively. The me command is in the direction you are facing. About the contract command: By specifying the me direction, you will reduce the zone by the specified number from you, while by specifying the up direction, you will reduce the zone from bottom to top. That is, the lower limit rises higher. Between the first argument and the last, there is one more, by asking it you will get an increase in the reduction of the selection area from one side to the other.
The // shift (length) (direction) command will shift all selections. For example:
//shift 5 up will move them 5 cubes up.
You can also specify two points using other commands. For example
//hpos1 and //hpos 2
These commands will set the points in the direction you are facing. To put it even simpler, the cross located in the center of the monitor will serve as a guide for you.When you change the selected area, you can see in brackets exactly how much territory you covered. I think everything is clearly visible in the screenshot.
After selecting the cuboid, you use the command -
/region claim (your region name)you can save it.Regions have their own owners ( owner ) and members (member ) If the region was created by you, then you are automatically its owner, and you can add or remove members using special commands.
To record other members or owners you need to enter the commands:
/region addowner (name of your region) (username) For example : /region addowner your name region player1. To add team members, enter: / addmember (name of your region) (username)
To remove members/owners:
/region removeowner (name of your region) (nickname of the owner to be removed) /region removemember (name of your region) (nickname of the member to be removed)Are you wondering what this is for? - It’s simple, for example, you wanted to build a house on your territory, called your friends, added them to the list of members or owners, and after you finish construction, simply delete them.
Regions can be either parent or child. You can assign a parent and child region using the command:
/region setparent (region name) (parent region name)
To remove a parent region, just enter the command:
/region setparent (region name)That is, as we can see, there is no need to enter the name of the parent region.
If you saved a region but made a mistake, you can edit the selection with the command:
/region select (region name)Then save the selected fragment of the area:
/region claim (region name)
Delete a region
/region delete (region name)
Also, region owners can place flags. By team:
/region flag (region name) (flag) (value)
Flags
- pvp - Is it used pvp in this zone.
- use - Mechanisms and doors are used.
- chest -access - chests.
- water flow - spreading of water.
- lava flow - spreading of lava.
- lighter - Using a lighter.
Values
- deny - disabled.
- none - identity to a flag from a non-private zone.
- allow - enabled.
To find out information about the region, a list of owners, members, and some other information, enter the command:
/region info (region name)
Important information: The maximum area of the allocated cuboid is no more than 50,000 cubic meters. Maximum quantity regions per person no more than 10.
On our server, territory protection is carried out by a special WorldGuard plugin. Strictly adhere to the rule, FIRST protect your zone, and only then - CONSTRUCTION!
To protect your zone, you must first select it. The allocation of a zone on our server is done with a chicken feather (enter the command //wand to get the feather into the inventory). It should be noted that on other servers a wooden ax is usually used for this.
For us, any zone protected by WorldGuard is a parallelepiped (or cuboid). That is, it can be rectangular, square, and so on, but it cannot be of a complex shape. In the game it stands out with only two extreme points.
In this picture these points are 1 and 2.
PS: The red grid will only be visible in the game if you install the WorldEdit Client User Interface mod (abbreviated as Worldedit CUI). How to do this is described below.
How to select a region for private: Poke into one corner of the future private with the left button with a pen in hand, and into the other, opposite corner, with the right button. These will be the opposite points of our cuboid, i.e. the same 1 and 2 from the picture.
Remember, you don’t need to privateize your home from wall to wall!!! You are allowed up to 200,000 cubes in each of the privates. You will still want to add a veranda later, make a balcony, or a second floor. Select a larger region so that they don’t dig into you from underground or break through the wall.
However, this method is not always convenient. It forces the construction of high pillars and the digging of deep holes (to mark these extreme private points).
To make this job easier, there are the following special commands:
//expand<длина> <направление>
— This team expands the region in a given direction.
Example: //expand 10 up — Expand the selection by 10 cubes up.
//contract<длина> <направление>
— Reduces the selection of a region in a given direction.
Example: //contract 5 up - Reduce the selection by 5 cubes from bottom to top
Possible directions:
1. up
2. down
3. east
4.west
5. south
6. north
7. me
The first two expand up and down, and the last one goes where you are looking. By the way, me can be omitted, the command will be executed in the direction where you are currently looking. You can also simplify your set of commands by writing only the first letter of the direction.
Example: //expand 15 e - Expand the selection by 15 cubes to the east (e - East).
The contract command needs additional comments. If you specify the direction me , the region will decrease by the specified number AWAY from you. Accordingly, if you specify the up side, the region will decrease from bottom to top, that is, the lower border will rise up. There is also a third argument, between the first and last. It allows you to specify the amount of reduction of the region on the other side, in the other direction.
On any server there is a limit on how many cubes a region can hold. If your allocation contains more cubes than allowed, you will not be able to save that region. To find out how many cubes you have in your selection, use the command:
//size
You will be told how many cubes you have allocated to the cuboid, and the coordinates of the extreme opposite points of our cuboid - 1 and 2
When you've finally finished selecting the cuboid, you can save it for yourself:
/region claim<имя региона>
— Saves the selected cuboid as a region with the specified name.
After this command, you are the sole and absolute owner of the region, and only you can dig up and re-install blocks in the protected area.
Each region has owners (owner) and members (member). Owners can change region settings, and add members and other owners. When you create a region, you are automatically registered as the owner.
To become a member of a region, use the following commands:
/region addmember<регион> <ник1> <ник2>
etc.
Example: /region addmember TestRegion Player1 Player2
To kick a region out of membership, use the following commands:
/region removemember<регион> <ник1> <ник2>
etc.
Example: /region removemember TestRegion Player1 Player2
Attention, parentheses< >No need to write ANYWHERE!
In order to prevent griefing and other scandalous situations, it is prohibited on our server to add other players as owners.
For example, the player Semaru wants to build himself a diamond warehouse.
Semaru selects the region in any way and writes
/region claim SkladOlmazaf
Now no one except him can build in this region.
Then his friends MCAwesome and FlashPoint come and want to “help” him.
Semaru writes:
/region addmember SkladOlmazaf MCAwesome Flashpoint
Now MCAwesome and FlashPoint can take out all of Semino's junk help him build a warehouse. When it is finished, and Semaru wants to remain the sole owner of it, so that no one will interfere with him, he writes:
/region removemember SkladOlmazaf MCAwesome Flashpoint
and these players will no longer be able to modify cubes within the MoyDom region.
If you made a mistake when marking a region and have already saved it, it doesn’t matter, you can select it again using the command:
/region select<регион>
After this, you can change the selection (expand or contract it in the direction you need), then delete the old region with the command:
/region delete<регион>
And create it again (as described above).
Attention, you can ONLY delete regions that you own!
Now ordinary users can also set flags for regions, but only owners can do this.
Flags are set with the command:
/region flag<регион> <флаг> <значение>
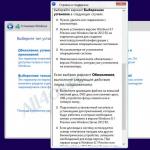
Currently, we only have the following flags available on our server:
Flags:
use - Is it possible to use buttons, doors, etc.
chest-access — Is it possible to use chests?
Values:
deny - disabled for everyone, including EVEN the owner.
allow - enabled for everyone, including anyone EVEN homeless from the next street.
If the flag is not set at all, then this means: “Only the owner and those whom the owner has entered.”
The command - /region list - displays a list of ONLY your regions, in case you forgot which regions you already have.
Command - /region info<регион>— displays a list of owners and members of the specified region, and some more additional information. Namely, the priority of the region, its coordinates and flags.
You can always find out if a cube belongs to a region by poking the cube of interest with an arrow (using right button mice).
You will see:
“Can you build? No. or Yes."
At the end of the article, if you still haven’t figured out HOW to make it private, watch this VIDEO.