In the process of using the computer, your context menu is "clogged" with various items added by your installed programs. To make matters worse, time delays appear, context menus appear, slow you down and make you wait every time you right-click on a file or folder.
What happens when you right click a file? Are there significant delays in the appearance of the context menu? Then I'll tell you how to get rid of it, or at least reduce the delay. To do this, we need to remove some context menu items to speed up the process. Even if it pops up quickly, you can remove some context elements just to tidy up the menu. Let's look at how you can customize the context menu
Editing with CCleaner
One of the fastest, easiest ways to customize the context menu is the popular app CCleaner. The context menu editing feature was added to CCleaner relatively recently, so you must have the latest version of the application installed to use this feature.
In the running program, click on the icon Service in the sidebar, select , and go to the tab Context menu at the top of the list. You will see a list of context menu items you can easily disable and customize the context menu to your liking
To disable an entry in the context menu, select it and click the button Switch off. The change takes effect immediately, and you do not need to restart your computer. Button should not be used. Delete- if you disable an entry in the context menu, you can easily re-enable it later. But if you have already uninstalled, but want to see it in the context menu again, you will have to reinstall the applications associated with it.
On the left picture below is my menu before settings, on the right after. The speed of appearance has increased significantly, which is an integral part of comfortable work.


Customization with ShellExView
CCleaner is easy to use, but you may have noticed that it doesn't show all of the context menu items, and therefore not all of them can be disabled. But fortunately there is another ShellExView tool. After downloading and running ShellExView, it automatically scans the system.

To view only those records that belong to the context menu, select the menu item Settings, select Filter by extension type, and select Context menu.

The list includes both third-party context menu items and built-in ones that come with Windows. Third-party context menu items are highlighted in pink. You can also disable some of the built-in context menu items if you like.
To disable an entry in the context menu, select it and click on the red button in the upper left corner. When you click on the button, a dialog box will appear with confirmation of disabling the selected element, click OK. If you want to turn it on again later, you guessed it, press the green button (although in my opinion it's not a button, but a light bulb))))
You will have to restart your computer for the changes to take effect. It's not as convenient as in CCleaner, but you can manage all the context menu items.
It is also possible to remove context menu entries by editing the registry directly, but I wouldn't recommend doing that. Even for advanced users, this process is much more tedious and time consuming (the context menu items are stored in five different places in the registry). When editing the registry, it is not possible to easily disable the context menu entry, you can only delete them - so you will have to back up each key before deleting it if you want to restore it later. If there are programs, why complicate your life. But if you are certainly not a young system administrator, or you want to make fun of a friend and crave knowledge, then read here how to configure the context menu using the registry.
A free program for customizing the Windows context menu. The archive contains two versions: with and without an installer.
The context menu is perhaps one of the most convenient operating system controls. With one click of the mouse, we can access the most frequently used functions.
However, not all functions are available here, and it often happens that, due to the lack of the necessary option, you have to embark on a long journey through folders each time to launch the desired process.
You can make things easier by creating a shortcut, but having too many shortcuts on your desktop can be confusing. Those who are well versed in the Windows registry can change or add the necessary items to the context menu on their own, and for those who need such an opportunity, but are not friends with the registry, there are special programs!
I want to talk about a very good program for editing the context menu - fast explorer. It can add/remove static items or whole new function groups in the Windows Explorer context menu.
In terms of functionality, the paid program is closest to it. Mmm+(although there the emphasis is more on cleaning and optimizing the menu). Compare competitors:
Comparison of Fast Explorer with paid analogue Mmm+
As you can see, both programs provide us with the opportunity to customize the context menu in a way that is convenient for us. But if the paid Mmm + is aimed more at reducing the menu by grouping rarely used items, then Fast Explorer, on the contrary, expands it by adding new sections.
Who cares, but it seems to me that this approach is more appropriate, because you don’t have to dig into extra submenus and look for the right item, and everything is always at hand.
Fast Explorer exists in several variations: an installation file and an archive with a portable assembly. If you choose the latter option, then you will only need to unpack the downloaded archive to get started.
If you downloaded the installation file, you will have to go through the installation procedure. In principle, it is standard and all that needs to be done is to select the language of the wizard, and then the path for installing the program (you can leave everything as it is).

Launch Fast Explorer
Now you can run the program:

Fast Explorer Interface
First you need to enable the Russian interface. This is achieved by selecting "Russian (Russia)" from the "Language" drop-down list. Now we have a normally Russified program. Consider its interface:

Conventionally, the Fast Explorer window is divided into three parts: "Tools", "Menu Items" and "Details". In the Tools section (on the left) there is a menu with four options, as well as buttons for cleaning the registry and checking for updates.
In the center is the section "Menu items". Here we will edit the Windows context menu. On the right you will see the third section - "Details". In this section, you can configure some parameters of registry entries (namely, we will make amendments to the registry), as well as display their properties.
Let's move on to practice. Getting comfortable in the program is not difficult even for a novice user. But first, it's worth understanding the difference between a static menu item and a dynamic one. The first is just another entry that is added to the Explorer context menu and does not have any additional properties other than those specified.
A dynamic menu item is an entry that, when clicked, brings up another submenu (or cascading menu in another way). In this case, the dynamic menu can have its own separate formatting and design.
Adding new items to the context menu
Let's try to add a new static item to the context menu. I personally like to use portable software (which does not require installation and often does not make changes to the registry). But, since you have to manually associate files with such programs (and not always necessary), you have to get into the jungle of folders every time to launch the desired application.
In our example, I will show how you can create a new context menu item for graphic files to open them with portable Photoshop.
To create a new entry in the context menu, select "Static Items" in the tools and in the "Menu Items" section, click the "New" button.
After pressing the button, an entry with the name “new menu item” will appear in the list, and an explorer window will pop up in front of you, in which you will need to specify the path to the executable file of the program with which we want to associate the new entry in the context menu. We find the desired exe-shnik, select it and click the "Open" button.

Now the entry has been given the name of the selected program and associated with it, but the new menu item will appear in the context menu of all files (see File type: "All files"). Now let's look at the "Details" section.
Here we will see three lines: "Application", "Options" and "File Type". The first entry is the path to the program's executable file, the second is the additional application launch options, and the third is just what we need. Click on the arrow to the right of the inscription "All files" and in the drop-down menu we will find the first item "Images" that comes across.
An entry will appear with a new registry key for the file association and a list of graphic file extensions, in the context menu of which the entry we created will be added. It remains only to click the "Apply" button to make changes.

Calling the context menu
Now let's see what we got. To do this, call the context menu of any picture on the computer:

Formation of dynamic submenus
Now let's move on to a more interesting feature - the formation of dynamic submenus. Select the Cascading Menus tool and check the Enable Dynamic Menus box.

We will see a warning that if you manually edit the files created by Fast Explorer, “dead” links may remain in the registry. If you are not going to dig into the folder with the program, then there is nothing to fear, so click "Ok".
After dynamic menus are enabled, the Item, Style, and Menu buttons are activated. Let's start with the "Item" button. Here we have the option to create a new context menu item, add a submenu to it, or limit it with a separator:

It is logical that you should start by creating a new item, and then attach submenus to it. I propose to make a "Quick Launch Programs" menu and add your favorite portable applications to it, for example. Click "Add item" and give it the desired name. The file type can be left "All files and folders with files" in order to have access to the created menu from anywhere in the OS.
Adding an icon
In Fast Explorer, we have the ability to attach an icon to the created item, which will help us quickly find the entry in the context menu. To do this, click the "Icon" button and click "Select".
A library with standard Windows icons will open, from which you can select the desired icon. However, you can use Explorer and select an icon from any file.

Let's start building the menu. To do this, select the section created earlier (“Quick Launch Programs”) and by clicking the “Item” button, select “Add Item” (you can use the context menu, see the screenshot below). We will be prompted to select the executable file of the program with which we want to associate the created item.

Creating a menu style
Another thing that distinguishes dynamic menus from static menus is the ability to change their style. By clicking the "Style" button, you can change such parameters as the color and font type of menu items, as well as the size and background of the item field:

Thus, the standard context menu can be colored in order to better see the items we need:

You can complicate the design of the menu a little by adding several submenus, and already in them links to programs. For example, sort programs by type: "Video", "Photo", "Sound", "System", etc. In general, there is where to show imagination :).
Cleaning up static items
Let's move on to the third tool - "Cleaning static items".

Here you can remove or temporarily disable some standard context menu items. If you are not too well versed in what this or that record is for, then it is better to leave everything as it is and do not experiment once again :).
For those who nevertheless “decided to try it”, the system works simply: you select the desired entry in the “File Types” section, and in the “Menu Items” Section, either uncheck the available action, or delete this action altogether by selecting it and clicking the "Delete" button.
Attention: after clicking the "Delete" button, the selected entry is permanently deleted from the registry!
Cleaning up extensions
It remains to activate the last tool - "Cleaning Extensions".

This tool helps to get rid of unnecessary entries in the context menu associated with a specific file extension. As in the previous case, you can either temporarily disable the entry or delete it completely.
Checking the registry for errors
Another additional feature of Fast Explorer is to check the registry for errors. Under the toolbar, you will see the inscription "Errors in the registry", after clicking on which, a window with a list of errors will appear.

You can either fix all the errors at once, or individually, highlighting each one.
However, it is worth noting that this function in Fast Explorer is very weak and cannot be taken seriously. Only a small proportion of errors are displayed here, and their presence can only signal that it's time to take on a "general cleaning" of the registry with a more advanced tweaker (or manually :)).
conclusions
For now, that's all :). We have figured out all the functions and now you can proudly show off your fancy and functional context menu to your friends and acquaintances.
But it is worth remembering that before deleting Fast Explorer (if you want to delete it, of course :)) you should first delete all created menu items in order to avoid misunderstandings. Now that's really all :). Until we meet again, let the work at the computer bring you only positive emotions;).
P.S. It is allowed to freely copy and quote this article, provided that an open active link to the source is indicated and the authorship of Ruslan Tertyshny is preserved.
If you notice that the right-click context menu does not appear immediately, but after a long and unpleasant delay, it's probably time to clean it up. If the list of commands has grown a lot, pay attention to whether all of them are so necessary. And if everything is so, let's try to edit the context menu.
Some programs during installation ask whether to place its command in the context menu or not. But not everyone does this, and therefore, after a batch installation of a number of programs, you can find a greatly expanded menu of additional commands. Some of them can be extremely useful - for example, checking a file for viruses or the possibility of a special launch. And some can safely be excluded from the list. Or vice versa, add something at your discretion. So let's do it.
In this case, you can follow two options for the development of events: use ready-made solutions in the form of free programs for editing the context menu or edit the registry manually. It doesn't matter which method we choose - first we make a backup copy of the registry.
Editing the context menu is possible with:
How to edit context menu for files?
So, everything is ready, menu editing programs have not yet been downloaded, let's start manual editing. As you know, there are two context menus in Windows: for files (with small variations depending on the type of file) and for directories (folders). Here is the registry key responsible for the context menu of files:
HKEY_CLASSES_ROOT\*\shellex\ContextMenuHandlers\
Under the ContextMenuHandlers section are applications that appear in the menu when you right-click on a file. Each of them can be deleted forever, or you can deactivate until the moment (which I will advise you). You can delete an entry by simply deleting a subsection, deactivating it by adding a mathematical “ – ” to the left of the value. For example, I wanted to hide the ability to edit documents using the editor NotePAd++:
We go to the specified registry path and add a “minus” to the left of the parameter value:

Everything about NotePad ++ in the context can be forgotten for now. If it doesn’t help, but the record is tired, just delete the section.
However, you probably noticed that the registry key does not display all the items from the context menu list. Because not all items are stored in one location. The rest are in the following sections:
HKEY_CLASSES_ROOT\*\shell HKEY_CLASSES_ROOT\AllFileSystemObjects\ShellEx\ContextMenuHandlers
How to edit context menu for folders?
The meaning is exactly the same, just remember that for the Desktop context menus are located in a different section of the registry. sections. I rarely look into them for the simple reason that third-party programs do not like to be embedded there. However, if such an embarrassment happened (or you decided to get rid of, say, the paragraph Gadgets), note the necessary registry keys:
HKEY_CLASSES_ROOT\Directory\Background\shell HKEY_CLASSES_ROOT\DesktopBackground HKEY_CLASSES_ROOT\Directory\Background\shellex\ContextMenuHandlersYou already know how to delete and deactivate.
How to add an item to the desktop context menu?
In my opinion, some commands in the menu are missing. I take screenshots all the time and edit them in Paint-e. His point, and add. Opening section:
HKEY_CLASSES_ROOT\DesktopBackground\shell
And create on the left under shell new subsection (I called it Drawing), and in it a new subsection named command:

Now, in the right part of the window, change the value of the REG_SZ parameter to the path indicating the location of the file, enclosing it in quotes. The path is easy to find by looking at Properties file. At Paint-and it's like this:

Do not leave the registry and set the necessary permissions for the created partition on the left by selecting your account. Just in case, so that there is no window with an error. We check the menu itself - everything is in place:

How to edit the context menu in the Create item?
separate paragraph of the article. Since it allows you to work with other Windows commands, the developers put it in a separate section.
But before heading to this section, let's immediately decide on the type of files that we want to create from the context menu. For example, if I edit the registry a lot and often, let this type of file appear with me when I right-click it. And here we will assume that everything is in order with the file association of your copy of Windows: .reg files are registered in its memory. This means that in the registry we are looking for:
HKEY_CLASSES_ROOT\.reg
Where .reg- these are the files I need. As you understand, in the section HKEY_CLASSES_ROOT there are a bunch of them. And I just have to create a new subsection in the section .reg(I will name him Shell New) and immediately on the right I will add a new parameter with an empty value, but the name NullFile:

All. Checking the Desktop:

The method works on my Windows 7. If you have a newer version, it may not work. But then, to the steps described, you just need to add the file of the desired type to the folder at:
C:\Windows\ShellNew
You already have it. Create a file of the desired format, name it with any name. And return to the same registry key (I remind you that HKEY_CLASSES_ROOT \ .reg) and add to the two existing ones the third one with the name in the parameter and the value of the full path to it. See:

Well, you learned how to delete or deactivate.
How to edit the context menu using programs?
There are a lot of such programs on the Internet, they are fully functional and all are free. But believe me, they are not always helpful to an ordinary user who is not going to delve into the wilds of extensions for the context menu. I will give you a couple of links, and you yourself select the ones you like at your discretion. All were developed under Windows 7, I did not try it on W10. Their functionality is different:
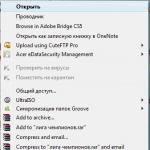
- . A lightweight program that does not require installation. Unzip the archive to your desktop and run the .exe file. The window that you will see, however, can confuse even an advanced user with an abundance of menu extension items:

Disabling / enabling items is done through the red / green buttons of the action menu on the toolbar (see the arrow).
- Program Ultimate Windows Customizer, developed by specialists of the English-speaking forum TheWindowsClub. Has a graphical interface. He does not understand Russian, however, armed with a dictionary, it will be possible to check and correct a lot of things in the system. Requires installation, but if you are concerned about context menu settings, UWC can help you a lot in optimizing it.

Select the desired setting (1) - in my case Context Menus, specify the folder/directory where the menu is displayed (2). Field 3 displays the items currently in this menu. To add something or reset to default settings through the button Apply Defaults(4), select the desired item in the center quadrant, and enter a name of your choice:

As you can see, I preferred to access the list of Windows services in the context menu. Selected (1) item Services, entered (2) the name of the item in the menu Services(in Russian, of course); clicked on Add(3). As you can see, it immediately appeared on the menu. After exiting the settings window close, some operations may be required:

Reboot(to restart a computer), log off(end session with this account), Restart Explorer(restart Windows Explorer), close(just close the window). In general, as I described in a recent article Well, in my opinion, a very handy program to edit the context menu from start to finish; take a look at her other activities.
Read: 338
Good day ... In today's article, we'll talk about how you can clear the context menu of the Explorer program in Windows.In general, the context menu of Windows Explorer is a convenient tool, but quickly acquiring unnecessary items.
Almost every second program considers it its duty to stuff their commands or sub-items into them. Of course, for some types of software this is relevant and in demand by users.As an example, the item added by most antivirus programs is “Check for viruses” (the exact name varies from manufacturer, of course).
Why is a clogged context menu bad?
Difficulties arise in usability, in other words - to find the desired item or command in the menu with your eyes, if there are several dozen sub-items, it is more difficult than when there are half a dozen of them. In addition, pop-up submenu blocks confuse even experienced users, albeit for seconds. And there is nothing to say about newcomers.
Because of the menus clogged with unnecessary rubbish, the system itself begins to slow down, or rather, the explorer (Explorer.exe). Such "brakes" are noticeable even on the newest and most powerful configurations, not to mention the "budget" and "office" options.
How to edit the context menu
It would seem that uninstalling an unnecessary program and the commands associated with it will also be deleted. But what if the program is needed, but its items in the context menu are not? In addition, not all programs “clean up after themselves” when uninstalled, i.e. menu items may remain when the program associated with them is no longer in the system.
There are two ways to solve
- Using system tools (Registry Editor)
- Using third party utilities
Note
- You can just press the combination Win + R and type "regedit" (without quotes)
- On Win 7 and 8 Regedit.exe is better to run immediately as administrator
Important! Before further steps, you need to export the editable subsection !
Make it simple. Right click on the name of the subsection - "Export".
In the window that opens, the system will “ask” what to export (a separate branch or the entire registry), in which folder to save the copy and under what name. In the future, if necessary, you can return everything “to the way it was” by simply double-clicking on this copy file (import back) and restart the computer to be sure.
So. You need to find and open a branch:
HKEY_CLASSES_ROOT\*\ShellEx\ContextMenuHandlers
and delete unnecessary context menu items (same as in screenshot 1, just select the "Delete" command).
In addition, you should immediately look atHKEY_CLASSES_ROOT\*\OpenWithList
Here are the entries of programs from the sub-item of the context menu "Open with". Cleaning it, as a rule, gives a very noticeable increase in the speed of the conductor. In the same way, you can clear the context menu for folders in branches from unnecessary:
- HKEY_CLASSES_ROOT\Directory\shell
- HKEY_CLASSES_ROOT\Directory\shellex\ContextMenu Handlers
- HKEY_CLASSES_ROOT\Folder\shellHKEY_CLASSES_ROOT\Folder\shellex\ContextMenuHandlers
And for certain types of files in entries like "HKEY_CLASSES_ROOT\.<расширение файла>". For example - "HKEY_CLASSES_ROOT\.avi".
The advantages of this method
- Does not require installation of extra programs
- All changes are reversible
Cons of this method
- A rather time-consuming process (manually edit a lot of parameters).
- Difficult for novice users.
- Some programs are listed in the above sections not by their own name, but by a “human-intelligible” identifier (this can be seen in screenshot 3). As a result, they must first be "identified".
- There is a risk of “hooking” the commands and points of the system itself (once again, emphasis on the importance of pre-exporting backups!).
Installing a specialized utility
There are quite a few programs of this type. There are good reviews about the ContextEdit program, but it is paid. There are also free CCleaner (we read how to use the program) and the Context Menu Tuner program.But they "see" by no means all the items of the context menu. And they have problems with "rollback" of actions in case of errors. Autoruns from Win Sysinternals requires professional knowledge, this is clearly not a level for beginners.
Against their background, the fairly reliable and simple ShellExView program from Nirsoft stands out well. You can download it from this link. Install the program, copy the ShExView_lng.ini crack to the root folder of the program and run it.The program is easy to bring to a form understandable even for beginners.
"Settings" "Filtering by Extension Type" "Explorer Menu".
And it's easy to edit - there is a "Deactivate" command, i.e., an unnecessary item can simply be disabled without deleting it. In case of an error, it can be turned back on in two mouse clicks (the “Activate” command).
pros
- There is an archived version (does not require installation)
- Doesn't install its own toolbars in browsers, doesn't crawl into startup and the Internet on its own, doesn't offer any advertising nonsense in its interface
Minuses
- Russifier ShExView_lng.ini must be copied separately to the program folder
- The availability of new versions must be checked on your own. official website
However, these two aspects can be attributed to the minuses very conditionally. That's basically all I wanted to say about this. I think this article will be helpful...
We are already familiar with the concept of a context menu. It's time to deepen our knowledge about it and consider the topic - How to remove or add commands to the Windows context menu.
The functionality of Windows makes it possible for the user to edit the context menu to his taste.
Editing the context menu (a set of "explorer" or "actions" menu commands) is possible in one of two ways:
- Through the program settings;
- Through the Windows registry;
- With the help of additional installed applications.
Let's see how it's done:
Installed programs often have (by default) the ability to integrate into the context menu (CM) command set. Then such a parameter is present in their settings on the main tabs, or maybe on such as "Integration", "Download" or "Adding", etc. For example, for the WinRAR archiver, it is enough to uncheck the settings:

It is clear that in this way you can both add (installing) and remove (removing) a command (s) from the list. Do the same with other applications.
Working with the registry
When working with the Windows Registry, you need to be very careful. To be in the registry, you need to search the Start menu by typing “regedit” and run the found executable file “regedit.exe”:

Making a copy
Before editing the Registry of any version of Windows (including Windows 7), do not forget to back it up to be safe. To do this, in the editor, on the "File" tab, select the "Export" command. Select "Entire Registry" at the bottom of the dialog that opens. By assigning a name and specifying a location - "Save":

If something irreparable happens (especially for an inexperienced person), you can return the registry to its previous state using the “File” / “Restore” command, specifying the previously created backup file.
Cleaning up a set for directories
The registry itself looks like a tree-like block diagram (on the left side), each of the branches of which has its own parameters (on the right). The "shell", "Shellex ContextMenuHandlers" and "Folder\shell" branches of the "HKEY_CLASSES_ROOT\ Directory" are responsible for the folder context menu. Having examined these branches in more detail, you can make sure that the "shell" folder includes the upper part of the context set, and the "Shellex ContextMenuHandlers" folder - the lower one. The folder "Folder\shell" repeats the previous one.
Program elements are removed from the set in each of the branches. By right mouse click, the delete element is selected, the “Delete” command is called:

Now for files
The same procedure is used here, but in other branches. Since the “*/shellexContextMenuHandlers” and “*/shell” branches in the “HKEY_CLASSES_ROOT” registry key are responsible for the set of Context Menu commands for files:

The removal procedure is exactly the same. Do not forget to only delete unnecessary in both branches.
We use third party applications
Removing or adding an item to the context menu of any version of Windows (including Windows 7) is much easier (and safer for a beginner) using additional utilities.
After installation and launch, in the program window (by the “Type” column) you can see all programs from the Windows context menu (type = Context Menu).

Unnecessary is removed by highlighting and pressing the red circle:
An interesting and useful utility with a telling name (there is a free version) Ccleaner. It has many useful properties. Website - http://ccleaner.org.ua/. In our case, it clears the registry of unused entries, paths to programs, shortcuts, etc.:

To clear the Context Menu, you need to go to the "Service", in the "Startup" tabs, find the "Context Menu". This will display the list of applications added to the set and their status (enabled: yes/no):

To delete - while on the line, the right mouse button calls the "Delete" command. Since a second return (inclusion in the list) is possible only when reinstalling or reconfiguring the application, it is recommended that you select the "Disable" option. - Then it will be easy to return ("Enable").
Adding with FileMenu Tools
It is very easy to add a new item to the context menu using the FileMenu Tools program.
It offers the user three tabs:
- Left - management of the proposed elements;
- Medium - to configure the "Send" function;
- Right - disables the commands introduced by third-party programs from the list:

You need to add a new element with the "Add Command" command. To specify its parameters, the lower right part of the window - “Properties” is intended. For example, to list the menu string "Open in Firefox" (opening HTM and HTML files):
In "Menu Text" you need to enter the name, and in "Extensions" - options for extensions:

In "Program Properties" the route to the executable file of the Firefox.exe application is written:

Saving the added item is done by pressing the green element at the top of the window (on the left):
This article helped you understand the various ways to edit the context menu. Now you know how to add and remove elements from it not only using Windows, but also using other programs.