Greetings, dear readers! In today's article, we will talk with you about a multiboot flash drive, what it is for and how to create it, but first things first ...
It's always good to have a multi-boot USB stick with multiple operating systems on hand. Indeed, why bother looking for disks and a distribution kit, when you will always have the opportunity to install any system you need?
Many of you wondered: how to make such a multiboot flash drive? What programs do I need to use so that I have my own flash drive with several operating systems? But not always the knowledge and skills of an ordinary user are enough for this. In this material, I will provide you with clear instructions, how to write several operating systems to a USB flash drive.
So, first of all, let's summarize the concept with you - "Multiboot flash drive", because not every user knows such a term. Imagine that your computer does not boot from a hard disk or drive, for some unknown reason the system cannot boot from the above devices. Then, in this case, a multiboot flash drive comes to the rescue. We can say that such a flash drive is a certain multi-purpose set of necessary utilities, programs that are designed to diagnose your personal computer. Here it will not be difficult to guess what diagnostic operations you can carry out with your PC, as an example I give you a few of them:
1.Testing RAM or hard drive
2. Diagnostics of the hard drive (recovery, backup)
3. Record on removable media.
In simple terms, an installer is written to the flash drive, thanks to which, when booting from an external drive, a menu for selecting specific actions (OS installation, testing, diagnostics, etc.)
So, I suggest you start creating your own bootable USB flash drive. In this article, as an example, I will create a bootable USB flash drive with two operating systems, Windows XP and Windows 7. I will add that in one of my future articles I will definitely tell you how, in addition to operating systems, it will be possible to write utilities on a USB flash drive that will allow you to execute various diagnostics of your computer.
How to write several operating systems to a USB flash drive?
I am absolutely convinced that after reading this material, you will be able to create multi-boot flash drives with several operating systems. Including, you can create a USB flash drive, on board which will be Windows 7 and 8, not to mention the old-fashioned XP.
What do we need to get such a wonderful flash drive? First, you need a working operating system. In the example we will be using Windows 7 (32 Bit). In it we will make our wonderful multiboot flash card, which will contain Windows XP and Windows 7.
For this we use the well-known utility WinSetupFromUSB. This program has long been known and has proven itself as a utility that allows you to create multiboot flash cards. I suggest you go to the official website of the WinSetupFromUSB program in order to download and install it on your computer. http://www.winsetupfromusb.com/downloads/

In fact, this program allows you to create a USB flash drive on the "UEFI" system.
In our example, we will use an 8 gigabyte flash card. This is quite enough to write two operating systems. You can always take a USB flash drive and a larger one, but keep in mind that for one system you will need at least 4 gigabytes of memory.

So, we have downloaded the program to our computer, now we just have to unzip and run it.

Note that the program can work in both 32 and 64 bit systems. At the moment I am running the program on Windows 7 (32 bit system), so I press WinSetupFromUSB_1-4X32.

So, we open our program. Do you see the main window? The name of our flash card is displayed here. Check the box next to "Auto format ...". Next, click on the NTFS item. Select "Windows 2000 ..." and then click the explorer button that opens on the right.

In the explorer itself, you need to assign a folder with the XP file distribution kit. In the event that you have an installation disc, then all you need to do is make a copy of the files and transfer them to a folder, calling it somehow "WindowsXP".

If you are working with a separate XP image, then you need to open it in DAEMON Tools, and then perform the same actions, namely copy the entire distribution kit into this folder.
Everything. The folder is indicated. Now we need to click on the "ok" button.

We agree with the license

Click "go"


Once again

The first step in creating your multiboot flash card is complete!

Moreover, it was completed successfully: it already has one operating system.

Roughly the same steps must be repeated with the "Seven". This operating system, which many prefer 8-ke, is quite versatile and not too demanding. How do I install it? No harder than XP.
We go to the folder where the WinSetupFromUSB utility is located and click on WinSetup ... exe.

In the main menu that appears, we will see that our flash drive has been identified. This time, do not click on the item "Auto format it ..."
It is necessary to check the boxes Vista / 7/8 / ... Next - open the explorer (the button is on the right). We are looking for a 64-bit "seven" image, click on it once with the left mouse button and then simply open it. We start the process by clicking on "GO".

So everything went well. Now you have two systems on your flash drive: "XP" "Seven".

This is already a lot. However, what to do if you want to record another, more modern system on the same flash card? Shall we say the Eight?
So, the process is exactly the same as in the previous case: choose your USB flash drive. Do not click on the "Auto format ..." item. Otherwise, the existing operating systems will simply be removed from your computer.
Then tick Vista / 7/8 / ... Finally, click on the explorer menu, find there the image of the required operating system and click on "open". Further - "go" and voila! The third operating system will appear on your flash card.
How to install one of the systems from a flash card?
If you are going to install xP, "Seven" or "Eight" on a PC with UEFI, then your very first step is to turn off Secure Boot. This is very important, otherwise the installation of the system will be impossible. If you don't know how to do this, here's to you .
If you are going to install systems on a computer with BIOS, then you should simply start booting it from your flash card.
So, we enter the boot menu of your computer. Next, you choose your USB flash drive. The first window that appears is the GRUB4DOS menu.

Select Windows XP / 2000/2003 ... and XP will be installed.
Select Windows NT6 ... and you will have a choice: start loading "Sevens", or "Eights" on 64 bits.
So let's try to install both systems. Let's start with XP.
Using the arrows on your keyboard, you simply select "Windows XP / 2000/2003 ...". Then press Enter and a window will appear. We agree, select the third item and press "Enter".

At this point, the loading of the operating system begins. Then you install XP as if from a disk. There is nothing complicated about it.
I will only note that a reboot awaits you. After the GRUB4DOS window appears - select "4 Second part of Windows XP" ... That's it. The installation will continue soon and your PC will have Windows XP.
By the way, if during the installation process you got such a blue screen,

then in this case you should perform one simple trick in the BIOS of your computer. Namely, switch from AHCI Mode to IDE Mode, in the SATA Configuration tab.

If the above method did not help you to avoid the appearance of a blue screen, then I recommend that you create an image of the operating system with the SATA drivers integrated inside. In the event that these drivers are not available, then an evil blue screen will pop up on new motherboards, notifying of an error. And all because the program simply will not be able to detect the hard drive. We will consider this issue in more detail in the next article.
Of course, today there are a huge number of programs that will allow you to easily create a multiboot USB flash drive. Moreover, most of them are not only free, but also very easy to use. For example, you can see in the video presented.
Having created such a USB flash drive, you will always have several operating systems at hand, which will undoubtedly save you a lot of time. You will no longer need to search for operating system boot disks or CD writers. Once, having spent your time creating such an irreplaceable tool, you will never regret it.
I hope that today's tips on how to make a multiboot flash drive were useful to you. I tried to highlight this process in as much detail as possible and therefore I am sure that you will succeed if you follow my simple instructions. That's all for today, if you have any questions - ask them in the comments, I will be glad to help you!
Dear users, if after reading this article you have any questions or you want to add something about the subject of this article or the entire Internet resource as a whole, then you can use the comment form. Also ask your questions, suggestions, wishes ..
So, for today this is actually all that I wanted to tell you about in today's issue. I hope that you have found interesting and useful information for yourself in this article. Well, I, in turn, am waiting for your questions, wishes or suggestions regarding this article or the entire site as a whole.
The Windows 7 operating system has long won the trust and respect of millions of computer users around the world. Windows 7 is considered a very user-friendly, stable and easy-to-learn program.
Among its many conveniences and advantages, it should be noted the ability to roll back the system to a working state after failures and install drivers on the computer automatically.
However, no matter how reliable the system is, there is a small probability that the system will “crash” and even its “rollback” will not help. Here we will be helped by such a wonderful invention of mankind as a flash drive.
This article will show you how to make a multiboot USB flash drive with windows 7.
Modern laptops have long been equipped with not only USB 2.0, but also USB 3.0. Windows 7 does not understand USB 3.0 formatting, so please use a USB 2.0 computer connector.
It is clearly shown below how these connectors differ and where you need to correctly plug the USB flash drive so that the system can boot without problems.

If you put a USB flash drive into the wrong connector, after formatting it, Windows 7 will display an inscription that informs you that it has not found drivers for DVD / CD ROM.
Now let's proceed directly to the process itself, you will learn how to make a multiboot USB flash drive with windows 7.
First of all, make a system image using DAEMON Tools. Download, install it and run it, click on the "Create disk image" menu item in it and in the window that opens, put a dot in front of the "Standard iso" inscription. Now select the folder to save and press "Start".

After that, copy all the data you need from the flash drive (by the way, it must have a volume of at least four gigabytes) to any other medium, because after formatting it, they will all disappear.
To do this, insert the USB flash drive into USB 2.0 and restart the computer ("Start" - "Shutdown" - "Restart"). Wait a few seconds. If the function works, the boot from the USB drive will start (you will be asked to press the F-8 or F-12 key on your keyboard) to select the system boot source. After pressing the key, the following window should appear:

Select with the up or down keys the item underlined with a red line - this is our removable media, and press "Enter".
If the function is not enabled, normal Windows 7 will boot. So, you need to change the BIOS settings. BIOS is the main program that is loaded almost the very first at system startup and sets fine-tuning for the correct operation of Windows 7.
In order to enter this mode, at the beginning of the operating system loading, when the screen is still black and only some white letters are visible on it, press the Delete key.

If you see an inscription marked with an arrow, then everything is included, but you need to check. After clicking on Delete, the BIOS program window itself will load.

Using the "Right" and "Left" keys, activate the Boot menu item.

Now click on the Hard Disk Drives label and look in the list that opens how many active hard and external drives you have. When you see the inscription Boot Device Priority (it will mean from which disk Windows 7 will initially boot), see what is written there.
To do this, use the arrows to make the first line called 1st Drive active, where the HDD parameter is set: SM-MAXTOR STM3. Press Enter, a window will open in which arrows move to the inscription of our removable media and click on Enter again.


Please note that the numbers indicate the order of loading the operating system. We need to put our USB flash drive under number one, and our disk partition under number two, from which the system usually boots. If our flash drive is not in the USB connector, then windows 7 will automatically select its startup method from disk number 2.
Now we return to our topic, how you can make a windows 7 multiboot USB flash drive.
Using the UNetBootin program
Download the program by copying the exact address of the official developer (http://unetbootin.sourceforge.net) into the line of the browser you are using and you will be taken to the download page. Download it to your hard drive and open the downloads folder.

Run it (installation is not required) and you will see a window on the screen in which you select the letter of your flash drive prepared for recording, and the desired file type of the final image.

Now click on the button with the image of three dots and manually find our image that you have already created.

Open it up.

Click "Ok".

The data copying process starts.

How to make a multiboot USB flash drive using UltraISO
Although it is paid, you can use the trial version for your own purposes, I think you will have enough time. What is another plus - the Russian language is already built into it.
So, go to the official website at the link http://www.ezbsystems.com/ultraiso and download the trial version by clicking on the "Free Trial" button.
Install it by choosing Russian during the installation process. You will have a shortcut on your desktop, using it run the program as an administrator. Choose the trial version again.

That's it, now the main UltraISO window will appear.

Find the saved system image on the hard drive to write it to a USB flash drive. To do this, click on the menu item at the top of the "File", then select "Open" and open your folder with the image.

Select our file with the left mouse button and press "Open" again.

Insert the USB flash drive into the USB connector of a laptop or computer and select the "Boot" menu in the program, in which you click on the inscription "Burn hard disk image".

Click on "Format".


You are waiting for the end of the recording process.


All is ready! You can clearly see the result in the explorer.

How to burn a USB flash drive using the built-in capabilities of Windows
This is the most difficult method and is suitable for those who are used to digging into the very essence in order to better understand the principle of the system and programs.
To do this, call the line for entering commands ("Start" - "Run"). An empty line will open, in which you need to enter the cmd command and press Enter.

A black screen appears with an empty line to enter commands.

Place the mouse cursor at the very end and enter the list disk command to display a list of your hard drives and removable disks, press Enter again.

In our example, the removable media is called "Disk 3", in your case the name may be different. However, it is easy to calculate by the amount of free disk space (we have four gigabytes).

Now enter the following command select disk 3 (change the number accordingly to your own).

The drive you specified will be selected, and the system will write about it.

Using the clean command completely remove all files from the flash drive.


Now select partition 1.

After that, you should type active.


You are waiting for the end of the process.


After entering the assign command, the removable media will be assigned the letter "J" in the system.
Now exit this mode with the Exit command.
Windows will boot and open the explorer. Copy all the operating system files of the previously created archive to a USB flash drive.


Well, now you have a copy of Windows files that you can always carry with you and install on any computer.
From this article, you learned in what ways you can make a multiboot flash drive in different ways.
I hope this information will help you in a critical situation, but it is better that your system never crashes.
Hello.
Quite often, many users, due to various system errors and failures, have to reinstall Windows (this applies to all versions of Windows: be it XP, 7, 8, etc.). By the way, I also belong to such users ...
Carrying a stack of disks or several USB flash drives with an OS is not very convenient, but one USB flash drive with all the necessary versions of Windows is a nice thing! This article will show you how to create such a multi-boot USB flash drive with multiple versions of Windows.
Many authors of such instructions for creating such flash drives greatly complicate their guides (dozens of screenshots, a huge number of actions need to be performed, most users simply do not understand what to press). In this article, I would like to keep everything as simple as possible!
So, let's begin…
What do you need to create a multiboot flash drive?
1. Of course, the flash drive itself, it is better to take a volume of at least 8GB.
2. The winsetupfromusb program (you can download it on the official website: http://www.winsetupfromusb.com/downloads/).
3. Images of Windows OS in ISO format (either download them, or create yourself from discs).
4. Program (virtual emulator) for opening ISO images. Recommend .
Step-by-step creation of a bootable USB flash drive with Windows: XP, 7, 8
1. Insert the flash drive into USB 2.0 (USB 3.0 - blue port) and format it. The best way to do this is to go to “my computer”, right-click on the flash drive and select “format” from the context menu (see the screenshot below).
Attention: when formatting, all data from the flash drive will be deleted, copy everything you need from it before this operation!
2. Open an ISO image with Windows 2000 or XP (if, of course, you plan to add this OS to a USB flash drive) in the Daemon Tools program (or in any other disk).
My computer. pay attention to drive letter virtual emulator, in which the image with Windows 2000 / XP OS was opened (in this screenshot, the letter F:).
3. The last step.
Run the WinSetupFromUSB program and set the parameters ( see the red arrows in the screenshot below):
- - first select the desired flash drive;
- - further in the "Add to USB disk" section, specify the letter of the drive in which we have an image with Windows 2000 / XP open;
- - specify the location of the ISO image with Windows 7 or 8 (in my example, I indicated the image with Windows 7);
(It is important to note: those who want to write several different Windows 7 or Windows 8 to a USB flash drive, or maybe both, you need to: for now, indicate only one image and press the GO record button. Then, when one image is recorded, specify the next image and press the GO button again and so on until all the desired images are recorded. For information on how to add another OS to a multiboot flash drive, see later in the article.)
- - press the GO button (no more checkboxes are needed).
Your multiboot flash drive will be ready in about 15-30 minutes. The time depends on the speed of your USB ports, the general boot of the PC (it is advisable to disable all heavy programs: torrents, games, movies, etc.). When the USB stick has been burned, you will see a Job Done window.
How to add another Windows OS to a multiboot flash drive?
1. Insert the USB flash drive into the USB port and run the WinSetupFromUSB program.
2. Specify the desired USB flash drive (to which we have previously recorded using the same utility Windows 7 and Windows XP). If the flash drive is not the one with which the WinSetupFromUSB program previously worked, it will need to be formatted, otherwise nothing will work.
Testing a multiboot flash drive
1. To start the installation of Windows from a USB flash drive, you need:
- insert a bootable USB flash drive into the USB port;
- configure the BIOS to boot from a USB flash drive (This is described in great detail in the article "" (see Chapter 2));
- to restart a computer.
2. After restarting the PC, you need to press some key, for example, "arrows" or the space bar. This is necessary so that the computer does not automatically start loading the OS installed on the hard disk. The fact is that the boot menu on the flash drive will be displayed for only a few seconds, and then immediately transfer control to the installed OS.
3. This is how the main menu looks like when loading such a USB flash drive. In the example above, I recorded Windows 7 and Windows XP ( actually they are on this list).
Flash drive boot menu. You can choose to install 3 operating systems: Windows 2000, XP and Windows 7.
4. When you select the first item " Windows 2000 / XP / 2003 Setup The boot menu prompts us to choose the OS to install. Next, select the item " First part of Windows XP ..."And press Enter.
To create a bootable USB flash drive, we will use programs from both a third-party manufacturer and the built-in Windows command interpreter. Each method is different and has its own specifics, but I think that a simple end user will be able to cope with creating a bootable USB flash drive using any of the proposed methods:
- how to make a bootable USB flash drive using the command line
- how to make a bootable USB flash drive using the UltraISO program
- how to make a bootable USB flash drive using Windows7 USB / DVD Download Tool
If you are interested in information on creating a bootable USB flash drive for a family of Linux operating systems, then you can familiarize yourself with the information on this link "bootable USB flash drive for Linux".
So, I propose to start creating a bootable USB flash drive in order, as defined in the above list, respectively, go to the first method.
BOOTING USB stick using the command line (I method)
Next, we will use only those commands that we need to create a bootable USB flash drive. Therefore, the following figure shows the sequential input of commands to create a bootable USB flash drive. And please pay attention to the fact that the commands entered are indicated by a red underline!
Graphical representation of command input at the command line
Now let's describe the previously entered commands:
DISKPART- run the program, a text-mode command interpreter, which allows you to manage objects (disks, partitions or volumes) using scripts or direct command input from the command line.
list disk- we display a list of disk drives connected to the personal computer.
select disk 1- select the disk with the number "1", since in our case it is a removable flash drive.
clean- clears all data from removable media - flash drive.
create partition primary- we create a primary section.
select partition 1- select the created section.
active- make the section active.
format fs = NTFS- we format the flash drive in the NTFS file system.
assign letter = T- if necessary, in this way you can assign a letter to the flash drive.
Exit- exit from the DISKPART program.
LOADING FLASH CREATED!
NOTE: After you have created a bootable USB stick, you need to transfer the operating system files to this removable media. The files must be transferred in an unpacked form, in no case do not just add an image of the operating system, for example, one * .ISO file, so it WILL NOT WORK !!!
You can see a complete list of Diskpart commands in the following table:
Table of commands of the program "DISKPART"
| COMMAND | EXPLANATION |
| ACTIVE | - Mark the selected section as active. |
| ADD | - Adding a mirror to a simple volume. |
| ASSIGN | - Assign a name or mount point to the selected volume. |
| ATTRIBUTES | - Working with the attributes of a volume or disk. |
| ATTACH | - Attaches a virtual disk file. |
| AUTOMOUNT | - Enable or disable automatic mounting of basic volumes. |
| BREAK | - Splitting the mirror set. |
| CLEAN | - Clears configuration information or all data on disk. |
| COMPACT | - Attempts to reduce the physical size of the file. |
| CONVERT | - Convert disk formats. |
| CREATE | - Create a volume, partition or virtual disk. |
| DELETE | - Delete object. |
| DETAIL | - Viewing object parameters. |
| DETACH | - Detaches the virtual disk file. |
| EXIT | - Shutdown DiskPart. |
| EXTEND | - Expand the volume. |
| EXPAND | - Increase the maximum available virtual disk space. |
| FILESYSTEMS | - Displays the current and supported file systems for the volume. |
| FORMAT | - Format this volume or partition. |
| GPT | - Assigning attributes to the selected GPT partition. |
| HELP | - Displays a list of commands. |
| IMPORT | - Import of a group of disks. |
| INACTIVE | - Mark the selected section as inactive. |
| LIST | - Displaying a list of objects. |
| MERGE | - Merging the child disk with the parent. |
| ONLINE | - Transfer of an object marked as "offline" to the state "online". |
| OFFLINE | - Transfer to the "offline" state of the object marked as "online". |
| RECOVER | - Updating the status of all disks of the selected package. Attempting to repair disks of the wrong packet and resynchronizing mirrored and RAID5 volumes with outdated plex or parity data. |
| REM | - Doesn't take any action. Used to comment out scripts. |
| REMOVE | - Deleting a drive name or mount point. |
| REPAIR | - Recovering a RAID-5 volume with a failed member. |
| RESCAN | - Search for disks and volumes on the computer. |
| RETAIN | - Placing a service partition on a simple volume. |
| SAN | - Display or set the SAN policy for the currently loaded OS. |
| SELECT | - Setting focus on the subject. |
| SETID | - Changing the type of section. |
| SHRINK | - Decrease the size of the selected volume. |
| UNIQUEID | - Display or set the GUID Partition Table (GPT) code or Master Boot Record (MBR) signature of the disk. |
LOADING USB stick using UltraISO program (II method)
UltraISO is designed to create and edit disk images. When creating a bootable USB drive, we will use the built-in functions of this program.
Open the program with administrator rights, as shown in the figure:


We select the necessary operating system image to create a bootable USB flash drive, for example, the Windows Vista disk image is selected here:


A pop-up window appears where you need to make sure that the removable media, the file of the recorded image and the recording method are correctly specified (it must be installed in the USB-HDD + mode) and click the "burn" button

After clicking the "Write" button, the "Hint" window will appear, which will offer you to erase all information on the USB flash drive. Agree!

Then the data will be written to the USB flash drive ...

And finally, after a certain time, the operating system image will be written to the newly created bootable USB flash drive for future installation.

LOADING FLASH DRIVE IS DONE!
NOTE: Do not forget to set the primary device boot in the BIOS I / O system, that is, make sure that the computer boots from removable media - the bootable USB flash drive you created.
DOWNLOAD DRIVE using Windows7 USB / DVD Download Tool (Method III)
Windows7 USB / DVD Download Tool created by Microsoft for writing operating system disk images to optical and removable media. When creating a bootable USB drive, we will consistently follow all the instructions of the program.
First, you need to download this program from the official Microsoft website. Then you need to install the program following the instructions of the installer. After installing the program, a shortcut will appear on the desktop, as shown in the figure:
Run it with "Administrator rights", right-click on the shortcut and click on the line "Run as administrator". The program will start, click the "Browse" button and select the operating system image * .ISO

After you have selected the image of the recorded system, click "Next", another window will appear where you will be offered to select the type of media - optical or removable. Since we have a removable media - a flash drive, select "USB device"

We select our removable media from the proposed list, i.e. USB flash drive and press the "Begin copying" button

After pressing the above button, the process of formatting the flash drive will begin ...

After a while, the process of writing the disk image data to the USB flash drive will continue.

We wait for some time until the image is recorded, and in the end we will get 100%, and now the bootable USB drive has been generated!
NOTE: Do not forget to set the primary device boot in the BIOS I / O system, that is, make sure that the computer boots from removable media - the bootable USB flash drive you created.
M ultibootable flash drive, complete with a distribution kit of several operating systems, antivirus Live-disk, the necessary programs that work autonomously from bootable media - this is a universal tool for solving various problems and tasks with a computer that ordinary users have to deal with every now and then. What can we say about IT-specialists, most of whose professional life is the restoration of the working capacity of computer equipment.
Flash drive, which brings together various bootable software solutions, will replace a bunch of different optical boot disks. A single multiboot flash drive can be used to neutralize viruses that block the start of a computer, and to reinstall the operating system, and to restore it from a backup, and to allocate space on the hard disk, and for other tasks. Ready-made images are available for download on the Internet Live-discs with a selection of various software for solving computer problems. But, of course, it is better to prepare a universal rescue tool yourself, choosing the contents of the bootable USB flash drive to suit your individual needs and preferences.
The program can create flash drives with various bootable software WinSetupFromUSB for Windows. It can bundle a selection of bootable media based on the bootloader Grub4dos ... We will use it to create a multiboot flash drive. And, accordingly, we will consider this whole process in detail below.
1. Contents of a multiboot flash drive
The first step is to prepare a multiboot flash drive distribution kit. In our case, we have a flash drive with a small volume by modern standards - just 8 GB... Therefore, it will only be equipped with the necessary tools. And this is a distribution kit Windows versions 8.1 , 10 and old XP , antivirus Live-disk from Avira, a disk space allocation manager and a free backup. To write to a USB flash drive, we prepare ISO-images of the bootable media of the selected software and installation disks of operating systems.
2. Download WinSetupFromUSB
WinSetupFromUSB Is a free program. You need to download the latest version on the official website. At the time of this writing, the current version is 1.6 ... WinSetupFromUSB works portable, no installation on the system. All you need to do is unpack the downloaded archive and launch the program shortcut in accordance with the bitness of the current Windows.
Download the WinSetupFromUSB program from the official site:
http://www.winsetupfromusb.com/downloads/
3. Formatting the flash drive
Next stage - flash drive formatting... This process can be carried out as with standard Windows tools (command "Format" in the context menu called on the flash drive in the explorer) and inside WinSetupFromUSB. Let's consider the last option.
In the program window at the top, select the desired USB flash drive, if there are several of them connected to the computer. We activate the checkbox of the option "Auto format it with FBinst"... After that, its additional options will be revealed. Of these, you just need to decide on the future file system of the flash drive - NTFS or FAT32... If the distribution kit prepared for writing to a USB flash drive contains files weighing more than 4 GB, you need to select the file system NTFS... If not, we leave FAT32 default.
The FAT32 file system must also be left if the multiboot flash drive is intended, among other things, to work with computers based on BIOS UEFI. In this case, you will not need to disable the function. Secure boot, and the distribution kit contained on the flash drive 64 -bit Windows 8.1 and 10 installs on GPT-disk partition.
WinSetupFromUSB prepares a universal bootable USB flash drive - for computers with a regular BIOS, and for devices based on BIOS UEFI. But the interface UEFI sees only bootable USB drives formatted in FAT32... Some programs can bypass such restrictions and create bootable UEFI- flash drives with a file system NTFS, but WinSetupFromUSB, alas, is not one of them.
So, we define the file system and press the button below "Go".
In the warning window about erasing data on a flash drive, click "Yes".

And we press again "Yes" in another warning window.

In a few seconds we will see the inscription "Job done"- Job is done. We press "OK".

Now you can start adding the contents of the multiboot flash drive. The order in which you add operating system installation disc images and program bootable media is not important. It is only important to adhere to the corresponding column in the central part of the window. WinSetupFromUSB.
4. Adding a Windows distribution kit
Adding a Windows distribution kit is possible in two forms of the program window. One of the forms is designed to add images of Windows installation disks, starting with version Vista , the other is for setup files Windows XP and older versions of the system. In our case, we first add the image to the corresponding form Windows 8.1... We put a tick on this form and using the browse button indicate the path to ISO-image. A set of a multiboot flash drive is formed in stages: each distribution kit is added and recorded in a separate order. Press the button "Go".

We are waiting for the completion of the process and click "OK".

Now we activate the same form with a tick and use the browse button to add another Windows distribution. In our case, this is the installation disk. Windows 10... For the same version of Windows, you can add its different editions one by one - 32 - and 64 -bit. Add, click "Go", we are waiting for the completion of the process.

5. Nuances with Windows XP
Presence of the installation disk on the flash drive Windows XP it may be necessary in rare cases to reinstall the operating system on very old PC assemblies. But the process of creating a bootable USB drive with this version of the system using WinSetupFromUSB there are some nuances. In the program interface, the upper form is intended for adding a Windows XP distribution kit and earlier versions of the system.

The browse button of this form does not add the usual ISO-image of the distribution kit. Before content ISO-image must be opened in the virtual drive. In systems Windows 8.1 and 10 this is done by regular means - on ISO-file, the context menu is called and the command is selected.

V Windows 7 and earlier versions of the system mount ISO-images are possible through third-party programs such as Alcohol 120% or Daemon tools... The content of the connected ISO-image is transferred to a separately created folder.

And this folder is already in the process of creating a bootable USB flash drive is added to the program window WinSetupFromUSB.

The next step is to accept the license agreement.

And only then start recording.

Another nuance is the need to integrate drivers for SATA-controller in the distribution Windows XP if it does not initially contain them.
6. Adding bootable program media
ISO-images of the operating system distribution kit Linux , Live -discs based on Linux and WinPE, bootable media of various programs using the browse button are added in the active form "Linux ISO / Other Grub4dos compatible ISO"... After adding ISO-image a small window will appear "Boot menu name", in which you can set a name for how the bootable media will be displayed in the bootloader menu Grub4dos... In our case, we indicate the path to the anti-virus image Live-disk Avira. Press the button "Go" and wait for the recording to complete.


And then the image.

7. Testing the flash drive
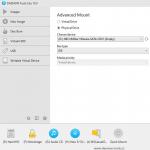
One of the advantages of the program WinSetupFromUSB is built-in ON to emulate computer hardware - QEMU... By using QEMU You can immediately, without leaving the current operating system, test a USB flash drive - even a regular bootable one, even a multiboot one. At the bottom of the WinSetupFromUSB window, check the option box and click "Go".

A QEMU window will open, in which everything will happen as on the monitor screen after booting from a USB flash drive. The first thing we will see is the bootloader menu Grub4dos... Using the navigation keys or numbers according to the serial numbers of the software in the list, we can select one or another bootable media, Live-disk or operating system installation process.

The Windows installation discs will be combined into two partitions. One will contain distributions Windows XP and older versions of the system, in the other - versions of Windows, starting with Vista... Each of the sections leads to the window of the additional boot menu for the corresponding versions and editions of Windows.