Attention! This article might make you infatuated graphic editors, it leads to learning the secrets of Photoshop, memorizing hot keys and awakens the spirit of enthusiasm in people. Read strictly as necessary and monitor your performance.
How to remove background in Photoshop - magic wand
This is the name of the tool with which you begin to cut the object. To do this, you need to open the desired image in Photoshop and find it in the toolbar. For users with an English-language interface, it will be written as a magic wand tool.
- hold down the Shift key and click with the Magic Wand on the background until it is all selected. Remember: you cannot release shift until you have selected the entire background, and you also cannot hit the object with your wand. Background only!
This is how the selection process looks like:


- when you have clicked on all the non-dotted areas and your background is finally ready to further work, find the Delete key on your keyboard and click on it,
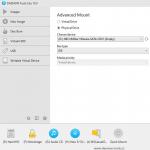
- be sure to check the settings in the window that appears, everything should match the screenshot below,

- in order in Russian: the first field contains the word “White”, then “Normal”, and “100%”.
- click on the word OK,
- you will get a clipped object on a white background, but some debris from the selection may remain,


- to remove it, press the English key E, this will bring up the eraser,
- carefully erase unnecessary details,
- the object is cut.
This method is great for solid backgrounds and crisp objects. But if the background is blurry or highly detailed, the magic wand option may not work. Let's try to disassemble the second method.

How to remove background in Photoshop - layer mask selection
You will have to work a little more, but the result will be much better.
- open the desired image and immediately copy the layer, for this right click mouse click on the image thumbnail at the bottom right and select the field “Copy layer” or “Duplicate layer”,

- now create a mask on the copied layer: in the bottom right, find the desired icon and click,

- a small white window will appear next to the layer thumbnail, as in the screenshot,
- now take the Brush tool by clicking on the Latin letter B,
- your brush settings should be like in the screenshot below,

- Select the always black brush color and press the Q key, now the layer thumbnail is highlighted in red. This means that you are on the right track.


- carefully paint over the object, without going out of frame and without falling into the background,
- if you did hit the background with the brush, change the color of the brush to white and paint over your miss. Remember: we draw with black, we erase with white,
- paint over the whole object.


- now press the Q key again and then Delete,
- the background is removed, you can move the object to a new location or fill it with white.


Both options will seem very easy after you try them yourself. The main thing is, do not be afraid to make a mistake, because cancel last action you can always use the keyboard shortcut ctrl + z + alt. And to consolidate your knowledge, watch the video below.
Hello dear readers!
Photoshop is an interesting thing that everyone should be able to use! I will not explain here what it is and how, I will just give useful lessons in plain language.
As many say - I will write for dummies!
For someone, Photoshop is a hobby, for someone - a way to earn money, or just entertainment ... And for me, Photoshop is another irreplaceable tool, without which my blog and I have no road!
He helps me make cool unique pictures (I will write about this later - I have my own chips there, I advise you to subscribe to my blog. And then suddenly the article will come out, and you will not know about it ...)
Make various 3D boxes and covers, lettering, etc.
Therefore, I gradually began to master this knowledge, and I want to start teaching you too! These will not be just another dull and abstruse lessons for professionals - everything will be for dummies in an interesting format (friends, no offense here).
On this occasion, I am creating another section on the blog called "Photoshop Tutorials"!
Yes, I have a lot of sections, and one is even empty - but you are not looking at it! Soon I will fix it and fill in everything with useful articles ...
You just need to subscribe to my blog and wait for them to appear on your e-mail! And your subscriptions are like a lighthouse in the wilderness, they will motivate me and show me the right way, and then there will be no room for laziness!
Well, let's finish with such a fabulous introduction and it's time to get down to the topic of the post ...
In this short article, we will reveal such a little secret: "How to remove the background from a picture in Photoshop? "
Recently I myself asked myself such a question and was in search of an answer to it ... But now, I do all this in a matter of seconds, and even my blogging friends ask me for help (I didn’t tell them a secret and said that I’d better write an article about this - so they will be delighted)
How to remove the background from a picture in Photoshop!
But first we need program entitled Photoshop ( more precisely so - Adobe photoshop )…
It doesn't matter which version, but the main thing is that it is! Or you can use online Photoshop, having found it through any search engine - its capabilities are not particularly inferior to those of the installation program!
Opening our Photoshop ...
Now we need to add our image to remove the background: File - Open... (I think the screen is not needed here)
I will use this picture as an example ( I'll take the blog libraries, so as not to load too much):
P.S. And here's a small note: the picture must be in the format Jpg, with formats PNG image and GIF such a trick will not work ... But if your picture is not in the format JPG, then this is not a reason for frustration - we just need to change the format of the picture!
How do I change the format of a picture?
Everything is simple here! You can use the program for example Paint(this is a standard program that is on every computer - well, or at least it should be)
We open the picture and just save it in the format we already need ( Jpg) without any changes!
With Photoshop, such a trick does not work: does not want a picture of the format PNG image and GIF save in Jpg …
By the way, I am using Adobe Photoshop CS6 Portable... (p.s. I am very good version got caught)
After adding a picture, in the window " Layers"Double-click and in the window that opens, click" OK» ( so we can create a new unlocked layer and subsequently make changes):
Now we need to select in the left panel the tool called " Magic wand"(Works more accurately than" Fast selection«) And using it to make clicks on those parts of the picture that we want to delete ... (made a click with the left mouse button, thereby selecting the area and pressed Delete):
After removing the background, you need to save ( File - Save As ...). The picture needs to be saved only in the format PNG image, only then the background will remain transparent!
In general, here is my result:
Perhaps I have some errors, but I was just in a hurry - all this can be fixed by paying more attention! But the main thing is that you grasp the very essence ...
Now such a picture can be easily placed on any background!
Photoshop tutorials - how to remove the background ... Second option!
And here is the second option! To be honest, I don't like it!
Everything remains the same, only we use a different tool, namely the Pen. In general, see the picture:
I hope the essence of the picture is clear! We need to select the object with dots until the contour is closed ... If we put a point incorrectly, do not worry - it can be canceled (in the tab: Window - History, well, or by right-clicking on it - Delete anchor point)
For convenient dotting, you can use the magnification of the picture.
When you put all the points and the path closes, right-click - Form selection area, well, then look at the picture:
After all these actions, the background will become transparent, all that remains is to save the picture in the format PNG image.
Why don't I like this option?
- very long (especially if the picture is not a circle or a square =)
- the outline of the picture sometimes changes its appearance
And since I don't like the second option, I decided to record a small video lesson only on the first ... In general, we look:
Well, yes, I could not resist and wrote down about two ways =)
The cursor is not visible on the video while working in the program - something is frozen ... But, I think the essence is clear! And I also haven't added any credits, but a great article was written above, and I'm also waiting for you with my questions in the comments!
That's all! Bye everyone!
03/11/15 29.4KIntroduction
Removing the background from a photo can be a really difficult task, especially if the subject you want to cut out has an extremely complex background. In this tutorial, we'll walk you through the entire process of removing the background from an image step by step to help you get through this difficult task.
First, you need to open the image you want to remove the background from in Adobe Photoshop. To demonstrate the technique, I chose a photograph of a giraffe taken at the Colchester Zoo that has a very clear border between the bits we want to keep (the giraffe itself) and the background.
I'm using Adobe CC, but the background removal technique described here will work in Photoshop CS5 and older, although some elements may look slightly different:
Step 1
So, we need to make a selection of the desired area. There are various tools for selection, but for beginners, the easiest to use are the “ Fast selection» ( Quick Selection) and " Magic wand» ( Magic wand). There is also a Lasso tool ( Lasso), it is more accurate, but it also takes more time.
For our example, we will use the " Fast selection"Located on the toolbar. Make sure to use this tool with the plus in the middle by pressing and holding the Shift key.
Select the background area that you would like to remove by holding down the left mouse button and dragging the cursor over the desired area. If you have accidentally selected something unnecessary, you can use the "Subtraction" option of the " Fast selection"By holding and holding the Alt key, and thereby remove the extra area from the selection. Don't forget to hold down Shift again before continuing to select the background.
You don't have to be too neat with things like hair and fur, because you can refine the edges later ( we will discuss this in a minute).
When you are happy with the selection made, right-click and select the option “ Invert selection» ( Select inverse):

Step: 2
Now click on the button " Add layer mask» ( Add Layer Mask) at the bottom of the Layers panel ( it is a rectangle with a black circle in the center) and you will immediately see that the background has disappeared.
The result may not look great yet, but don't worry, you can use the mask refinement tools to improve it:

Step: 3
Double-click the mask in the Layers panel ( this is a black and white image following the preview of your photo) and then select Mask Edges ( Mask edge) from the dropdown menu. You will see the Refine Mask menu ( Refine Mask):

Step: 4
In this step, you can make adjustments to the mask to improve its appearance. First, check the box next to "Show radius" ( Show Radius).
You will not see any changes, but by moving the slider of this parameter, you can make sure that the radius grabs all the stray strands of hair and gets rid of the background between them.
If you move your cursor over the photo, you will see a circle with a plus in the center. You can use it to capture difficult, hard-to-reach areas by holding down the left mouse button and dragging the cursor over problem areas:

Step: 5
Uncheck the " Show radius"To return to preview masks. Now use the sliders to adjust the mask until you are happy with the result.
You can change the view mode by clicking on the small arrow next to the thumbnail and choosing a mode from the drop-down menu:

Step: 6
If now you want to add your photo to new background, you can do this by opening the background image and simply dragging the image you just cut onto the new background.
When working with graphic files, it is often necessary to remove the background around an object. This may be due to the insertion of this element of the photo into some kind of composition, or the desire to replace the background of the picture. In this regard, a popular question arises: "How to remove the background of a photo in Photoshop?"
Removing a solid background
Considering the question of cleaning the background in a photograph, it is worth considering separately the question of how quickly in Photoshop to remove a background that has a uniform shade. This will avoid the extra work required to remove the colored portion of the picture.
Before deleting the necessary fragment of the photo, you must select it. This can be done in dozens different ways, but if you want to highlight a certain shade of color, then in "Photoshop" there is a special tool that allows you to do this as quickly as possible. By selecting in the panel quick access menu item "Selection", you need to find the item "Color range".
In the window that appears, select the Eyedropper tool and click on the background that you want to select. With the help of the sliders, all that remains is to adjust the selection and click "Yes". The result of these actions will be the selection of all areas of the photo containing the selected color. To delete, you need to press the "Del" key on the keyboard. This method is one of the simplest, high quality solving the problem how to remove the background in Photoshop.
"Magic" cleaning
The analogue of this background removal is the Eraser tool, which can perform this action even faster. To do this, just select the "Magic Eraser" and click once on the background - as a result, a checkerboard background will appear in its place, which symbolizes the presence of a transparent part of the photo. The downside of this approach is the lack of control over the area that will be deleted, as opposed to using quick selection.

In order to provide control over how to delete in Photoshop without affecting the rest of the photo, it is worth using another "magic" tool that works in a similar way to the eraser, but performs selection instead of deletion. There are two such tools, and they perform the same actions - and "Quick Selection". The only difference is that the "stick" requires a step-by-step selection of a shade, and the selection allows you to move the cursor over a large area of the picture at once.
Quick mask mode
Previous approaches - the answer to the question of how to remove White background... In "Photoshop", in addition to monochrome backgrounds, it is possible to clear and multi-color ones. Such a need may arise if an inappropriate landscape is depicted there. So how do you remove the background in Photoshop?

There are also several methods to accurately remove the required part of the photo. The first is to use the "Quick Mask". A mask is a special mechanism that allows the user to paint over the area that needs to be selected with the help of painting tools. To quickly switch to the "Quick Mask" just press the letter Q on the keyboard. Then, using a brush and an eraser, you need to paint over the part of the photo that should be deleted. Back in normal mode by pressing the same key, we will notice that the required area of the picture will be selected - to delete it, it remains to press the already familiar Del key.
Removing the background with Lasso
If the object around which you want to select the background has sufficiently clear boundaries, then there is another convenient way how to remove the background in Photoshop. To do this, use the Lasso tool. It is presented to the user in three forms. The first one has a similar name, "Lasso" - it allows you to arbitrarily draw lines for the future selection of the area. With its help, it is rather difficult to accurately select the required part, therefore, two other versions of the tool are often used.

The next one is the "Straight Lasso" - with it you can draw a selection area using straight lines. This way you can draw a clear border, for example around buildings or angular geometric shapes.
For more complex elements, such as a silhouette of a person, you should use the "Magnetic Lasso". It, thanks to its algorithm of actions, moves along the contour of the object, defining it using the difference in colors - it is enough to roughly move the mouse cursor around the element of the photo.

As a result of using "Lasso", the element itself will be selected. In order to perform deletion, the selection must be inverted by pressing the combination Ctrl keys+ I. Then you can perform background removal.
other methods
It is worth noting that, figuring out how to remove the background in "Photoshop", you can find several more different ways. However, most of them are quite difficult to perform, allowing you to make the deletion clearer. However, a good result can be achieved by simpler means, spending a little more perseverance and diligence on this, while even, perhaps, saving a little time.
3/31/16 12.4KRemoving the background of an image allows you to highlight smaller details, place them on a new background, and draw attention to certain elements of the image. We will tell you how remove background in Photoshop.
Method 1 of 2:
Removing the background quickly
Step 1
Use the tool “ Fast selection» ( Quick Selection) to quickly highlight the elements you want to keep in the image. The tool looks like a paintbrush with a small dotted ball at the end. It should be the fourth tool from the top in the toolbox.
Tool " Fast selection»Automatically finds the borders you click on by adding them to the selection:

Step 2
Click near the borders of the items you want to keep. Click and move around the image and the details you want to keep, other than the background, will be highlighted. Continue until everything you want to keep is included in the selection.
If you make a mistake, hold down Alt and click on the area you do not want to select to deselect.
Using the "[" and "]" keys, you can make the selection tool larger or smaller.
To remove white background in Photoshop, highlight it, and then press “ Delete". It will disappear!

Step 3
Go to the Refine Edge menu ( Refine edge) to adjust the selection area. This is the menu located in the "Selection" section; Refine Edge ( Selection; Refine edge) allows you to see how the image will look without the background. From now on, you have several possible options... First, choose On White from the View box at the top of the Refine Edge menu.
- Radius ( Radius): allows you to shrink boundaries. A value of 1–2 pixels will usually subtly exclude background bits;
- Smooth ( Smooth): Removes hard edges so you get a rounder selection.
- Feathering ( Feather): Blurs boundaries, avoiding bumps or tricky, imperfect highlights such as hair.
- Contrast ( Contrast): Sharpens the borders before removing the background in Photoshop. The opposite of the Smooth operation;
- Offset edge ( Shift Edge): Increases or decreases the selection based on a percentage of the original:

Step 4
Right click on the selection to remove it from the background. Click "OK" in the window " Clarify the border", Then right-click on any selected area. Select " Conclusion: on new layer "To separate the image from the background.
Make sure the selection is open when you right-click. If not, press the V key to bring up the normal cursor and then right-click:

Step 5
Delete the background layer to separate your image. Now you can remove the background in Photoshop... You can do this piece by piece, slowly removing the background and creating new layers by copying, or simply delete the whole layer. Either way, you will end up with an image with no background.
Method 2 of 2:
Using other tools

Step 1
Create a duplicate of your image. Let's say you have a picture of an elephant in the desert. Your goal is in Photoshop CS6 to remove the background so that you can add a new background behind the elephant, but the quick selection tools can affect parts of the elephant itself. Fortunately, you have several other tools at your disposal for handling complex areas.

Step 2
Use the Lasso Tool ( Lasso) to capture small manual areas. The lasso tool follows the mouse, making a selection after you completely close the selection outline. While this tool is difficult to use for large images, it is a great way to get precise selections.
Zoom in on the image, then use Ctrl / Cmd-click to add small sections or Alt / Opt-click to remove sections:

Step 3
Use " Color range» ( Color range) to remove most of the monochrome areas from the background. This tool selects large areas of similar color, such as grass, sky or wall. But if the image you want to save has a color close to the background, this method will not work.
To use it, you need to do the following:
- click on "Selection" in the top menu;
- select " Color range»;
- use the eyedropper to choose which color you want to highlight. You can also define specific colors by selecting them from the menu " Choose: by samples».

Step 4
Use the Pen tool ( Pen) to make neat, precise selections around objects. The Pen tool is the simplest and most powerful tool discharge. However, it takes time to master it. Just click around the image to place the points and the program will connect them. Click and hold the Pen tool in the toolbar and select Free Pen for curved lines from the drop-down list. When you're done, right-click on the line, and select " Select area».