When printing drawings from dwg format (AutoCAD program), problems constantly occur when opening files. If the version of the program in which the drawing was created differs from the version in which it is opened, then the drawing may not open correctly. The fonts will be replaced, and pictures inserted into the drawing may not be displayed. Therefore, the most reliable way to print a drawing is to save it in pdf or jpg format. Moreover, this saving is made convenient and simple. Since version 2009, AutoCAD has a built-in tool for printing drawings in PDF format. This way you will save a lot of time both for yourself and for the printing house.
1. After opening the drawing, run the standard “Print” command and select the “DWG to PDF” device in the list of printers:
2. Specify the desired size of the drawing in the "Format" list.

3. Place a frame around the drawing for output to PDF, as with regular printing:

4. Set the sheet orientation:

5. Check the "Fit" box in Print Scale.
Hello friends!
Recently I encountered the following problem: how to translate a file dwg V pdf. The fact is that not everyone has the AutoCAD program installed and the customer cannot print out a drawing or as-built diagram and asks to send it to pdf format.
I used to do this using the program Total CAD Converter. Good program and it can be downloaded on this site: http://www.coolutils.com/ru/TotalCADConverter
The only problem is that it is paid and costs 3,000 rubles. But you can use it for free for 30 days.
That's what I did. Alternatively, you can translate on the same site dwg V pdf online, but unfortunately these files are not quite adequate for some reason. Lines are drawn in different thicknesses. Here is the source file itself:

And here is what happens after online conversion:

And then I began to look for other ways to solve my problem and came across the site Mikhail Orlov http://acad-prog.ru/dwg-v-pdf/.
On this site I found an article on how to translate from dwg V pdf using AutoCAD program.
Without hesitation, I did not reinvent the wheel, but asked Mikhail to post this article on his website. So, read, study and implement.
“In this article we will look at how to convert files DWG to PDF.
When creating a project based on AutoCAD, there is always a need to transfer it to the customer or related organizations. The easiest way is to transfer the file in AutoCAD format with the dwg extension. But this method has several significant disadvantages. Firstly, it often happens that the person to whom you need to transfer the project simply does not have AutoCAD installed. Secondly, by transferring drawings in dwg format, you give the other person full access to the results of your work. Your works can be edited and used to their advantage.
In part, the AutoCAD developers made sure that users could protect their information. To do this, AutoCAD provides the ability to convert DWG files to PDF.
Well, the files in pdf format, can be opened by anyone using a free, publicly available program Acrobat Reader. And everything will be fine with information protection.
The procedure for converting a dwg file to pdf is quite simple. Let's take a closer look at it.
Converting an AutoCAD file to pdf is done by printing to the file.
Open your drawing.
Click the Application Button.
Move your mouse pointer below to the “Print” line. In the list that appears, select “Print”.
Or just press Ctrl+P on your keyboard.

The “Print – Model” window will open. There are many printing customization options. We will look at one of possible options print.
The main thing that needs to be done is to specify DWG To PDF as the printer. pc3. Let's look at some advanced settings for the DWG To PDF printer. pc3. To do this, after selecting the DWG To PDF printer. pc3, click on the “Properties” button.

In the window that opens, click on the line “Advanced properties”. Then click on the “Advanced Properties” button.

The DWG to PDF Conversion Properties window opens.
Here, in the “Fonts” frame, you need to select the “Enable All” radio button. AutoCad attaches all the necessary fonts to the PDF file. If you do not do this, it is possible that some text in the PDF file will not be displayed correctly. When opening the PDF file, it will display messages about which font is missing.

Framed " Additional settings output":
If you check the “Include layer information” box, the generated PDF file will have the ability to manage layers.

If you uncheck this box, a PDF file will be created without this option.

If, after creating a PDF file, you want it to immediately open in Acrobat Reader, check the “Open in PDF viewer when finished” box.
After the properties are set, click OK.
Then click OK in the “DWG To PDF Plotter Options Editor” window. pc3".

In the “Changes in Plotter Parameters File” window. In order to save the settings for other files, select the “Save changes in the next file” radio button and click OK.

All other settings are made as with normal sheet printing:
Specify the sheet format;
Print area; What to print: select “Frame”; Click on the “Frame” button<»; Указываем область печати;
(Selecting the print area can be done differently)
To preview what the printed document will look like, click “Preview...”;
If everything suits you, click “OK”.

A window will open in which you need to specify the location and name of the file. Click save.

AutoCAD will create a file with a pdf extension.
If in the settings you checked the box “When finished, open in a PDF viewer,” then after creation it will open. If not, then in order for it to be seen, it needs to be found and launched.
Why are such “body-movements” needed? It's very simple! Compass programs are often incompatible with each other. That is, a drawing, even the simplest one, made in the old version, will not open in the new Compass. Also, when opening a drawing, fonts and pictures may change. And in order to print a drawing, you probably need to save it in a universal format - PDF or Jpg. They are guaranteed to open on any computer in any printing house. About another drawing program - we already have AutoCAD.

3. In the proposed formats, select jpg#;

4. Important point. To preserve quality, it is best to set the “Resolution” to 300. “Shades of Gray” - if you need black and white drawings.

5. Now we learn how to save as pdf. This requires "virtual printers". These are programs that are installed under the guise of a printer, but they do not print documents, but convert them to pdf. The best "virtual printer" is doPDF. We have already written about him. In this article we will use a printer that is installed on the computer along with the Compass. It's simpler, but it's enough.
Open "Preview".

6. In the printer settings, select "Adobe PDF". And click "OK".

7. Thus we have both a jeep and a pdf. You can go print!

Good afternoon everyone!
Recently I received a very interesting question by email from a girl named Olya: how convert dwg to pdf. And this is a very relevant topic for those who do not have a printer for personal use. And there is one at work, at a good friend’s place, or at a regular printing and photocopying boutique, and it doesn’t matter where else. The important thing is that other computers are unlikely to have a CAD program installed that reliably reads the dwg format.
I hope you remember that the dwg format is the format of drawings in which we work and save all our patterns.
So what can be done here? It seems that you need to save the drawings in full size, but there is no printer, and simply re-taking screenshots is not an option...
There is a solution! You just need to convert the dwg format to pdf and you can safely throw the drawings and patterns onto a flash drive and run to the nearest printer :)
Pdf format is very popular and is used on almost all computers, mobile devices and tablets. And speaking in very professional language, the pdf format is a cross-platform electronic document format created by Adobe. It is used mainly to provide printed products in electronic form. Do you regularly download books from the Internet? 🙂
Converting dwg to pdf is easy!
Having asked this question, I first began to look for a solution in the program itself. Typically, sophisticated CAD programs have a built-in pdf printer. And it also appeared in the new version of the NanoCAD program.
But I hasten to disappoint you. The new version of NanoCAD is not free... Many people probably noticed this when they tried to update the version, right?
Well, what can you do... Developers put a lot of effort into improving their program, and they also need income. But after thinking about ordinary people like us, they still kept the free version, although not a new one.
It seems to me that we won’t have to be very upset about this. We have everything you need to create patterns on a computer at hand.
And in order to convert dwg to pdf we will find another solution. And that solution is doPDF - dwg to pdf conversion program format.
Now let's move on to the practical side of the issue.
- Download the doPDF program to your computer using this link. The program is free.
- Open the downloaded archive and run the .exe file in it (double click).
- After launch, the program will prompt you to select a language - install Russian.
- Click next (as if reading the greeting), and in the next window we agree to the terms of the agreement.
- Next, select the folder where we will install the program.
- Click the “next” button again, agreeing that the program will create a shortcut on the desktop.
- In the next window, you can set doPDF as the default printer by checking the box, or you can leave it unchecked. In any case, you will see this printer in the print settings.
- Next, next... Install and complete.
This is such a quick and easy installation. By the way, I don’t know about you, but my program shortcut never appeared on my desktop... But it is in programs.
Well, now let’s launch our NanoCAD program and select the required pattern for printing. I chose the one we recently built. And also open our template for printing ().
For the printing example, I'll just copy the sleeve of our jacket. To do this, select the sleeve and press Ctrl+C, go to the template tab and Ctrl+V and set it something like this:
Next, go to sheet 1, you can select it above the command line: 
Then select the menu “File” - “Print” or press the key combination Ctrl + P. In the window that appears, set the printing settings:
- printer - doPDF;
- paper size and orientation - A4, portrait;
- print area - sheet;
- check the box - multi-page;
- We check the scale - one to one.

Click the “Print” button. A window will appear in front of us where we need to select the location where we want to save our sheet in pdf format. You can also select a specific folder and check the box next to “Always use this folder”?, so as not to constantly select the same folder. 
Creating drawings in any drawing program, including AutoCAD, cannot be imagined without exporting them to PDF. A document prepared in this format can be printed, sent by mail and opened using various PDF readers without the ability to edit, which is very important in document management.
Today we’ll look at how to convert a drawing from AutoCAD to PDF.
We will describe two typical saving methods, when the drawing area is converted to PDF, and when the prepared drawing sheet is saved.
Saving a drawing area
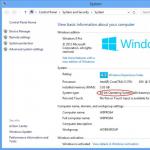
1. Open the drawing in the main AutoCAD window (Model tab) to save it as PDF. Go to the program menu and select “Print” or press the hotkey combination “Ctrl+P”

2. Here are the print settings. In the “Printer/Plotter” field, expand the “Name” drop-down list and select “Adobe PDF” from it.

If you know what paper format will be used for the drawing, select it in the “Format” drop-down list; if not, leave the default “Letter”. Set the document orientation to landscape or portrait in the corresponding field.
You can immediately determine whether the drawing will fit into the sheet dimensions or will be displayed in a standard scale. Check the “Fit” checkbox or select a scale in the “Print scale” field.

Now the most important thing. Pay attention to the "Print area" field. From the What to Print drop-down list, select the Frame option.
When you subsequently draw a frame, a corresponding button will appear to activate this tool.

3. The drawing field will open in front of you. Draw a frame around the desired saving area by left-clicking twice—at the beginning and at the end of drawing the frame.

4. After this, the print settings window will open again. Click “Preview” to evaluate the future appearance of the document. Close it by clicking the cross icon.


5. If you are satisfied with the result, click OK. Enter a name for the document and determine its location on your hard drive. Click "Save".
Saving a sheet to PDF
1. Let's assume that your drawing has already been scaled, designed and placed on the layout (Layout).

2. Select "Print" from the program menu. Set the Printer/Plotter field to Adobe PDF. The rest of the settings should remain default. Make sure that the Print Area field is set to Sheet.

3. Open the preview as described above. Likewise, save the document as PDF.