Formatting paragraphs in the editorWORD
A paragraph is a structural component of the text, usually connected logically and highlighted graphically, for example, in the form of indents. When you type text, pressing the Enter key each time creates a new paragraph. Setting the paragraph appearance determines its format, which is responsible for placing text on the page.
Setting up (formatting) a paragraph implies:
* distance to the right or left of the paragraph;
* paragraph line spacing;
* alignment of paragraph lines relative to the left and right margins;
* indentation or protrusion of the first line of a paragraph;
* spacing before and after the paragraph;
* paragraph breakdown into pages.
First of all, when starting to set up a paragraph, you need to be able to highlight it. To do this, do the following:
* Left-click three times on any word in the paragraph;
Use keyboard shortcuts:
*
*
Aligning Paragraph Lines
By default, paragraph text is left aligned. But documents are different, and the alignment may also require different. For example, for test work at universities, width alignment is accepted.
To set the desired alignment method for paragraph lines, use one of the following methods:
Go to the "Home" tab, and then highlight the paragraphs you need (the order does not matter).
In the Paragraph group, click one of the four available alignment buttons:
* “Left” – aligns paragraph lines to the left;
* “Centered” – aligns paragraph lines to the center (proportionally equidistant from the right and left edges);
* “Right” – aligns paragraph lines to the right;
* “Justified” – aligns paragraph lines simultaneously to both the left and right margins. In this case, the text will visually “stretch” (fill the space of the lines), and additional space will appear between words.
Select the paragraphs you need, and then use the keyboard shortcuts:
*
*
*
*
The most common use when formatting paragraphs is to indent the first line. How many times have I observed how “experienced secretarial assistants” and representatives of other professions related to the creation of texts electronic documents, have no idea how to set a paragraph using the Word 2010 interface. They usually use the double or triple spacebar press for this purpose, or, at best, the key
Now let's look at how to adjust indentations, and this can be done visually (by eye) or accurately (by setting a certain value in the "Paragraph" window). Visual adjustment involves using a horizontal ruler, where you can quickly change the size of the indentation, guided by the feeling of the desired size “by eye”. Fine tuning allows you to set the indent value in the units of measurement used in the document - it is worth using it when you know the size of the indent value.
Visually adjusting the first line indentation
To indent the first line of a paragraph, do the following:
1. Select the required paragraphs;
2. On the horizontal ruler, move the cursor to the “First line indent” icon;
3. Click and hold the left mouse button, and then drag the icon along the ruler to the desired location.
1. Click the tab indicator button until the First Line Indent icon appears;
2. Click on the horizontal ruler where you want the first line indent to be.
Fine-tuning the first line indentation
1. Select the required paragraphs;
2. Click right click mouse over the selected fragment;
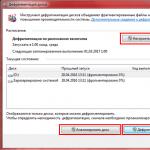
3. B context menu(Fig. 1) select the “Paragraph” item (you will be taken to the “Paragraph” window);
4. On the “Indents and Spacing” tab, in the “Indentation” group, in the “First Line” column, set the desired indentation value (default 1.25 cm).
1. In the window open document go to the “Home” tab;
2. Select the required paragraphs;
3. In the “Paragraph” group, click the “Paragraph” button;
In rare cases, in addition to the usual indentation of the first line of a paragraph, a protrusion is used. This technique is often used to design poetic prose and a number of artistic works, in particular, magazine articles.
To create a ledge, do the following:
1. Select the required paragraphs;
2. Click the tab indicator button (Figure 3) until the Tab icon appears;
3. Click the horizontal ruler where you want the first line tab to end, and then type the text for the first line of the paragraph. Now, starting from the second line, the text will begin below the tab position on the horizontal ruler.
1. In the document, select the necessary paragraphs, and then go to the “Home” tab;
2. In the “Paragraph” group, click the “Paragraph” button;
3. In the “Paragraph” window, on the “Indents and Spacing” tab, in the “Indentation” group, in the “First Line” column, select the “Indentation” value;
4. Set the desired value manually or using the controls.
Sometimes you need to quickly adjust the position of a paragraph relative to the edges of the document. In particular, when it seems to us that the indentation set for lists is too large, or the inserted images are too far from the left margin, and this spoils the overall appearance of the document. In this case, we can very quickly, “on the fly,” change the indentation value, selecting the optimal one. To set the left indent for all lines of a paragraph by a specified amount (a multiple of the standard), do the following:
1. Select the required paragraphs, and then go to the “Home” tab;
2. In the “Paragraph” group, click on the “Decrease Indent” and “Increase Indent” buttons. All paragraph lines will indent (or move to the side) from the left margin by 1.25 cm.
Note. Please note that each repeated click on these buttons shifts the paragraph lines by 1.25cm. Don’t get carried away, if you click too much on the decrease indentation button, you will remove it altogether, and on the contrary, by constantly increasing the indentation, you will ensure that the words completely disappear from view (more precisely, they will go beyond the edges of the visible area). To remove the first line indent for a paragraph, use the “Paragraph” window and select “No” in the “First Line” field or enter a zero value in the “On” field. You can also use the "Cancel" button on the panel quick access, to go back a few steps.
1. Select the necessary paragraphs;
2. On the horizontal ruler, move the mouse cursor over the Left Indent icon and, while holding down the left button, move it to the desired position.
If you get confused when setting up indents, you can easily fix this by removing them, to do this, do the following:
1. Select the required paragraphs;
2. On the “Home” tab, in the “Paragraph” group, click the “Decrease Indent” button.
1. Select the required paragraphs;
2. On the horizontal ruler, click (and hold) the left mouse button on the “Left Indent” icon;
3. Drag it to the starting position on the ruler, level with the left margin.
Quickly adjust the right indentation
It is also possible to carry out quick setup indentation on the right. This is needed when you are typing text that needs to look like a block, for example when you are writing poetry, tanka or poetic prose. In these cases, right alignment gives the text a special look, also emphasizing its theme.
To quickly set the right indent, do the following:
1. Select the required paragraphs;
2. On the horizontal ruler, click and hold down the left mouse button on the “Right Indent” icon;
3. Drag it to the desired position on the ruler.
To remove the right indent, do the following:
1. Select the required paragraphs;
2. On the horizontal ruler, click (and hold) the left mouse button on the “Right Indent” icon;
3. Drag it to the starting position on the ruler, at the level of the right margin.
Fine-tuning paragraph indentation
By default, paragraph lines begin immediately at the left margin and end at the right (if you fill a page with text in one large paragraph, it will look like a page-sized text block). Often you need to specify the exact distance from the left margin, or from the end of the lines to the right margin. In particular, this is necessary when you have clear requirements for the design of the work, in particular, the value of the indentation values. To do this, do the following:
1. Select the required paragraphs;
2. Go to the “Home” tab and in the “Paragraph” group, click on the “Paragraph” button;
3. On the “Indents and Spacing” tab of the “Paragraph” window, in the “Indentation” group, in the “Right” and “Left” items, set the desired value.
1. Select the required paragraphs;
2. Go to the “Page Layout” tab and in the “Paragraph” group in the “Left Indent” and “Right Indent” lines, set the desired value.
Paragraph formatting options include:
- padding values
- tab stop values
- text alignment
- line spacing alignment
To apply formatting, simply place the cursor anywhere in the paragraph that is to be formatted or select several paragraphs.
Using a ruler
The ruler, located at the top of the page, is divided into two areas: white - corresponds to the document text area, gray - indicates the page margins.
Four indent markers allow you to set paragraph indents. To set an indent, simply drag the corresponding marker to the desired location. To better understand the action of the markers, drag them around and see what comes out of it.
Right indent marker determines the distance from the entire paragraph text to the right margin.
Left indent marker specifies the distance from the edge of the paragraph text to the left margin.
If a first line indent is specified for a paragraph, the first line indent marker will move with the left indent marker, but the first line indent will remain the same relative to the text of the paragraph.
First line indent marker defines the indentation for the first line only (red line). Using this marker you can make a protrusion. To do this, the first line indent marker must be moved to the left of the left indent marker. In this case, the beginning of each paragraph formatted this way will begin to the left of the paragraph's body text.
The same operation can be accomplished using the protrusion marker. To do this, move this marker to the right of the indent marker of the first line of the paragraph. However, the result of seemingly one action can turn out different. What is the difference between indentation and left indentation?
When you move the left indent marker, the first line indent marker moves with it, thereby maintaining the difference between the first line indentation and the indentation of the remaining lines of the paragraph.
When you move the indentation marker, the first line indent marker remains stationary, causing the difference between the first line indentation and the indentation of the rest of the paragraph text to change.
By placing the left indentation marker under the indentation marker, we thereby remove the indentation/indentation of the first line.
Using the ruler you can control tab stops. What is tabulation?
When you press the "Tab" key, the cursor moves to a specific position.
The default is usually a multiple of 1.25 cm. The default tab stops are marked just below the ruler with gray tick marks. In the left corner of the top line there is a button for setting different modes tabs.
There are five tabulation modes in total:
- Left alignment
- Center alignment
- Right alignment
- Decimal point alignment
- Vertical bar

To select the desired tab, you need to click on the tab type button, and the alignment methods will change cyclically. When the desired tab is selected, you need to left-click in the desired place in the top ruler. This will set a new tab stop and remove any default tab stops to the left. If there is a need to move a tab stop, you need to move the corresponding tab stop marker with the mouse. To remove a tab, you must move the desired tab stop to the document area. You can use the keyboard shortcut Strl+Shift+N to remove all tab stops.
To quickly apply indentation, line spacing, and alignment settings to a paragraph, you can use the buttons on the Formatting panel.
Using the Dialog Box
All paragraph formatting parameters are available in the "Paragraph" window ("Format" - "Paragraph").

To set the necessary formatting parameters, you must enter numerical values in the appropriate fields of the window. The formatting result will be visible in the lower "Sample" window.
To control the placement of paragraphs on pages, use the options provided on the Page Position tab.

The No Dangling Lines option prevents a paragraph from breaking at the border of two pages if this would leave a dangling line on one of the pages.
The first or last line of a paragraph is called a hanging line if it is located at the very end/beginning of the page.
The "Don't break paragraph" option prevents paragraph breaks at the border of two adjacent pages.
The Keep From Next option prevents page breaks between the current paragraph and the paragraph that follows it.
Parameter "C" new page" inserts a forced oxbow break before the paragraph.
The "Disable line numbering" option prevents line numbers in a paragraph from being displayed when printing.
The Prevent automatic word hyphenation option prevents words from being hyphenated when you break lines within a paragraph.
The Tab stop dialog box allows you to specify tab stops by entering numerical values, set or remove multiple tab stops, and select a placeholder type for the tab stops.

Sometimes you need to copy the style of one paragraph and apply it to another. To do this, use the "Format Painter" button ("Standard" panel).
Position the cursor within the paragraph whose format you want to copy.
Click the Format Painter button.
Select the paragraph(s) to which you want to apply formatting.
In order to apply formatting to several pieces of text, you need to double-click on the “Format Painter” button and, in turn, select the text to which you want to apply the format. When finished, click on the “Format by Sample” button, and the button will become inactive.
In conclusion, I will also say that there are many options for formatting characters and paragraphs. Built-in formatting styles are used to use them together. But more on that a little later.
When you type content in new documents, Word applies default formatting to font and paragraphs. You can customize paragraph formatting, both in the standard Normal template, which is used to create new documents in most situations, and in any other templates and documents created on their basis. We will show you the procedure in both cases.
Changing paragraph formatting in the standard “Normal” template
To change paragraph formatting in the current document and in all documents that will be created from the Normal template, create a new Word file or open an existing one.
- If you are creating new file, then the Normal template styles will be applied to any content you start typing.
- If you open an existing document and want to set a different style for a paragraph, place the cursor in the paragraph whose formatting you want to change.
Open the tab Home(Home) and in the lower right corner of the section Paragraph(Paragraph) click button Paragraph options(Paragraph Settings).

In the dialog box Paragraph(Paragraph) select which settings you want to change. Please note that the settings are located on two tabs: Indents and Spacing(Indents and Spacing) and Position on page(Line and Page Breaks). When you're done with the settings, click Default(Set As Default).

A dialog box appears asking whether you want to change the default formatting only for the current document or for all documents based on the Normal template. To ensure that the new formatting settings are applied in all documents created, select an option All documents based on the Normal template(All documents based on the Normal.dotm template) and click OK.

Paragraphs that have the same style applied as the paragraph you selected will have their formatting changed.

Changing paragraph formatting in an existing document (and in its original template)
You can quickly change the formatting of all paragraphs that have the same style applied in an existing document. Open the document and on the tab Home(Home) press button Styles(Styles).

The panel of the same name will appear. Find the style you want to change in the list and hover your mouse over it. Click the down arrow and select from the drop-down list Change(Modify).

In the dialog box Changing the style(Modify Style) configure the desired formatting options. To open more options, click the button Format(Format).

To apply formatting changes to all new documents based on the current template, select the option In new documents using this template(New documents based on this template). This way, the formatting settings will be saved in the current template and will be used the next time you create a document based on this template.

Paragraph formatting
A paragraph in Word is understood as a fragment of text that ends with a ¶ sign (if you enable the display mode of non-printing characters, which corresponds to the same icon on the “Standard” toolbar). It appears every time the "" key is pressed. Enter» . When formatting a paragraph, change:
§ Alignment. The appearance of a paragraph is determined by how it is positioned in relation to the page: left, right, center, justified.
§ Paragraph indentation. The distance between a paragraph and the left (right) margin of the page. The indentation value can be negative, then we speak of a protrusion.
§ First line indent . It can be positive, zero and negative. Positive indentation is a “red line”.
§ Line spacing . The distance between lines of text in a paragraph.
§ Spacing before (after) paragraph . This is the vertical distance between the first line of a given paragraph and the last line of the previous paragraph (or, respectively, between the last line of a given paragraph and the first line of the next paragraph).
Paragraph formatting is done in one of the following ways:
1. Using the "Format" toolbar;
2. Using the program menu “Format”;
3. Using the context menu;
4. Using keyboard shortcuts.
Using the Format toolbar
It is enabled by default. Its central part is shown here, which is directly responsible for editing a paragraph (not a font). The purpose of the tools is clear from the tooltip after briefly holding the mouse on the tool. On the toolbar you can find tools for changing paragraph alignment, changing line spacing, indents, setting the outer border of a paragraph, and highlighting it with color.
By clicking inside a paragraph, we can determine which formatting tools were used: they will be highlighted. In the figure (see above) you can see that the selected paragraph is set to align the text to the width of the page.
By clicking the mouse on the tool buttons, we will change the corresponding parameter for the entire paragraph at once. But if we want to do the same for only part of a paragraph, then the corresponding fragment of text is first selected and then edited.
Format program menu
 The greatest possibilities for formatting a paragraph are contained in the “Format” dialog. The operating procedure is as follows:
§ Select the "Format" menu à » Paragraph..."
§ Select a tab "Indents and Spacing".
§ Set the desired type of alignment, indentation, position of the first line, space before (after) a given paragraph, line spacing.
§ Click the “OK” button to apply the settings.
Note
§ The position of the paragraph after changing the parameter is shown in the "Sample" window (that is, we can immediately see what would happen to the paragraph if we clicked on "OK" right now; so there is no need to rush to click on "OK" and look at this is a window; if suddenly we don’t like something there, we can immediately correct the shortcomings by changing certain parameters).
§ You can also set the tab stop value in this dialog by clicking on the “Tab stop…” button.
Keyboard shortcuts for paragraph formatting
Here are examples of keyboard shortcuts used in formatting. Ctrl+ QorCtrl+ L– the entire paragraph (within which the cursor is located at that moment) is aligned to the left, Ctrl+ E- in the center,Ctrl+ R– on the right edge.
Formatting paragraphs in Word. In any document you cannot do without text formatting. , we discussed in the last lesson, now it’s our turn to look at the issue of formatting paragraphs in Word. The main semantic unit of a text is usually a paragraph. Therefore, alignment commands and formatting operations are designed to change appearance separate paragraphs. Without a paragraph, the text will not look beautiful, and it is not very suitable for reading. You've probably convinced yourself of this? On sites where text is a continuous wall, your eyes get tired very quickly. And no matter how interesting it may be, visitors stop reading it mid-sentence and leave. That’s why a competent web designer must break the text into small paragraphs. Books written without paragraphs lose their appeal and most often remain unclaimed.
Therefore, paragraphs are a must. In Word you can make your work easier With in paragraphs. For this needs to be configured text editor"for yourself."
Formatting paragraphs inWord
Note
Setting paragraph formatting in Word is the same for all versions of the program, so you don’t have to worry about this.
To fully format a paragraph, use the "Paragraph " Enter the menu –Format, and select – Paragraph –
or right-click on the document field and select the item in the drop-down context menu Paragraph .
- In the window that opens " Paragraph" on the " tab Indents and spacing » configure Alignment paragraph
– Left edge
– Centered
– On the right edge
– Width
- In the dropdown list Level you can set the semantic level of a paragraph in general structure text.
- Panel Indentation defines the right and left borders of a paragraph relative to the right and left borders of the page.
- In the dropdown list First line You can set the presence and size of the “red line” (paragraph indentation).
- Panel Interval allows you to set spaces between paragraphs, as well as between the lines of a given paragraph. Increased spacing between paragraphs often replaces paragraph indentation.

- Tab Position on page is intended for formatting paragraphs that fall on the border between pages. Here you can prohibit tearing off one line from a paragraph, require that the entire paragraph be placed on one page, “attach” the next paragraph to this one, or start a new page with the current paragraph.

Note:
Using a window Paragraph It's very easy to format, but you shouldn't do it. It's useful for learning formatting techniques, but... practical work It's better not to use it.
Now let's look at more effective ways formatting paragraphs in Word.
There is a way - formatting paragraphs using a ruler . Many people don't use a ruler at all. But in vain - this is also quite a powerful tool in capable hands, and you will soon see this for yourself.
Formatting a paragraph using a ruler
Ruler in Word not only provides information about the document layout, but is also powerful tool formatting. It allows you to control the side margins and tab stops of the current paragraph. Paragraph boundaries are set by moving (dragging) special markers.
How to include a ruler inWord
In Word 2003 the ruler is included in the menu – View. You just need to check the box next to the entry Ruler .

IN Word 2007/2010 the ruler is also in the menu – View – Show and Hide block – Ruler.

Note

- The triangular marker located at the bottom left of the ruler (pointing up) sets the left border for all lines of the paragraph except the first.
- The inverted triangular marker at the top left defines the start line of the first line of a paragraph and allows you to create a paragraph indent.
- The square marker under the ruler is a control that is always located directly below the triangular marker for the left paragraph border. When you drag it, both left border handles move together, maintaining their relative position. This paragraph format can be used when formatting epigraphs, especially important fragments text, quotes and so on.
- The triangular marker located on the right sets the right border of the current paragraph.
- The ruler is also used to specify tab stops . It will already be formatting paragraphs using tabs . Tab stops are used when a row consists of several fields, for example in a simple table. By default, tab stops are spaced every half inch and are marked on the ruler with short vertical ticks.
- The symbol indicating the tab stop is located on the ruler to the left. It looks like " corner" By clicking on it, you can change the appearance of the tab character and, accordingly, the method of displaying the text.
The selected tab character is set by clicking on the ruler. You can later change its position by dragging it. To remove a tab character it is dragged outside the ruler.
After manually setting a tab stop, all default tab stops that precede it are removed, i.e. all your subsequent documents will already be with this new one paragraph formatting.
∟ Left-aligned tab stop position. The text is located to the right of the specified position, starting immediately at that location;
┴ Center aligned tab stop position. The text is positioned symmetrically relative to the specified position;
┘ Right-aligned tab stop position. The text is placed to the left of the specified position, ending at the specified location;
Types of tab stop markers:
Character-aligned tab stop position. Allows, for example, to arrange a column of numbers of different lengths so that the decimal points are located one below the other.
Note:
To move between tab stops, use the keys TAB And BACKSPACE .
That's how much new we learned today, and what is , And How include ruler in Word , and what is tab in Word . I hope that this new knowledge will be useful to you.