If your Epson Stylus NX, SX, S series printing device shows a message that “Some parts of the printer have worn out and you need to send it to service center", while all the LEDs on the printer are blinking, most likely this indicates that the resource of the so-called “Pampers” of the printer has been exhausted and needs to be replaced. Usually you can use various programs or utilities that allow you to reset the diaper counter and you can continue printing. But after a large cycle of printed sheets, sooner or later the diaper actually becomes overfilled with ink and it can simply leak out of the printer onto your desktop.
To avoid such trouble, we bring to your attention an article that describes in detail how to output diapers on printers and multifunction devices, using the example of Epson Stylus NX130, Epson Stylus SX130, Epson Stylus SX125, Epson Stylus S22.
For this we need a rubber tube and a 100 ml container. The pictures show the corners, in principle it is quite possible to do without them, the main thing is that the connections are strong and do not let ink through.

So, open the cover on the back of the MFP or printer; you may need a screwdriver for this. Disconnect the printer's rubber tube that is connected to the diaper and attach it to the tube that will discharge ink into the container. To do this, make two holes in the plug of the ink flask: one for the cable, the second for air outlet.


Next, everything is very simple, insert the end of the rubber tube into the ink container, and close the lid so as not to crush the cable, for free ink output. The waste ink container should be level with the printing device.


When performing all these actions, be extremely careful and do everything wearing protective gloves so as not to get your hands dirty;-)


In fact, there are two most common problems with Epson printers: the diaper counter is reset and the cartridges are reset. I am silent about drying out of the print head, since this is a problem with all inkjet printers. I described in the article “” about resetting the diaper counter and removing ink from it. But here is the problem with zeroing CISS cartridges for a long time remained without a decision.
More recently, Epson management realized that it was simply useless to fight the illegal installation of continuous ink supply systems (popularly called CISS for short) on Epson printers and decided to release two models of their printers with their own CISS already pre-installed (Epson L200 and Epson L800). I note that the L800 model is made on the basis of the best printer for home photo printing - Epson T50. I recommend it to everyone - you won't regret it.
The most pleasant surprise new printers had so-called chipless CISS installed on them. The beauty of such CISS is that the printer can print until the ink runs out in the system itself. That is, there are no longer printing stops on half a sheet. It seems like a small thing, but those who print large volumes of color images on Epson printers will understand me.
Now, after a little background, let's move on to our “patient” and begin the “operation” :)
First, remove the cartridges from the print head and remove the chips. We don't need them anymore. Some people simply cover the contacts of the chips with tape, but I don’t see the point in this, since we won’t need the chips from the cartridges anymore.
Then, without turning off the printer, launch the PrintHelp program. Download links necessary programs will be at the end of the article. After launching the program, we will see a window with an image of our printer.

Initially, the program starts in simplified mode. In order to enable the display of all possibilities for working with the printer, we need to go to the “File” menu and then to “Settings”.

Then, in the window that opens, check the box next to “Allow additional operations for printers” and click on the “OK” button

After this, the programs will appear on the right side additional settings printer


In the window that appears, click “Yes”. In the next window, click “I understand” and wait for all operations to update the printer’s firmware to complete.


Once all operations are completed, you will be prompted to restart the printer.

We turn off the printer and when we turn it on we are happy with the chipless Epson SX130.
Note
When flashing the printer to a chipless one, cleaning the printer through standard utility Epson. Now to clean the printer we will use a third-party utility called PrintClean. Great program- nothing superfluous. I doubt that you will have any problems with it. You can download the program from the link at the end of the article.
If you doubt that you can understand PrintClean, do everything according to the instructions.
First, let's launch the program. The program icon will appear in the tray next to the Windows clock.


After this, a window with the cleaning process will appear in the upper right corner of the desktop.

Once the cleaning is complete, the program will close this window itself.
That's basically all. Sometimes it happens that the firmware crashes and the procedure must be repeated. I don’t consider this a problem, since the whole procedure in real life takes a maximum of 30 seconds. But what a pleasure it is to forget about resetting cartridges.
Thank you all for your attention. Subscribe to our blog news. Comment, like. After all, this will be a reason to continue working on the blog for you.
Best regards, Oleg Smetanin
To reset the waste counter Epson ink SX125 and SX130 program used Adjustment Program ver 1.0.1. Actually, it is intended for ME320 and TX121, but SX125 and SX130 are a blast.
Unfortunately, you cannot download the program from our website.
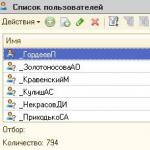
Operating procedure: We are launching a service program for Epson ME320, TX121 printers, which is suitable for resetting the diapers of many new printers, incl. and S22, SX125, SX130...
IMPORTANT! Do not try other functions other than resetting the diaper if you do not want problems for your printer.
Connect the printer to your computer with a good USB cable. Turn on the printer and run the program.
Select model TX121 for MFP type SX125, SX130 ... or ME320 for S22.
Destination you can choose ESP. Port - auto.
Next, as usual - Particular Adjustment Mode
Select an item Waste Ink Pad Counter and we go into it.
We check the boxes on both counters - Main Pad Counter and FL Box Counter.
Click Initialization.
Turn off the printer so that it remembers the reset.
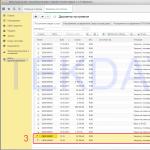
We launch the universal PrintHelp utility and check the value of the diaper counters - they should be 0%.
If it is more convenient for you to watch and listen, then how to use this program is shown in this video:
To add this page to your "Favorites" click
Other articles in this section:
"During active use inkjet printer there comes a time when the printer refuses to work and displays an error message, requiring you to contact a service center. Depending on the printer model, notification of this error occurs in different ways, but the most standard way of displaying an error message is by alternating flashing of two red LEDs under the printer buttons, and also a window with an error pops up on the computer monitor.
Moreover, a warning about the imminent end of the service life of the absorbent pad (diaper) also appears in the form system message on the computer monitor.

After the warning message appears, you have the opportunity to print another 15-20 A4 images (photos), after which the printer will refuse to print until the waste ink counter is reset.
All inkjet printers use a special container to collect waste ink (Waste Ink), which is often called a “diaper”. This “diaper” is a container containing absorbent material that absorbs waste ink well.
Where does waste ink come from in an inkjet printer? Every time you turn it on, the print head is automatically cleaned - a small amount of ink is pumped from the cartridges into the print head, which at this moment is in the extreme right (left) position of the printer, and the ink is “dumped” into the “diaper”. Also, when standard cleaning is started through the printer driver, ink is pumped from the cartridges through the print head into the absorber.
Since the volume of the ink collection container, with the absorber located in it, has a certain limitation, sooner or later, there comes a time when the containers overflow and the ink begins to flow out, which causes contamination of both the printer itself and everything that surrounds it. .
To avoid such an extremely unpleasant situation, absolutely all inkjet printers are equipped with a system for monitoring the amount of waste ink. In reality, this system is nothing more than a program counter that counts the number of all printer starts and all head cleaning procedures performed. Since the volume of ink pumped out of the head during cleaning procedures is approximately known, and the capacity of the sump is also known, it is not difficult to calculate when it will fill.
When the counter value for the amount of waste ink supposedly drained into the sump reaches the value preset in control program printer, the printer first issues a warning that the absorbent pad is about to expire, and soon completely blocks the ability to send a print job.
If the “diaper” of an inkjet printer is overfilled, the service technician must take the following actions:
- replace absorbers - “diapers”
- reset (zero) the Waste Ink Counter."
You can reset the used diaper ink counter using the special PrintHelp service program from the SuperPrint development team (Resetters). PrintHelp- universal service program for Epson, Canon printers.


The program can perform the following functions for Epson printers (not for all models):
- checking the current value of the waste ink counter
- reset the waste ink counter (some models require a RESET CODE)
- cleaning the print head
- enhanced cleaning of the print head during initial refilling
- read and write serial number printer
- reading and USB recording ID
- read and write HEAD ID
- creating an EEPROM backup dump
- paper feed test
- nozzle check and test
- printing of color fills
- initialize (disable) PF deterioration offset
- obtaining status about the printer status
- ink level reading
- reset Ink Level and reset Diaper in printers L100, L200, L800 free
List of supported Epson printer models:
Models for which diaper reset is carried out WITHOUT a Reset Code are highlighted in green. Resetting diapers WITHOUT Reset Codes is possible only for countries: Ukraine, Russia, Kazakhstan, Belarus, Moldova, Georgia
Artisan: Artisan 50, Artisan 1430, Artisan 700, Artisan 710, Artisan 725, Artisan 730, Artisan 800, Artisan 810, Artisan 835, Artisan 837
B: B40W, B42WD, B1100, B1110
BX: BX300F, BX305, BX310FN, BX320FW, BX525WD, BX600FW, BX610FW, BX620FWD, BX625FWD, BX925, BX935
C: C58, C59, C62, C63, C64, C65, C67, C68, C76, C77, C78, C79, C82, C83, C84, C85, C86, C87, C88, C90, C91, C92, C93, C94, C95, C97, C98, C99, C110, C120
CX: CX2800, CX2900, CX3100, CX3200, CX3300, CX3400, CX3500, CX3600, CX3650, CX3700, CX3800, CX3900, CX4000, CX4080, CX4100, CX4500, CX4600, , CX4700, CX4800, CX4900, CX5000, CX5700F, CX5900, CX6300, CX6400, CX6500, CX6600, CX7300, CX7700, CX7800, CX8300, CX8400, CX9300F, CX9400Fax, CX9500F
D: D68, D78, D88, D92, D120
DX: DX3800, DX4000, DX4200, DX4800, DX5000, DX5050, DX6000, DX7400, DX7450, DX8400, DX9400F
EP: E-600, EP-302, E-600, EP-702A, EP-703A, EP-705A, EP-706A, EP-775A, EP-801A, EP-802A, EP-804A, EP-804F, EP- 901F, EP-902A, EP-903
K: K100, K101, K200, K201, K300, K301
L: L100, L110, L120, L200, L210, L300, L350, L351, L355, L550, L555, L800, L1300, L1800
M: M100, M105, M200, M205
ME: ME2, ME-10, ME-20, ME-30, ME-32, ME-70, ME-80, ME-82WD, ME-100, ME-101, ME-200, ME-300, ME-301, ME-303, ME-320, ME-330, ME-340, ME-360, ME-401, ME-403, ME-510, ME-520, ME-530, ME-535, ME-560, ME- 570, ME-600F, ME-620F, ME-650, ME-900WD, ME-940FW, ME-960FWD, ME-1100
NX: NX110, NX125, NX127, NX130, NX200, NX210, NX215, NX220, NX230, NX300, NX305, NX330, NX400, NX410, NX415, NX420W, NX430, NX510, NX515, NX530, 620, NX625
P: P50, P60
PX: PX610FW, PX650, PX659, PX660, PX700W, PX710W, PX720WD, PX730FWD, PX800FW, PX810FW, PX820WD, PX830FWD, PX-203A, PX-V600, PX-V630
Photo: Photo 820, 830U, 890, 900, 950, 960, 1280, 1290, 1390, 1400, 1410, Photo 1430, Photo 1500, 2100, 2200
PictureMate: PM100, PM210, PM215, PM225 PM235, PM240, PM250, PM260, PM270, PM280, PM290, PM310. Diaper reset is NOT available. Reading is available.
PM: PM-3500C, PM-4000px, PM-G800, PM-G4500, PM-G5000, PM-A820, PM-A890
R: R200, R210, R220, R230, R240, R245, R250, R260, R265, R270, R280, R285, R290, R295, R300, R310, R320, R330, R340, R350, R360, R380, R390, R800, R1800, R1900, R2000, R2400, R2880, R3000
RX: RX420, RX425, RX430, RX500, RX510, RX520, RX530, RX560, RX580, RX585, RX590, RX595, RX600, RX610, RX615, RX620, RX630, RX640, RX650, 0, RX685, RX690, RX700
S: S20, S21, S22
SX: SX100, SX105, SX110, SX115, SX117, SX125, SX130, SX200, SX205, SX210, SX215, SX218, SX230, SX235, SX400, SX405, SX410, SX415, SX420W, SX430, SX435, SX510, SX515, SX525WD, SX600FW, SX610FW, SX620
T: T10, T11, T13, T20, T21, T22, T23, T24, T25, T26, T27, T30, T33, T40W, T42WD, T50, T59, T60, T1100, T1110
TX: TX100, TX101, TX102, TX103, TX105, TX106, TX109, TX110, TX111, TX115, TX116, TX117, TX119, TX120, TX121, TX125, TX130
TX200, TX209, TX210, TX219, TX220, TX230, TX300F, TX320F
TX400, TX405, TX408, TX409, TX410, TX419, TX420W
TX510FN, TX515FN, TX525, TX550W, TX560WD, TX600FW, TX610FW, TX620FWD, TX650, TX659
TX700W, TX710W, TX720WD, TX800FW, TX810FW, TX820FWD, TX830FWD
WorkForce: WorkForce 30, 40, 42, 310, 315, 320, 323, 325, 500, 520, 600, 610, 615, 630, 635, 840, 1100
WorkForce WF-7010, WF-7011, WF-7012, WF-7015, WF-7018, WF-7510, WF-7511, WF-7515, WF-7520, WF-7521, WF-7525
WorkForce WF-2010, WF-2510, WF-2520, WF-2528, WF-2530, WF-2538, WF-2540, WF-2548
WorkForce WP-4011, WPM-4011, WP-4015DN, WP-4020, WP-4022, WP-4025DW, WP-4092, WP-4095DN,
WP-4511, WP-4515, WP-4520, WP-4521, WPM-4521, WP-4525, WP-4530, WP-4531, WP-4532, WP-4533, WP-4535, WP-4540, WP- 4545, WP-4590, WP-4592, WP-4595 - Diaper reset is NOT available. Reading is available.
XP: XP-20, XP-30, XP-33,
XP-100, XP102, XP-103, XP-111,
XP-200, XP-201, XP-202, XP-203, XP-204, XP-205, XP-206, XP-207, XP-208, XP-211, XP-212, XP-214, XP- 215, XP-216, XP-217
XP-300, XP-302, XP-303, XP-305, XP-306, XP-311, XP-312, XP-313, XP-315,
XP-400, XP-402, XP-403, XP-405, XP-406, XP-411, XP-412, XP-413, XP-415, XP-510,
XP-600, XP-610, XP-605, XP-615, XP-700, XP-710, XP-750, XP-800, XP-810, XP-850, XP-950
For those printers in which the diaper is made in the form of a separate cartridge with a separate chip, it can only be reset using chip programmers.
Using the program free. All functions are supported incl. and diaper reset function. For some models this function works after entering