Extensions add new functionality to the browser.
Adding an extension to Chrome is generally easy.
All work is done in the browser Google Chrome.
So, to add an extension to Chrome, go to Settings and management of Google Chrome.
Finding the entrance to the settings is easy. Hover your cursor over the three horizontal bars in the upper right corner of the Google Chrome browser. A hint will appear - Setting up and managing Google Chrome.
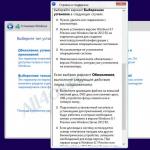
Click on the button with three stripes. A context menu will open (Fig. 1).
Fig.1 Adding an extension to Chrome – Settings and management of Google Chrome
There are two ways to do this.
First: V context menuSettings and Google Chrome control click Settings, then in the window that opens click Extensions.
Second: in the context menu Settings and Google Chrome control choose Additional tools , then in the menu that opens, click Extensions.
The result will be the same. We will get to the section with already installed extensions in chrome.
If we compare, the second method is faster and preferable, but in general this is an amateur job.
You can also access extensions via address bar chrome by entering the address - chrome://extensions/.
As already mentioned, here we will see all installed extensions.
To add new extension to chrome you need to click on the link - More extensions .
It is located below the list of installed extensions.
There are quite a lot of extensions here and at first it’s difficult to quickly add what you need.
To make it easier to find the required extension, there is a line at the top left Search by store. It will help you a lot if you know the name of the extension.
For example, to find an extension for the site’s TIC check button, just enter the phrase yandex tyc google pr indicator.
The required extension will open.
Click on the button For free. The extension verification process will begin.
Then a dialog box will appear New extension confirmations.
Click Add. The check is carried out again and a dialog box will appear asking you to activate the added extension in Chrome.
There are times when when trying to add an extension to Chrome, an error is thrown during verification.
Then you can try adding the extension to chrome by clicking anywhere else in the selected extension, not on the button For free.
In this case, a new dialog box will open and in it, click on the button to add For free and then the process of checking and adding as usual.
Sometimes it helps.
Or you can simply click update in the error dialog box and repeat the process of adding the extension to Chrome.
Usually everything ends well. A new extension is being added to Chrome.
You can see it immediately by going to the section Extensions.
The added extension will already be enabled.
So, we looked at the whole process of adding an extension to chrome (google chrome).
But the path to searching and adding an extension can be significantly shortened.
To add an extension to Chrome, you can simply enter in the address bar:
https://chrome.google.com/webstore/category/extensions?hl=en
Good day, dear readers, today we will continue to study the Google Chrome browser, and consider a few more things from its functionality. The topic of today's note will be how to save the Google Chrome extension to your computer, by this we mean creating a folder on your computer from which, at any time without the Internet, you can install the extension.
And so earlier I told you which ones I use in my practice, we looked at how to install, disable and delete them. Let's imagine the situation. what you would always like to have in the arsenal of your distributions, the installation files of your chrome extensions, so that you can install it anywhere and without the Internet. Let's first understand where the extensions folder is located in chrome.
It is located in your user profile, the folder itself is hidden, so you need to enable the display of hidden and Windows folders. I have a dozen, but it’s done the same way everywhere, read the article on the link on the left.
C:\Users\Username\AppData\Local\Google\Chrome\User Data\Default\Extensions
As you can see, their names are not particularly readable, but you can of course go into each of them and:
- Look at the extension icons to understand what’s here
- View version
- Get into the script code
But there is a much simpler way, follow the link
https://chrome.google.com/webstore/category/apps
And in search bar paste any copied name from this abracadabra. As a result, you see, I found out that this is our Access to RuTracker extension.

And so, in which folder of the chrome extensions we found out, now we need to learn how to drag and drop them.

If you just want to copy the folder with extensions and transfer them to another computer, then you will not succeed. We have two options for transferring.
- This is a chrome extension packaging and porting
- Downloading packages in .crx format and then installing them.
How to install an extension in google chrome manually
And so, in order to be able to install the extension in Google Chrome manually, consider the two options described above.
Packaging extensions in chrome
Go to Setting up and managing Google Chrome > Additional tools > Extensions. Check the Developer mode box and click the Package extension button.

Select a review and indicate the full path to the folder with the plugin, I did it like this
C:\Users\lacky\AppData\Local\Google\Chrome\User Data\Default\Extensions\apdfllckaahabafndbhieahigkjlhalf\14.1_0

A file of .crx and .pem format is generated, the first is the installer, and the second is the private key.

This is what it looks like in the folder.

Next, you take these files and transfer them to new computer. Then open Google Chrome and simply transfer the file with the .crx extension into it. Once the installation begins, sometimes you may be asked for confirmation.
I would like to note that, unfortunately, this is how you can transfer 90 percent of chrome extensions

For example, I transferred the WOT plugin like this

Alternative method to get CRX file
Installing the Give Me CRX extension will help us, then go to any plugin you like in the store, look at its installation page and right-click

As a result, you will be redirected to a page with a download link.

If a window appears that it is impossible to add an application, extension or script from this site, then go to the address in your browser chrome://extensions
Then simply transfer the crx file and you will see the installation wizard.

This is how easy it is to create your offline collection of Google Chrome extensions,

First, a little about what an extension is: an extension is a small add-on for the browser that expands its functionality. Extensions can perform a wide variety of functions: they make it possible to download music or videos where you simply cannot download them, for example, on VKontakte or Youtube. They simplify working with documents, images, and give you the opportunity to choose which search engine use in a specific situation without going to the search engine website, change appearance site.
Extensions in Google Chrome are installed from the official application store, don’t let the name confuse you - you don’t have to buy anything. To get to the extension store, follow the link
Or go to the store using the browser menu: in the upper right corner of the browser, click on the button with three dots. The browser menu will open, in it you need to select "Additional tools." Another window will appear in which you need to find the item "Extensions" and click on it:
Now you are in the tab with extensions installed in the browser. If no extensions have been installed before, then nothing will appear here, or pre-installed ones will be displayed Google extensions Chrome – documents, presentations, spreadsheets. Depends on the browser version. Click on the menu item at the top left "Extensions", then down to "Open Chrome Web Store":


after which you will be taken to the extension store. Here you can view all available ones, sort them by categories, capabilities, ratings. The only negative is the language; not all extensions have a description and interface in Russian.

If you know which extension you need, then just enter its name in "Search by store" and press Enter. Please note that search results may contain not only extensions, but also applications. To avoid mistakes, select from the search results "Extensions". From the results found, select the required extension and click the button "Install":

After installation, an icon should appear in the upper right corner, which can be used to manage the extension, configure it, enable or disable any functions:

Settings are activated by right-clicking on the icon. In some cases, there may not be an icon; it all depends on the extension being installed and its capabilities.
How to install a third-party extension in Google Chrome
If you have a third-party extension or user script from a source you trust, but for some reason this extension is not available in the Google Chrome store, you will not be able to install it in the usual way. To ensure security, installing third-party extensions, i.e. extensions not from the store, is prohibited in Chrome. Below are ways you can work around this limitation.
Installing the downloaded extension in .crx format
- First you need to open the extensions page in the browser, as described above: Browser menu in the upper right corner > Additional tools > Extensions. Or copy chrome://extensions/ into your browser's address bar and press Enter.
- At the top of the page there is a "Developer Mode" switch, activate it. 3 will appear below additional buttons: "Pack extension" And "Update extensions":

- Extension file ending with .crx, rename it so that it ends with .zip and open it with an archiver as a regular archive. Unpack it into a folder prepared for this (for example, create a folder on drive “C” called Extensions, or any other name).
- In the browser, on the page with extensions, click on the button "Load unpacked extension" and in the window that appears, select the created folder, then click OK.
The extension will be installed in the browser, now all that remains is to activate it by moving the switch next to the extension to the “Enabled” position.
Installing a user script - a file like .user.js in Google Chrome
Method one, simpler, but requires installation additional expansion. The extension is called tampermonkey and must be installed from the Google Chrome store. After installation, it will be available in the upper right corner of the browser. When pressed left mouse button The following window will appear on the extension icon:

in which you need to select an item "Create new script". Please note that opposite the point "Enabled" there should be a green checkmark.
A window will open to create a new script. Now you need to open the downloaded user script using a text editor, copy the code from it and paste it into this window in the browser. Then click on "File -> Save":

The script is ready to work.
The second method of installing a user script– without using extensions. To do this, you will have to modify the script a little, create a manifest.json file for it, thanks to which the script can be installed as an unpacked extension.
- First you need to download the script file itself called *.user.js.
- Now create a folder and put the script in it (for example, create a folder on drive “C” called Extensions, or any other name).
- Open the script using a text editor. Pay attention! Ordinary Windows notepad may not be suitable - it is advisable to use text editor with the ability to change the encoding, for example Notepad++. The text of these two files must be in UTF-8 encoding, otherwise installation will not work. In the script file, at the very beginning, find following lines:
// @name ... // @version ... // @description ... // @include ... (can be several) // @exclude ... (can be several)
- In the same folder, create a manifest.json file and paste this template into it (or download the finished file):
( "content_scripts": [ ( "exclude_globs": [ "all_domains_and_paths_from_exclude_directives" ], "exclude_matches": , "include_globs": [ "all_domains_and_paths_from_include_directives" ], "js": [ "userscript_file_name.js" ], "matches": [ " http://*/*", "https://*/*" ], "run_at": "document_idle" ) ], "converted_from_user_script": true, "description": "description_of_your_user_script", "name": "name_of_your_user_script" ", "version": "userscript_version_number", "manifest_version": 2 )
"content_scripts" : [ ( "exclude_globs" : [ "all_domains_and_paths_from_exclude_directives"] , "exclude_matches" : , "include_globs" : [ "all_domains_and_paths_from_include_directives"] , : "description_of_your_userscript","name" : "your_userscript_name", "version" : "userscript_version_number", "manifest_version" : 2 |
Fill it with the userscript data you looked for in step 3.
userscript_version_number- up to 4 numbers separated by dots. For example, 2.1.3
userscript_file_name.js- name of the script file located next to the manifest.json file
all_domains_and_paths_from_include_directives- each in quotes, separated by commas, with all metacharacters like “*” - all paths from @include directives, which are written at the beginning of the userscript file (for example, [ “http://site1.ru/*”, “http:// site2.ru/*" ]);
all_domains_and_paths_from_exclude_directives- the same for @exclude directives
After everything is ready, the userscript is installed as a third-party extension. Browser menu in the upper right corner > More tools > Extensions. Check the “Developer mode” checkbox, then select “Load unpacked extension...” and in the window that opens, select the folder with the newly created files. If everything is done correctly, the user script will be added to the browser and activated. The only negative this method is that every time you launch the browser, it will display this window:

notifying you that it has a third-party extension installed that may be unsafe. Just click “Cancel” and everything will work.
Hi all. I am often asked about extensions for Google Chrome, and the questions are quite standard - where are they located, how to enable or disable them, how to configure them, etc. In this article we will look at basic setup extensions. When I first started using this browser, which was new to me, I didn’t like it because it was too simple in its capabilities. But over time, it got better and better, and I couldn't resist switching to it.
Extensions for Google Chrome go by many names, often called plugins or add-ons, and sometimes called applications. Although, applications are a separate category in the Google Web Store, which most often represents links to other websites or games and has nothing to do with extensions.
Where are extensions for Google Chrome?
I already wrote about where to look for extensions and how to install them in . To go to the extensions tab, you need to go to the browser menu, then select “ Tools", then click on the item " Extensions»:
There are two other ways to access extensions: go to your browser history or go to its settings. In both cases, you can see the History/Extensions/Settings trio on the left. You can also click on the extension icon right click mouse and select “Settings”, if available for this plugin.
How to enable, disable, remove and update plugins for Google Chrome.
Disabling or removing extensions is very easy. Look at the picture below. If you right-click on a plugin, you can choose what to do with it in the context menu.

If the plugin has settings, you can access them by clicking on the corresponding item. For complete removal extensions from Google Chrome, you need to click on the item “ Delete", to disable - " Disable" Paragraph " Hide button" allows you to hide the extension from the panel, but it will continue to work.
To delete hidden extension, you need to go to the extensions tab and click on the trash can icon. Here you can also change the plugin settings and indicate whether they can work in Incognito mode or not. By default they can't.

Paragraph " Settings» allows you to change the add-on settings, if any. Sometimes I'm like that simple plugins that they don't even have settings. Most have them, for example, as in a plugin for text translation or an extension for customization smooth scrolling in Google Chrome - — You want the pages to turn smoothly, right?
The question often arises, how to update plugins for Google Chrome? To which I will answer you that you do not need to update them. They update themselves background, without your participation. It’s the same with updating Google Chrome itself - it also updates itself quietly in the background, which is a convenient solution.
If you have plugins are not installed from the web store, then you need to do the following: create a “Downloads” folder in the “My Documents” folder. After this everything should work. If desired, you can then move the folder for the downloaded files to another convenient location.
I would also like to add a few words about
Almost all plugins that work in Google Chrome will work in Yandex Browser, Chromium, the browser from Mail.ru and other variations of Google Chrome. Therefore, do not specifically look for plugins for Yandex Browser or similar ones, know that in most cases the plugins will work in all these browsers.
Frequently Asked Questions
1. chrome disable fps left- this means that you have the Fraps program installed. You can just turn it off Fraps program or change the settings so that the fps indicator is not displayed.
That's all for today, thank you everyone. If the article was useful to you, share the information in social networks with friends. If you have any questions, write them in the comments, we will find a solution.
Small useful article from one of our readers.
The path I have chosen may seem long or confusing to you, but it has the right to exist.
So let's get started:
1. Launch Chrome and go to the extensions menu at chrome://chrome/extensions
2. Switch to developer mode
3. Appear additional features, which Google developers Chrome nicely provided us, ordinary users, with the ability to repackage the extensions installed in Google Chrome.
4. Click the "Pack extensions" button and the following window appears in front of us:

Now a little more about the location paths of extensions installed in Google Chrome for Windows 7:
C 1:\Users\Username 2 \AppData\Local\Google\Chrome\User Data\Default 3 \Extensions\
For Linux Ubuntu 11.04 4:
/home/username 5 /.config/google-chrome/Default 3 /Extensions/
1 – The drive name may vary, usually this is the drive on which Windows 7 is installed
2 – Username on the system who has the Google Chrome browser installed
3 – If you have several users in Google Chrome, the folder name may be different (for example Profile 1, etc.)
4 – Tested personally on Linux Ubuntu 11.04, perhaps in other distributions the paths may be slightly different (also the path may differ for beta, dev, canary Google versions Chrome)
5 – Username on the system who has the Google Chrome browser installed
5. We found a folder with extensions, looked into it and saw many subfolders with names in the style of “blpcfgokakmgnkcojhhkbfbldkacnbeo” - these are our extensions, in each such folder there is a subfolder with a name in the form “4.2_0” - it denotes the version of this installed extension.
Now a small digression: Each extension is located in a folder with a name generated by the browser itself, i.e. Just by looking at the folder with extensions, it’s difficult to say which is which, but you can turn on your head and, based on indirect data, find out which extension is in a particular folder. Such data includes: a) extension version (the name of the folder with the extension version will be a good hint for us). b) the icons inside with the extension folder will also be a good guide. c) you can simply view the contents of the scripts and identify what extension is in front of us.
I didn’t bother too much and made a copy of all the extensions I had; later I can give all the packaged extensions regular names.
6. Now the packaging process itself, it can be a little tedious (and I warned that the method is “confusing”, but we are not looking for easy ways ;), but it really works ( alternative ways I didn’t find it, and I didn’t really look for it, this one suited me).
In the "Packaging extensions" window, indicate the full path to the extension being packaged; for clarity, I will give an example of the full path to one of the extensions installed in Google Chrome on my computer in Windows 7
C:\Users\Administrator\AppData\Local\Google\Chrome\User Data\Default\Extensions\capoflidgjlhkbndkbnopnbnmkfcjbgn\1.6.0.8_0
(In Windows 7, in the expansion folder selection window, the ability to view hidden folders, which is what the AppData folder is, so it’s easier to copy the full path to the extension in advance and simply paste it into the window for selecting the extension path; no such problems were observed under the Ubuntu OS, where the folder is selected as normal).

Then click the “Pack extensions” button if you get a message

Then you need to specify the path to the file private key, it lies one directory up from the folder with the extension.
Extension path (as above):
C:\Users\Administrator\AppData\Local\Google\Chrome\User Data\Default\Extensions\capoflidgjlhkbndkbnopnbnmkfcjbgn\1.6.0.8_0
Path to the key file:
C:\Users\Administrator\AppData\Local\Google\Chrome\User Data\Default\Extensions\capoflidgjlhkbndkbnopnbnmkfcjbgn\
I think it won’t be difficult to paste the same path copied in advance into the bottom field and delete the last directory.
7. That's it, your efforts have been rewarded, a message should appear.

This means that our extension is packaged and is in specified address, you need to copy/transfer the extension.crx file and the key file to a separate folder, for further transfer of this extension to another computer with installed browser Google Chrome.
8. To package the remaining extensions, you need to repeat the operations starting from point 6 of our manual.
Now you are the proud owner of an offline collection of your favorite extensions for Google Chrome. You copied everything onto a flash drive, brought them where you needed them and decided to install them. Ask me "how to do this?" It's very simple. Open Google Chrome and drag the file with the .crx extension onto its window. Chrome will ask you one single question: