All main connectors are located on the back panel of the router. Turn the device over and note the connection ports network cables. As a rule, there are five of them: four for cable connection of devices home network and a separate cable connector provided by your Internet provider. Insert the cables into the required slots, and insert the power supply connector into the round port. After that, plug the power supply into the outlet and press the button on the router to turn it on.
Attention! The Netgear manufacturer does not recommend connecting or disconnecting Internet cables while the power is on. This may cause the router to fail.
An interesting feature of Netgear routers is that budget models have two LAN ports instead of the usual four. In this case, the ports are not visually separated, but differ only in color. The cable from your provider must be inserted into the blue port, and wired home network devices into the yellow port.

After connecting the cables, you need to clarify the details for logging into the admin panel of the router. You will need the control panel address, username and password for the device. Turn the router over and find this information on the sticker at the bottom. Typically a standard name account: admin, and password: password (on earlier models the combination 1234 was also used). In addition to the router's IP address, there is a special address for logging into the control panel in Netgear: routerlogin.net. When using it, the router's IP is detected automatically, after which redirection occurs.

Important! If there is no login information sticker on the bottom of the router, check the router box. The necessary sticker with information can be located on it.
Basic setup
Open any browser and enter the router address that you specified earlier in the address bar. Go to this address and enter the specified username and password, then click “Login.” Upon successful login, the “Status” tab will open in the Netgear control panel. It displays the network status, Wi-Fi settings, number of connected devices and status additional functions router.

Pay attention! In this and the following screenshots, the setup is performed using the Netgear R7000 router as an example, since it has maximum number parameters. In other Netgear routers, the setup is similar, but some functions may be missing.
Among the conveniences of the latest versions of the Netgear web interface, one can note the division of all router settings into “basic” and “professional”. It is implemented in the form of two horizontal tabs: “Basic mode” and “Advanced mode”. settings". For example, the Status tab from basic mode corresponds to the “Router Status” tab from the additional settings. At the same time, much more technical information is displayed in professional mode.

To configure the connection, go to the “Settings -> Internet Settings” menu. Check the type of connection, as well as the presence of a username and password, in your agreement with your Internet provider. If the connection is password protected, check “Yes” in the first setting item, and then select the connection type from the drop-down list. There are options to choose from: PPTP, PPPoE, L2TP. Enter your username and password.
The contract may also indicate an IP address if a connection with a static IP is used. In this case, enter it in the “Internet Port IP Address” section. It is recommended to set the DNS server IP address selection field to “Obtain automatically from your ISP.” Leave the router's MAC address at its default value.

Setting up a Wi-Fi network
After that, you can go to the Wi-Fi settings. Select menu "Settings -> Wi-Fi setup networks." Specify the region in which the router will be used (select from the drop-down list). The “Enable SSID Broadcast” checkbox determines whether your network name will be displayed when searching on client devices. If you remove it, the network name will need to be entered manually when connecting. In the “Channel” drop-down list, select “Auto” so that the router independently determines the free frequency range. It is recommended to set the “Mode” parameter value to maximum speed from the available options.
Configuring Network Security Settings
Next, set your security settings. Optimal choice— WPA2-PSK encryption. It will protect data transmitted over Wi-Fi and also restrict the connection of third parties to your network. Password length is limited from 8 to 63 characters.
In addition to the traditional 2.4GHz Wi-Fi frequency, modern models Netgear routers in higher price segments are supported new standard: 5 GHz. To operate at this frequency, a separate wireless network with its own security parameters is created. Among the advantages of the 5 GHz frequency are higher data transfer speeds over Wi-Fi and better protection from interference created by neighbors’ routers. Main disadvantages: smaller coverage area (due to differences in the physical characteristics of the wave) and incompatibility with older wireless equipment.

Setting up a guest network
The Netgear Wi-Fi router allows you not only to set up the main wireless network, but also to create a guest one. At the same time, on router models that support 5 GHz frequency, guest networks can also operate in this format. For guest access, you can set your own name (SSID) and security parameters: encryption type and password. Most important parameter Guest Wi-Fi - “Allow guests to see each other and provide access to my local network.” By unchecking this checkbox, you can share your guest Wi-Fi password without worrying about guests gaining access to personal files on your computers.

MAC address filtering will help ensure maximum network security. To configure it, go to the “Security -> Access Control” menu. Activate the “Enable access control” checkbox and select a filtering mode (allow or block the connection of new devices). All connected devices will be displayed in the table. For each of them, you can set your own rule - allowing or blocking Wi-Fi connections. After activating the “Block connection of all new devices” item, only those devices to which you have allowed access will be able to connect to the network.

Pay attention! To check the MAC address in Windows, press Win+R, enter cmd and select OK. In the window that opens, type getmac and press Enter.
If you are using a limited connection or just want to have statistics on transmitted and received information, use the menu " Additional settings-> Traffic counter". In addition to simple traffic accounting, it allows you to set a monthly limit on the volume of sent and received data. If necessary, you can also enable warnings that will be displayed before the end of your monthly traffic allowance. In addition, a connection time limit is available, but the vast majority of modern Internet providers no longer use it.

To change network addressing, select the menu item “Settings -> LAN Settings”. Here you can change the router name and its IP address. Do not forget that after changing the IP, you must use the new address to further log into the web interface. The “Use router as a DHCP server” item is responsible for automatically assigning IP addresses to various clients. You can set the address range yourself by entering the start and end IP addresses. If you need to set up manual addressing, be sure to add the MAC addresses of all devices to the Address Reservation table and allocate your IPs for them. Devices that have not been included in this table will not be able to interact with the network.

Advanced setup via Netgear Genie app
Another way to configure a Netgear router is the Genie utility. It comes on a disk included with the router, but the best solution will download latest version from the manufacturer's website. Size installation file is about 45 MB, since apart from standard features settings, the application provides tools for determining network properties and diagnosing.
Launch the program after installing it. The loading window will be displayed and at this time the initial parameters connections.

The Netgear Genie program interface looks approximately the same as the router control panel. But at the same time, the utility has a number of useful functions, not available through the admin panel. At the bottom of the window there is a banner with a link to the versions of the application for iOS and Android. Although their functionality is smaller, they are more convenient than the router’s web interface when used from a smartphone.
If you are interested in the netgear topic of setting up a router model n150, then you did the right thing by visiting this resource and going to this article, which will help you set up your router. I will try to convey the information in order and in accessible, human language.
In order to answer the question - how to set up a netgear n150 router, you first need to find out all the parameters of your Internet connection from your provider. After this, we take the router out of the box, turn it on and connect with a patch cord (a wire crimped on both sides included with the router) between your computer and the device itself. We plug one end of the wire into any of the LAN ports on the router, and the other into the network card on the computer, if you have physical connection Everything is fine, the lights on at least the power and LAN port should be on.
The next thing you need to do is get into the console (interface) of the router. To do this, launch any browser ( Internet Explorer,Opera, Google Chrome and others). In the address bar we write the following IP address 192.168.1.1 , a window should open requiring you to enter a user and password. We need to enter the username there - admin, password - password. If you are setting it up for the first time, if the settings have already been entered, then you know your data. It may also be the case that someone else set it up for you and you forgot or don’t know the password, and so that setting up the netgear n150 router doesn’t end there for you, you need to reset the settings to factory settings. On the back surface of the router there is a button in a small hole, poke it with a pen or toothpick and hold for 10-15 seconds, after which we wait for the router to reboot and enter the router interface with standard data.

Basic settings
After logging in, you may see a window asking you to configure the router automatically, select “No. I want to configure the router myself” and click “Next”. After which we will see the router control panel. Now let's set up the Internet connection. To do this, follow the instructions:
- On the left, click “Install” then select “Basic Settings”;
- Depending on the type of connection, select the option “yes” or “no” in the section “Do I need to enter connection information when connecting to the Internet?”;
- Depending on the selected option, data entry fields may appear where we can enter our data if necessary;
- In the field " DNS address» also, depending on the settings of your provider, select suitable option and, if necessary, enter the DNS provider;
- In the “MAC address router” field, I advise you to select “use the computer’s MAC address”, or “Use this MAC address”, if necessary, enter another;
- Click on the button Apply.

This concludes the basic configuration of the netgear n150 router, but we move on.
Setting up a wireless connection
In order to configure the wireless network of our router, you need to take the following steps:
- Go to the menu on the left "Installation" then select "Wireless connection settings";
- Enter the network name you came up with in the “Name (SSID)” field, select your region, change the channel, for example to 1 , set the mode b andg;
- In the “Security Settings” item, put a dot in the option WPA2-PSK[AES];
- In the “Security modes (WPA2-PSK)” field, enter your password for the wireless network;
- And finally we press the coveted button Apply.

Recently, Netgear has made changes regarding routers - in addition to the incomprehensible indices WNDRхххх, they began to additionally assign slightly more understandable Nххх. For example, you can already find n150, n450, n900. These numbers indicate the theoretical maximum wireless throughput speed. Wi-Fi module. In this article we will look at how to configure the netgear n150 router, its characteristics, equipment and appearance.
Initial acquaintance with the Netgear WNR1000 n150 router
As we can see from the model index, its wireless network throughput speed is 150 Mbps. This is the lowest end of Netgear's line of routers, but it's more than enough speed for most home use. For example, for online broadcasts Full HD movie resolution is enough 20 Mbps.
You will be pleasantly surprised by the price of the router, which is around one thousand rubles.
Netgear WNR1000 n150 router configuration
The router is supplied for sale in a white and green cardboard box. The front side of the package shows the router itself and its main characteristics.
The router package does not differ from the standard set:
- The netgear n150 router itself;
- Power unit;
- Network wire patch cord;
- Warranty card;
- Installation Guide;
- CD with program quick setup router.
There is no antenna included, as it is built-in.
Front and side panels of the Netgear WNR1000 n150 router

On the front panel there are indicator LEDs indicating power connection, activation of the automatic wireless secure network WPS, activation of the Wi-Fi module, presence of an Internet connection and activity of the LAN ports. The router is cooled through grilles located around the body.
There are two buttons on the side of the case: activating WPS and turning the Wi-Fi module on/off.
Rear panel of the Netgear WNR1000 n150 router
On the back panel of the router there are interfaces for connecting network cables, a power supply connector and a button to turn the device on/off.

The router is equipped with four lan ports for connecting local network devices and one wan port to connect to your provider.
Hardware of the Netgear WNR1000 n150 router
The router is powered by an Atheros AR7420 processor with an operating frequency of 340 MHz. RAM is 32 MB. The flash memory in which the firmware is stored is 4 MB. The radio unit is 1T1R standard, supports data transfer rates up to 150 Mbit/s, runs on the Atheros AR9285 chip.

Next, we’ll figure out how to configure the netgear n150 router. The board is located in the form of tracks on printed circuit board, and 3D antennas, thanks to which even the router is not equipped external antennas, but the signal range is at a quite decent level. Through 2 rooms with solid walls, the connection with the laptop is stable high level(5 strips out of 5).
Setting up a Netgear WNR1000 n150 router
Option one, for less experienced users
Setup can be done in two ways - for beginners, the Netgear genie program has been developed, which makes setup practically automatic mode, you only need to enter the data provided by the provider. And the second way is through a web browser for more experienced users, in which all settings are made manually.
Let's consider the first option

Netgear genie router setup wizard
The setup takes place in five steps. First of all, connect the router to any of the lan ports and the computer’s network card. Next, turn on the router and insert the supplied CD into your computer's CD drive. The Netgear genie assistant will launch. The program is entirely in Russian, all points have detailed description, it is very difficult to get confused.
Option two, for more experienced users
To make settings in a more advanced way via a web browser, first of all you also need to connect wifi router netgear n150 to your computer and turn it on. Next, launch any web browser and in the address bar write the IP address of the router, set by default by the manufacturer - 192.168.1.1. A window will appear for you to enter your username and password to prevent unauthorized access to the settings.

In the “Username” field enter “admin”, in the “Password” field – “password”. These settings will need to be changed in the future.
Attention! Letter case matters! For example, the password "Password" will be invalid!
After entering, press the “OK” button, the main settings menu will appear. If this does not happen, it means that the router has already been configured earlier and the password has been changed. Reset the settings by pressing the recessed button on the back of the device and hold it down for 10 seconds. The settings will be reset to factory settings.
So, we entered the settings menu.

In the menu in the upper right corner you can select a language; Russian is present in the list. On the left there is a settings tree, in the center of the window - settings for the selected item, on the left side of the window - tips on the selected item. Let us immediately note that all models of Netgear routers have the same settings; there are only minor differences related to the features specific model. But in general outline the settings are the same.
In the main menu you can find out the firmware version, Internet connection status, local wired and wireless network status.
Basic settings of the Netgear WNR1000 n150 router
The “Settings” tab has two submenus – “Basic settings” and “Wireless network settings”.

It is possible to assign an IP address using a DHCP client, or specify the address explicitly (static). The physical (mac) address can also be changed. When connecting to the Internet via PPPoE, PPTP or L2TP protocols, you will need to enter the data provided by your provider in the appropriate fields.

In this submenu, we set the name (SSID) of our wireless network, select the region where the router will be located, leave the channel and mode unchanged, and select the security settings that are most resistant to hacking - WPA2-PSK. In the “Passphrase” column, enter a password to connect to the Wi-Fi network that is at least 8 characters long.
Netgear WNR1000 n150 router firmware update
To update the firmware, you first need to visit the manufacturer’s website and, if more recent firmware is available, download it to your computer.

There are two update options - in automatic mode, which requires an Internet connection, in which the router automatically synchronizes with the site, checks the firmware version and updates if necessary, and manual mode, in which the user himself checks the versions and downloads it himself.
For the first option, just click the “Check” button. If desired, you can check the “Check new version at the entrance."
For the second option, you need to click the “Browse” button, in the menu that opens, specify the path where the file was saved new firmware, and click the “Download” button. After the update, the router will automatically reboot.
Changing the password to enter the settings menu of the Netgear WNR1000 n150 router

In the first field you must enter the old password, in the second and third fields - New Password. It is not possible to change the username; it will remain “admin”.
In order not to forget the password, you can take the device serial number, indicated on the label on the bottom of the router, as the password.
1) Connect the power supply to the corresponding connector on the router (indicated in the diagram below) and electrical network 220 V.
2) Press the power button.
3) We connect the incoming Internet cable to the WAN port on the router (marked in blue).
4) Connect the short cable supplied with the router to network adapter computer and into one of the LAN ports on the router (marked in yellow).
Manual configuration of the Netgear N150 JNR1010 router
We connect the short cable from the router kit to the computer’s network adapter and to one of the LAN ports on the router.
We connect the incoming Internet cable to the WAN port (rightmost) of the router.
Enter in address bar browser address 192.168.1.1 and press the Enter key. Next, enter the login details to the router’s web interface.
The default username is "admin" and the password is "password".
Stage 2. Update software router.
Step 2. Select the "Administration" tab on the left of the page
Step 3. Go to "Update router"
Step 4. Click on the "Browse" button and select the file "jnr1010-v1.0.0.14.img" previously saved to your computer
Step 5. Click "Download"
After this operation it will begin automatic update. You need to wait for it to finish.

After the update, the authorization page should appear on the web interface. Authorization is the same as step 1.

After a successful update, information about the router microcode version will appear in the upper right corner of the page. Correct version - 1.0.0.14

Stage 3. Setting up an Internet connection.
Step 1. Select the “Basic mode” tab at the top of the page
Step 2. Select the tab on the left of the "Internet" page
Step 3. Select the radio button “Do I need to enter a username and password when connecting to the Internet?” to "Yes" position
Step 4. Set the values according to the example in the image below
Step 5. Click the "Apply" button.

Stage 4. Setting up a wireless network.
Step 1. Select the tab on the left of the page " Wi-Fi network"
Step 2. In the "Name (SSID)" field, enter the name of the wireless network - this is how it will be displayed when searching for an access point from various devices.
Set the “Channel” value to “09”, “Mode” to “Up to 150 Mbit/s”
Step 3. "Security Settings" - "WPA-PSK+WPA2-PSK"
Step 4. “Passphrase” - enter the serial number of the router. It can be found on the box or on the bottom panel of the router itself. It is marked with S/N symbols. This password must be entered on the connected software Wi-Fi devices when prompted for a network key.
Step 5. Click confirm.

Stage 5. System settings.
Step 1. Select the “Advanced” tab at the top of the page
Step 2. Select the tab on the left of the “Settings” page
Step 3. Go to "Internet port settings"
Step 4. Set the flag to “Respond to Internet port echo request”
Step 5. Click "Apply"

Stage 6. Setting up remote control.
Step 1. Select the “Advanced” tab at the top of the page
Step 2. Select the tab on the left of the “Advanced settings” page
Step 3. Go to "Remote control"
Step 4. Set the flag to “Enable remote control”
Step 5. Click "Apply"

Step 7. Setting the administrator password.
Step 1. Select the “Advanced” tab at the top of the page
Step 2. Select the tab on the left of the "Administration" page
Step 3. Go to "Setting a password"
Step 4. In the "Old password" field, enter the previously set password, the default value is "password"
In the "Set Password" field, enter the last 8 characters serial number router. We enter alphabetic characters in the English layout in uppercase (capital).
Below, enter the new password again to check.
Step 5. Click "Apply"

Router setup is complete! We reboot the router by turning off and on the power button and check the network operation.
Under the “N 150” brand, D-Link offers universal routers of the DIR-300 and DIR-300NRU models of one of their latest revisions. A solution in the form of a “100-Mbit” router, equipped with an additional “150-Mbit” Wi-Fi antenna, is well suited for building both home and office networks. Therefore, the D Link n150 router will be in demand, and the company will continue to update hardware revisions and firmware. Let's consider the option of setting up the basic functions of the device in a graphical interface with a “white and blue” design, a manual for which is currently missing on the official website.
Router D-Link N150
What does the combination “N 150” mean? Wireless networks, as we know, operate using one of three protocols: 802.11 B, or G, or N. The “802.11 G” protocol can provide maximum connection speeds of up to 54 Mbit/s, while “802.11 N” – up to 150 (this is when using one radio channel). Actually, the last option is implemented in the “N 150” routers.
It is desirable that all subscriber devices in the Wi-Fi network can also work with the “N” protocol. But if this condition is not met, it will be enough to switch the router to “mixed” mode, and any device will be able to work in the wireless network (even using the now outdated “802.11 G” protocol). Let's start setting up.
Setting up basic router functions
Preliminary steps for installation and connection

Router DIR-300 with Wi-Fi 150Mbps
On the back panel of the device there are four LAN ports (for connecting local computers, NAS drives, etc.), as well as one “Internet” port. The provider's cable is connected to the last port (the port is also called “WAN”).
The setup is done in the web interface. Before setting up the router, you must make the following hardware connections:
- In the “Internet” port – install the connector of the network cord from the provider
- Any of the LAN ports – connect to a wired network card of the PC (using the patch cord included in the kit):

Connecting the router to a computer for subsequent configuration
- We do not turn on the power to the router now. You need to check that the wired connection is configured correctly:

Settings network card on the computer
- At the last stage, connect the power supply and turn on the router. In about a minute you will be able to enter the graphical web interface (when the device boots up).
To enter the web interface, open a browser on your computer and go to the address: 192.168.0.1. The following image should appear on the screen:


Main GUI tab
Here, of course, you need to click on the “Manually configure” button. Next we will look at how to set up an Internet connection.
Connection setup (DHCP option)
If the provider “distributes” the Internet using the DHCP protocol, setting up a connection in the router will be easy. In the web interface you need to go to the “Network” -> “Connections” tab:

Router connections tab
Where you need to left-click once on the line that says WAN. A page will open where you can set connection parameters:

Setting up a DHCP connection
There is no need to configure anything additional for DHCP connections. If you plan to watch IPTV, check the “Enable IGMP” checkbox. If you need to change the MAC address, the new value must be set in the corresponding field (MAC). In the “Connection Type” list, in addition to “IPoE” (for us this is “DHCP connection”), there are three more options that must be considered separately. These are L2TP, PPTP and PPPoE.
Having completed the necessary settings, click “Save” in the lower right corner of the page. The interface will return to the Connections tab. Check that the “Default Gateway” point remains on the connection that we configured (if there are several of them). Then you need to click “Save” in the upper right corner of the tab.
A few seconds after saving the settings, the Internet connection will appear automatically. You can verify its presence on the “Status” -> “Network Statistics” tab:

Device status tab
Additionally, let's talk about setting up connections of other types (for example, PPTP). In this case, the IPoE connection should remain (you need to click the “Add” button and set the PPTP parameters). At the same time, even if the IGMP service is used, the IGMP checkbox is set only (!) in the IPoE settings, if necessary.

Connections tab after PPTP setup
Happy setup!
Turn on Wi-Fi network
Setting up a wireless network in a router is easier than any type of connection. On the “Wi-Fi” tab -> “ General settings"The "Enable" checkbox must be checked. wireless connection" To configure network parameters (name, etc.), you need to go to the next tab - “Basic settings”:

Wi-Fi setup
You need to do the following:
- In the “SSID” field – set the value of the network name
- “Country” – leave “default”
- “Channel” – radio channel number (from 1 to 13). It is recommended to use “auto” (then D Link n150 home router will turn on the least noisy one)
- “Wireless mode” – wireless network protocol, “N 150” or another. It's better to leave "B/G/N mixed". Only if all subscribers support working with “802.11 N”, to achieve the highest speed, you can select “N Only”.
- “Maximum number of subscribers” – here zero means “auto”.
The last remaining setting is the “Hide...” checkbox. If you want to work on a hidden name, then install it. Finally, you need to click “Change” and wait for the tab to update. Then, in the upper right corner, click “Save”.
Wi-Fi network protection can be set in the Security Settings tab:

Setting up encryption on a wireless network
A wireless network with new parameters will appear after rebooting the router. In the top menu you need to select the following:

System menu at the top of the tab
Saving with a reboot will allow you to immediately turn on the Wi-Fi network. Remember that the router will take about 1 minute to boot. Happy routing!
Additional router features
Setting up IPTV
You can watch IPTV through a set-top box or through a computer connected to the router’s network. The setting option in both cases is different. Here we look at how to configure the D Link n150 router to broadcast IPTV in local network(view on computer).
First of all, in the Internet connection settings, you need to check the “Enable IGMP” checkbox. Moreover, it should be set only for “IPoE” connections. What was discussed above.
However, that's not all you need to watch IPTV. There is a tab in the web interface called “IGMP”:

IGMP Tab
It is located in the list of “Advanced” tabs. And it contains one checkbox (“Enabled”, it must be checked), and a list of the version number (recommended “2”). Make settings on the “IGMP” tab, click “Change”, then click “Save”.
After completing these steps, you can watch TV channels through your computer. All multicast packets (used in IPTV) end up in the local network.
Question and answer
Question: how does the D150L router of the Beeline operator differ from the D-Link N150?
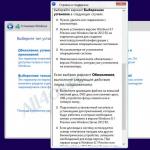
Hardware - nothing (this is one model). Programmatically, the firmware is configured “for the operator” so that the user only has to set a login and password:

Beeline D150L router configuration interface
Conclusion: one router is no better (no worse) than another. At the same time, the Beeline device does not need to be configured for the network of this operator. By the way, the interface address here ends with “1.1”.
Question: How can I reset my router if I can’t open the interface?
Turn on your device. Wait 2 minutes. Press "reset" on the back panel for 10 seconds. All indicators will flash 1 time. In a minute, you will be able to log into the web interface.
And here we have configured the router for PPTP: