Despite the fact that Apple has provided the ability to install the system from a hidden partition on the hard drive, you should not neglect the ability to burn the installation image to a DVD or USB flash drive and feel protected from any unforeseen situations. Plus, you don't have to spend least$ 69 on, which only goes on sale in August.
To implement this plan, we need the downloaded from the Mac App Store Lion, a blank DVD or flash drive that exceeds 4 GB, plus 30 minutes of free time. Also, be sure to copy all the important information(if any). So let's get started.
We go into the directory with installed programs, we find the application Installing Mac OS X Lion.app there (if it is not there, then you will have to download it again from) and select in context menu item "Show Package Contents".

In the window that opens, you should go through the internal directory structure and go to the SharedSupport folder.

We are interested in the first file with a size of 3.74 GB. If you want to create a bootable DVD, you just need to take any application that can write DMG images and use it to burn InstallESD.dmg to a disk (just copy it to the Desktop at least first).
Otherwise, double-click on this file with the left mouse button and wait until the mounted image appears on the screen called Mac OS X Install ESD:

It's time to insert the USB flash drive into your computer and run Disk Utility, which is located in the Programs> Utilities folder. Now, in the sidebar, select our flash drive, and on the right - the tab Erase.
In field Format select the file system type "Mac OS Extended (Journaled)", in the field Name enter something conscious and click on the button Erase... The formatting operation will take some time (depending on the size of the flash drive).

There is very little left - to restore our mounted InstallESD.dmg image to a USB flash drive. To do this, select the flash drive again in the side menu and click on the tab Restore.
In field A source drag the image icon called Mac OS X Install ESD, and in the field Appointment- our newly formatted USB stick.

Check several times that you did not mix up the fields, and also did not select any desired USB flash drive as the destination. If everything is indicated correctly, then feel free to press the button Restore and you can go for a walk:

That's all! Now, when the need arises, it will be enough to insert the USB flash drive into the USB port of your computer and after turning it on, press and hold the Option (Alt) key to select the boot partition.
You may be wondering which is better: burn a DVD or create an installation flash drive? I think that the latter option is more acceptable, and the owners of new Mac mini do not have to choose at all :)
Which, according to Cupertino, thanks to new technologies, makes Mac computers more reliable, functional and faster. A little later, the first beta version of macOS High Sierra was released, and today we will tell you how to create yourself bootable USB disk to install this operating system on your Mac.
To do a so-called "clean" install, you first need to create boot disk, which can be used as a USB disk. This will allow you to install macOS High Sierra on multiple computers. In addition, you must have access to the new desktop image. operating system... If you do not have a paid developer account, you can wait until the public beta version of macOS High Sierra becomes available or download its image from third-party resources.
Read the instructions to the very end before starting the process of creating a USB disk with macOS High Sierra and then installing it.
Requirements:
1. Computer *
running OS X 10.7 Lion or higher.
2. The macOS High Sierra installer distribution downloaded to your computer.
3. USB-disk with a capacity of at least 8 GB.
* Your computer must be compatible with macOS High Sierra - Mac Compatibility List.
How to create a bootable USB drive with macOS High Sierra
1. Download the macOS High Sierra installer. By default, the distribution is named Install macOS 10.13 Beta. You can rename it, but in order not to get confused, we recommend leaving this name. Make sure the Install macOS 10.13 Beta file is in the Applications folder (where all programs from the Mac App Store are downloaded). If it is located elsewhere on your computer, move it to that folder.
2. Connect the USB drive to your Mac computer... If it is not yet formatted, run the application " Disk utility» ( Programs → Utilities → Disk Utility) and format it with GUID Partition Scheme and Mac OS Extended (Journaled). This process will erase all data from the USB drive.

3. As the name of the USB disk, you can choose any convenient name, for example, "USB". Make sure that no other drives with the same name are connected to your computer.
4. Start "Terminal" ( "Programs" → "Utilities" → "Terminal") and enter the following command * :
sudo / Applications / Install \ macOS \ 10.13 \ Beta.app/Contents/Resources/createinstallmedia --volume / Volumes / USB --applicationpath / Applications / Install \ macOS \ 10.13 \ Beta.app --nointeraction
Then press Enter to move Install macOS 10.13 Beta to your USB drive and make it bootable.
* If you've renamed the macOS High Sierra installer distribution or USB drive, edit the command to include your names. If the macOS High Sierra installer was not in the Applications folder, edit the command to show its current location.

5. Enter your password (it does not appear on the screen) and press Enter.

After that, the process of creating a bootable USB-disk with macOS High Sierra will begin. Throughout the entire process, the USB drive will not be visible on the desktop. The process of creating a bootable USB disk will be accompanied by the following text in the "Terminal" window:
Erasing Disk: 0% ... 10% ... 20% ... 30% ... 100% ...
Copying installer files to disk ...
Copy complete.
Making disk bootable ...
Copying boot files ...
Copy complete.
Done.
Once the files have been copied, your USB drive will reappear on your desktop, and Terminal will notify you that the process is complete.
6. That's all! A bootable USB disk with macOS High Sierra has been created, you can close Terminal.
How to install macOS High Sierra on Mac from a bootable USB drive
1. Connect the macOS High Sierra USB drive to your Mac.
2. Hold down the Alt (Option, ⌥) key on your keyboard and restart your Mac. If your Mac has been turned off, just turn it on.
3. In the window that appears, select the macOS High Sierra bootable USB drive as the bootable one. After that, the macOS High Sierra installation window will appear on the screen.

4. Click "Install" and wait until the installation of macOS High Sierra is complete.
******************************************
Subscribe to our Telegram channel to keep abreast of the latest news and rumors from the world of Apple and other largest IT companies in the world!
To subscribe to the Newapples channel in Telegram, follow this link from any device on which this messenger is installed and click on the "Join" button at the bottom of the screen.
Someone thinks that only a real Mac is needed to create it, others prefer to install a whole virtual machine to install Mac OS on it (!) and make this ill-fated USB flash drive there 🙂
Friends, everything is much simpler, we only need 7-zip, OS X installation image and BootDiskUtility. ALL!!!
Let's get started:
1
... Checking the size of the boot partition with Clover v Options —> Configuration.
There must be a check mark next to Boot Partition Size and its size, click OK. By the way, now the downloader will come to us from the Internet, as evidenced by the checkbox "Download" DL
in sources for Clover Bootloader Source.
2
... In the main window of the BootDiskUtility program, select Tools, then in Clover Fix Dsdt Mask Calculator.
Although all the checkboxes are already checked in advance, we check the partitions in the DSDT table, this action will greatly help when installing a Mac OS, because you need not only to emulate the boot environment EFI, but also easy to explain how to work with your "special" equipment.
3 ... After that, we format the flash drive by pressing Format Disk in the main window of the program, then OK... With such a radical approach, two partitions will be created on the flash drive - the first with the Clover bootloader, and the second is still empty. But Windows is not able to perceive such a bewitching picture, so in the explorer only the first partition with the bootloader will be displayed.
4a. El capitan [for Mac OS X 10.11] Just download the 5.hfs partition already prepared for deployment and installation with the latest OS from Apple.
4b. Yosemite [for Mac OS X 10.10] I suggest you immediately download a ready-made partition image for installation, section 5.hfs, which includes such necessary changes as copying and replacing the Packages folder to a USB flash drive in / System / Installation / from OS X Install ESD / Packages and placing BaseSystem.dmg and Basesystem files .chunklist in the root directory.
Please note that systems Mavericks (10.9), Yosemite (10.10) and El Capitan (10.11) have the same recovery partition names - 5.hfs.
4c. Mavericks [for Mac OS X 10.9] It's even easier here - from the dmg archive with OS X Mavericks, unpack the file 5.hfs this is our boot partition. Or just download it right away and go to step 5!
4d. Mountain lion [for Mac OS X 10.8.4 or 10.8.5] Let's leave the flash drive alone for now and work with the installation image. In order for the installation to start all the same, it will need to be unpacked several times, because DMG — just an archive, open it in the program 7-zip or we can go the other way and immediately download the much needed unpacked 3.hfs partition.
And extract the file from it 2.hfs
Then, in the same way as we opened the first archive, we go inside the file 2.hfs and look at the size of the packed folders. Choosing the largest one, we will quickly get to the one we need InstallESD.dmg residing at ... 2.hfs \ Mac OS X 10.8.4 \ Install OS X Mountain Lion.app \ Contents \ SharedSupport \ extract it to the light white
We open our newly minted InstallESD.dmg and extract from it ... one more InstallESD.dmg located in the InstallMacOSX.pkg \ folder. Life is an unpredictable thing, but it's too late to turn off the path, so let's move on. When extracting the file, the archiver will notice the coincidence of names and offer a replacement, but we will choose Rename automatically and our newly extracted file will be named InstallESD_1.dmg
So we got there. From our InstallESD_1.dmg we extract for the last time 3.hfs he is bootable Mac partition OS X 10.8.4
5
... We go back to BootDiskUtility and choose second partition on a USB flash drive, we need to restore the installation partition, so select Restore partition- and then our precious 3.hfs for OS X 10.8 or 5.hfs to install Mavericks or Yosemite / El Capitan, based on what was chosen in 4a-d steps. Copying will take some time and after that you can safely move on!)
We examined how by means command line write down the setup DVD-disk OS X Lion... Some readers have noted that it would be nice to know how to do the same, but for USB-disk. And indeed, do not leave the same owners MacBook Air and the last Mac mini deprived. :)
Let's get started. I'll make a reservation right away that in order to successfully create the installation disk, we need disk space on USB-disk is slightly larger than 4GB, and therefore flash drives with a volume of more than 4GB, for example, 8GB, are suitable for these purposes. In my example, a 16GB flash drive is used.
We connect the USB flash drive to the computer. First, we need to determine what device the connected disk is known to the system as. To do this, open Terminal.app and enter the following command:
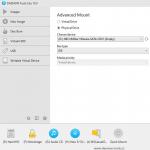
Information about all disks known to the system will be displayed. It looks something like this (all pictures are clickable):

From the information displayed on this command, we need to understand what refers to what. In principle, this is not difficult to understand. The device / dev / disk0 is yours local disk, with OS X installed. And the information we need relating to our flash drive is highlighted in the picture in red. In my case (and in yours, most likely) this is / dev / disk1.
Now we need to create a disk with GPT-partition, with one partition and file system HFS +... This is done with the following command:
diskutil partitionDisk / dev / disk1 1 GPTFormat HFS + Lion 16G
Where / dev / disk1 - what was highlighted in red in the picture above, 1 - create one partition, GPTFormat - instructions to create GPT-partition on disk, HFS + - file system for the partition being created, Lion - the partition label (can be arbitrary), 16G - the size of the partition being created (must match the size of your flash drive, fix it if necessary).
The result will be something like this:

As you can see, in fact, two partitions were created on our disk, not one. The first partition with ID disk1s1 is the system partition EFI about two hundred megabytes in size, ignore it. We need a second (large) partition with the ID disk1s2 (highlighted in red in the picture).
It is this identifier (or rather its full version of the / dev / disk1s2 entry) that we need for the next final command, which will create the installation disk:
asr restore --source / Applications / Install \ Mac \ OS \ X \ Lion.app/Contents/SharedSupport/InstallESD.dmg --target / dev / disk1s2 --erase --noprompt

Once again, I draw your attention to the fact that in this command we use the disk ID / dev / disk1s2 (highlighted in red).
Upon completion of the team's work, we will get what we wanted - installation -disk OS X Lion.
Fair, not overpriced or understated. There should be prices on the Service website. Necessarily! without "asterisks", it is clear and detailed, where it is technically possible - the most accurate, final.
With the availability of spare parts, up to 85% of complex repairs can be completed in 1-2 days. Modular repairs take much less time. The website lists the approximate duration of any repairs.
Warranty and liability
Any repairs must be guaranteed. Everything is described on the website and in the documents. The guarantee is self-confidence and respect for you. A 3-6 month warranty is good and sufficient. It is needed to check quality and hidden defects that cannot be detected immediately. You see honest and realistic terms (not 3 years), you can be sure that they will help you.
Half the success in Apple repair- this is the quality and reliability of spare parts, so a good service works with suppliers directly, there are always several reliable channels and your own warehouse with proven spare parts for current models so that you do not have to waste time.
Free diagnostics
This is very important and has already become a good form for service center... Diagnostics is the most difficult and important part of the repair, but you should not pay a dime for it, even if you do not repair the device as a result.
Repair in service and delivery
Good service appreciates your time, therefore offers free shipping... And for the same reason, repairs are carried out only in the workshop of the service center: correctly and according to technology, it can only be done at a prepared place.
Convenient schedule
If the Service works for you, and not for itself, then it is always open! absolutely. The schedule should be convenient so that you can catch up with before and after work. Good service works both on weekends and on holidays. We are waiting for you and working on your devices every day: 9:00 - 21:00
The reputation of professionals consists of several points
Age and experience of the company
Reliable and experienced service has been known for a long time.
If a company has been on the market for many years, and it has managed to establish itself as an expert, people turn to it, write about it, recommend it. We know what we are talking about, since 98% of incoming devices in the SC are being restored.
We are trusted and passed on difficult cases other service centers.
How many masters in directions
If several engineers are always waiting for you for each type of equipment, you can be sure:
1. there will be no queue (or it will be minimal) - your device will be taken over immediately.
2. You are giving Macbook repairs to an expert in the field of Mac repairs. He knows all the secrets of these devices
Technical literacy
If you ask a question, a specialist must answer it as accurately as possible.
So that you have an idea of what exactly you need.
They will try to solve the problem. In most cases, the description tells you what happened and how to fix the problem.