One way or another, many users of computers and laptops, regardless of the OS installed, are faced with the concept of a primary input / output system called BIOS or BIOS. And quite often there is a need to install an update, in particular on MSI motherboards. it is for this manufacturer, now it will be considered. The topic of corrections will be discussed separately. possible mistakes, which may appear during the installation of new firmware.
MSI: and why is it needed?
Of course, when buying a computer or laptop, no one particularly cares about specifications motherboard does not delve into. The potential user is more interested in the processor, RAM, volume hard disk, video card, etc. And not everyone realizes that all these components are installed on the "motherboard", and for correct work all devices require a primary system in the form of BIOS or UEFI.
Nothing is eternal. How device drivers become outdated and constantly require updates, not to mention themselves Windows systems so the BIOS does not last forever either. Let's see how on a laptop (MSI board is used as a base) or on a stationary computer. Basically, there is not much difference.
General rules for installing firmware
To install BIOS updates, you should clearly understand that an incorrect firmware version or its incorrect installation can have simply disastrous consequences. Therefore, you need to use strictly defined packages designed exclusively for this brand of MSI motherboard. How to update BIOS? First, you need to fulfill a few prerequisites.
As the first thing to do
First of all, you need to find out the modification of the "motherboard". The MSI name doesn't say anything yet. To do this, you can use several of the simplest methods.

For example, access to detailed description configurations can be obtained using utilities like Everset, where a description of all devices in the computer system, including the motherboard, will be shown.

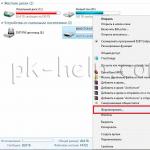
However, you can do it even easier, because Windows systems natively have a viewer for all information. To do this, use the msinfo32 command, which you enter in the Run execution console. Moreover, it is absolutely not necessary that it be launched on behalf of the administrator. You can also rummage in the "Device Manager", where you will have to find two identifiers DEV and VEN, and then search for them (by the way, this is the best option).
Required software
Basically, after that you can start installing the update. Note that not all programs for searching and installing driver updates can perform a corresponding search. Therefore, using automated programs like Driver Booster will have no effect here.

This means that you will have to go to the site yourself through any web browser. In the browser itself, a special AdBlock blocker may be enabled by default, which should be temporarily disabled.
If the required update is found, you just need to download and install it running at the administrator level. Otherwise, a specialized utility called MSI Live Update can be downloaded from the same site.
MSI Live and "A" drive error fix
Finally, let's see how to update the BIOS. MSI Live Update is not that hard to learn as a program. The most important function here is to start scanning.
The application, by the way, works in the same way as automatic driver updaters, but has a specific focus. After the distribution files are found, you just need to select the version for installation that exceeds the modification available on the computer.
The process itself boils down to the fact that the source distribution is saved on the hard drive, however, it is better to specify the save location manually, since the program uses such a deep path by default that then it can be problematic to find the downloaded file itself. The file itself is an archive, from which you need to extract data by any archiver or simply by means of the system. Only after that you can start the executable files, the whole process will take place in automatic mode, after which a complete reboot will be required.
In principle, for updating it is not recommended to use what is proposed to resolve the issue of how to update the MSI BIOS from a USB flash drive. Firstly, you will have to write information to the drive, and secondly, such a device is not immune to failures. As it turns out, the easiest way to update is from a file saved on the hard drive.
After starting the utility, you just need to agree with automatic installation firmware, after which the process starts. Then you just need to wait for it to end (note: some additional settings may be required on Windows 7).

In the case of the "seven", an error of reading disk "A" may be issued. This is normal, especially since floppy drives have not been used for a long time. To fix the problem, go to the settings and select the Standard CMOS Setup section there, where set the value for the Floppy Drive device to Not Installed, save the changes (F10, and then confirm by pressing the "Y" button). This will be followed by an automatic restart and the problem will disappear completely.
Instead of a total
Actually, that's all about MSI motherboards. How to update BIOS, hopefully, is already clear. Most interestingly, many users are afraid to do this, believing that in this way they can simply harm the system. Nothing wrong with that. It is believed (this is evidenced by the reviews of many experts) that after updating the BIOS, even an increase in the performance of computer systems is often noticed. And the update process itself, in general, is not particularly difficult. The most important thing here is to correctly determine the model of the "motherboard" and download for it exactly the update that corresponds to it. Well, then, as they say, a matter of technology. Moreover, any user can easily perform such operations, observing several main conditions described above.
At the end of our series of articles on updating BIOS, we will tell you how to update MSI BIOS, because motherboards from them have their own characteristics!
BIOS update in a device equipped with MSI motherboard is generally done as follows:
- is established specific model your motherboard;
- checks for updated versions of the system you are interested in;
- install them directly.
If you know exactly the model of your hardware and the version of the system to reinstall, then all that remains is to find out on your motherboard from the MSI brand. The firmware you need can be downloaded both to the computer itself and to a portable device.
How to update BIOS from MSI brand using a USB flash drive?
You can launch the version of the I / O software update you are interested in directly from the desktop.
For the convenience of this operation, you can use a special Click BIOS II interface, suitable for working with devices from the Taiwanese manufacturer we are considering. In the "Utilities" section you will find a suitable for installation from a USB flash drive M-Flash program to help you update your I / O software.
This specialized utility will prompt you to use the "Update Bios" option. With its help, it is selected from the flash drive desired file updates, previously downloaded from the official website of the manufacturer, and then it is installed in automatic mode. It is recommended that you restart your computer before continuing to work with your computer.
MSI live update 6 is located in the same section. This is a special utility with which you can find out the version of your motherboard using the "System Information" section. 
Also, this program will help you check in real time for the latest updates for your device, either manually or automatically. When choosing the first option, you will need to put a tick in front of the second item "MB Bios" before starting the scan. 
Understanding motherboard models and utilities from a Taiwanese manufacturer
It is worth remembering that under the abbreviation denoting equipment, the BIOS update for which we are trying to install, hides the name of a company specializing in the production of motherboards.
It sounds like Micro-Star International. Thus, we are not talking about any specific version of the motherboard, but rather about their whole family. For example, you might have MSI z270 a pro or MSI h110m pro vd on your computer.
You can find out your motherboard model in order to subsequently update the I / O system in various ways, including:

Have a great day!
So far the only representative of the MSI Gaming series for AMD platforms AM3 + is a 970 chipset motherboard. It has a traditional for Gaming solutions game network controller and an advanced sound subsystem, a set of proprietary software, as well as a high-quality component base, which is doubly important for successful overclocking of energy-hungry six- and eight-core AMD processors FX.
The editors would like to thank the company that kindly provided the motherboard for testing.
Specifications
| 1403 | 1593 | 14 |
| 7245 | 8273 | 14 |
| 500 | 718 | 44 |
| 49 | 65 | 33 |
| 16 | 23 | 44 |
| 199 | 282 | 42 |
Graphic benchmarks and games
| 35 | 35 | 0 |
| 90 | 90 | 0 |
| 70 | 70 | 0 |
| 56 | 65 | 16 |
| 91 | 91 | 0 |
Overclocking to 4.6 GHz significantly improved the results in processor benchmarks: for example, the minimum increase was 14 percent (WinRAR single and multi-threading), and the maximum - as much as 44 percent (Cinebench and x264 HD Benchmark 2 pass). The only processor-dependent game turned out to be Total war: Rome II - frame rate increased by 16 percent after overclocking. It is likely that if we had a more successful processor and a more powerful cooler (for example), the motherboard would allow us to conquer the frequency of 4.7-4.8 GHz.

conclusions
After a significant drop in processor prices, the AM3 + platform has found its second youth. So, now you can buy a six-core processor for only $ 110, and an eight-core one - $ 150. True, the outdated processor architecture forces you to resort to overclocking in order to more or less compete on an equal footing with Intel processors... And this requires a motherboard with a high-quality component base and a massive heatsink on the processor power subsystem. The MSI 970 Gaming is one of those. It sets it apart from its competitors. Network Controller and an advanced sound subsystem that can satisfy, if not a music lover, then a gamer and a movie fan, for sure.
Advantages:
- high reliability of electronic components
- ligament support AMD graphics cards CrossFireX and NVIDIA SLI
- Killer Game Network Controller
- high-quality sound subsystem Audio Boost 2
- automatic OC Genie overclocking
- good potential for manual overclocking
- rich delivery set
Disadvantages:
- reset jumper BIOS settings overlapped by video card

Prices in online stores
It is possible to display similar models if this one is not in the catalog.
Key Features:
Supports AMD FX / Phenom II / Athlon II / Sempron processors for AM3 + socket
- Supports DDR3-2133 (OC) Memory
- USB 3.0 + SATA 6Gb / s
- Audio Boost 2: Reward Your Ears with True Quality
- Killer Ethernet: Kill Your Lag
- OC Genie 4: Overclock in 1 Second
- Click BIOS 4: Easily Fine-tune Your System
- AMD CrossFire Support
- Sound Blaster Cinema 2: Realistic Surround Sound Experience
- Gaming Device Port: Optimized with Triple Gold-plating for High Polling Rate Gaming Devices
Changes:
Correct SATA port definition.
- Improved memory compatibility.
- Updated AGESA code.
WARNING:
DON "T FLASH WHEN YOUR SYSTEM IS RUNNING FINE
- DON "T FLASH IF YOU DON" T KNOW WHAT YOU ARE DOING
Flash AMI UEFI BIOS by MFLASH:
- Extract the BIOS-zip file that you have downloaded and paste it to your USB storage device.
- Press “delete” key to BIOS, select “M-Flash”
- Click “Select one file to update BIOS and ME”
- Select USB storage that comes with the downloaded BIOS.
- Select BIOS which you want to update and press “Enter”.
- A warning message comes out “Don`t remove USB drive or shutdown system ”and then System will be reset to update BIOS after 5 seconds.
- If your motherboard is equipped with multi BIOS then system will pop up
- "Please set the multi BIOS switch to the target BIOS ROM then press any key to continue." Otherwise it`ll proceed with next process.
- The system will start to update BIOS & ME
- After BIOS & ME update is finished, please press del key to enter BIOS setting menu to make sure that BIOS have been updated successfully.
Flash AMI UEFI BIOS by USB Disk Under DOS Mode
Download the BIOS that match your motherboard and version number to your USB device.
- Extract the BIOS-zip file that you have downloaded and paste it to your USB storage device (Note: Make sure that your USB is bootable).
- Boot your system from a USB storage device
- When you get the DOS prompt, execute the following sequence:
- Reboot your system when prompted
- After bios update is done, C: prompt will appear on your screen.
- After system restart, Press del key to enter BIOS setting menu to make sure that BIOS have been updated successfully.
About OS Independent BIOS:
Although installing a newer BIOS version might add new features, update various components, or improve the device's usability, this process is very risky, so the upgrade is recommended to be performed only when it is really needed.
In addition to that, this task should be performed by someone who has the knowledge to successfully complete the installation; regular users may fulfill it at their own risk.
When it comes to applying a new version without taking into account the computer’s operating system, the most commonly used method to flash the BIOS is by creating a bootable USB or CD containing the update file, and running it from DOS.
Still, regardless of the method used or whether the upgrade is performed by a regular or power user, it’s recommended that the new BIOS be applied in a steady power environment such as the one ensured by a UPS unit.
The Basic Input / Output System (BIOS) is a very important software that loads the currently installed OS, and tests all of the system's hardware components - so make sure you flash it correctly.
Bear in mind that failing to perform a successful installation could seriously damage your device, and the faulty BIOS resulted from the process might even render it unusable.
So, if this release includes useful changes, hit the download button, get the package, and update your BIOS version. Otherwise, check with our website as often as possible, so that you don’t miss the release that you need.
It is highly recommended to always use the most recent driver version available.
Try to set a system restore point before installing a device driver. This will help if you installed an incorrect or mismatched driver. Problems can arise when your hardware device is too old or not supported any longer.
From time to time, updated BIOS versions appear on the websites of motherboard manufacturers. This is due to the fact that by the time a new product is released, they do not always have time to develop the optimal firmware for it.
BIOS (Basic Input / Output System) - software implemented in the form of microprogram and recorded in the memory of the motherboard. It initializes the operation of computer components and adjusts its operating mode.
In other words, this microcode boots up the computer. He controls the work, hard drives, various ports and other devices. They also ensure the further launch of the operating system.
Before moving on to the update process, decide on whether you need to update the BIOS at all? If the computer is already working well, then there is no need to update the motherboard firmware. It is needed only for:
- Expansion of functionality and list of supported devices. For example, such as new processor models.
- Elimination of errors of the current version, due to which normal operation is impossible. For example, there is no sound on the computer and the reason for this is not in the sound drivers.
Let's make a reservation right away, updating the BIOS is a serious and rather risky undertaking. If the upgrade is not performed correctly or there is a power outage in the process, the motherboard may be damaged. In this case, you may need to carry it to a service center.
In addition, if the motherboard is under warranty, and you decide to reflash it, the warranty will be canceled. Therefore, weigh again which is better: update the BIOS and void the warranty or postpone this action until later, when the warranty period has passed.
If you do decide to update, it is highly desirable that your computer is connected to.
If, after updating the BIOS, the computer does not boot, do not rush to panic. Many motherboards provide a factory reset option. Read more about them in the instructions for your motherboard.
To reset the configuration of the MSI motherboard, the BIOS update of which will be discussed later, use the jumpers on the motherboard. Unplug your computer and short-circuit pins 2-3 to clear CMOS (volatile memory). Do not forget to return the jumper to its original state before turning on the computer (short circuit pins 1 - 2). Attempting to clear the CMOS while the PC is on may damage motherboard.
Go to MSI official website, download section. Download the update utility - Live Update. It is now located at: download.msi.com/uti_exe/mb/LiveUpdate.zip
After starting the program, go to the Live Update tab, check the Manual Scan action, then MB BIOS and click Scan.

If you have the latest BIOS version, you will see the following message.

It means: the BIOS of the motherboard has the latest version. There is no need to update.
If, however, Live Update informs about the need to update the BIOS - click on the corresponding icon (download and install) to load the BIOS of the motherboard. After downloading, the installer will automatically start.
In the window that opens, click Next.

The next window will offer 2 ways to update the BIOS. Select In Dos mode (USB) and click Next. How to update the BIOS of the motherboard in the second way - we will consider below.

Connect a USB flash drive to your computer to create a bootable disk, then select the required USB drive from the list.

Click on the Next button and confirm the clearing of all data on the USB flash drive by clicking OK.

Will begin to be created bootable USB drive, it will take some time. Upon completion, a message will appear stating that the bootable disk was created successfully.
Click Start to restart your PC.

Make sure that BIOS is configured to boot from a USB flash drive. When the computer boots up, follow the instructions provided.
Second way
At the stage of choosing the update method, specify In Windows mode, which means - in Windows mode, then click Next.
In the next window, close all programs by clicking Close all listed programs and click Next.

By clicking Start, you will start the BIOS replacement process. After it completes, the computer will restart.
If you have a different motherboard - new version Look for the BIOS and information on updating it on the manufacturer's website. Of course, you can use third-party solutions, but official updates preferable.