Unfortunately, when installing programs, most of them are automatically registered in Windows autorun 7 , even if these are not the programs themselves, then these may be certain components of them, for example, intended for sending update requests. Many computer users are bothered by this fact and want to disable autorun in Windows 7. Also, autorun sometimes becomes a way for various viruses to get onto your computer. The computer automatically opens some files that may be infected.
Also, due to the fact that Windows 7 autorun has accumulated a large number of programs that will be launched when the computer is turned on, this means that the computer will slow down and become dull, since the programs consume computer resources, such as processor time and RAM, This is one of the main reasons for the slowdown in computer performance. In order to get rid of these problems and increase operating speed, you just need to disable Windows 7 autorun.
The Windows 7 operating system easily allows you to configure and enable/disable autorun programs.
In order to find out which programs are in autorun and start working when you turn on the computer, follow these steps:
Start → All Programs → Accessories → RunIn the window that appears, in the open line, type the command:
msconfig
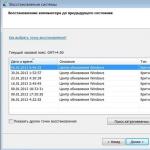
And click OK, In the “System Configuration” menu that appears, go to the “Startup” tab

On the startup tab, uncheck all programs that you do not use, or if you don’t know what it is, then disable it too, there’s even a button there - "disable everything". If necessary, everything can be returned back by checking the boxes again. There are not many programs that really should be in autorun, usually an antivirus.

After making changes, click “Apply” → “Ok”, the system will prompt you to restart the computer for the changes to take effect, you can do this immediately or do it later.
Windows 7 autorun very often contains viruses that begin to work and cause harm immediately when you start the computer, so if autorun contains programs unknown to you, with crooked names, then it is likely that this is a virus that needs to be removed.
Method 2 - Disable Windows 7 autorun
As in the first case, you must have administrator rights to perform these actions. In order to disable autorun, click “Start”, type gpedit.msc into the search bar and press “Enter”.

The “Local Group Policy Editor” will open, in which you need to open the following path in the left menu:
Computer Configuration → Administrative Templates → Windows components→ Autostart policies
You will see the item - "Disable Autorun" click on it double click. Select Enable, select for which devices and click OK.

Windows 7 disable flash drive autorun
There is another type of autorun, which is responsible for autorun from removable media and flash drives.
In order to disable autorun Windows flash drives 7, must be opened "Control Panel" and enter into the search bar "AutoPlay" and open it.

Windows 7 disable disk autorun
Uncheck the first box “Use autorun for all media and devices”

If desired, you can add necessary devices into autorun, this is very easy to do using the drop-down menu.
The Windows operating system, by default, after installation on a computer, has autorun functions enabled from the computer disk itself and devices connected to it. When the operating system starts or when an external storage device is connected, some malicious program may autostart. software.
When the autorun function is enabled in operating system, the launch of such malicious software does not occur when you have launched any program that has malicious code.
This happens when, for example, the operating system starts, after inserting an optical disc into the drive, or after connecting a flash drive to your computer.
To make your computer more secure, you need to disable autorun from hard drive, network drives, drive CD-DVD discs and from removable storage media (flash drives, memory cards, external hard drives). This is especially true for autorun from various removable media. When copying or transferring information using removable media from different computers, most often the spread of viruses occurs.
When you connect flash drives to a computer, the “autorun.inf” file autoruns the contents of the media. A virus or some malicious code may be located either in the “autorun.inf” file itself or on such media connected to the computer.
Disabling AutoPlay in Windows 7
To disable the autorun feature in the operating room Windows system 7 you need to disable autorun for all media and devices. To do this, go to the Start menu => Control Panel => Hardware and Sound => AutoPlay => Set default settings for media or devices. IN open window You need to uncheck the box next to “Use autorun for all media and devices.”
If you want to selectively leave autorun, then you will need to select values for each item separately. In this case, the checkbox next to “Use autorun for all media and devices” does not need to be unchecked.
Disabling AutoPlay in Windows XP Professional
In the Windows XP operating system, to disable the AutoPlay feature, you need to open the Group Policy editor. To do this, go to the “Start” menu => “Run”. Then enter the expression “gpedit.msc” => “OK” in the field.
After this, the “Group Policy” window opens, in this window click on the “Administrative Templates” item, then double-click with the left mouse button on the “System” item. Next, in the “System” section, double-click with the left mouse button on the “Disable autorun” item.

In the “Properties: Disable autorun” window, activate the checkbox opposite the “Enabled” item and in the “Disable autorun” field, select the “on all drives” option, then click on the “OK” button. After this, restart your computer for the changes you made to take effect.

Disabling AutoPlay in Windows 10
To disable autorun in Windows 10, go to the Start menu => Settings => Devices. In the settings window, open the AutoPlay tab.
In the AutoPlay setting (use AutoPlay for all media and devices), switch the switch to the Disabled position.
You have to open “My Computer” and at the same time also open your CD or DVD disc in order to play it. Agree this is not very convenient and then let’s look at how to enable or dvd disks.
In order to enable autorun cd or dvd discs, go to Control Panel and open the AutoPlay control.
You will see this window with autorun settings. For each individual media, you can select the setting you need. See the screenshot, I marked everything with arrows: To enable autorun, check the box next to “Use autorun for all media and devices”, then next to each media, click on the arrow so that a drop-down menu appears with the choice of enabling or disabling CD or DVD autorun.
Dropdown menu settings:
- If you select the setting - “Install or run the program from user media”, then when you start cd or dvd disc the program or game will begin to install immediately. I don't recommend you do this.
- If you select the setting - “Open a folder to view files using Explorer”, then when you launch a CD or DVD disc in a window on the desktop, the disc with the available information will be opened.
- If you select the setting - “Do not perform any actions”, then the CD or DVD disc will not autorun.
- If you select the setting - “Ask every time”, then when you start the CD or DVD disc, a window will appear on the desktop with a choice of actions, “Install” or “Open for viewing”.

If after all the settings you or still doesn't work, then go to the registry. In the Start menu, in the search bar, enter “Regedit”. In the registry window we look for this section
HKEY_LOCAL_MACHINE\SYSTEM\CurrentControlSet\Services\CDRom
We look in the right column for the value AutoRun, double-click on it with the mouse button. There should be a number in the window that opens 1
this parameter is responsible for enabling CD-ROM autorun, if enabled 0
, this means that autorun is disabled.


Let's move on. If you have everything enabled in the registry, but CD autorun does not occur, then do the following. Go to “Device Manager”, select “DVD and CD-ROM drives”, right-click on the device and delete it. Reboot the computer, after reboot, the system will install itself required driver and will identify the device.
Many users find it annoying automatic start each storage device with information inserted into the device. In this case, audio and video players can automatically launch, or windows with notifications may simply pop up. But much worse things can happen, such as the installation and spread of viruses.
To begin with, it’s worth saying that there are two types of automatic launch. The first one is AutoPlay, it searches for a certain type of information on the drive and offers to run it through the default utility. The second type is Autorun, he came from the old Windows versions. In this case windows looks for the Autorun.ini file on disk, and then reads and runs the actions recorded in it. This could be as simple as changing the media icon to something non-standard custom, or writing a virus into the system. This article will talk about how to disable autorun on the system.
Universal methods
This section will talk about several methods for disabling autorun, which are suitable for all systems, starting with Windows 7.
Disable Autorun and Autoplay in the Local Group Policy Editor
There are several ways to choose the right application. You can go to the launch, then you should go to control Panel, then select administration and here select Group Policy Editor. However, you can simply press win+r and enter into the window gpedit.msc. Next, the user will need to go to the computer configuration, after which Administrative Templates, then click on componentswindows. In this directory, you should select the autorun policy.
Next, you need to double-click with the left mouse button on the parameter “ Disabling autorun" In the window that opens, you will need to change the checkbox to Enabled, and at the bottom of the window you should make sure that the parameter will be applied to all devices. 
Using the registry editor
The user may not have access to the previous item due to the system version or other restrictions. In this case, you should use a utility to edit the registry; you can open it by pressing win+r and writing regedit. After that, on the left side of the menu you will need to go through the path consisting of directories HKEY_LOCAL_MACHINE\Software\Microsoft\Windows\CurrentVersion\Policies\Explorer\, the user will also need a second partition with the same path, only it will start with HKEY_CURRENT_USER.
In these two directories the user will need to click right click mouse over empty space and create new parameterdword for 3 bits. It will be necessary to name it NoDriveTypeAutorun, he will have to set the value to 000000FF. Then you can close the editor and restart the computer. After this, automatic startup of all drives will be prohibited.
Shutdown via control panel
You can also turn it off through the control panel. First, the user will need to launch it, then Equipment and sound and here click on Autorun. 
Here you can uncheck the use of autorun and in this case it will not be used for any devices. However, if the user is afraid of viruses or he simply does not like certain actions, then everything can be configured here. There is an option to choose what the system will do with each file type. You can configure everything so that video files will be played immediately, or the computer will not respond to them at all.
The user can configure all the items for himself, here you can select actions for audio and video, images and programs, DVDs and so on. However, for programs it is better to disable automatic launch or at least leave a request to the user. 
Autorun in Windows 8 and 8.1
For the eight, everything is set up a little differently. First you should go to settings, then go to Change computer settings, then go to Computer and devices, then go to Autorun.
Here you can turn the autoplay lever off or configure actions for each media type.
Disable in Windows 10
In the top ten for settings you should go to settings, then go to the devices section. 
Next, select autorun in the left menu. Here you can turn the switch to the off position, or configure actions for each media. 
Enabling autorun in Windows 7, 8, 10
Some users encounter the opposite problem. They want a menu to pop up or files to play when they insert a drive, but nothing happens. In this case, you should check the parameters described in the article. It's best to start with the settings section or control panel; this is the easiest and most likely way to disable automatic startup of drives. If everything is configured correctly there, then you should go to group policies and disable the specified option there. If everything is in order there, then all that remains is to go to the registry and delete the specified parameters.
Information applies to products
Kaspersky Internet Security
Kaspersky Anti-Virus
Kaspersky Total Security
Kaspersky PURE
Kaspersky Small Office Security
Cause of occurrence
The cause of the problem may be incorrect settings.
Description
There is malware that spreads by creating copies of itself on all available hard drives using their autorun. The attacker records on hard drive executable malicious file and writes the path to it in the file autorun.inf hard drive. When a hard drive is connected, the system starts the one specified in autorun.inf a malicious file that infects your computer. This way, an attacker can gain control of the system and user data. Located in RAM of an infected computer, the malicious code, in turn, when connecting new hard drives, writes a copy of its executable file to them and writes itself into their file autorun.inf, thereby ensuring its further spread.
Consequences of the correction
Disabling autorun from hard drives does not in any way affect the system boot (multi-boot) and does not affect its performance. The fix only affects file autorun autorun.inf, which may contain links to malware. By default, autorun from hard drives is disabled.