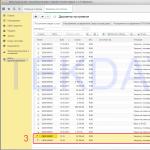
Not long ago, my work computer was supplemented with a laptop, which constantly stands on the table next to the monitor. I need to work on both computers at the same time, and I started to get tired of constantly moving my hands from one keyboard/mouse to another.
I thought, “How cool would it be to make the laptop display an extension of the desktop PC display, and at the same time control them with the same keyboard and mouse!” It turned out there was a way out. And it's called .
Description and principle of operation
This wonderful program, distributed with open source source codes under GPL license, can connect the screens of several PCs into one large virtual screen. However, the operating systems on them may be different. Windows, Mac OS X, Linux and other operating systems are supported.The principle of operation is very simple: as soon as you move the mouse cursor to the edge of the screen of one PC, it appears on the edge of the screen of the other:
Settings
Setting up the program is quite simple. Let me show this using the example of two computers, one of which (desktop) has Windows XP installed, and the other (laptop) has Windows Vista. We will control both of them, naturally, using the desktop keyboard and mouse.Let's assume that network names of computers without domain suffixes - respectively desktop And laptop.
Links
You can download the tiny (less than a megabyte) Synergy distribution from the program website: .At the time of publication of the topic, the latest version of Synergy is 1.3.1. Here are the direct download links:
- Windows:
My next off-topic will again be about computers. This time I will tell you how I attached one set of mouse and keyboard to two computers, plus combined sound. But I won’t go into details why I did it...
Until today, I actually already use one keyboard and mouse for two computers. To do this, I used the Synergy software solution, but this method failed me at the most crucial moments. For example, sometimes, at the time of network rendering, it was impossible to do anything at all with both computers.
In the end, I decided on the hardware method using a KVM switch. Moreover, I also decided to combine the sound of two computers, but first things first...
To implement my plan, I needed the cheapest KVM switcher, with two USB ports.


The presence of an audio channel in it doesn’t mean anything, since I didn’t even intend to use it!
To implement the idea with sound, two audio cords were purchased

and the cheapest USB sound card(if, of course, it can be called a map at all).

After experimenting with connections, I discovered that the switch I bought works great with a USB tee, so I also connected the Razer Nostromo extended keyboard, which is very convenient to use in Final Cut.

After making sure that everything was working correctly, I secured the resulting garland of wires under the table.

Switching between computers can now be done either through a given key combination or using a small button.

Now it's time for sound...

Everything here turned out to be not simple, but very simple. My Mac detected the connected audio speaker without any drivers.

All that was left was to connect line output this whistle to line input the second computer, and the linear output of the latter to the linear input of the whistle. It was also necessary to adjust the mixing so that all channels worked simultaneously.
And lo and behold, here it is happiness and freedom! One press of a button and I’m already running Windows, one more press and I’m back on the Mac.

And also, you probably noticed that I have a new animal - the CYBORG R.A.T mouse. 7

I'll tell you about it as a bonus.
After this mouse, my favorite Apple mouse became defective and retired.


The box included with this little animal contains all sorts of elements for transforming this modest device.

For example, instead of the standard side trim,

You can put one on which you can fold your unused fingers.

The length of the mouse can be adjusted to suit small hands

and under the big one.

In general, everything spins, moves and transforms. Among other things, the weight of this mouse can be adjusted to suit you; there are special weights for this.

Well, seven programmable buttons are simply a blessing, especially considering that the mouse has several switchable profiles and macro support..
True, I won’t tell anyone that after I connected it, it didn’t work for me at first. As it turned out later, it was necessary to tear off the red sticker.

That's all for today, now go to bed, otherwise in four hours you will have to wake up for work...
Professionals, and not only others, often need to work with several computers simultaneously. I don't mean managing a fully deployed server, we're talking about about situations when the second, third, etc. computers are located locally (possibly spontaneously) and for some reason it is impossible or inconvenient to use remote access/management tools, such as RDP or SSH. At the same time, sometimes it is simply physically impossible to place the required number of keyboards and mice on the table (not to mention without getting confused in them afterwards); different sizes and layouts will invariably lead to errors, take up nerves and time. In a word, the problem is known. Accordingly, there are solutions that have already become traditional. The most famous is KVM (Keyboard, Video, Mouse): a device that can, at the user’s command, switch one single set of keyboard, monitor and mouse between several computers.
However, despite all its obviousness this decision It's also not a panacea. Sometimes, for example, you still need to see several monitors at the same time, besides, any hardware solution has natural limitations, in this case - the number and types of ports (on which the price can very significantly depend). RDP also has its limitations, so today we will look at another way to solve the described problem - software analogues of KVM, although it is more correct to talk only about KM, since it is assumed that the computers controlled with their help are still equipped with their own monitors. In many (but, of course, not all) cases, they turn out to be the most universal and effective solution, devoid of hardware limitations and requiring the fulfillment of a single condition for their operation: computers must be connected to a local network.
Input Director
Of all the programs discussed in this material, designed to work in Windows environment, the most saturated with all kinds of settings and auxiliary functions. On the one hand, this gives additional freedom to the user, on the other hand, at first it will certainly lead to some confusion and a search for the necessary parameters on numerous tabs, especially since the interface is in English (however, like the rest of the participants this review). But for the simplest and most typical situations, such as, say, connecting a second computer for simultaneous use with the main one (permanently for work or quickly for the purpose of setting up, debugging), everything looks quite simple. The main thing is to understand that Input Director operates in terms of master and slave computers. The slaves are controlled using the keyboard and mouse on the master, which is actually the only difference except that it also issues most of the system alerts.
So, Input Director must be installed on the master and slave computers. The size of the distribution package is about 3 MB; for the review we used the latest beta version 1.3 build 98, since it introduced a number of really useful functions(although some of them are still unstable). A reboot is not required, so you can connect a new slave computer very quickly. The program is essentially a window with settings (except for the icon in the system tray of the taskbar) and all subsequent work is performed in it.
Rice. 1. Each computer running Input Director must be configured in master or slave mode, and in some cases even both.
The developers recommend configuring the slave computer first, although in reality the order does not matter. You need to go to the Slave Configuration tab and describe the computers that can act as masters. There are three possibilities for this:
- all computers;
- only from a specific subnet (defined by base address and mask);
- only specific computers (with specified network names).

Rice. 2. Slave mode setting: the easiest way is to specify the exact network name control computer, although in some cases it is possible to describe an entire subnet.
In a safe environment, such as at home, either option will do. The first two are also convenient when using the master/slave mode auto-switching option (Global Preferences tab) - its meaning is that after proper configuration, the master role will automatically switch to the computer on which at the moment controls (mouse and keyboard) are used.
On the Slave Configuration tab, you can also immediately enable or disable synchronization of the screen saver and system blocking, and also, if necessary, enable encryption (AES 128/192/256) of traffic.
These settings are sufficient for the system to operate. Now you need to return to the Main tab and click the Enable as Slave button.
Preparation of the host computer is generally done “symmetrically” on the Master Configuration tab. It is necessary to specify all slave computers, and individually. At the bottom of the screen, click on the Add button and in the Slave Configuration window that opens, enter the network name (or IP address) - this is enough and you can click OK. However, if necessary, here you can immediately select a “hot” key, by which the input will switch to this computer; indicate the number of monitors and their relative position (simply by dragging with the mouse); activate traffic encryption. You can also return to this window later and make the necessary adjustments.

Rice. 3. Setting up the main mode: by clicking the Add button, you need to add slave computers and correctly describe their placement relative to each other.
After configuring all slave computers on the Master Configuration tab, it is recommended to correctly position all described computers so that the picture reflects their physical location. Thanks to this, it will be possible to completely naturally “drag” the mouse to the desired computer through the corresponding edge of the current monitor. However, this mode can be disabled - if you plan to use only hot keys to redirect input, then there is no need to describe the location of the monitors.

Rice. 4. Input Director has the most convenient support for multi-monitor configurations.
Finally, you also need to go to the Main tab and click the Enable as Master button. Now you are ready to use the Input Director. The program very successfully implements visualization of the intersection of the edge of the monitor screen adjacent to another computer. Switching input will be accompanied by diverging “circles on the water” around the mouse cursor, so it is almost impossible to “get lost”. The same effect will be observed when the master/slave mode is automatically changed (plus a pop-up notification in the system area).

Rice. 5. Like this visual effect accompanies input switching.
In addition to actually managing multiple computers, Input Director also provides a “shared” clipboard. Thanks to this function, you can easily transfer any information from one computer to another, the developers also claim the possibility of file exchange via copy/paste, but in my case (Windows 7) it never worked, despite the fact that in the description latest versions Corrections of the corresponding errors are reported.
As mentioned, the abundance of additional parameters makes it possible to fine tuning programs. I don’t undertake to describe all the possibilities; I’ll dwell only on those that seemed the most interesting to me.

Rice. 6. The Master Preferences tab contains a huge number of settings that affect the operation of the entire system - they don’t even fit in the window, pay attention to the scroll bar. This illustration shows a group of parameters that control mouse input switching.
On the Master Preferences tab (on the host computer), you can select the most suitable convenient way moving the mouse over the edge of the screen - the Transition Options group of parameters is intended for this. By default, the mouse simply crosses the edge of the screen behind which the next computer is located, this may not always be convenient. That's why this operation can be done either with an additional key pressed, or after holding the cursor in the extreme position for some (adjustable) time, or by double “tapping” the cursor on the edge. You can also disable transition in the corners of the screen (for example, so as not to aim too much at the Start button).
On the Global Preferences tab on each computer, you can enable automatic activation desired mode(master or slave) when starting the program (by default it remains inactive), if necessary, disable the shared clipboard and “water ripples”, enable the information window above the system area of the taskbar, which will display the current input destination, and also activate the already mentioned auto-switching of master/slave modes. The last option requires that all computers marked with it be configured with both modes (which is active does not matter), which will require some work. But overall, the feature can be quite useful.

Fig.7. Convenient feature - automatic switching master/slave modes - requires preset all computers.
Finally, Input Director has the ability to record and execute keyboard macros (mouse functions are not supported). Of course, there are much more powerful tools for this. specialized programs, but some might find it handy to have the basics on hand just in case.
Mouse without Borders
This program is also intended for use only in a Windows environment, but is actually the complete opposite of Input Director in terms of ease of setup and use. It is also interesting that it was created by Microsoft employees, although it is not an official product. Within the corporation, there are many informal associations of programmers (not counting the full-fledged research department), which from time to time produce all sorts of interesting utilities. Likewise, Mouse without Borders was created literally in a garage - only not in a physical room, but in the community of The Garage. Its main developer, Truong Do, actually works on the Microsoft Dynamics project; he apparently needed such a utility for some personal purposes, although developers are one of the obvious target groups for various means management.
The general concept of Mouse without Borders is much simpler than that of Input Director - the program initially runs in auto-switching mode, i.e., at any time you can use the most suitable keyboard and mouse to control all connected computers.

Rice. 8. When installing Mouse without Borders on the first computer, answer no to immediately generate an access code.

Rice. 9. The resulting code will be needed to connect other computers.

Rice. 10. On each one you will need to specify the code and name of the computer with Mouse without Borders installed.
When installing, Mouse without Borders asks if it is already present on other computers. If you are installing it for the first time, you need to answer “no”, as a result of which a special code will be generated that acts as a password for connecting computers. Accordingly, on the second (and subsequent) computer you need to answer “yes” and enter the name of the first one and the code. After clicking on Link, the computers will be connected and the whole system will work.

Rice. 11. Mouse without Borders is ready to use immediately after installation.
Mouse without Borders allows you to connect up to four computers, the order of which can be changed in the settings window by simply dragging the corresponding images with the mouse. Multi-monitor configurations are not specially supported. TO basic capabilities program applies sharing clipboard, as well as the ability to copy files by dragging them with the mouse on the right computer. Last operation can only be performed on single files; groups and folders are not supported. The copying process is accompanied by a pop-up notification; all files are placed in a special MouseWithoutBorders folder, which is automatically created on the desktop. It should be borne in mind that no warnings are issued when copying files with the same names; new ones simply overwrite the old ones.

Rice. 12. The computer placement settings are quite simple, but in most cases they will be sufficient.
The minimalist settings of Mouse without Borders seem to reflect its most typical use. You can configure hotkeys, disable screen savers on managed computers and the need to first press Ctrl-Alt-Del (which is always processed by the local system) to unlock the computer. It is also possible to control all PCs synchronously, for example, to execute the same commands or programs - naturally, a mouse can only be used for these purposes if the monitor resolutions are the same. Finally, through the Mouse without Border icon in the system tray of the taskbar, you can quickly take and transfer screenshots of managed computers.

Rice. 13. In Mouse without Borders, the most necessary hotkeys are initially configured, which makes using the program even easier.
Thus, Mouse without Borders really doesn't go too far beyond its core objectives, which is a good thing in many cases. The result is the most compact distribution, easy setup, minimum problems.
Synergy
The main difference and advantage from previous review participants is cross-platform. The program works on Windows, Linux and Mac OS X; you can use ready-made binaries or compile them yourself. Natural costs are the use of cross-platform libraries (Qt) and, accordingly, a rather bulky distribution kit (about 11 MB). However, the principles of setting up and using Synergy on different platforms may differ due to the presence or absence of a GUI and some other features. Currently, version 1.4 is being developed, where this problem should be, if not resolved, then mitigated. In the meantime, in Linux and Mac OS X you need to be prepared to directly work with the configuration file, however, in Windows only with its help you can, for example, describe the configuration of a computer with multiple monitors. However, in the most typical cases, setting up Synergy is relatively easy (using beta version 1.4.5 as an example).

Rice. 14. On managed computers, you only need to enter the server name.

Rice. 15. Server - a computer whose keyboard and mouse will be used to control the entire system. On Windows, the easiest way to configure it is interactively.

Rice. 16. You need to drag the monitor icon into the cells and double-click on them to make the settings.
Synergy operates in terms of server and client - in fact, these are analogues of the master and slave computers of Input Director. Accordingly, it is necessary to configure the server whose keyboard and mouse are to be used, and the required number of clients. On clients, just specify the network name of the server and click the Start button. The server configuration is a little more complicated: you need to select the interactive configuration mode (Configure interactively), click on the Configure server button and describe the placement of the monitors in the window that opens. To do this, you need to drag the monitor icon into the free cells, then double-click on it and specify the network name of the corresponding client in the Screen name field. After this, the system is completely ready for use; all that remains is to return to the main Synergy window and click the Start button.

Rice. 18. Synergy doesn’t have a lot of settings, but it allows you to choose various ways switch input using mouse.
You can also take your time and tweak some settings right away (or come back to them after you've more clearly defined your preferences). For example, for each monitor you can specify “dead” corners in which there will be no transition to the next screen. Although they can be defined globally - in the Advanced Server Configuration tab of the Server Configuration window. Here the very method of switching to another screen using the mouse is adjusted. By default, the cursor simply immediately crosses the edge of the screen, but you can do this after a certain delay (Switch after waiting) or by double tapping on the edge (Switch on double tap within). But you will have to configure the hotkeys yourself - the Hotkeys tab is for this in the Server Configuration window. However, there is clearly some confusion here in the current beta version. Thus, the key combination must be specified twice - both when initializing it and when assigning a specific action.

Rice. 19. Synergy can be classified as a special class of KMG (G - gamepad), since it contains support for game controllers.
Synergy supports a shared clipboard, which is de facto standard for this class of programs, and also has one unique opportunity- under Windows, it can redirect commands not only from the keyboard and mouse, but also from the gamepad.
Resume
There are other KM programs, for example, commercial. I'm ready to assume that it is better tuned than others free analogues; moreover, in Pro versions The ability to copy files and folders is stated. Even so, the $50 price seems excessive.
In turn, the three described programs cover most possible situations and you can choose the most suitable one from them. Mouse without Borders captivates with its simplicity and is perhaps ideal for a first acquaintance. Input Director, on the contrary, will offer maximum settings and additional functions, down to keyboard macros. Synergy has no alternative when it comes to operating systems, other than Windows. In any case, each of them is capable of making simultaneous work with several computers more comfortable.
Mouse without Borders is not just about controlling multiple computers with one mouse and keyboard. So what can we do with Mouse without Borders:
Installing Mouse without Borders
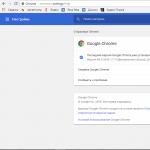
1. First, download Mouse without Borders from the link: the program is free (and yes, the developer is Microsoft Corporation :)).
2. Install Mouse without Borders on all required PCs.
3. Launch Mouse without Borders on the secondary PC and answer “NO”:
In response you will receive a secret code and PC name:
4. Launch Mouse without Borders on the main PC and answer the question “YES”:
In response, you will receive a window with input fields secret code and PC name, enter the information received earlier:
5. Click “LINK” and wait until everything is configured:
That’s it, we’re ready to click “NEXT”, then “DONE” and use one mouse and keyboard on several computers. If necessary, configure additional parameters.
Mouse without Borders made my work much easier, I hope you like it too.
The main advantage of laptops is not only portability, but also complete independence from peripheral devices. The mouse in laptops replaces the touchpad, but they have their own keyboard, which is in no way inferior external keyboards for use on regular desktop computers.
However, in practice, most laptop users prefer a touchpad connected via USB mouse. Why? The answer to this question is known to everyone who has at least once tried to perform some action requiring skill using a touchpad. For example, draw any figure in a graphics editor.
There are far fewer problems with built-in keyboards, but they are still not as convenient as external controls. Best option at home it is to use an external mouse and keyboard. The only inconvenience is that if you use two or three computers in your work, you will have to constantly switch cables between machines.
Can save you from all these inconveniences special program Synergy. This utility allows you to control multiple computers using one mouse and keyboard. In this case, one computer plays the role of a server, and additional computers are his clients. You can determine which computer will be the server and which the client during the installation process of the utility.

You will also need to add the client computer to the program list (Configure Server button).

The server starts first, and after the message that it is ready to connect appears, the client starts (you also need to specify the server’s network name in the client settings).

If the connection is established, when you move the mouse to the edge of the display, the cursor will jump to the screen of the second computer.