For a long time, among users of the Windows OS, the issue of the appearance of transparent windows in the seventh version was discussed. Everything is so and not so, there were many conversations, but in reality not everything turned out as expected. Yes, we were provided with a wonderful Windows Aero interface, but one interface did not solve all our needs. We were able to observe a transparent window only in one option, when you move the cursor to the right of the clock, then you can really see that the windows become transparent, and that's it. It's not enough.
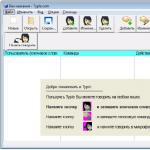
Why do we need transparent windows? Yes, just for convenience. For example, you work in parallel and watch basketball online. Then you are simply better off making some transparent windows for yourself. They can be made using several programs. The first one I want to present is the Vitrite program. Still similar in its functions to the Witright program is the GhostWin program. Of course, these two programs complement each other, so you can use both of them. There are many programs for creating transparent windows, and it makes no sense to consider all of them. We will focus on these two.
With Witright you can make one specific window transparent. Installing the program itself will not make you rack your brains. Everything will pass quickly and beautifully, even without advertising. Management of transparent windows, after installing the program, occurs using hot keys. Suppose you want to create a transparent window for yourself. To do this, you should press the key combination "Contral Shift" and any number from 1 to 9. The number means how transparent the window will be. If 1-10%, 2-20%, 9-90% transparency. If you want to return the window to its previous form, you will need to press the same key combination, only with the number 0. Also, using this program, you can set the priority window on top of all other windows. To do this, press the key combination "Contral Shift Plus".
As for the GhostWin program, it is almost the same in terms of functions, only a little different control. If you right-click on the title of the window, a menu will come out of it, in which you can choose the degree of transparency of the window. If you want to return the window to its previous state, just press the “Normal” key. The difference between GhostWin and Whiteright is that in GhostWin you can make the window transparent even when dragging and resizing. It is very comfortable.
Summing up the above, we can say that if you need to make transparent windows for convenient work, download these programs that I advised. When installed, they do not bite each other, but interact normally.
Brief demo
bias below the transparency slider.
Set transparent color not available.
Important:

Reset drawing options in a group change .

Note:
Change the transparency of a shape

Removing the background of a picture
Change the transparency of an image outside of Office
To make a picture transparent, do the following:
Draw a shape, fill it with an image, and then adjust the transparency of the drawing.
This process is shown in the video. To see more details about it and other methods, click the heading below to expand the desired section.
Brief demo
Setting transparency: detailed instructions
Changing the transparency of an entire image
Draw a shape, fill it with an image, and then adjust the transparency of the drawing.

Advice: If you change the original proportions of a shape by dragging, the picture inserted into the shape may be distorted. In addition, some drawings are not well suited for insertion into certain shapes. You can customize the look of the picture by resizing the shape or using the options bias above the transparency slider.
Change the transparency of part of a picture
Using the built-in transparency function, you can make one color in the picture transparent.
Unlike applying transparency to an entire picture, you can only make a single color transparent in an object inserted as a picture (that is, not in a picture in a shape). If a picture is inserted into a shape as described above, the Set transparent color not available.
Important: an area that appears to be a single color (such as green leaves) may actually include a range of similar color hues, so you may not achieve the desired effect. Applying transparent colors is best in the case of simple pictures with solid colors.
In the image below, the leaves are made up of several shades of green, so only part of the leaves becomes transparent, making it difficult to see the transparent effect. Repeating the process with a different color will remove the transparency from the first color. To undo color changes, click the button Reset drawing options in a group change .
Note: When printed, the transparent areas of patterns are the same color as the paper. On a screen or website, transparent areas are the same color as the background.
Adding a background with a pattern
Change the transparency of a shape

Removing the background of a picture
Change the transparency of an image outside of Office 2010
If you have an image editing application, you can use it to make the drawing transparent. Then save the picture in a format that preserves transparency information (for example, a PNG file) and paste it into an Office document.
Adjusting Picture Transparency: Basic Steps
To make a picture transparent, do the following:
Draw the figure first
Fill it with a pattern.
Adjust the transparency of the picture.
Setting transparency: detailed instructions
Changing the transparency of an entire image
Paste the image inside the desired size shape, and then adjust its transparency.

Change the transparency of part of a picture
Using the built-in transparency function, you can make one color in the picture transparent.
Important: an area that appears to be a single color (such as green leaves) may actually include a range of similar color hues, so you may not achieve the desired effect. Applying transparent colors is best in the case of simple pictures with solid colors.
Adding a background with a pattern
Change the transparency of a shape

Change the transparency of an image outside of Office 2007
If you have an image editing application, you can use it to make the drawing transparent. Then save the picture in a format that preserves transparency information (for example, a PNG file) and paste it into an Office document.
Change the transparency of part of a picture
On the tab Picture Format press the button Colour, and then click Set transparent color.
Note:
Change the transparency of a picture or fill color

Change the transparency of part of a picture
One color in a picture can be made transparent to hide part of the picture or create a layered effect. Transparent areas match the color of the paper they are printed on. In electronic display, such as web pages, transparent areas have a background color.
Select the picture for which you want to change the color transparency.
On the tab Picture Format press the button repaint, and then click Set transparent color.
Click the area of the picture or image that is filled with the color you want to make transparent.
Note: You cannot make more than one color of an image transparent. Areas that represent a single color (such as sky blue) can actually be made up of a variety of color variations. Thus, the selected color may only show up in a small area, and in some designs it may be difficult to see the effect of transparency.
Note: This page is translated automatically, so it may contain inaccuracies and grammatical errors. It is important to us that this article is useful to you. Was the information helpful? For convenience also (in English).
The interface of the "Seven" is famous not only for its convenience and high functionality, but also for its beautiful design style. Users are especially delighted with the possibility of self-configuring visual effects.
The transparent PZ (Taskbar) of the OS, which is the most important tool for managing the Windows 7 desktop, looks stylish. Below is a guide on how to make it translucent or transparent.
Instruction
It should be noted right away that, unfortunately, not all modifications of the "Seven" have a built-in function for the implementation of the task.
For example, to make a translucent or transparent taskbar using the standard tools of Windows 7, only owners of computers with an extended modification of "Home", as well as with versions of "Maximum", "Corporate" and "Professional" can.
But do not be upset if the basic set of OS tools is not rich in interface settings, as third-party utilities will come to the rescue that can quickly solve the problem.
At the beginning of this manual, methods using built-in tools are considered, and at the end, an example of an application from a third-party developer is given, which in a few clicks will make the "PP" transparent and translucent in any version of Windows 7 (even in such simplified ones as Home and Starter).
Method for modifications of Windows 7 with support for "Aero Peek"
Adjusting the transparency of the toolbar is very easy with standard OS tools.
You must perform the following sequential steps:

Note: In, the target menu can also be accessed through the "Control Panel".
3. Now you should select the style "Aero"; 
4. Done. Looking at the "PZ" you can already make sure that its appearance has changed and the goal has been achieved.
 A finer self-tuning of the transparency of the Windows 7 taskbar is also available. For this purpose, you only need to follow a few steps below in a short additional instruction:

Note: Obviously, you can change the color intensity settings only when the function is enabled.
If you have problems setting the transparency of the "PP", it is recommended to check the settings through the regular program "Seventh" OS called "Tuning the presentation and performance of the system" (abbreviated as NPPS).

For novice users, the described instructions may seem complicated.
Therefore, it is advisable to bring to the attention of beginners about the wide distribution of special files with the “.reg” extension in the global network, when loaded, changes are made to the registry that correct the “PU” transparency settings.
If the "teapot" has already made an unsuccessful adjustment attempt by entering the "Color" section,


 You will need to click on “Windows” in the default design section. After that, the OS will return to its original state and the windows will acquire colors that are comfortable for reading.
Method using a third-party application
Users, for example, of the "Home" modification of Windows with index 7, are recommended to use a utility called "TransBar".
![]() It is distributed on the Internet for free.
It is distributed on the Internet for free.
 It allows not only to make the "PP" transparent, but also to adjust its degree of transparency. Adjustment is made in the "Taskbar" tab by shifting the slider in the desired direction. The application clearly displays the level of transparency in percent.
To observe changes during adjustment directly in the program menu, you need to check the box "Auto apple".
Conclusion
The above methods for setting up and changing the "PZ" in the "Seven" are sufficient in most cases. Of course, there are many more ways to adjust the display settings of the Windows 7 interface, and there are many applications for this.
If the user decides to use a file that makes changes to the registry or a utility, then before downloading the distribution kit or file to the computer's memory, it is recommended to activate the antivirus program with freshly updated databases of malicious applications.
I offer a selection of my tips on how to optimize Windows 7. Most of the recommendations are relevant for systems that have an insufficiently powerful video card, memory and processor:
We do the following: Start - Control Panel - System. Choose Additional system settings.
In the window that opens, select Advanced - Performance - Options

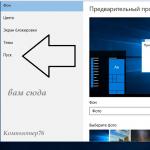
In the tab Visual effects choose . Apply. Let's get the classic look of the interface design.

If this view does not suit you, then you can turn on one of the design themes included in the Windows 7 distribution package. Right click on the desktop and select Personalization. And choose one of the themes.

After choosing a theme and changing the design, you can further speed up the mode Aeroglass, turning off the transparency effect. In the window personalization select item window color, and uncheck the item Enable transparency.

Save the changes and close the windows. In this mode, all the features of the mode are preserved. Aero Glass, and at the same time do not load a weak video card.
By default, all new layers in Photoshop are created with 100% opacity. But the degree of transparency of the layer can be changed using the settings. Opacity and fill located at the top of the Layers palette.
Opacity(Opacity) is a setting with a 100% scale that allows you to change the degree of translucence of absolutely the entire layer, with all the effects applied. If the value is different from 100%, then the underlying layer will be visible. The degree of transparency equal to 0% indicates the complete absence of visible images.
The transparency of the layer can be compared to tracing paper, which is applied to drawings in order to copy them.
fill(Fill) is a 100% scale setting that allows you to change the visibility of a layer without affecting the .
What does transparency look like in photoshop?
Logically, the transparency of a digital image is the lack of saturation and color density. If we imagine color as a film, then transparency is the intensity of light shining through it. But how to show translucency in a computer?
Photoshop has introduced a transparency convention for the world of computer graphics − chess background.

Now this symbol has become the standard. Many programs and web services use a checkerboard background when it comes to transparency. For example, Yandex.Images or Google-images show images with transparent elements on a checkerboard background.

3 ways to make an image layer transparent
To begin with, the required layer is needed. It will also be appropriate to select two or more using the Ctrl or Shift keys.
Note
The background layer (with the lock icon) cannot be transparent. For him, these settings are inactive.
One more note
The layer thumbnail will not change no matter what transparency you set.
Method 1 Entering numbers
Enter the value of the desired transparency in numbers from 0 to 100 in a special settings box on the palette. Since both settings have almost the same effect, you can use any of them, the main thing is to remember what they are.

Method 2 Slider
A little to the right of the numbers there is a button with a small arrow. If you click on it, a slider will appear. It must be moved with the mouse to the left or right to decrease or increase the transparency of the layer, respectively.
The digital display will show the current value, and the image itself will change with the movement of your hand.

Method 3 Using the keyboard
For a number of Photoshop tools, the ability to change the opacity of a layer using the keyboard is available. Select a tool, for example, or (there are also a number of other tools, you can find them by brute force).
Now press the numbers on the keyboard:
- Number 1 will change the opacity to 10%, 2 to 20%, 5 to 50%, and so on;
- The number 0 means 100%;
- Dial 55 for 55%, 67 for 67% and so on
To use the same trick to change fills, hold down the Shift key along with the numbers.
How to make a section of a layer transparent
To make transparent not the entire layer, but only its separate section, some efforts will be required. As such, there is no tool for this purpose. However, depending on the task, there are at least two solutions.
Both solutions are united by the initial, perhaps the most time-consuming work - the creation of a selected area. The logic of actions is simple - you need to select a fragment of the image, with which further work will take place.
In our example, let's say you want to make a gray round background transparent. To do this, I will use the tool . On the settings panel, you need to set the parameter Add to Selection, and then click on all the desired areas until you select them all.
After the selected area has appeared, you can make this fragment transparent.
Method 1 Cut out the desired area of the image on a new layer
First you need to make sure that any of the tools for creating a selected area is active. for example Magic wand, which was used in the previous step.
Now you can right-click on the selection. A context menu will appear. We are interested in the team Cut to new layer.

As a result, this fragment will be separated from the current image and moved to a new layer. And then with that new layer, you can do whatever you want, including changing the transparency.

Method 2 Using the eraser
This method is suitable if you need to achieve not a uniform decrease in transparency, but a floating one, that is, somewhere stronger, and somewhere weaker to make this effect.
Select , in the options bar, set the value Opacity other than 100%. Then erase the areas of the image that are in the selected area. The tool will only affect the pixels you have selected.
Change the value Opacity if you want to achieve an uneven effect.

How to save an image with transparency
There are many, but only two of them support transparency - PNG and GIF.
GIF has a limitation - a pixel must either be transparent or not, there is no third option, that is, a transparency value of, for example, 59% will no longer be supported. This format also has restrictions on the number of colors used - there can be no more than 256 of them.
So the image needs to be saved. in PNG format. Only he is devoid of all the shortcomings and is able to show translucent pixels.
To make a PNG image in Photoshop, you need to run the command: File - Save As. A dialog box will appear in which you need to specify the location to save on your computer, and also select from the drop-down list File type — PNG(*.PNG).
Noticed an error in the text - select it and press Ctrl + Enter . Thank you!