Images on the Internet tell people a lot of interesting facts, but it is not always possible to take a closer look at them. Due to the lack of sufficient traffic, users of the World Wide Web have to save money by viewing only textual information.
But not all users find the right way to remove or disable images from the most popular browser. To perform an image neutralization operation, it is worth considering the points that allow you to do it correctly.
Changing google chrome settings - turn off images correctly
 To prevent the display of graphical elements in the specified browser, the user should find the settings panel of his browser and follow these instructions:

Graphics do not always turn off immediately after performing the actions of such a plan. If the user, after adjusting the settings, opens Google Chrome, and the graphic elements are present, you should do this:
- restart the program used to enter the network;
- restart your personal computer or mobile device - turn it off and on again;
- go to the general settings of the device you are using, turning off the ability to display pictures.
If the question of how to disable pictures in google chrome remains unresolved, it is possible that a person has an outdated version of a computer or mobile program installed. This case suggests that you need to update or reinstall the program.
Disabling images in the menu of a computer or mobile device
There are no exceptions when the image cannot be turned off in the program menu. Such a case is a clear indication requiring the following actions:
- open the menu of a smartphone or personal computer device;
- go to the application management system;
- open from the general settings menu, an item that allows you to manage the operation of programs and open the desired application;
- find the option to turn off images and put a mark there.
After these steps, the network user should turn off the device and turn it on again. After that, you should launch the previously disabled browser. The situation must be completely corrected.
If these actions did not provide adequate assistance, the Internet user should seek professional help from a service center that maintains computer equipment. Specialists will definitely be able to fix such a problem quickly and efficiently.
Modern websites are largely composed of media, in particular images. This presentation format is easier for most people to understand. But at the same time, it loads the Internet connection, increasing the waste of network traffic (although not so much). But not only in order to save it, people are interested from time to time, how to disable images in chrome browser. We will consider this procedure in more detail.
First, we will talk about the presence of such a function in the version for stationary platforms. And right after - about mobile devices. We wish you a pleasant reading.
Case #1: PC
On computers and laptops, the required parameter is officially provided by the developer. And you can get to it like this:
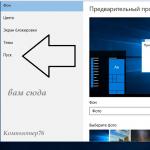
But if you do not like the presence of images on a separate resource, then you can not hide them everywhere, but only for it. To achieve this, first copy the link to the unwanted website. Then on the settings page find the block "Block" and click on the button "Add". Then paste the link you copied earlier into the single column and click again "Add".
This procedure can also be performed in the opposite direction - to block images everywhere, but enable their display on individual web pages.
Case #2: Mobile Devices
Unfortunately, this feature is not available on Android and iOS. But you can activate the "Traffic Saver" feature. It reduces the quality of media files, while reducing the consumption of mobile traffic and speeding up the speed of Internet surfing. Instructions for its inclusion are set out on our website.
Google Photos is the best way to create a simple animation from several images. Sometimes the service does this automatically, offering you options for your creativity, but you can also create a GIF yourself.

To do this, you just need to go to the "Assistant", select the creation of animation from above and mark the necessary photos. You can use from two to 50 images. The finished GIF file is automatically saved to Google Photos.


This feature is also found in the Assistant menu. In collages, you can use from two to nine pictures, which will be automatically glued together and distributed over different areas of the image.
3. Quick photo editing
Google Photos, of course, will not replace a serious one, but it still has the basic image editing tools. Various filters, cropping, rotation, as well as brightness, saturation and detail settings are available to users.


To access these functions, you need to open the photo and click on the icon with the sliders located at the bottom. You can also use standard smartphone tools for editing. You can go to them by selecting the appropriate item in the image menu at the top.
To view a whole pack of photos, for example from a vacation, the slide show mode is perfect. When turned on, pictures are automatically changed after a few seconds. This feature will be especially useful in the case of the web version of Google Photos, which allows you to turn your PC screen into a photo frame.

The slideshow mode is activated from the menu of any photo, just click on the three dots in the upper right corner and select the desired item. This is true both for the web version of the service and for the mobile application.
5. Scanning printed photos
Through the side menu of the Google Photos mobile client, you can go to the "" application, which allows you to scan printed photos and create digital copies of them. This automatically crops, corrects, removes glare and rotates the photo to the correct position.
Google Photos stores all the pictures from your smartphone in, so you can safely delete them from the device’s memory if you have constant access to the Internet. The mobile application of the service even has a special function “Free up space”.


It allows you to delete from the gadget all the pictures that have already been uploaded to the cloud. Previously, Google Photos will evaluate their number and total weight, asking for confirmation of deletion.
Google Photos can automatically apply filters to your photos, create movies and animations, and remind you of what that day was like a year ago. The results of such a creative can be saved or deleted, and if necessary, such tips can be discarded.


To do this, open the side menu of the service, go to "Settings" and click on the "Assistant Hints" item. There you can choose which recommendations to keep and which to remove.
Thanks to the use of artificial intelligence, Google Photos can recognize what is shown on uploaded photos. For example, it can be food, a document, a sunset, mountains, a building, and so on. You can quickly find the right frame among thousands of other photos by specifying in the search what is captured on it.


Similarly, the service will be able to sort photos by events and cities. This will already allow you to go to the pictures taken on last year's vacation or on some of the past holidays.
Photos and videos from Google Drive can be viewed and edited in the Google Photos app. To do this, you need to enable synchronization in the settings. You can do this in any of the services.
In Google Photos, the desired switch is located at the bottom of the main settings. In the “Google Drive” settings, which open after clicking on the gear, you need to check the box next to “Create a folder for Google Photos”.

Many images on your smartphone are automatically saved in separate folders, especially pictures from and simple downloads. By default, all of them do not fall into Google Photos, but this is easy to fix.


In the service settings in the section "Startup and synchronization" there is an item "Folders on the device". There, for each folder where there are at least some images, a switch is available. It is he who allows you to start the automatic download of all the pictures contained in them.
All photos from Google Photos can be downloaded to any device in one large archive. There is a separate Google Takeout web service for this. With it, you can download all the data related to you from all Google services. If necessary, you can limit yourself to only photos.

To do this, go to the special page of the service, click on the "Deselect" button and activate the switch only opposite "Google Photos". It remains to click "Next" at the bottom of the page, select the archive format, size and method of obtaining. It can be uploaded to the cloud storage or sent to you via a link.


All sorts of animated pictures on the site are often fun, often just decorate the site, less often - both together. But only if in the subject, in moderation and not for long. As for an ordinary viewer, GIFs are actually a one-time thing and quickly lose their attractiveness (even if you rush to post it anywhere and send it to all your friends and acquaintances). Therefore, very soon (or right away) such an animation starts to interfere, and then infuriates, especially if you try to read something important next to it. Therefore, we will talk about how to stop gif animation in the browser.
In fact, this problem is seriously aggravated by the fact that in most popular browsers, the standard option to stop gif animation on web pages is simply not provided. At least at the time of this post.
So, if you are also puzzled by finding ways to solve the indicated trouble, we recommend that you start by studying the available addons and extensions. For our part, as all possible assistance, we offer a couple of proven options for Google Chrome and Mozilla Firefox browsers. So:
how to stop gif animation in google chrome
I must say that Google prepared thoroughly for this case and created their own extension. It's called Animation Policy ( link to the official catalog of Google extensions, the author of the program is the author: Google Accessibility) and is intended for those users who wish to manually control the behavior of GIFs in their Chrome. Indeed, through the Animation Policy, you can allow the display of GIFs on sites, allow only their one-time playback, or prohibit all at once.
After installing the extension, you simply click on the small lightning bolt icon that appears in the browser extensions panel and select one of the three Animation Policy modes. By default, the middle one is enabled - "Allow animated images, but only once" ("Allow animated images, but with a one-time playback"). After that, GIFs will annoy you less.
how to stop gif animation in mozilla firefox
To tame the obsessive rampage of gif-images on sites for the Firefox browser, a special add-on has been developed - ESCape From Them GIFs. You can find it by this link (also in the official Mozilla addons catalog). The software installs quickly, but after installation it requires you to restart the browser.
Otherwise, it works extremely simply: if a GIF interferes with any site, press the Esc button directly on the computer keyboard - the picture stops. If there are more than one GIFs on the page, then the addon will stop all of them, even on very gif-enabled sites. By pressing Esc again, the process of scrolling it or them resumes.
how to stop gif animation in internet explorer
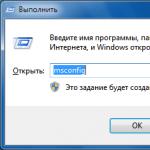
But in Internet Explorer, unlike other browsers, the built-in option to stop gif animation is just present. To enable it, open IE, go to " Settings ", click" Browser Properties ", in the next window, select the tab" Additionally ", then in the window" Options"Find the section" Multimedia", in it we deactivate the option" Play animation on web pages " (uncheck) and click OK .

But after that, it will still be necessary to restart not even the browser, but the entire computer for the changes to take effect. But then IE will definitely not show GIFs.
Now in You probably ask about Edge? And we’ll answer you right away: at the moment, a separate option to turn off the display of GIF animation, like Internet Explorer, has not yet been “attached” to the Edge browser. And extensions for this, too, have not yet been written. They will probably write, but then ...