A non-standard 1C configuration is when: 1) the 1C configuration was written from scratch by the programmer independently, 2) the 1C configuration was standard, but changes were added to it, even if one attribute was added.
In this article we will look at how it is necessary to correctly update 1C configurations, as well as several techniques for softly changing standard configurations, i.e. correct change, which will not affect the possibility of further updating.
In order to make any changes to the standard 1C configuration, it is necessary to unlock the change to the standard 1C configuration, and in some cases “remove it from support”.
In the very optimal option updates 1C configuration can be updated completely automatic mode, this is possible when we do not allow configuration changes. Quite often it is necessary to enable configuration changes because adaptation is necessary application solutions according to the customer’s business requirements, we will focus on this option.
Before you update it is highly recommended to do backup copy database, this can be done through the Administration/Upload menu information base.
There are 2 update options: a) Updating 1C through support (call through the Configuration/Support/Update configuration dialog) and b) through Comparison merging with the configuration from a file. It should be noted that the difference between these two points is that in the first case, both the main configuration and the supplier configuration are updated, and when comparing merging configurations, only the main configuration is updated, the supplier configuration remains the old one. Therefore, the most recommended option is to update via Update Configuration. To update via Configuration Support, the vendor's CF or CFU delivery files are used, which can be found by searching, in the template directory by specifying the path on the Internet, or by directly specifying the path to the required file on your hard drive.
When updating the 1C configuration without the ability to make changes, the update after selecting the update file occurs automatically; if the possibility of making changes is enabled in the configuration, then after selecting the update file a configuration comparison window will be displayed. In this dialogue we can see how the system offers us to update our non-standard 1C configuration. At the bottom of the dialog box there is a corresponding legend for object statuses: “Object Compliance Statuses” indicate a comparison of the “Main Configuration” and the “New Configuration”, “Object History Statuses” indicate a comparison of configuration objects with the “Old Supplier Configuration” objects.
By checking the boxes next to objects, you can choose whether the current configuration object will change or remain old, as well as how to change the object. In the action menu, you can check boxes for subsystems (this is useful if the configuration is supported by several suppliers). This menu also allows you to specify the priority of aggregation for all objects at once; by default, the system considers the supplier’s configuration to be a higher priority. The filter settings allow us to specify which configuration objects we should display in order to be able to specify the merging mode in detail. There are several standard filter templates, and you can also specify filters for each pair of configurations being compared. It is possible to set the “Show only twice changed properties” checkbox in the “Filter” settings; this will allow you to filter out objects whose updating did not result in conflicts between supplier changes and modifications to these objects:

So, the result will be a list of objects that were changed twice during the finalization of the standard configuration and in the new supplier configuration. If you agree to the update, then previously made improvements to these objects will be lost. Therefore, for each object it is necessary to make a decision on how it will be updated. At this stage, a preliminary comparison should be performed solely to reduce the amount of work later. The assessment is not accurate and quick - “by eye”. If there are more changes in the object in the new supplier configuration, then we leave the instance of the supplier object. Leave a checkmark. Then you will need to transfer changes from the working configuration. If there are more changes in the object in the working configuration, then we leave an instance of the working configuration object. Uncheck the box. You will then need to migrate the changes from the provider configuration. You can do things a little differently with modules, because... It is possible to compare modules procedurally.

Those. if in our 1C configuration and in the supplier’s configuration various module procedures are changed, then by checking the boxes correctly we will save ourselves from manually transferring code changes. To get to this, you need to click the button in the form of a magnifying glass next to the name of the mode for combining modules:
When displaying a menu of actions on an object (for example, by clicking the right mouse button), we can call up a report on object comparison.
To confirm the 1C update, you need to select the menu item Configuration/Update database configuration.
To refuse the 1C update, you need to select the menu item Configuration/Return to database configuration.
Several rules that simplify future updating of 1C configurations:
The basic rule for updating 1C: you need to add new objects, because... When updating, new objects are not affected by the system
When changing the texts of modules, it is also advisable to add your own new procedures and functions, and call your new ones from existing ones
Using event subscriptions, thanks to this you can modify standard mechanisms without changing the standard code
Using standard configuration functionality
Programmatic creation of form elements (In the FormCreationOnServer event)
Thank you!
Leave your name and phone number, the operator will contact you at working hours within 2 hours.
Moscow St. Petersburg Samara
Step-by-step instructions with photos
Many users of standard 1C configurations are afraid to make changes and update programs on their own. In many ways, these fears are justified, since incorrect updating of a non-standard 1C configuration can lead to loss of data or loss of completed settings. That is why we have compiled the most detailed step by step instructions, in which we will show how to correctly update a non-standard 1C configuration.
Attention : Before you begin the update, be sure to create backup copies of all information databases. This will allow you to return to original condition if there are any difficulties with the update.
Making a backup copy of information databases is quite simple. To do this, launch the 1C program in the “Configurator” mode. In the “Administration” tab, select the “Download infobase” function. If you wish, you can additionally save the databases on disk or removable media.
Step-by-step instructions for updating a non-standard 1C configuration
- The first stage completely coincides with updating the standard 1C configuration. We launch the “Configurator” mode, which is available only to users with full access rights. In the “Configurator” tab, select “Support” and click “Update configuration”.
- In the next dialog box, you need to check the “Search for updates in catalogs” checkbox. Click Next.
- In the window that appears, check that the selected update is correct. If all the data is correct and you agree with them, click the “OK” button.
- The update process may take several minutes. After which a window will appear with the result of comparing the new and current configuration so that you can see which systems will be updated. Click the Run button.
- If you are sure that all changes made to the configuration do not intersect with 1C objects, in the subsequent windows that appear, we agree with the program.
- After this, the program will offer to update the database configuration. We agree with the program

- In the process of updating atypical configurations 1C there is a change in the structure of the information base. The program informs the user about this in a separate dialog box. You need to accept these changes, so just click the “Accept” button.


Attention: 1C updates are available only to users licensed programs“1C:Enterprise”, in order to receive updates, users of PROF versions must additionally conclude a 1C:ITS (Information and Technology Support) agreement. You also need to register on the site technical support users https://users.v8.1c.ru/. Users of licensed 1C programs can register on the site either independently, using the instructions included with the program, or with the help of our managers.


Attention: For many configurations, there are several program reactions (for example, Accounting 2.0 and Accounting 3.0). When choosing an update, pay attention to which edition the update will be applied to.


Attention : 1C:Enterprise 8 allows you to automatically update even changed configurations. If the changes made do not intersect with objects developed by 1C (for example, additional details have been added to the document or new look directory), the update will be completed correctly. However, if the settings made “intersect” with standard objects for updating, it is recommended to invite a 1C specialist.


The difficulty of maintaining non-standard 1C configurations is that they are individual for each individual organization. That is why the company “1C:Franchisee Victoria” assigns to each company with a non-standard configuration of 1C programs a personal specialist who knows the specifics of setting up programs. In addition, our technical support team is always ready to answer your questions.
1C software products are specific in the sense that their operation is greatly influenced by the legislation of the country in which these programs are used. That is why it is very important to be able to update these products, since in addition to legal issues, updated configurations will contain a fix critical errors, speeding up the entire program and other useful details. There are two options for the development of events: the first option is an update of the standard (standard) configuration, which happens quite quickly and does not require much effort, while the second option, when you need to update a modified assembly, is longer and more complex.
Defining the Configuration Type
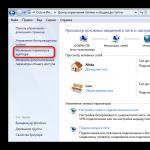
Usually, the user knows exactly which version he has, since the standard build is characterized by the absence of interference with the internal objects of the program. Another thing is that modification, as a rule, is carried out by programmers; accordingly, the user receives an already modified product, which he may not even be aware of. There is a simple way to understand whether changes have been made there or not. To do this, you will need to enter the Configurator mode, the corresponding button for which is in the start window of the program. There is a Configuration tab at the top, in which there is a Support item. After clicking on it, you should select Support Settings. IN open window The “Enable modification capabilities” button must be active; also, a sign of a standard assembly is the presence of a lock icon next to the assembly name. These signs indicate that the program modules have not changed, which means that you can perform a centralized update from the official website via the Internet. In the absence of these signs, it can be argued that the programmer worked on editing this product, while a situation is possible when the modification was partial, that is, a number of objects were left in their original form. All modified objects remain without identification icons, and standard elements are marked with a yellow cube. A partial modification does not remove the program from support completely, since it will be possible to update untouched objects.
Standard (typical) configuration - preparation for update
In addition to the indicated problems, such as changes in legislation or deterioration in the performance of the program, you need to update it when the 1C program issues a corresponding message. It will say that this build was released some time ago, now there is an improved configuration, and that it can be updated right now through the website or using the ITS disk. To begin with, it is very important to make a backup copy of the database so that you can restore everything if something goes wrong. This is done in three ways. You can simply copy the root folder with the database to a disk or flash drive. After launching 1C, a database is selected, and the path to it will be indicated in the window. In case of problems, this folder is moved to the location of the non-working database. You can also operate through the configurator, for which you need to select this mode in the program. In the Administration section there is a button Upload infobase. After selecting a folder, a .dt file will appear there, which can subsequently be opened with the corresponding button in the same section.

The third method occurs a little later, at the stage of updating via the Internet. Everything can be done through the ITS disk, which is received by the enterprise every month; you can also take this disk from an employee who has an agreement with the ITS, you just need to make sure that the configurations match. Otherwise, everything is done over the Internet. There is an important nuance: update packages are installed strictly sequentially, and if any releases were skipped, the system will require you to install them first. contained in the Help menu, where you will need to click the About section.
If everything is in order with the Internet, then you need to go to the website usersv8.1c.ru, where you enter your login and password. Next, select the required configurations located on the Download updates link. The next step is to select specific releases, taking into account the very first and those that have been released recently. All files are saved one by one on the computer. Before updating you need to open all archive files, and install each release. Releases can be downloaded, as described, from the ITS disk. Now you need to enter the Configurator mode, after which objects should be displayed on the left; if they are not there, you will need to click the Open configuration tab.
To update, the user goes to Configuration-Support-Update configuration. In the new window, click Search.

From the proposed options, select Search in current update catalogs, then indicate the available release or the one whose name will be highlighted in bold. You must click Yes on all other suggestions, including the last Reorganize Information window. The final step is to run the program in production mode for the updates to take effect.
Updating a non-standard (modified) 1C configuration
The point of updating a modified assembly is to ensure that changes made by programmers are not lost, and changes made by developers take effect. All of the listed steps described in the previous instructions are performed this time, only at the final step a comparison table will appear, where in one column there will be a configuration with modified objects, and in the second column there will be a list of updates. These columns contain metadata trees. With a green marker, the program will mark which specific objects the programmer makes adjustments to, and which ones the product developers made changes to. At this stage, you need to find those objects that are marked in these two columns.

To simplify your search, you can use the Filter button, which is located below, and then check the Show twice changed properties option. If everything is done correctly, then only the objects we need will be displayed in the working window. The procedure for updating non-standard modules will not affect the configuration.

We need to analyze this table. In this case, it is clear that changes occurred in both cases, since there are pencil icons, since there is also an icon next to the module name, this means that they will be merged. The last column on the right indicates that when the process is completed, all user code will be changed in favor of the update from the developers.
There are other modes with partial merging (priority), but these modes are used experienced users, since a beginner will turn all the developments into confusing modules. Accordingly, there is no point in changing anything in the last column. On the other hand, by unchecking the first column, the forced merger can be canceled. Based on this, you can either manually enter the code into the updated module, or leave the code alone and manually make the updates themselves. To understand what exactly you need to enter, click on the selected module right click mouse and select Show differences. This step will show the differences in specific procedures. At the bottom of the window there is also a division into two columns, but the code itself is already displayed there.

Further actions depend on the level of change in the modules; if the configuration has been radically rewritten, then it will be extremely difficult to update everything yourself, without the help of a programmer.
Possible when updating 1C
Most errors are made when the database is heavily modified, since several pages of code, various reference books and other objects can confuse an inexperienced user. It is very important to create and save an archive before making any changes. backup recovery, and then make sure again that everything was done correctly. A classic mistake is updating a non-standard assembly as if it were standard. But even if you follow the described instructions, it is far from a fact that the program will immediately work as it should. Probably without additional settings can't get by. The configurator does not display the changes made in the controls of the dialog forms, so this point will have to be checked manually, otherwise the updates will all be overwritten. After updating, the configurator may prohibit updating the old infobase, since document numbers are no longer unique, the same applies to information registers.
To solve the problem you will need:
— change the number of characters in codes;
— change codes in the information base;
— change the uniqueness control property in all directories.
During the update process, we must not forget about updating interfaces and user rights, which is often overlooked. The importance of sequential update of releases has already been described; it is also extremely important to use built-in processing of configuration updates, which will allow you to convert the necessary data and fill the databases with information if necessary. It is in the user's interest to ensure that the internal identifiers of objects or details match, otherwise the update may overwrite all developments. Even after carefully preparing a new configuration, you cannot immediately move on to combining it with the working base in use, since it also needs to be updated, and then everything must be thoroughly tested.
You need to understand that there are options when the configuration will be returned for support, that is, its update process will occur in the standard mode for the program, through downloading the release over the Internet. The program is removed from support after modified modules are introduced into the product. Removing these modules will return the program to initial state, but it is impossible to completely get rid of them, since normal operation of 1C will be impossible, because for some reason the modules were programmed with this. Accordingly, these modules can be moved outside the scope of the program - the work will be performed using external modules, but this will not affect the operation of the program. Thus, directories and other objects will remain in place. Doing this on your own without the necessary knowledge is problematic, so the programmer must return the program to the standard assembly framework, if required.
There are also several tips to make the update process easier in the future. software products 1C. First of all, you need to try to modify the program as little as possible, and unless this is absolutely necessary, then do not introduce anything third-party there, but try to solve problems with the standard tools that are available. Without exception, all configuration changes must be commented out and recorded in a separate document so that nothing important is missed during the recovery process. To volume program code in standard objects has been reduced, it should be moved to its own common module, you need to understand that calls to procedures and functions cannot be touched - they must remain in standard objects so that the program can work correctly. For optimization purposes, it makes sense to replace all calls to standard procedures and functions that are found both in the “self-written” code of objects and in the code external modules, to call procedures from its own module. These procedures are a simple shortcut that will be used to call procedures from standard modules. Thus, when comparing changes, the user will not have to search for the necessary lines in the modified code for a long time. If you follow these recommendations, the update time is reduced to several hours of work, and if everything is left as is, the process can drag on for several days.
This article does not describe techniques for using automatic and automated configuration updates using external components and/or software products. You can find information on them on this and other Internet resources.
You may have noticed that with each update, the number of objects requiring your attention only increases. At the same time, you know for sure that, for example, only one document has been changed, and when updating, a list of several dozen changed objects is given. Of course, you can use the technique described in the article. Yes, it will work. Many people perform updates this way. But I consider this approach ineffective and time-consuming when updating configurations on the 1C:Enterprise 8 platform. Unlike the 1C:Enterprise 7.7 platform, the 1C:Enterprise 8 platform allows you to open several configurations simultaneously (*.cf files) and perform several comparisons of configurations in one copy configurator. The only exceptions are, perhaps, configurations built on the UPP (Management manufacturing enterprise) - they are too heavy, the platform falls.
The process of updating 1C:Enterprise 8 configurations is more automated compared to 1C:Enterprise 7.7. A fairly high level of automation can significantly reduce the labor intensity of work when updating non-standard configurations. Unfortunately, most often the process of updating non-standard configurations cannot be performed completely automatically and requires the intervention of a specialist.
Is it possible that the update process will be completed completely automatically? Certainly. To do this, mutable objects must be added and must not use the functionality of the existing configuration. Those. these objects must solve completely different accounting problems that expand the functionality of the standard supplier configuration. Agree that the situation described is extremely rare. Changes almost always affect standard vendor configuration objects.
Please note that the database can contain up to three types of configurations:
- database configuration – this is the configuration with which users work;
- working configuration (main) is a configuration that we can make changes to and users can continue to work;
- vendor configuration – This is the initial configuration of the supplier, on the basis of which working configuration And database configuration. A database can have multiple configurations from different vendors. The configuration supplier can be not only 1C.
In case the configuration is removed from support, vendor configuration there won't be. Which in turn significantly increases the complexity of the update.
Let's look at the update process and analyze possible errors using the example of updating the configuration of the soft starter (the supplier of the standard configuration is 1C, modifications by the Inform Service company). Initially, updating this configuration was not carried out using the technology described in this article, so the errors discussed in this article are the most common in practice. The update will be from version 1.2.6.2 to version 1.2.14.1.
Stage 1. Preparation.
At the first stage, we will bring into correspondence working configuration To vendor configuration. This is a very important stage, which will significantly reduce the amount of work required to analyze the changes we have previously made.
You can skip this step if latest update passed through “support” (Menu “Configuration” U94; “Support” U94; “Update configuration”) or was performed according to the method described in this article.
Version mismatch working configuration And vendor configuration may occur when you use *.cf files for updating that are not from the supplier’s distribution or when using update methods different from those described in this article. For example, objects were added to the working configuration by copying via the clipboard or Drag&Drop.
1. Comparison of versions.
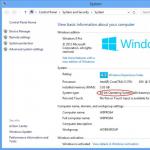
Let's check the version numbers working configuration And vendor configuration. Number working configuration look in the “Configuration” menu U94; “Open configuration” menu “Edit” U94; "Properties". In the “Development” block, select “Version”. (Figure 1).

Number vendor configuration look in the “Configuration” menu U94; "Support" U94; “Support Settings...” item “Version”. (Figure 2).

If the numbers match, then move on to the next step. Cm. .
IN in this example needs to be brought into line working configuration And provider configuration with support for objects removed from support or added without support. To do this, perform the following steps:
2. Saving the working (main) configuration.
Let's save working configuration to a file, for example work.cf. To do this, select the menu item “Configuration” U94; “Save configuration to file...”.
3. Obtain the update file for the provider configuration.
To match the configurations, we need a *.cf file from the supplier's distribution with the same version number as working configuration(Figures 3 and 4). This file can be obtained by installing the appropriate distribution. By default, the configuration distribution is installed in the C:\Program Files\1cv81\tmplts\ directory. For more information about installing configuration templates, see the documentation.


Let's check the template directory. If there is a *.cf file of the required version in the templates directory, then go to .
What can you do if there is no *.cf file of the required version? vendor configuration? In this case, you can use *.cfu files and, repeating the procedure described in Stage 1 several times, successively raise the version number to the required release, in this case to 1.2.6.2. It should be noted that using *.cfu files may not fix errors made earlier during the update. Which, you see, is quite strange, given the fact that first the supplier file is compiled based on the *.cfu file, and then the update is performed. This may be due to the fact that for some reason not all configuration objects are included in the comparison. Therefore, I suggest using as many as possible long way, but also more reliable.
You need to create an empty database with "old" vendor configuration. Update provider configuration to the required version and use it when performing work at stage 1. To receive "new" vendor configuration you need to do the following:
Creating the "old" supplier file for the current configuration. The 1cv8.cf file can be taken from the supplier's distribution or saved from the working database if the configuration is under support. To save the 1cv8.cf file from the working database, you need to go to the “Configuration” menu U94; "Support" U94; “Support setup...” click the “Save to file” button and specify the directory and file name. For example, on the desktop.
Create a database with the new provider configuration. The database can be created using the supplier's distribution from the ITS disk or using the 1cv8.cf obtained earlier from the desktop. In the first case, we follow the instructions included in the distribution kit. In the second case, to create a database from a file located on the desktop, we create a new infobase without configuration and launch the configurator. In the "Configuration" menu U94; “Load configuration from file...” indicate the file previously saved on the desktop. Open the configuration through the “Configuration” menu U94; “Open configuration” and update to the desired release through the “Configuration” menu U94; "Support" U94; “Update configuration” using *.cfu files.
Create a "new" provider configuration file. To do this, select the item in the “Configuration” menu U94; “Save configuration to file...” We specify the location and name of the file 1cv8.cf. Click “Save”.
4. Matching the operating configuration and the supplier configuration through an update.
Using the resulting *.cf file vendor configuration Let's perform the update. To do this, select the menu item “Configuration” U94; "Support" U94; “Update configuration”, “Select update file”, “Finish” (Figure 5), “Run” (Figure 6).


Solutions:
- unmark an object that is in the supplier configuration;
- remove the reference to the object that is in the provider configuration.
Based on the fact that the link in the added “Department Head” interface is made to the object vendor configuration, support for which has been withdrawn by the supplier (possibly due to a change in accounting methodology), then the correct solution in this situation would be to remove the link to this report from the “Department Head” interface. We do not close the configuration comparison window; we delete the link to the “Payment for Orders” report in the “Department Manager” interface. After removing the link, we will compare the configurations again. To do this, click the “Update” button in the update window (Figure 6).
5. Restoring settings partially lost at the previous stage.
To restore partially lost settings, merge with a previously saved file working configuration work.cf. To do this, select the menu item “Configuration” U94; “Compare, combine with the configuration from the file...”.
6. Saving the update results.
Let's save the changes working configuration and update database configuration. To do this, select the menu item “Configuration” U94; "Update database configuration."
Here another problem awaits us (Figure 8).

To solve this problem, let's look at the cause of its occurrence. There may be several reasons, but the most likely are the following. These objects have been copied to working configuration from vendor configuration or the supplier previously deleted these objects and later added new ones with the same names, but with different internal identifiers. As a result, objects with different internal identifiers but with the same names appear in the configuration.
We deal with roles simply - we delete them, because the roles have not changed (this can be verified by comparing and working configuration). We act differently with document details. The attribute must be renamed, for example OrderReserve1, and after updating, the values from the renamed attribute must be transferred to the new one. To do this, you can use the processing of UniversalSelectionAndProcessingObjects.epf from the ITS disk.
Let's consider another situation similar to the previous one, but which arose during the update of 1C: Enterprise Accounting 8.1. What to do with forms? (Figure 9)

In the picture we see that the ListForm was removed from the supplier and then added by the supplier new form with the same name. Accordingly, you need to mark both forms for updating and click the “Run” button.
If you receive a message that there are links to objects to be deleted, you must, without closing the update form, clear the links to the form to be deleted in the object properties. In this case, in the register properties. After this, you need to click the “Update” button in the update form, mark the register properties for updating and click the “Run” button again.
Let's save the changes working configuration and update database configuration"Configuration" U94; "Update database configuration."
If necessary, transfer the values of the OrderReserve1 attribute to OrderReserve using external processing in 1C:Enterprise mode.
Stage 2. Update.
After carrying out the preparatory work at Stage 1, we proceed to the update basic configuration and transfer of previously made modifications to the supplier’s standard configuration.
To update the configuration, we need a *.cfu file or a *.cf file from the supplier's distribution. You can read more about how to obtain them.
If the update is performed through several versions of the configuration, then you should pay attention to the situation described in the article. If the update is not performed on a working base, then after completing the preparation of each new stage, we save the *.cf files. They will be needed when updating the configuration of the customer's production database.
If the update is carried out through several versions, then during the update you should definitely pay attention to the objects that are deleted and to objects with changed names, as well as to the actions performed during the first start after the update. If these objects are used in processing at the first start after the update, then they should not be deleted, and for objects with changed names, appropriate changes should be made to the text of the processing module. In this case, the objects left behind may be deleted during the next or next update.
If the update is performed through several versions, then to reduce the labor intensity of the update, you can use the method of calculating key releases, described in the article.
1. Preparation of databases.
So, based on the results of the first stage, we prepare two identical databases. The first (main) is our future result. The second (auxiliary) is for performing comparisons, opening configurations and other preparatory actions. For file version this is simply copying the files of the main database to another directory and connecting this directory to the list of databases, for the client-server - uploading/downloading.
2. Three-way comparison of configurations.
Let's open both databases in Configurator mode and perform a three-way comparison of configurations in both databases, using the existing supplier's new configuration file. To do this, in both databases, select the “Configuration” menu item U94; "Support" U94; “Update configuration”, “Select update file”, “Finish” (Figure 10).

As a result of comparing three configurations ( old vendor configuration, new vendor configuration And working configuration) we get a list of changed objects. Set the filter “Show only twice changed properties” (Figures 11 and 12).
It is these objects that need to be dealt with first, because... After the update, previously made settings may be lost.


At this point, we suspend work in the second (auxiliary) database and continue in the main one. There is no need to click the “Run” button in the auxiliary database. We need this database exactly in this form until the update process is completed.
So, as a result, we get a list of objects that were changed twice during revision typical configuration and in . If you agree to the update, then previously made improvements to these objects will be lost. Therefore, for each object it is necessary to make a decision on how it will be updated (Figure 13). At this stage, we perform a preliminary comparison solely in order to reduce the amount of work in the future. The assessment is not accurate and quick - “by eye”.
new supplier configuration, then we leave an instance of the supplier object. Leave a checkmark. Then we will transfer the changes from working configuration.
If there are more changes in the object in working configuration, then we leave an instance of the object working configuration. Uncheck the box. Then we will transfer the changes from vendor configuration.
We deal with modules a little differently, because... We have the opportunity to compare modules procedurally. Those. in case in our configuration and various module procedures have been changed in the supplier’s configuration, then by correctly checking the boxes we will save ourselves from manually transferring code changes. To get to this, press the button as shown in Figure 14.


After we have decided on the objects that will be updated immediately and on which there are still checkmarks, we duplicate the state by checkmarks in the auxiliary database, and in the main database we press the “Run” button. In the main database we get an almost ready-made configuration.
Next, we perform all comparisons in the auxiliary database. We already have one comparison - a three-way one. To determine previously made changes, we perform an additional second comparison old vendor configuration With main configuration. To do this, select the item in the “Configuration” menu U94; “Compare configurations:”, select for comparison “ Provider Configuration" And " Basic configuration

In a similar way we compare old vendor configuration with new one. For comparison we need a file new supplier configuration. If there is no such file, now it can be obtained from the main database. To save to a file new supplier configuration in the main database in the “Configuration” menu U94; "Support" U94; “Support setup:” click the “Save to file” button. (Figure 2). Specify the file name, for example, new.cf. Next, we make a third comparison of configurations and when comparing, specify the new.cf file as the second configuration.
So, we received a list of twice changed objects in the additional database. And two more comparisons that will help us more effectively transfer previously made settings from old version to a new one. In the main database we have an almost ready-made configuration, in which we need to deal with twice changed objects.
To reduce the time for analyzing changes to a standard configuration and, accordingly, for updating, it would be appropriate to comment on all changes made to the configuration, noting not only the changed text of the modules, but also the purpose of the changes made. For a number of reasons, this is very often not done. When performing an update, you are not interested in the reasons for making changes, but in their consequences. Namely, the need to preserve the functionality of the changed configuration. This may require not transferring the changed lines, but completely reworking the added (changed) code to fit the functionality of the new vendor configuration.
Comparison of forms, tables, and modules of objects in the configuration is performed with a sufficient degree of detail (Figure 17). This is quite enough for making decisions.

But in some cases, the data in comparison reports is presented in a way that makes it difficult to make a decision quickly. For example, in case of changing the type of details that have composite type data, composition entered based on objects, etc. It is at this stage, due to its complexity, that improvements are lost during the update. Let's consider this situation using the example of details that have a composite data type. When generating a report on object comparison (Figure 17), the differing data in the compared configurations is presented in the form of lists containing the composition of data types, separated by commas. However, the report does not show at all what types of data were added or deleted. Of course, the report can be printed and “hidden” to identify differences. In the example under consideration, there are about 200 such objects. Obviously, the comparison process seems to be quite labor-intensive and will take about 50 hours.
To reduce the labor intensity of work when comparing objects, you can use the configuration developed by the Inform Service company. The labor intensity of work when comparing composite objects can be reduced by approximately 20 times.
The “Cell Comparison” configuration is launched in 1C:Enterprise mode and allows you to present information from the object comparison report in a visual form (Figures 18 and 19). For comparison, the capabilities of 1C:Enterprise 8 are used.


The configuration scheme is simple. In the configurator we create a report on comparison of objects (Figure 17) and save it to a file, for example Comparison Report.mxl. Open 1C:Enterprise and in the dialog (Figure 18) select the saved file and indicate the cells to be compared. To do this, double-click the right mouse button on the selected cell spreadsheet document. By clicking the “Compare” button, we get the result of the comparison, in which the different positions are highlighted in color (Figure 19).
Particular attention should be paid to RLS templates for changed user roles.
After completing the update and transfer of previously made changes to the standard configuration, we will perform syntactic control of the modules and check the operation of the changed objects. After successful testing, the configuration update process can be considered complete. Now all that remains is to update the external ones printed forms, reports and processing. For some configurations, it is necessary to check the reporting forms connected as external ones.
Stage 3. Delivery of work.
In the given example, the amount of work to correct errors made during previous updates, as well as to update to version 1.2.14.1 and transfer the changes previously made to the standard configuration, is about 100-150 hours. It is not possible to carry out such a volume of work by updating directly in the customer’s database. Accordingly, preparatory work must be performed on a copy of the database, and the result of the update must be transferred to the customer’s working database.
First, we carefully study the instructions from the distribution kit. We carry out the necessary work before updating the working database.
If no configuration changes were carried out in the customer’s working database during the preparation of the update, and the update was prepared on a current copy of the working database, then to transfer the settings, save the working configuration to a file, for example work_2.cf, by selecting the “Configuration” menu item U94; “Save configuration to file...”.
- Using the work_2.cf file, we transfer the changes. To do this, select the menu item “Configuration” U94; “Load configuration from file...”;
- When asked about updating the database configuration, we will answer yes.
If configuration changes were carried out in the customer's production database during the preparation of the update, then these changes must also be reflected during the update.
If the update was not prepared on a current copy of the working database, then to transfer the settings we will use the technique used in the first stage. To do this, we need a *.cf file of the standard configuration of the supplier (1.2.14.1) and the result of the update in the form of also a *.cf file. To do this, save the working configuration to a file, for example work_2.cf, by selecting the “Configuration” menu item U94; “Save configuration to file...”.
Further actions on the customer’s side will be as follows:
- create a database backup;
- Using the *.cf file of the standard configuration of the supplier, we will perform the update. To do this, select the menu item “Configuration” U94; "Support" U94; “Update configuration”, “Select update file”, “Finish” (Figure 10), “Run”;
- Using the work_2.cf file, we transfer the changes. To do this, select the menu item “Configuration” U94; “Compare, merge with configuration from file...”;
- Let's save the changes to the working configuration and update the database configuration. To do this, select the menu item “Configuration” U94; "Update database configuration."