On at the moment on the market computer programs there are many various utilities for photo processing; many such utilities are also presented on our website. This time I want to present to your attention a program PanoramaStudio Pro, which will appeal to any amateur photographer, even a beginner, even one who has been doing this difficult business for many years. And all because the program is not only easy to use, takes up little space and has a nice interface, but because it is also of high quality.
The main focus of the PanoramaStudio Pro program is the creation of panoramic images. But first, you can also process the images by rotating, cropping or scaling, so to speak - preparing the photo before placing it in the panorama. After adding your chosen photos, PanoramaStudio Pro will combine them into a uniform, high-quality panorama, with smooth transitions that you won’t even notice. Moreover, the program will do all this quickly and efficiently. In addition, the utility works with all known image formats, so you don’t have to convert them further.
Download PanoramaStudio Pro in Russian
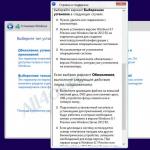
You can download the PanoramaStudio Pro program for compiling panoramic photographs on our website completely free of charge by clicking on the link below. For a complete and comfortable work program you will need to carry out simple treatment and Russification. How to do all this - you will find information below. After all these simple manipulations, which will take you literally a couple of minutes, you will be able to enjoy the high-quality work of the program and the most beautiful panoramic images!
Copy the files Order_ru.html and panoramastudio.qm to the directory installed program with replacement.
1. Install the program and close.
2. File PanoramaStudio3Pro.exe resp. bitness copy with replacement to the folder with the program.
In order to create quality panoramic image It is not at all necessary to be a professional photographer or have a good understanding of the work of special programs. Thanks to rapid development information technology More and more services are appearing on the Internet free services for creating panoramas online.
The most famous service for creating panoramic photographs among Runet users is the resource Dermandar.
Now we will not go into the details and features of this process, since our task at this stage is limited only to introducing the novice photographer to the wonderful world of panoramic images. But it’s still worth saying a few words about what panoramas are and what they are like.
Panoramic image is a picture or photograph that allows the observer, usually located in the center, to receive maximum visual information about the space around him. Panoramic images are divided into three main types. Widescreen panoramas are long images made up of images taken from different angles. 
Circular or cylindrical panoramas differ from the previous ones in that they end in the same place where they begin. And finally, spherical or volumetric panoramas are a cubic projection of an image; they are also called 3D panoramas.
Since images of this type use flash technology, they can only be viewed in a browser or using special software. But for wide-format and cylindrical images, any image viewer can work.
For professional panoramic image creation, it is best to use special programs, such as PTGui Pro or Autopano Giga. But for a simple workout it will be enough to visit online service creating Dermandar panoramas.
The service is extremely simple and convenient, so you will not have any problems using it. This service allows you to create widescreen and cylindrical panoramas. To create a widescreen panorama you will need at least three photographs good quality and best of all, the same size, while it is highly desirable that the overlap in the border area is at least 15 and no more than 20 percent.
This is necessary so that the program on the server can determine the overlap points as accurately as possible, otherwise your panorama may turn out to be of poor quality. To create a circular panorama you will need at least six images, but do not forget that the first photo must overlap the last one.
The finished images should be renamed in the order in which the pictures were taken. Let the first photo be called 1.jpg, the second 2.jpg, the third 3.jpg, and so on. On home page service press the button " Create Your Panorama", selects the type of panorama, mark the prepared images with the mouse, upload them to the server and in a few seconds your panorama will be ready.
A window will appear in the browser window in which you will be asked to save the finished panorama to hard drive(V JPG format), create a new one or upload it to the service and receive a link to embed on a website or blog, although you will have to register for this. No registration is required to download the image.
Don't think that only Photoshop can create panoramas. By the way, I described how to make a panorama using Photoshop in my review ().
There are a number of free programs that do an excellent job of this task. And the best part is, you absolutely don't have to pay for them. Some of them do not even require installation on your computer.
![]()
Over many years of photography (more than 10 years) I have tried many and decided to put together my own small personal rating free programs for creating panoramas. So let's get started!
Rating of free programs for creating Panoramas
4th place - Canon Ptoho Stitch program
An old, good and free program that comes with Canon cameras. The program's interface is old, but it performs its functions.
How to make a panorama using Canon Photo Stitch?
Step 1- launch the program
Step 2— select photos from which the panorama will be created.
Step 3— we start combining the photos into one large panorama frame.
At the same time, you can enable the option to display the seams along which the photos are combined.
Step 4— Select panorama generation settings (the program offers a choice of possible options)
Step 5— crop the edges of the panorama and save it to a file.
Result of work Canon Photo Stitch - assembled separate panorama with cropped edges. Very good, but it took a lot of manual work!
3rd place - Hugin program
A free program from a large team of authors with extensive but confusing functionality. In my opinion too difficult for a beginner. One of the advantages is that there is support for the Russian language in the interface.
How to make a panorama using Hugin?
Step 1- launch the program. When you open it, there is a set of tips for beginners - a small bonus from the developers.
Step 2— We set the settings for creating a panorama using Hugin - the folder for saving, the name of the files, etc. There are a lot of settings, so hang in there :)
Step 3— Upload photos to create a panorama.
Step 4— Select the lens type and look at the aligned images.
Step 5— Select the settings for creating a panorama before generating the resulting photo.
Saving the panorama.....
As a result, we get this processed panoramic photo using free program Hugin.
2nd place - MS Image Composite Editor program
Yes, yes, you heard right - the letters MS means that this program was made by Microsoft. Moreover, it’s free! 🙂
Cons - there is no Russian interface, but the program is so simple that you don’t need to read too much.
How to make a panorama using MS Image Composite Editor?
Step 1- open the program and go to the settings section - upper right part of the window - see the gear.
Step 2— select a photo to create a panorama. Button in the top header - “New Panorama from Images”
You have completed step 1 - imported photos for the panorama.
Step 3— combining photos into one picture — “Stitch”
After you receive the panorama, you can enlarge it for viewing using the sliders.
Step 4— If you need to crop a photo, go to the “Crop” button.
For cropping, markers are used, exactly the same as in Photoshop for this command.
If everything suits you, save it.
As a result, you receive a finished processed panorama using the MS Image Composite Editor program
1st place - AutoStitch program
My favorite free program for creating panoramas!
What captivates her?
- no need to install on PC, just open the archive and work
- minimum settings for creating a panorama
- small program size
- smart frame detection
How to make a panorama using AutoStitch?
Step 1- launch the program and go to settings
Step 2— Open the photos and add them to the program
ALL…. I repeat... THAT'S ALL! 🙂
the program will do the rest itself.
The result of the program will be a assembled panorama from the files that you added.
If you are still not satisfied with this functionality, you can make panoramas with using Photoshop CS().
Additional information free program for creating panoramas:
- AutoStitch - Website address - http://matthewalunbrown.com/autostitch/autostitch.html
- MS Image Composite Editor - Website address - http://research.microsoft.com/en-us/um/redmond/projects/ice/
- Hugin - Website address -
- Canon Ptoho Stitch— Website address — http://support-au.canon.com.au/contents/AU/EN/0200246607.html (select the Download checkbox to see the download link)
Video review of free programs for creating panoramas (Rating)
Today I will tell you about a wonderful program - Hugin. With its help, you can effortlessly create even the coolest and most complex panoramas.
Hugin - is the most popular program for constructing panoramas and, in addition, has a completely free license and its use is absolutely free.
The program reads the EXIF of your photos and automatically aligns them relative to the focal length and viewing angle of your lens, places them in the right order and seamlessly stitches together shadows, wires, fences, people and other objects in your panorama.
Finally, the entire construction of the panorama, instead of complex and dreary work, will be reduced to a game of finding 5 differences between similarities, or even to pressing just three buttons.
I'm sure many of you have already tried to make friends with her and abandoned it, because... Hugin doesn't have the most intuitive interface. Today we will correct this situation.
How to shoot panoramas?
A few words about how to get good pictures for your future panorama. Everything is simple here:
- Shoot one by one- from left to right and from top to bottom.
Not essential for small panoramas, but when there are more than 10 photos... It will be easier for you to sort them out later.
Lock exposure changes- this is the main requirement.
Switch your camera to manual mode and set static aperture, shutter speed and ISO parameters. It is necessary that these parameters are the same in each photo from the panorama. The requirement is not mandatory, but highly desirable. This way you will protect yourself from possible problems during assembly and highlights in the final result.

Interface
So we downloaded and installed Hugin, let's run it:

Let’s immediately look at the meaning and functions of each individual tab:
- Assistant(Assistant) - This is the default view, there are three main buttons and a preview window for your panorama.
- Preview(Preview) - Here you can enable or disable the display of certain photos, as well as go to the photo menu to apply masks.
- Layout(Placement) - Here we can see all the connections between photos and quickly move on to creating and editing them.
- Projection(Projection) - Here you can change the projection parameters of your panorama.
- Move/Drag(Shift/Shift) - On this tab you can move photos and place them in the desired order.
- Crop(Crop) - Here we can select the final area that will fall into your panorama.
Alternative interface
In addition, Hugin also has an alternative interface" Panorama editor(Panorama Editor)", which is called up through the "View" menu bar, or if you switch to the advanced interface, but more on that later.
Screenshot of an alternative interface

Quick start
So, if you have a correctly captured panorama and if you are lucky, then all your actions will come down to pressing just three buttons:
1. Upload pictures...
Click on " 1. Load images...(1. Upload pictures...)" Select our photos for the panorama, they will be loaded into the project.

2. Align...
Click on " 2. Align...(2. Align...)" After a certain period of time, Hugin will calculate the connections and connect your photos to each other. If you're lucky...

If this does not happen, and instead of the intended panorama you see something incomprehensible, it is better for you to cancel and proceed to creating a panorama in semi-automatic mode.
If you wish, you can go to the " tab Move/Drag(Shift/Offset)" to align the horizon and " Crop(Crop)" to select the final area of the panorama.
3. Create a panorama...
Click on " 3. Create panorama...(3. Create a panorama...). And save our finished panorama.

Usually these three simple steps sometimes it’s enough, but what if we have a fairly large and complex panorama that doesn’t want to be assembled in a fully automatic mode? - let's figure it out!
Theory
First we need to understand how Hugin works.
Among your photos loaded into the project, when you press the " 2. Align...(2. Align...)", Hugin, using a certain algorithm, looks for certain control points between your photos and shifts them in accordance with them. Control points are nothing more than the same places in two photographs.
Two photographs with control points between them are considered related.
It turns out that each photograph must have a connection with one or more other photographs in the project. Control points can also be set manually.
Photos connected by control points form a group and behave like a separate photo. Initially, the number of groups is equal to the number of unrelated photographs; your task is to reduce the number of such groups to one.
The next step Hugin begins panorama mixing and the more control points there are in your photos, the better.
Assembling a panorama
So, let's try to assemble a panorama in semi-automatic mode.
Projection
First of all, let's upload photos to the project and go to the tab Projection(Projection) and adjust the field of view.
The field of view is a black window in which you see all your photos. It is nothing more than the viewing angle of your panorama. It is measured in degrees and, as a rule, it cannot be more than 360° in width and 180° in height.
That is why photographs that approach the poles are so coolly flattened.
You can change the field of view at any time from any mode using the semi-icons on the right and bottom of the Hugin interface.
Arranging photos
Go to the tab " Move/Drag(Shift/Shift)", and begin to shift the photos in the desired order.

It's worth noting that you don't have to try to match pixel to pixel when joining photos. Your task is to connect the photos so that Hugin “understands” which photo has a connection with which, for this it is enough that they simply touch each other.
You can check connections by switching to the " tab Layout(Placement)".
There are two movement modes:
- normal(Normal) - You can move groups of photos by simply dragging them.
- normal, individual(normal, custom) - in this mode you can select individual photos and work directly with them.
If you need to rotate a photo, you can do this in the second mode by selecting the desired photo and dragging an empty space away from it.
Assembly
Once you have arranged your photos in the desired order, you can try the automatic mode again:
Let's switch to the "tab" Preview(Preview)" and click " 2. Align...(2. Align...)", thereby initializing the process automatic search control points.
Result
This way you can have one or more groups of related images.
Photos connected by control points in the first mode can only be moved all together, but as in the second, they can still be moved individually.

Align them relative to each other and move on to the next point.
Creating checkpoints manually
So, after completing the previous steps, we received several unrelated groups of images. Now we will learn how to connect them.
Connections

Go to the tab Layout(Placement) and here we see all the connections between your photos.
The gray lines mark the supposed connections - these are the very connections that should exist, based on the location of the photos on the tab Move/Drag(Shift/Offset), but do not yet have their own control points.
We need to resolve them: we select one such connection, after which a window with two photographs will open.
Now we need to find several identical places in the photographs and put control points on them. 2-3 dots will be enough for each pair of photos. You can get by with just one inode.
Creating points
The algorithm is simple:
Select a point on the left image, select a point on the right image. Click Add(Add). You can use the function Fine-tune(Adjust exactly).
Add 2-3 points, close, move on to the next connection.

After all the photos are connected by control points, go to the tab Assistant(Assistant) and press " 2. Align...(2. Align...)"
As practice shows, it is not always necessary to process absolutely all connections; sometimes it is enough to connect only a few, the rest will be completed by hugin itself.
Result
Additional features and conveniences
The list of Hugin functions does not end there; there are several more useful and convenient add-ons, I will tell you about some of them.
Ctrl key

When you hold Ctrl, you can hover over a photo and instantly see its number and its contents. If you click on it, you will be taken to the editing mode for a specific photo.
Masks

You can use masks if you want to exclude or necessarily include some areas from your photos, to do this, go to the "tab" Masks(Masks)". Select the desired photo, click on " Add new mask(Add new mask)", then select the desired area, and select the mask type:
- Exclude region(Excluded area)
- Include Region(Included area)
- Exclude region from stack(Excluded area from stack)
- Include Region from stack(Included area from stack)
- Exclude region from all images of this lens(Excluded area from all shots with this lens)
Cropping photos
You can adjust the cropping of the edges of your photos; to do this, go to the "tab" Masks(Masks)" and in the lower window select " Crop(Crop)", these options can be applied to several photos at once if you first select them in the top window.
Different types of panorama projections
On the "tab" Projection(Projection)" you can choose various types panorama projections, for example, you can choose something exotic that will make it look quite unusual.
Panorama output modes
- Exposure corrected, low dynamic range(Exposure compensation, narrow dynamic range)
- Exposure fused from stacks(First exposure mixing, then merging)
- Exposure fused from any arrangement(First merging, then flattening exposures)
As practice has shown, the first mode works better than the other two. Unfortunately, it is not always available from the "tab" Assistant(Assistant)", but it can still be called through, on the " tab
While traveling, you can create several consecutive images for later stitching in the program. A series of photographs that will be combined into one large image will allow you to more fully capture unforgettable landscapes of mountains, seas or other beautiful places. If you have the necessary equipment, you can create 360 degree panoramas. Although for phones this is no longer a problem. It is necessary that the device meets the minimum hardware requirements, and then it’s as easy as shelling pears. But there are no such programs for PC yet. I suggest you familiarize yourself with some of them. One of them will definitely find a place on your system disk.
PTGui
The first PTGui program, which is one of the the best tools for creating panoramic images. PTGui software uses proprietary software algorithms to stitch together panoramas. Support implemented hardware acceleration processing on video adapters.
Some features of the program:
- Creating panoramas from any number of images;
- Create panoramic images in a few clicks;
- Full automation;
- Preview in real time;
- Reading EXIF information;
- Detection of lens parameters and camera crop factor;
- Batch adding points to photos;
- Creating panoramas based on a saved template;
- HDR support;
- Many other features.
Powerful enough software product, which will automatically place control points and stitch together several photos into a single panoramic image. In addition to full automation, you can switch to manual mode and perform detailed settings for various parameters. The photos will be joined so that no stitching lines will be visible.
In addition to the usual ones, the program can create 360° panoramas, export them and generate virtual tours.
Some features:
- Automatic stitching of panoramas;
- Color correction;
- Removing the ghost effect using Smartblend technology;
- Creation of virtual tours;
- Full HDR support;
- Batch rendering;
- Other functions.
Hugin
The completely free Hugin program offers to create panoramic images both automatically and manually, which allows you to control the entire process. Implemented support for HDR images. The program has three operating modes: simple, advanced and expert. Therefore, Hugin is suitable for everyone - from beginners to professional users. Lenses are detected automatically, so information about them will be used to create the best panorama stitching. To do this, Hugin makes a geometric correction. There are tools for making color correction, controlling exposure, working with masks, etc.
Pano2VR - software to convert panoramas (spherical and cylindrical) to QuickTime VR (QTVR) formats, Adobe Flash 8 and Flash 9/10 (SWF). It is possible to create templates for your own panoramas. You can add sounds, animations, and configure automatic rotation. There is also a function for dynamic correction of the original image, which allows you to load into the program not the entire panorama, but only the part of the image necessary for editing.
To conveniently place a panorama on a website or blog, you can export all elements of the panorama into a single SWF file. Virtual tours are created with a 360 degree view. One of the export formats could be modern HTML5.
Microsoft's Image Composite Editor (ICE) software offers advanced stitching of panoramic images. The program analyzes the output photos and then creates panoramas based on the data received. high quality. Finished panoramas can be saved in one of the following formats: JPEG, TIFF and Photoshop PSD / PSB.
Image Composite Editor can add missing pixels. Therefore, all incomplete photos will have smooth borders. The program interface is quite simple and will guide you step by step through all the steps of creating a panorama.
While working, you can enlarge the image and see all the details and correct possible flaws.
Peculiarities:
- Work on many processor cores;
- Support for very large image sizes;
- Photoshop layers support;
- Automatic exposure mixing;
- Projection selection;
- Automatic panorama cropping;
- Supports a large number of formats;
- Other.
Professional Panoweaver software allows you to create a panorama in a few clicks. Various types of images are supported from which you can create panoramas, including 360 ° panoramas for creating virtual tours.
Professionals will note the opportunity Raw support& HDR. Among the formats that are exported are the following: Html Flash VR, QuickTime movie (*.mov), standalone swf, HTML5 panorama for iPhone, iPad, Android. Panoramas can be embedded on websites.
Batch stitching mode allows you to quickly and automatically process hundreds of images, saving a lot of time. Addition supported GPS coordinates. And the use GPU NVIDIA or AMD will only speed up image rendering.
Arcsoft software has always attracted me with its simplicity and quality. Photos are analyzed, after which seamless panoramas are created. The program operates automatically and in most cases does not require user intervention.
Vertical, horizontal panoramas, grid, 360 degree panoramas and automatic mode are available.
In addition to automatic work, there are tools for manually making changes, placing points, borders for gluing, etc.
Brightness, contrast, cropping, color correction, adding text and frames are also included in the program's capabilities.
According to the developers, the Pos Panorama program will automatically find control points and create panoramic photos. Horizontal and vertical photos are supported. The main image formats are supported: JPG, BMP, PNG, TIFF and GIF.
Let's continue, PanoramaStudio Pro uses one of the best algorithms for identifying boundaries in a photo. Create panoramas quickly and efficiently. There is an editor that will help you adjust the lighting and color of the photo, adjusting the pictures if they differ greatly in the parameters described above. In addition to automatic, there is also a manual mode for marking control points.
Finished panoramas can be exported to Flash format to create virtual tours. HDR support available. There is also the ability to create spherical panoramas.
Support various models lenses guarantees better performance. You can export finished panoramas as screensavers, 3D panoramas, and as regular images in one of the graphic formats.
Free tool for viewing various panoramas. All types of panoramas are supported, including spherical ones.
STOIK PanoramaMaker - will create panoramas in three stages: import of source photos, analysis and stitching as best as possible, and finally - export to the format of your choice.
There is automatic and manual modes. The program's algorithms can produce good results even if your photos are taken at an angle or have other shortcomings, for example when shooting trees in windy weather.
Geometric compensation and lens curvature correction are taken into account. If results are unsatisfactory automatic mode You can switch to manual.