Good afternoon.
Despite the fact that today the D-link DIR 300 router model cannot be called new (it is slightly outdated) - it is quite widely used. And by the way, it should be noted that in most cases it copes with its task perfectly: it provides all devices in your apartment with the Internet, simultaneously organizing a local network between them.
In this article, we will try to configure this router using the Quick Settings Wizard. First things first.
1. Connecting the D-link DIR 300 router to a computer
The connection is generally normal for of this type routers. By the way, router models 320, 330, 450 are similar in settings to the D-link DIR 300 and differ little.
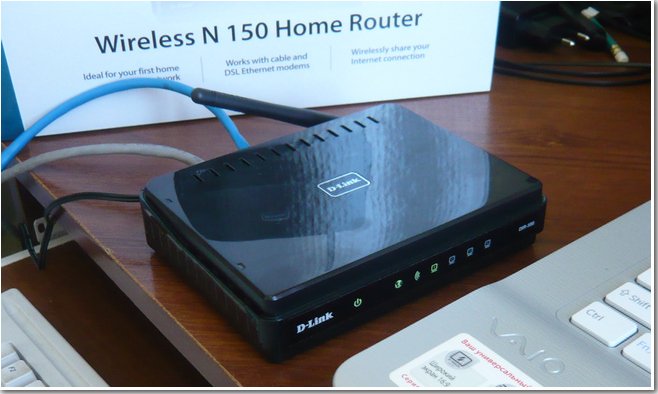
The first thing you do is connect the router to your computer. The wire from the entrance that you previously had connected to network card computer - connect to the “internet” connector. Using the cable that comes with the router, connect the output from the computer’s network card to one of the local ports (LAN1-LAN4) of the D-link DIR 300.
The picture shows a cable (on the left) for connecting a computer and a router.
That's all. Oh, by the way, pay attention to whether the LEDs on the router case are blinking (if everything is fine, they should blink).
2. Setting up a network adapter in Windows
We will show the setting using Windows 8 as an example (by the way, everything will be the same in Windows 7). By the way, it is advisable to carry out the first setup of the router from a desktop computer, so we will configure Ethernet adapter* (means a network card connected to a local network and the Internet via a wire *)).
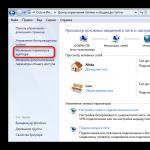
1) First, go to the OS control panel at: " Control Panel\Network and Internet\Network Center and shared access
". Here you are not interested in the section on changing adapter parameters. See screenshot below.
3) In the Ethernet properties, we need to find the line “Internet protocol version 4...” and go to its properties. Next, set automatic acquisition of an IP address and DNS.
After that, save the settings.
Now in command line type “ipconfig/all” and press Enter.
You should see the properties of all your adapters connected to the computer. We are interested in Ethernet, or rather its MAC address. In the screenshot below, we need to write down (or remember) the line “physical address”, this is what we are looking for.
Now you can move on to the router settings...
3. Setting up the router
First of all, you need to go to the router settings.
Address: http://192.168.0.1 (type in address bar browser)
Login: admin (small Latin letters without spaces)
Password: most likely you can leave the field blank. If an error pops up that the password is incorrect, try entering admin in the login and password fields.
3.1. Setting up a PPPoE connection
PPPoE is a connection type used by many providers in Russia. Perhaps you have a different type of connection, you need to check with the contract or technical support of the provider...
First, go to the “SETUP” section (see above, right under the D-Link header).
By the way, perhaps your firmware version will be Russian, so it will be easier to navigate. Here we will consider English.
In this section we are interested in the “Internet” tab (left column).
INTERNET CONNECTION TYPE - in this column you should select the type of your connection. In this example, we will select PPPoE (Username/Password).
PPPoE - here you select Dynamic IP and just below enter your username and password to access the Internet (this information will be clarified with your provider)
It is also important to note two columns.
MAC Address - remember a little earlier we wrote down the MAC address of the adapter to which the Internet was previously connected? Now you need to enter this MAC address into the router settings so that it can clone it.
Connection mode select - I recommend choosing Always-on mode. This means that you will always be connected to the Internet; as soon as the connection is lost, the router will try to restore it immediately. For example, if you select Manual, it will connect to the Internet only at your direction...
3.2. Wi-Fi setup
In the “internet” section (top), in the left column, select the “tab” Wireless Settings«.
Here, check the box next to Enable (i.e. enable). Now lower the page a little lower to the heading “Wireless Network Settings”.
The main thing to note here are 2 points:
Enable Wireless - check the box (means you are enabling wireless Wi-Fi network);
Wireless Network name - enter the name of your network. Can be as arbitrary as you like. For example, "dlink".
To do this, under the “WIRELES SECURITY MODE” heading, enable the “Enable WPA/WPA2...” mode as in the picture below.
Then, in the “Network key” column, enter the password that will be used to connect to your wireless network.
That's all. Save the settings and reboot the router. After this, you should have Internet access and a local network on your desktop computer.
If you enable mobile devices(laptop, phone, etc. with Wi-Fi support) you should see a Wi-Fi network with your name (which you set a little higher in the router settings). Join it by entering the password you set earlier. The device must also have access to the Internet and local network.
class="eliadunit">
For a long time now, my friends have been asking me to buy and set up a router for them. We go to the store, buy it and set it up step by step, and you watch everything that happens, everything will be clear even to a beginner. You can connect any router, it all depends on your persistence and, of course, patience. Setting up the DIR-300 NRU Router is not difficult, this router is extremely popular due to its inexpensive price of 1000-1100 rubles and good reliability and works with operational Windows systems XP, Windows Vista,Windows 7.
- On the official websites of Russian providers, there are instructions for installing it, but as I noticed outdated revisions b1, b2, b3, the web interface of the settings is black and brown. In 2011 D-Link updated the web interface, now the router settings windows (including the new model DIR-300NRU b5) pale green, and the background is white, naturally the settings have changed a little. For providers, everything remains in place. This confuses many users who have recently purchased a router.
IN at the moment According to my observations, the most commonly purchased model is the D-Link DIR-300 NRU b5, which has Wi-Fi support at speeds of up to 150 Mbit, uses an updated settings interface, a built-in firewall and compatibility with wireless standards 802.11b and 802.11g. I advise you to know exactly what you are buying and check everything in the store. I do not recommend buying a router secondhand, since any router may be subject to damage during operation. unsuccessful firmware and you will have to roll back to official firmware.
Attention setting D-Link router DIR-300 NRU(HW revisions: b1, b2, b3), is slightly different from the configuration of the router model DIR-300NRU b5, but the essence is basically the same, now you will see everything for yourself. More information for you: The website has an article How to configure the Asus RT-G32 router, which may be useful to you.

Now about the settings. Before you actually go online, WAN(global computer network) from our home, you and I first go to our Internet provider or ISP in VPN- virtual private network, (for example Beeline).
There are few real providers in Russia, there are many sub-providers, in simple language intermediaries. But how to configure the router depends on how these providers organize their network.
How do all providers (providing Internet services) differ and how does this affect the router settings? Nowadays, one half of providers use a modern network protocol to operate DHCP or IPoE, where is the IP distribution and DNS addresses happens automatically (I must say it’s very convenient for an Internet provider), and to access the Internet they use an outdated tunnel protocol PPTP or a new layer 2 tunneling protocol L2TP(combining PPTP and L2F).
The other half of providers use an outdated protocol PPPoE mainly related to technology xDSL(for example, Rostelecom), that is, it uses DSL modems, in the router settings we again select the PPPoE connection type (information at the end of the article) and set it up a little differently than in the first case. Of course, sometimes there are other features, so before you buy a router, this is my advice to you. Call your provider and find out all the information you need to configure the router, ask about which range of router models to choose from, so as not to have to worry later with settings, firmware and, as you said, specialists like me.
Now, let's take a closer look at setting up, in my opinion, a very good router from D-Link, DIR-300NRU b5. In general, I configured this router many times, both in Windows 7 and in Windows XP, but unfortunately I didn’t look at the accompanying manual, but it turns out that in fact, as our reader said, nothing is written there about Windows 7, but about XP there is information. Don't worry, our router works fine in both operating systems.

Let's start with the fact that you need to find out what network protocols your Internet provider uses, you can find out by looking at the contract with it or you need to call the support service of your provider and just ask, this is the best way, by the way. Let's start with the most common and easiest to configure network protocol today, DHCP. You also need to find out how your provider issues IP addresses, in the case of the DHCP protocol this happens automatically, you can verify this by looking at Properties local connection your network adapter.
Windows XP. Start - Control Panel - Network connections- Connection via local network- Properties - Internet Protocol (TCP/IP)-Properties - Get IP automatically And .

Windows 7. Start - type View network connections - Local area connection - Properties - Internet Protocol version 4 (TCP/IPv4) and Properties - Obtain IP automatically and Obtain DNS server address automatically.


If you have the Use the following IP address checked in the Internet Protocol Properties and the addresses are registered, the same addresses must be specified in your agreement with your provider, then your Internet provider works using the PPTP or PPPoE protocol. Let's look at setting up a router with these protocols at the end. But before connecting a router with these protocols, you also need to set the Obtain IP automatically and Obtain DNS server address automatically parameters in the Internet connection properties.
Let's move on to the router settings. If something goes wrong, you can always reset your router to factory settings by pressing the button Reset.
We will connect the one carried out by your provider local cable Internet to WAN port on the router, as we see on it it is written internet, and connect the router and your desktop computer to each other with a network cable (in our case, blue) via LAN port No. 1.

Users to whom the Internet is supplied using ADSL technology need to connect the cable coming from the DSL modem to the WAN port. As we can see, the DIR-300 router has 4-LAN ports, to which you and I can connect up to 4 personal computers that do not have Wi-Fi.

Turn on the router, open any browser: Chrome, Opera, Mozilla, Internet Explorer and enter in the address bar 192.168.0.1 and press Enter.


Firmware for download on the official D-Link website.


Click on the WAN line.

One of the main windows that we need opens before us. Net->Connections

If our provider uses the DHCP network protocol (a network protocol that allows computers to automatically obtain an IP address), setting up everything here is not difficult.
Connection type we exhibit IPoE
MTU: defines maximum size packet in bytes that can be transmitted over Ethernet networks, no more than 1500.
MAC: a unique identifier, if your provider uses a MAC address binding, then it must be indicated in the contract; if not (in most cases), leave the one that will be set automatically and corresponds to what is written on the bottom of the router.
Allow- put a tick
Obtain an IP address automatically put a tick
Obtain DNS server address automatically, also check the box and our router will automatically pick up the DHCP settings data from our provider. Leave everything else as is and click Save.


Click on the button Status - Network Statistics. In the WAN field, you and I see information that our router has successfully received the necessary data from the provider and we have Internet.

Many people sometimes ask: What does LAN show? Answer. So, our computer is connected to the DIR-300 router via a LAN cable, right!
Now we connect the laptop to our router.
Click in the router settings Wi-Fi button. General settings
. We leave everything as default. Basic settings We don’t touch it either.
Security Settings-Network Authentication or protecting your network from intrusion - choose WPA-PSK(Pre-shared key). Access to your virtual network will be possible only after entering a key known to you and the users of your virtual network.

PSK encryption key: We come up with an encryption key, preferably 10-digit, consisting of letters and numbers in random order, it’s more reliable
Now our laptop also has internet. Here are friends and all the settings of our router in network protocol DHCP.
As for setting up our router in PPPoE mode, you will need to go to the router settings Net->Connections and select PPPoE connection type, then enter the username and password, as well as confirm the password. Detailed instructions available on the D-Link website itself - http://dlink.ru/ru/products/5/728.html

Every day more and more flows into our lives electronic devices, requiring constant access to the Internet: computer, laptop, smartphone, tablet, TV, etc. How them all connect to the internet and at the same time pay as for one device, at the standard rate.
This will help us wi-fi router or whatever they call it Wi-Fi router.
In this article we will go through step by step, how to configure and connect the D-Link Dir-300 router to your provider based on a connection to the Dom.ru provider via the PPPoE protocol. Router D-Link Dir-300, is a fairly popular model among a wide variety of routers, or routers as they are also called, due to its stable operation, good characteristics, reasonable price.
Setting up the D-Link Dir-300 router
Let's unpack the box with the router, remove its contents, the kit should contain the following:
- the router itself (router);
- cable (patch cord) to connect the router to the computer;
- power unit.
To organize the connection and configure the router, we additionally need:
- an agreement from your provider with login and password;
- settings data (connection type, protocol version);
- The “twisted pair” cable is the one that the technician brought to connect you to your apartment or house.
Connection
We take the router, plug in the power supply, wait until the green LEDs light up, indicating that it is in good condition. Connect one end network cable to LAN port 1, the other end to the network card on the computer. We connect the cable from the Internet to WAN port(INTERNET).


As a rule, new router comes with factory settings specified in the instructions or on the back of the router case (bottom). If your router is not new, then perhaps the previous owner changed it network settings and changed the router access password. In this case, if you still don’t know the settings, then the only way to access the router is to reset the router to factory settings, this is done by pressing a pin or toothpick on special button through a small hole labeled “reset”; you probably did a similar procedure when you removed a disk from a jammed CD-ROM. If you didn’t succeed in rebooting the router the first time, try holding down the “reset” button longer, and also give the router time to reboot from 30 seconds to 1 minute after releasing the button.
Settings network connection and login to the router control panel
In order to get into the control panel of the D-Link Dir-300 router, and not only this model, in the network connection settings in the TCP/IP Internet protocol you should specify “ Obtain an IP address automatically».
Path for Windows XP looks like this:
Start > Control Panel > Network Connections > right-click on “Local Area Connection” and select “Properties” > in the TCP/IP Internet Protocol properties set “Obtain an IP address automatically” and “Obtain a DNS server address automatically”.

Path for Windows 7 looks like this:
Start > Control Panel > Network and Sharing Center > Change adapter settings > select Local Area Connection > Properties > Internet Protocol Version 4 > Properties > select “Obtain an IP address automatically” and “Obtain a DNS server address automatically.”

The above settings are similar in different operating systems, be it Windows XP, Windows Vista or Windows 7.
To log into the router control panel(router) D-Link Dir-300 open any browser and enter in the address bar http://192.168.0.1, after which a login window to the administrative section of the router will open. In the authorization pop-up window, enter the user name in the field admin, enter the password in the field too admin.

Setting up the Internet on D-Link dir-300
By entering your login and password, we are taken to the main page of the router settings control panel. The router configuration interface, depending on the hardware revision and current firmware, may have different appearance. After this we need to go to “Advanced Settings”, the link is at the bottom.

In the page that opens we find the section “ Net" and follow the link " WAN»

On this page we see that one connection has already been created by default, it is disabled, we do not touch it, we need to add our connection by clicking on the Add button in the lower right corner.

Here the main task is to correctly select the type of Internet connection from the list (select a protocol from the drop-down list). Information about what type of connection your Internet provider uses can be easily found on its official website, or call technical support, where they should tell you step by step about setting up the router; perhaps all the settings will be given in the Internet access service agreement .
For reference, protocols that some providers use:
- Online - Dynamic IP, i.e. You don’t even need to configure anything in the connection, the only thing worth taking care of is the Wi-Fi password, which will be discussed below
- Beeline - L2TP + Dynamic IP
- Interzet - Static IP
- Rostelecom, Domolink, TTK, Dom.ru - PPPoE
- Stork - PPTP + Dynamic IP
In most cases, all that needs to be filled in besides the connection type is the login and password that you received from the service provider, for example, to connect to the Internet via the PPPoE protocol, it will be enough to enter the login and password issued by the provider and come up with a name for the connection, do not touch the rest of the settings need to.

After entering, click on the “Save” button. Once again we find ourselves on a page with connections, the last of which is just created, which, as we are shown, is “broken”. At the top right you will see an indicator indicating that the router settings have been changed and now need to be saved. You should do this - otherwise, after rebooting the router or turning off the power, all settings will be reset. Refresh the connection list page. If you have configured everything correctly, without mixing up the password or connection type, it will turn green and the Internet will become available.
Settings Wi-Fi points access
If you are on home page settings of the D-Link dir-300 router, then again go to the advanced settings. In the Wi-Fi section, check that the module itself is turned on (the switch is green in the picture and says On) and follow the link to the main settings.

On the page that appears, you need to specify the name of the access point SSID, by which you will recognize your wireless network among possible others. Since we will be setting up wireless network encryption and setting a password for accessing Wi-Fi, we should not hide the access point name. There are also other customizable parameters here, but you shouldn’t change them unless absolutely necessary. Click the change button and save the settings.

Now we need to protect our wireless network from random connections and “free Internet”. While on the advanced settings page, in the Wi-Fi section, click on the “Security Settings” link. Here we are interested in the “Network Authentication” field, select WAP2-PSK from the list. In the “PSK encryption key” field, set a password. The password must contain at least 8 characters and consist of numbers or Latin letters. Click the change button and save the settings.

Changing the administrator password
To protect your router from unauthorized connections via Lan or Wi-Fi, you need to change the administrator password for the router. To do this, go to the “System” > “Administrator Password” section and change the password in the standard way.
At this point, the most necessary settings for the normal operation of the router are completed; there are, of course, many more specific settings, but you should not change them unless absolutely necessary.
If something doesn’t work out for you or suddenly becomes unclear, you can watch this video on setting up the D-Link DIR-300 router:
The D-Link DIR-300 router has a point on board Wi-Fi access 802.11n and allows you to organize a wireless network at home, through which mobile gadgets can access the Internet and access each other’s files. Correct setting router not only helps to avoid hacking home network“craftsmen”, but also allows you to significantly increase the Wi-Fi speed and increase the coverage area of the D-Link DIR-300.
After connecting the D-Link DIR-300 router to the provider’s network, you can configure Wi-Fi, set a password and distribute the Internet to wireless devices. The access point can be configured in three ways:
- Using the “Wireless Network Setup Wizard”;
- Manual setting of parameters;
- Automatically, via WPS protocol.
Quick setup
The DIR-300 provides configuration using the “Wizard”. This method requires minimal effort and allows you to set up a Wi-Fi network in seconds without diving into technical details.
To establish a connection, you need to log into the router’s web interface and select the “Wireless Network Setup Wizard” section. Depending on the firmware, the “Wizard” may be located in different places in the interface, but all options and menu items are in different versions The software have the same name. Procedure for the “Master”:
Set the network mode to “Access Point”.


Enter the access point name - the name of the Wi-Fi network, which will be displayed on all connected devices. For security reasons, it is not recommended to leave the default name “DIR-300”.

Select the “Secure Network” item and create a password that the router will request from connected devices.


After following these simple steps and applying the changes, Wi-Fi setup using the “Wizard” will be completed and the D-Link DIR-300 will be completely ready for use.
Manual setting
Unlike quick setup, manual configuration allows you to take into account the characteristics of connected devices and neighboring networks, which allows you to improve throughput and reception quality.
Basic manual setting Wi-Fi networks for home use on the DIR-300 are performed in 2 stages:
- Setting basic network parameters;
- Configure security settings.
Basic settings
The main wireless network parameters are located in the router control panel on the “Wi-Fi – Basic Settings” tab. To go to this item in the “dark gray” interface, you will need to switch to advanced mode.


Description of functions:
- Option "Enable" wireless connection» controls power to the access point. In order for devices to use a WiFi connection, the checkbox must be checked.
- Disabling Wi-Fi network broadcasting without deactivating the radio module may be necessary when using the DIR-300 in client mode. If you uncheck this box in standard mode, then wireless communication between the router and all devices will be interrupted.
- The MBSSID and BSSID parameters are configured when the router is used to simultaneously serve several wireless networks. At home, such a scenario is unlikely, and if there is only one network, these parameters cannot be changed.
- If you check the “Hide access point” checkbox, the WiFi network name will no longer be displayed both on other people’s devices and on trusted ones. In this case, the router will not stop broadcasting. To establish a new client connection, you will need to enter SSID name manually. This function is implemented in D-Link DIR-300 to ensure security.
- The selection of the channel can be entrusted to the router firmware, leaving the value “auto”, but the automatic setting is not always adequate, which often leads to a drop in the wireless speed of the router. To manually select the correct channel, you need to evaluate the performance of neighboring Wi-Fi networks. In the “light” air interface of the D-Link DIR-300, when selected, a histogram appears showing the channel load.

The less loaded the channel, the higher throughput, and therefore the wireless transmission speed. To study the situation in more detail, you can use one of free programs, for example, WiFi-Analyzer.

Security Settings
Professional hackers are hunting for corporate secrets and are unlikely to be interested in hacking into someone's home access point. But there are amateurs who can “harmlessly” pick up a password in order to use the “free” Internet or connect to the webcam of someone else’s computer. Therefore, you should not neglect basic safety rules.
Wireless network security settings are located in the router control panel on the “WiFi – Security Settings” tab. To go to this item in the “dark gray” interface, you will need to switch to advanced mode.


Description of functions:
- A network authentication method that excludes the objective possibility of hacking - WPA2. In corporate Wi-Fi networks, access is used through a RADIUS server, and for a home network, a preset PSK password key is suitable. Thus, WPA2-PSK mode will provide maximum protection.
- The encryption key is the same password that must be entered on the WiFi device in order to connect to the D-Link DIR-300. Complex password and correct settings – the most important conditions network security. The password cannot be set to simple numeric or dictionary combinations, or your date of birth. Good password contains more than 8 characters: numbers, special characters and letters, case sensitive. Regardless of the complexity, finding a key is only a matter of time, so it is recommended to change the password to a new one every month.
- AES – data encryption technology. Provides key cryptographic strength without reducing speed wireless transmission, therefore well suited for use in the 802.11n standard. The update period should be left at its default value of 3600 seconds.
- Pre-authentication through adjacent access points is only used in complex networks with multiple routers.
After completing these steps and applying the changes, the Wi-Fi security setup is complete and the D-Link D-300 is ready to operate securely.
Connecting using WPS
The WPS protocol was developed to simplify Wi-Fi network setup. For the user, the essence of the technology is that the router is paired with any WPS-compatible TV, smartphone or tablet without having to enter a password: when you press a button on the router, the devices exchange a digital access code and connect automatically.

Depending on the hardware revision of the router, the button may be located on the side or back of the case.

Brief instructions for connecting to D-Link DIR-300 via WPS using an Android device as an example:

Select the “WPS Button” option.

Press the WPS button on the DIR-300 case.

After a few seconds, a successful connection message will appear.


Thus, in just 4 simple steps You can connect any WPS-compatible device to the router and you won’t need to enter any password.
Despite the convenience this method pairing, the WPS protocol has the lowest security: when exchanging identification packets between devices, a digital code is used that can easily be picked up by spyware.
Additional features
- The MAC filter in the D-Link DIR-300 is an auxiliary means of protecting against unauthorized Wi-Fi connections. Allows you to configure both black and whitelists MAC addresses.

- “List of WiFi clients” displays up-to-date information about connected devices. The function allows you to forcefully disconnect any user from your home network.

- The “WPS” tab provides access to simplified device pairing options.
- On the " Additional settings"you need to pay attention to 2 important parameters: "TX power" and "Channel width".

Transmitter power is expressed as a percentage. The higher it is, the wider the Wi-Fi network coverage area.
The channel width can be selected automatically - 20/40, or adjusted manually. The wider the channel, the greater the throughput, i.e. speed.
The 40 MHz channel gives a noticeable increase in speed, but is less resistant to interference from neighboring networks than 20 MHz. In addition, as you approach the edge of the coverage area, the throughput of the 40 MHz channel is greatly reduced. To improve reception, you will need to configure the D-Link DIR-300 transmitter to maximum power, but then the router will begin to emit too strong a flow of radio waves, which will “clog” weak waves from the antennas of mobile gadgets. This will significantly reduce wireless transmission speeds on devices operating in close proximity to the router. Thus, pick up optimal values power and channel width is only possible by measuring speed and coverage directly at the DIR-300 installation site.
- It is not recommended for users who do not have special knowledge to change the values of the remaining parameters on the “Advanced Settings” tab.
- WMM – WiFi-Multimedia technology optimizes wireless traffic for multimedia applications. To improve speed performance while watching online videos or calling on Skype, the option must be enabled. It is not recommended to change parameter values.
- In “Client” mode, DIR-300 can connect to another router to organize complex infrastructure in large homes or offices, as well as when connected to a provider’s Wi-Fi network.
Found a typo? Select the text and press Ctrl + Enter

Setting up the Internet for a specific provider using firmware
Almost all Russian Internet providers provide ready-made firmware for configuring wireless routers on their official websites. In the list of devices you can easily find the D-Link DIR 300, the characteristics of which allow you to fine tuning for any provider. In most cases, on the Internet service provider’s website you can download both the firmware itself and the program for installing it. In addition to the set of files, it is always offered step by step instructions. So with automatic tuning there won't be any problems.

Problems may arise with provider firmware if the settings are hidden by the developer password. The user will not have the opportunity to go into the settings and manually specify the parameters for Wi-Fi. Therefore, before flashing the device, you need to check with company representatives about such blocking. Even if the router was flashed due to negligence, it can always be revived using recovery firmware from the official D-Link website.
Wi-Fi Settings
In the control menu of the D-Link DIR 300 wireless point, settings WiFi connections have a separate section with many items.
- MBSSID allows you to create several different Wi-Fi networks. It will be useful somewhere in the office to give Internet access only to the bosses, but at home this function is not used.
- In the SSID field, it is recommended to write your own name for the wireless network in Latin letters.
- You can set any wireless mode, depending on your capabilities. wireless devices. If the laptop only works in 802.11G mode, then there is no point in installing a more powerful one.
- In the security settings, in the “network authentication” field, it is recommended to select WPA-PSK/WPA2-PSK mixed. Firstly, this connection does not require a RADIUS server, and secondly, a password with letters and numbers is harder to crack.
- You need to select AES for encryption and enter a password for the Wi-Fi network. This completes the setup, you can save the changes and enjoy the Internet via a wireless network.
Hardware connection to WiFi network
Setting up WiFi distribution in the D-Link DIR 300 wireless access point can be done not only at the software level, with settings made through a special menu. On one of the side panels of the device you can see a huge button labeled WPS. Thanks to it, you can make a quick hardware connection with a device that supports this technology. It is enough, for example, to select a connection to a wireless Internet network on your tablet via WPS and select the required network in the list of wireless points that appears. To complete the connection on the D-Link device, you need to press and hold the hardware button for about 2-3 seconds to connect the device via Wi-Fi. The devices will connect without entering a password, which is very convenient when you don’t want to give your personal network password to your guests.

However, before you can use this amazing feature, you need to enable it in your router. To do this, you need to find the WPS item in the access point management menu and go to it. After checking the box next to “enable WPS” and saving, the function will be available for use. IT savvy users may try to create an additional Wi-Fi network with limited capabilities, for example. Purely for guests who urgently need the Internet, but so that their connection does not interfere with the owner’s current downloads.
Setting up network television
Many users will like the IPTV performance characteristics of the D-Link DIR 300 router. Minimum settings and maximum pleasure from watching high-quality digital video. When entering the IPTV setup menu, the wizard prompts you to select the port number in the wireless access point to which the TV set-top box will be connected. The main thing is to remember the selected number and always connect digital television only there. In the Miscellaneous section, it is recommended to enable IGMP, NAT and firewall. It is better not to touch other fields. Naturally, you need to click the “Save” button, and you can safely start watching the video high definition on the computer screen. The provider providing the IPTV service must provide the player for viewing, the server address and the list of channels.
Advantages of the D-Link DIR 300 router
Judging by numerous reviews from owners, the advantages of wireless router can't be counted. This is true, otherwise where would so many positive reviews come from?
- As mentioned earlier, the main factor when purchasing is price. The device is affordable for any user.
- Availability of a four-port switch to which you can connect personal computers And network printer, For example.
- Ability to watch IPTV on multiple devices, both over WiFi and local network.
- Very convenient WiFi setup in D-Link DIR 300. The menu items have a description, and any user can independently launch their own wireless network in a few minutes.

There are also disadvantages to a wireless device
We hear from users that the D-Link DIR 300 “crashes” during operation - that is, it spontaneously reboots or freezes for an indefinite period of time. After studying the information on specialized forums, you can find that the problem is known to specialists and can be solved by replacing the firmware. Freezing can occur due to the user's fault if files are downloaded over a wireless network by several devices with a total speed equal to the Internet channel width. For all owners of D-Link DIR 300, it is recommended to limit the speed of downloading files, primarily for torrents, by 5-10% of the maximum channel width. The recommendation only applies to devices that access the Internet via a wireless network. Working with the cable has no disadvantages. The negative side includes complaints about the small coverage radius. The router has neither an amplifier nor an antenna output. Although for the price that the access point has, you can demand from it good coverage not worth it.

Conclusion
If you decide to purchase an inexpensive router, you should pay attention to the D-Link DIR 300. WiFi setup, local network, digital television and security will not take much time. Not all providers provide open access to the Internet. Many people use individual settings that select routers can be friends with. These include the most popular wireless access point in Russia from the well-known manufacturer of communications equipment D-Link DIR 300.