You bought a printer and are glad that wireless technologies finally reached your small office, hurry up to print the first photo or page of text, as they say, “over the air”, without tying yourself down with a heavy burden of wires. But here's the problem: I've never had to deal with wireless interfaces printers. The heart skips a beat in anticipation of the first high-quality photo from the sea, and a silent unanswered question pulsates in my head: how to connect a printer via WiFi? Instructions from the printer manufacturer, on the one hand, tell everything in detail and detail, but on the other hand, these explanations often do not dispel the fog of ignorance. Especially if the instructions are printed in a language unfamiliar to us.
There's really nothing complicated. We went through this ourselves - we will share it with you. We apologize in advance to advanced users and system administration professionals. This article is unlikely to be useful to you, because... We will deliberately make it simpler for understanding by most users who do not have regular close contact with digital technology.
Initial data. What should we have
Connecting the Printer via Wi-Fi by Entering the SSID Password
Perhaps the easiest way to make friends with your typing assistant is wireless Wi-Fi network- this is to authorize the device on the network by entering the SSID password. This is the password that you usually enter for the first time in order to connect your laptop to your home or office network. tablet computer or smartphone. Let's look at the sequence of our actions using the example of connecting an Epson printer.
Please note: In order to connect the printer this way, it must be equipped with an LCD display.
- go to the printer settings (icon with a wrench and a screwdriver)

- select "Wi-Fi Settings"

- go to the menu "Set up a Wi-Fi connection"

- go to the "Wireless Network Setup Wizard" menu

- after that, select your network from the list of found ones. We hope you haven’t forgotten the name of your network? Forgot?? Then look on your laptop or smartphone to see what network they are connected to, and then select the same name in the list on the printer screen.
- After you have selected your network, you will be prompted to enter the SSID password using the printer keys. If you have forgotten your password or it is too long, we recommend that you proceed to the second method of setting up the network - without entering a password.

- as soon as you have entered the correct password, the Wi-Fi icon on the printer panel will glow green. This doesn't mean everything is lost. On the contrary, you can congratulate yourself: you have figured out how to connect Epson via WiFi by entering a password.

- Once the connection is established and provided that your computer is connected to the same network and the necessary driver is installed on it, your PC and printer should “see” each other and you can print wirelessly to your heart’s content.
Connecting a printer via Wi-Fi without entering the SSID password
This connection method is useful if your printer is not equipped with an LCD display, i.e. you physically cannot enter the SSID password. We also recommend this method if your SSID password is too long and complex (labor-intensive and time-consuming typing of characters) or you accidentally forgot the password.- if you have a printer with an LCD display, perform operations on the first three pictures from the first method, i.e. go to settings and Wi-Fi installation. Select "Connect using the WPS button" from the list

- If you have a printer without an LCD display, then on the panel you need to press the button marked Wi-Fi

- the printer will then begin scanning and attempt to connect to the wireless network. At this time, a message will appear on the LCD display indicating that you need to press the WPS button on the router(s). On a printer without an LCD display, the indicator above the Wi-Fi sign will simply blink.

- next we should find on our router and click WPS button(on some routers it is written as OSS). By clicking this button, we let the router know that the printer that is “knocking” on the network’s door is not someone else’s device and we consent to this connection. The WPS button is usually a small, inconspicuous button on the back or side of the router case. As an example, we have provided a photo of the popular TP Link model.

- if we pressed the correct button and the operation was successful, the printer will confirm this with a green indication. If the Wi-Fi indicator is green and not blinking, you can print.
Video on setting up a Wi-Fi printer without an LCD display
Do you have any questions? Is something not working out? Write to us in the comments below the article and we will be happy to tell you how to connect the printer via WiFi.
Do you want to know how to connect your printer to your laptop via Wi-Fi? In this article we will try to explain to you what you will need to do. In fact, the process is extremely simple and is identical for all operating systems, from Windows 7 to Windows 10, so you shouldn’t have any problems.
We have prepared two connection options for you via Wi-Fi connection:
- Using a connection to an access point;
- Through discovery public access to the network.
Connect to a Wi-Fi hotspot for later printing
In this case, a peer-to-peer wireless network will be used, that is, we will not use a router. So, to connect you must do the following:As you can see, the process of setting up a wireless connection between a printer and a laptop via Wi-Fi is really very simple. But this method somewhat inconvenient because you will constantly have to disconnect from the existing Internet connection, if it is not cable, in order to send the document for printing.
Sharing a printer - solving problems with disconnecting the Internet connection
In this case, there is also a nuance - to set up sharing, you will have to connect the printer to the laptop first using a USB cable, only then can you use it using Wi-Fi connections. You must do the following: This method much more interesting than the previous one, because you don’t have to disconnect your Internet connection. We hope that we helped you with the question of how to connect a printer to a laptop via Wi-Fi.
 Canon printers are affordable, easy to use, and good value for money. Models of this brand have positively proven themselves in the market. If, as a rule, there are no problems with installation via a cable, then setting up the printer in Wi-fi mode may be difficult. Let's look at how to connect a Canon printer via Wi-Fi to a computer or laptop, using the example of the popular Canon Pixma G3400 flagships, Canon Pixma MG3640.
A few simple steps
The Pixma line of printers, particularly the G3400, features Wi-fi adapter, implementing the connection Canon printer Pixma in modes:
- infrastructure, that is, to the home network using a router;
- direct connection in access point mode.

The main problem in this case is switching between modes. The Pixma G3400 model does not have a display, so all manipulations are performed blindly by pressing and holding the buttons on the printer body.
- Sequentially press the black print, color print and Wi-fi buttons. The power indicator will stop blinking and remain illuminated continuously.
- Activate Wi-Fi on your computer or laptop.
- Find your printer model in the list of displayed equipment.
- Enter the requested password. Enter the password for new printers serial number, which can be viewed directly on the printer.
If no failures occurred during the execution of the algorithm, it means that the connection was successful and you can get to work. To connect a Canon printer to a laptop, you need to perform exactly the same steps.

Some differences arise when setting up Wi-fi through home network using a router. In this case, the Pixma printer must be switched to infrastructure mode.
For this:
- Press and hold Wi-fi button until the printer power light starts blinking.
- Press the color print, black print and Wi-fi buttons successively. The power indicator will light up continuously.
Similar to connecting through an access point, the printer you are looking for is determined in the equipment folder and installed as the default printing device. To avoid confusion, when to press which buttons, it is worth writing down this information and stick it directly on the printer so that it is always at hand.
Connection using Wi-fi Protected Setup technology
Pixma line printers support connection via a router using WPS. This method allows you to avoid entering passwords and simplifies the equipment installation procedure. In our case, the method is recommended for the Canon MG3640 printer. In order to use WPS, before setting up the printer, you should check your router settings and, if necessary, activate WPS. The router must be equipped with a WPS button.

The algorithm for connecting the printer is as follows:
- Connect the printer to the power supply.
- Press and hold the Wi-fi button until the printer power indicator starts blinking.
- On the router, press and hold the WPS button.
- When the printer and router are connected, the light on the printer will turn on continuously.
The procedure for searching for a printer by the router takes a few minutes, but in the future it will ensure uninterrupted access of the MFP to your network.
What to do with outdated printer models?
Users still have quite old printer models in use. These models do not have Wi-Fi connectivity. In addition, the manufacturer does not release updates for drivers. For this reason, users are forced to replace a perfectly working, but outdated printer with a new, upgraded model. How to find a solution? As an example, let's try connecting a Canon LBP 1120 printer to the Windows 7 operating system on a computer or laptop.
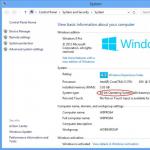
The manufacturer's website officially states that drivers for a 64-bit system are under development. If the user has a 32-bit OS installed, then there should be no problems installing the driver. You can check the system bit depth in the Computer menu – Properties – System type (Bit capacity field). The driver for the LBP 1120 model is downloaded from the official website and installed on your computer or laptop.

- Disconnect the computer (laptop) and printer from the power supply. Connect the printer to the computer via a USB port.
- Turn on the printer, then the computer (laptop). After downloading operating system the search for new equipment will begin.
- Search and install the driver. To do this, cancel the search for the driver on the Internet and specify the system folder (option “Search for a driver on this computer”) where the driver was saved after downloading.
- After installing the driver, the printer is ready to use.

But what should you do if your computer (laptop) has a 64-bit Windows 7 operating system installed?
The problem has two solutions:
- Connect the printer to another computer or laptop that has the necessary drivers, and through local network print the necessary documents and photos;
- Use virtual machine paired with the LBP 1120 printer driver for Windows systems XP.
Virtual machines are familiar to many advanced users. These are emulator programs that reproduce the work of various platforms without reinstalling the working one. operating system. Examples of such machines are: VirtualBox programs,Windows XP Mode.

Briefly, the algorithm is as follows:
- Download and install the virtual machine on your computer.
- Find and save to computer Canon driver LBP 1120 for Windows XP.
- Launch the virtual system and install the printer in it.
Setting up and working with virtual machines requires enough high level competence. If the user is not confident in his abilities, he should entrust the connection of the Canon LBP1120 printer to a professional.
Connect the printer to your Wi-Fi router y s USB port possible using the built-in Print Server - connects the printer to the router and allows access to it from any client computer on your network.
Connecting the printer to the router
In order to install a printer through a router, you need to connect the printer to the USB port of your router. In this article I will tell you how to connect the Asus RT-N56U Wi-Fi router and a printer in Windows 7. Connecting a printer to this router is also possible using a special utility:
The utility allows you to automate the connection and configuration of a network printer and works only in Windows OS. Next, I will tell you how to connect the printer through the router manually.
Attention! Make sure your printer model is supported by your router! Check your printer's compatibility with Asus router Can .
Connecting a network printer in Windows 7.
Check your printer connection using the web interface by opening any browser and entering address bar http://192.168.1.1. In the window that appears, enter your login and password (admin and admin, respectively).
In the next window you need to select the printer port (see Fig. 4). Go to item "Create a new port" and select the item from the drop-down list Standard TCP/IP Port.
After pressing the button "Next" The printer installation wizard will ask for the IP address of the printer on the network, the printer’s IP address corresponds to the router’s IP address - 192.168.1.1. Enter it in the field Name or IP address and uncheck the box "Poll the printer and select the driver automatically". Click “Next”.
A window will open "Search for TCP/IP port." Wait until a window appears asking you to enter additional information about the port.
Select device type Regular (Generic Network Card) and click Next:
Now you need to install the driver for the printer. Select your model from the list or Click the button "Install from disk..." and in Explorer, specify the path to the driver file. Then click Next. Enter any printer name and click Next again. A window will appear with the printer installation process, after which the installation wizard will offer to configure shared access to the printer via the local network.
Select an option "This printer is not shared" and click Next. The wizard will inform you that the driver installation was successful and offer to use the default printer. Now all you have to do is press the button "Ready" and configure the port properties.
Open menu Start - Devices and Printers. Find your printer, click right click mouse and select "Printer Properties". Go to tab "Ports" put a check mark on the port that you created earlier and click on the button "Configure port..."
In the TCP port settings, select the LPR protocol and set the Name. Now click "OK" to save settings.
The last decade has passed under the auspices of mobility, and therefore manufacturers have begun to slowly switch to wireless technologies. Output tools are no exception, and today let's look at how to connect a printer via Wi-Fi.
About printers and the essence of the problem
Despite the fact that there are not so many publicly available types of printers, about five, the technologies they use are being improved by each company that produces them. Thus, it turns out that virtually each model is more or less unique in terms of operating and production technology.
Idea wireless connection has been approaching this area of computer technology for a long time. Already five years ago you could buy multifunctional device(MFP) with support for Wi-Fi connection. It would seem worth adding a Wi-Fi module. But it's not that simple.
Even now there are many different subtleties and connection methods wireless printer with a gadget or computer. In fact, each model can have not only settings that are different from its predecessor, but also the operating principle itself. Therefore, connecting a printer to a computer via Wi-Fi is not such a simple matter. What can we say, there is a known case when a new-fangled device with Wi-Fi support could not be set up even in its own service center.
But it’s okay to connect, but setting up a printer via Wi-Fi in some cases can be simply extremely difficult, and sometimes even almost impossible. Why confuse and complicate such a process, which should initially be simple and intuitive, is unknown.
Since any universal method does not exist, then at least a few of the most common ones should be described. But even this does not guarantee that they will be at least partially useful to everyone who purchased such a device. In any case, here we will consider the three most common connection methods, which can be roughly designated as follows:
- Simple.
- Reasonable.
- Surplus.
Easy way
This option is the most convenient and least expensive in terms of the number of actions and time. It does not require any additional processes. Simply install the device in the desired location and turn it on. Of course, the gadget must be within reach of Wi-Fi coverage through which information will be exchanged.
After the device is connected to the power supply and turned on, you will need to start the PC. Then we install the drivers from the disk accompanying the device and reboot the system. After full load operating system, where the Wi-Fi module will be automatically launched, go to the “Start” menu, located in the lower left corner of the monitor screen, and in the right column of the window we find and click on the “Devices and Printers” position.
Clicking will launch a window where all connected devices will be displayed, including the one we need. Finding it will not be difficult, since its name will display the manufacturer and model.
Just right-click on it to bring up context menu, and select the second item from the top called “Use as default”.
If everything was done correctly, a round green icon with a white check mark will be displayed on the device icon.
In principle, that’s all – the gadget is ready for use. But before you print any documents on the printer via Wi-Fi, it is recommended that you print a test page.
Devices with this type of connection have one very significant drawback, namely, if you forget to turn off the device after use, then an unscrupulous neighbor or colleague can connect to it and send a couple of things to print out to no one necessary files. Therefore, it is advisable to turn off the device after finishing work.
Reasonable approach
In terms of execution, this method is practically no different from the previous one, with the exception of some nuances. Immediately after installing the printer drivers and utilities, you will need to go to the settings of the device itself and select the network to which it will be connected.
This is done very simply. You just need a little patience and attentiveness. In principle, everything will be approximately the same as when adding any other device to an existing Wi-Fi network.
First we find the desired network, and then enter the encryption key. It seems like a small thing, but the convenience increases significantly. In fact, you have succeeded in making a printer networked via Wi-Fi. And this allows almost any Wi-Fi device connected to this access point to directly send files for printing, without intervention personal computer or laptop.
In addition, devices paired according to this scheme are completely devoid of the disadvantages of the previous method, and the level of ease of use becomes simply prohibitive.
Redundant way
The last option we are considering, how to connect a laptop to a printer via Wi-Fi, is the most difficult compared to the previous two.
Such coupling schemes have their own nuances, which may play a role, or may be completely left out. The fact is that it may happen that the device will work from the start and no special actions or manipulations will have to be performed. This course of events is only possible if the stock IP address of the device is located within the same subnet with the provider used and allocated to the client.
Simply put, this is unlikely, especially since most people currently use dynamic rather than static IP addresses.
For devices with a similar connection scheme, you will need to add the IP address that the printer uses to the PC settings.
You will need to go to “Devices and Printers” again and click on the “Add a Printer” button.