Baltic Sea
Off the coast of Germany
1946
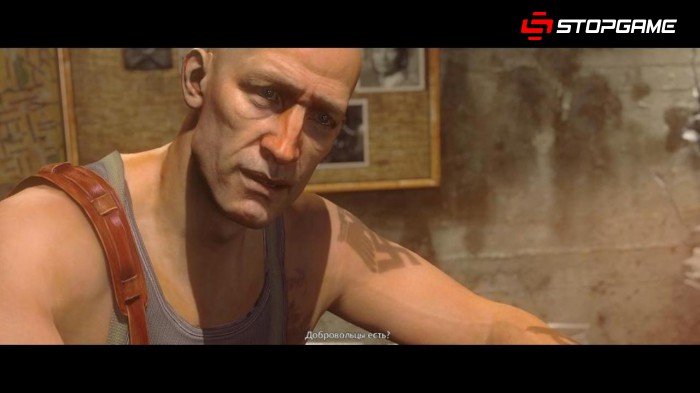
The outcome of the Second World War is almost a foregone conclusion: Nazi Germany, thanks to a technological leap, is confidently going to victory. William "BJ" Blaskowitz, special agent of the Directorate of Covert Operations, as part of a resistance squadron, participates in a desperate attempt to storm the fascist fortress, which contains the notorious general and genius scientist in one person Wilhelm Strasse, nicknamed the Skull. His ideas brought Germany to a fundamentally new stage of development.
Partner Fergus Reed asks to replace him at the helm, but that was not the case. The next anti-aircraft salvo breaks the pipeline of the sixth engine. We pass into the technical department and, turning to the left, we take out the pliers and wire from the cabinet. We get to a small opening in the far right corner, crawl to the engine and shut off the pipeline. From the loss of power, the plane began to decline. We leave for the cargo hold, go downstairs and cut the white-yellow slings from the cargo with a knife. Returning to the cockpit, we use the turret in the nose of the aircraft and successively destroy numerous fighters. We monitor the state of the aircraft by the indicator in the lower center of the screen.
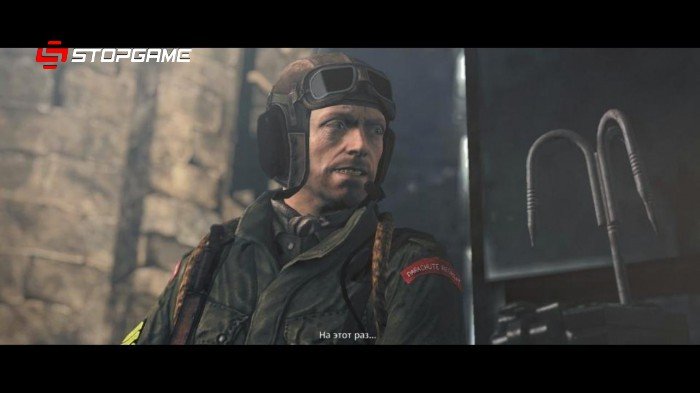
William "BJ" Blaskowitz.
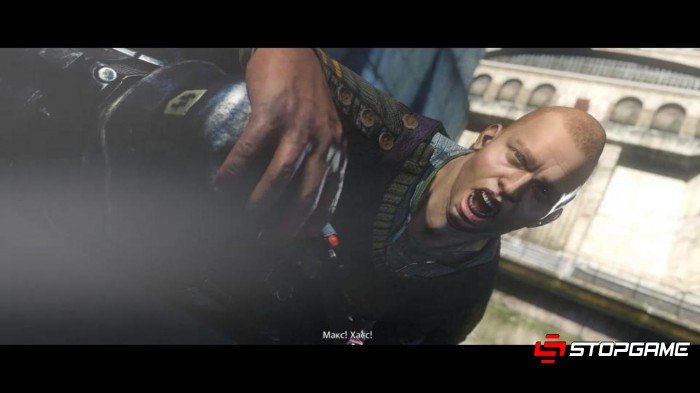
Head-on after colliding with one of the fighters, we lose consciousness for a while. Having woken up, we select the first aid kit and, having observed the landing aircraft, we pull the upper lever. The plane is knocked out, and it begins to descend rapidly. Pilot Private Wyatt begins to panic, but timely advice from Fergus saves the day. We open the cockpit door and after our partner with a running start we jump onto the wing of the plane. After talking with the soldier, we go into the cockpit and bring Wyatt to life. The fortress is straight ahead: we make an emergency landing in the waters off the coast.
Mechanized panzerhunda, similar to predators, prowl along the coast. Miraculously escaping from one of these in the cockpit, we answer Fergus's call and discuss further actions. We break the box in the aisle with a knife, scatter and, by pressing the squat button, we slip under the rubble. There is a first-aid kit on the left - we pick it up and restore health. Feel free to dive into the water, swim to the other end of the cargo hold and get out through the hole on the left side. The oxygen supply should be sufficient to reach the next plane. We do not stay in one place for a long time and, in general, we try to swim at an accelerated pace. We swim into the plane, go up the stairs and sit down behind the turret. Having shot two panzerhund, we leave the transport and get to the allies.
Having received a walkie-talkie and a submachine gun, we rush straight through the center without looking back. Further, we go downstairs, we pass to the machine-gun nest and replenish the supply of grenades. We throw a projectile into an automatic turret. We jump down through the formed hole next to it. We take armor, cartridges and a first aid kit from the shelves. Standing in front of the door, we lie down on the floor and shoot the enemy's leg through the slot. As soon as the door opens, we immediately finish off the Nazi. We move forward, killing enemies and competently using shelters. Don't forget to collect the remaining ammo, armor and first aid kits. The map is supplemented as we explore the location, but if we find a ready-made map, then the entire area will become available to us. We get to the very last machine gun nest and take the map from the box behind the turret.
Coming out, we turn left and move along the trench. We shoot the Kampfhund that has appeared on the way as soon as possible. If the dog jumps on us, then quickly and often press the shot button to strike with a knife. We get to the next machine gun nest, crouch down and sneak up on the officer. With the help of a knife, we make a silent murder. We select the dropped pistol, which can be equipped with a silencer and deal with enemies from a distance. For performing any of the same type of actions (for example, silently killing five officers), a corresponding perk is given, which opens up additional opportunities (displaying officers on the map). We leave from the other side and kill one more soldier.
Officers can turn on the alarm and call for help an unlimited number of times, which is why we always designate them as a priority target. The presence of officers will be notified by a signal in the upper right corner. Judging by the map, you can get into the bunker in two ways - quiet (by shooting shells in the room (or throwing a grenade at them) and making your way into the sewer through the gap formed) and noisy (by blowing up the gate with explosives located in the room on the left side). We use the second option - through the sewerage system. Moving along the narrow passage, we pick up ammunition from the hatch cover on the right side. Having penetrated into the bunker through a small lattice, we crouch down and go left and leave the room. Let's hide behind the box and wait for the officer to go downstairs. With a well-aimed shot from a pistol with a silencer, we neutralize him and the soldier on the left side. After silently killing an officer, trophies, letters and Enigma codes will be marked on the map with question marks. Having reached the gate, we go into the room on the left and select a fragment of the Enigma code from the box. Returning to the stairs, we will look into the small room on the left and take the map from the rack. We pass to the end along the rails and behind the boxes we find an open ventilation hatch. Through it we make our way to the morgue, where we pick up the Gold Medal trophy from the table.
Fergus Reed.
Climbing higher and higher, we clean the floors from enemies. Meanwhile, the allies almost got to the fortress. We get to the anti-aircraft gun and kill the shooter. If desired, the weapon can destroy the huge treadmill on the right side. Returning inside, we go to the right and go into the first room. There are three levers on the wall - we activate them in the following order: left - right - central. From the table of the secret room we take away a fragment of the Enigma code. Going to the left side, we go up one staircase, then along the second and, entering the room, we pick up Oscar's letter from the bed. Having made our way to the second anti-aircraft gun, we deal with the shooter and shoot at the obstacle on the left side. Returning inside, we go into the room on the right. The Gold Cup trophy is hidden under the tarpaulin - we crouch down to notice it. We leave outside, deal with opponents and get to the next control point. Opening the door, a panzerhund will attack us. We shoot him until Private Wyatt comes to the rescue. We are not in a hurry to shake hands, first we will take away the next code of "Enigma" from the room from which the mechanical beast escaped.
Together with a couple of comrades-in-arms we climb the wall, simultaneously killing the Nazis looking out of the windows. Most of the allies will stay below and cover us with fire. Having penetrated into the fortress, we go down the stairs and pull the lever to open the gate. We cling to any of the chains and go down even lower. Crouching down, alternately overtake two opponents and neutralize them. We also eliminate the dog lying in front of the passage, and the officer in a small room, from where we pick up the Golden Bowl trophy from the chest of drawers. We get to the hole around the corner, which is covered with boards. Having neutralized the enemy, we jump down and with the boxes we select a fragment of the Enigma code. We get out through a small rift in the wall, we immediately pass to the boxes opposite and from one of them we select the map. Going up to the next floor, we interact with the statue to the left of the Skull portrait-painting. Take away the Golden Sword trophy from the statue on the right wall. Through the secret passage we make our way into the office, kill the officer and take from the table a fragment of the Enigma code. We go back and go up the spiral staircase. The last officer loiters around the dining table.
We leave outside through the open window and shoot enemies on our and the lower floors. We move to the adjacent building of the building, climb the stairs and kill the dog. Going around the obstacle, we break the box and get the Golden Floorball Prize trophy from it. Having got out into the courtyard, we use the turret to clear the territory from the Nazis on the lower and upper levels. When finished, we go to the right and we get a fragment of the code "Enigma" through a small rift in the wall. We pass inside the plane and meet with the allies. We pry the beam with the part we received from Wyatt. Following the others, we make a running jump. The already flimsy floor finally collapses under the weight of five strong guys, who once again find themselves in captivity.
The disfigured bodies of the victims of the experiments are transferred here - to the crematorium. Nenarokom Wyatt starts up a four-phase burner system. Time is running out, so we act as quickly as possible. An open door reveals a flat surface with a keyhole. In the drawer on the far right tabletop is a fragment of the Enigma code, in the drawer on the far left tabletop there is a key. In the rest, you can find a first aid kit and armor. Having unlocked the passage, we quickly pick up Blondie and take him out of the crematorium. The surprises did not end there: a super soldier escapes from the floor capsule and literally crushes the head of the blond Prendergast. Keeping at a distance, we destroy the tubes on the shoulders of the enemy, and then continue to shoot at the respirator on his face until the bitter end. Near the Blondie there is a bag with endless ammunition - we will use it if necessary. The Skull appears in the crematorium and traps us in four walls.
The long-awaited meeting with the main enemy did not take place at all as planned: the Skull presents us with a difficult choice - to use Wyatt or Fergus for our research. Depending on the decision made, we will accordingly have the “Closing” or “Hacking” skill, which will allow us to further penetrate into unique and inaccessible places for another skill with ammunition, weapons and other useful things. In addition, along with trophies and fragments of Enigma codes, health or armor improvements will be hidden at locations, increasing the maximum value of the corresponding indicator by 10 units.
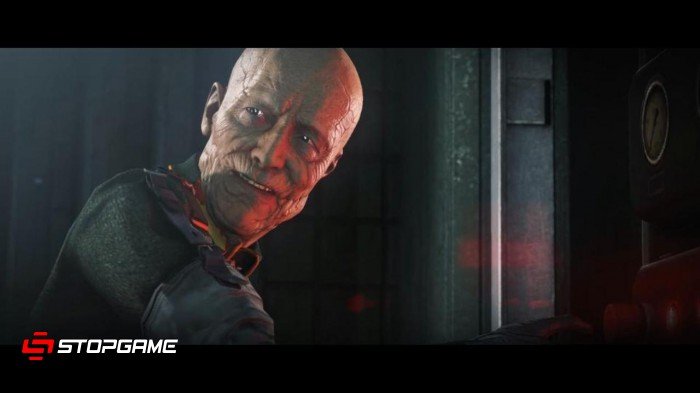
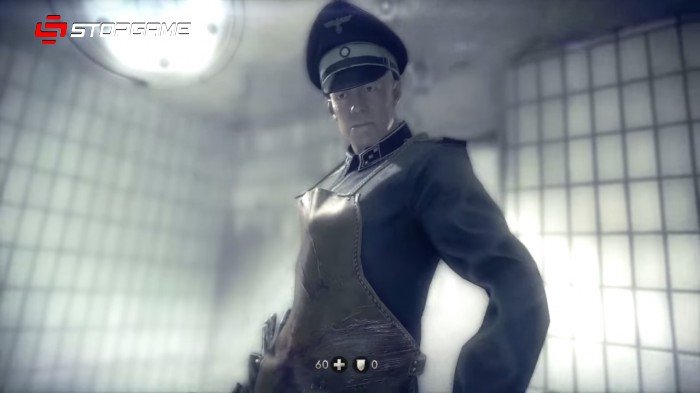
Wilhelm "Skull" Strasse.
Before leaving, Skull activated the burner system and left one of the super soldiers to watch over us. With dexterous movements, Fergus (or Wyatt) distracts the super-soldier and throws a piece of pipe at us - we pick it up and neutralize the enemy. We jump onto the tables and damage the nozzles located above them, from which fire oozes. Then we approach a friend near the window and with his help we get rid of the handcuffs. We break open the metal box to the left of the window or its lock with the "Closing" or "Hacking" skill. Mini-games are essentially no different. In the first case, we close two bare wiring and hold them in this position until all three bulbs light up, in the second, by rotating the right master key, we connect the green arrow with a row of holes and hold it for a few seconds. Jumping out of the window, a shard of shrapnel pierces our head. After some time, kind people find us alive in the vastness of the waters and take us to the hospital, where the doctor, after an X-ray examination of the skull, will find the same piece of metal in the brain. Being in a state of deep coma, with a disappointing prognosis, we are sent to a mental hospital.
Chapter 2: The Asylum
Poland
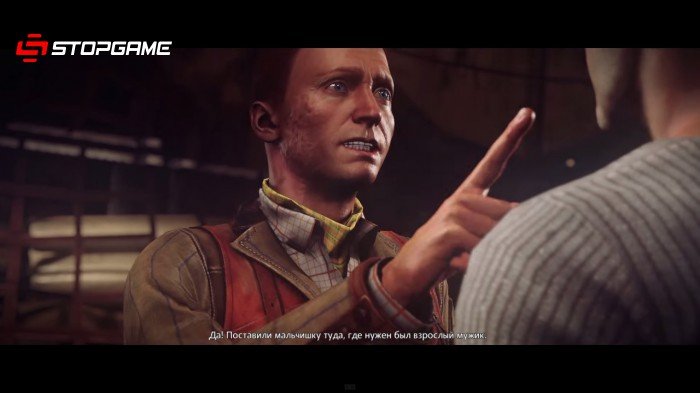
The Polish psychiatric hospital was run by a small family consisting of the father of Krzysztof Olive, a psychiatrist, a mother, a pharmacist, and the beautiful daughter of Anya, a head nurse who looked after us with special trepidation. Only the occasional Nazi visitation led by Sturmbannführer Keller, who each time took several patients with them for Reich experiments, caused concern.
One fine day, everything collapsed in an instant: the Nazis came with the goal of closing the institution, while killing all the sick. We turn our heads to the left and observe the unceremonious actions of the guests. A soldier kills Anya's father and a nurse. Anya herself gets off with only a blow to the head, after which she will be taken to Keller. Then the enemy will deal with the patients. We select a knife and, after waiting for our turn, we quickly strike. Having got ourselves a pistol, we attach a silencer to it and leave the room.
We select a knife and silently kill the enemy. There is a map hanging on the wall on the left - we take it away. Two officers at once move along the corridors. We track them on the map and neutralize them. Having dealt with the rest, we go to the stairs "B", go upstairs and pick up a fragment of the "Enigma" code. Also on the second floor in the corner room there is a locker with a lock - we break it open and take the armor improvement (Wyatt line). We go down to the first floor, we clean it and go to the staircase "A". Several steps are damaged in the lower half. Sitting down, through the crack you can see a small door - shoot through its lock. We pass under the stairs and take away Isabella's letter. There is a wall safe in the control room - we break it and get a health improvement (Fergus line). We press the button on the table, thereby opening the doors, and we destroy the appeared enemies. We go outside and face an even larger number of Nazis. Drones will periodically appear, which are especially dangerous at close range. Near the truck on the right side is a bag with endless pistol ammo. Under the front of the cabriolet is the Gold Bonnet Decoration trophy. We transfer Anya to the car and leave the territory of the hospital. On the way, Anya will wake up and take us to the house of her grandfather Roman and grandmother Olenka Targonsky, who live near the German border.
Chapter 3: New World
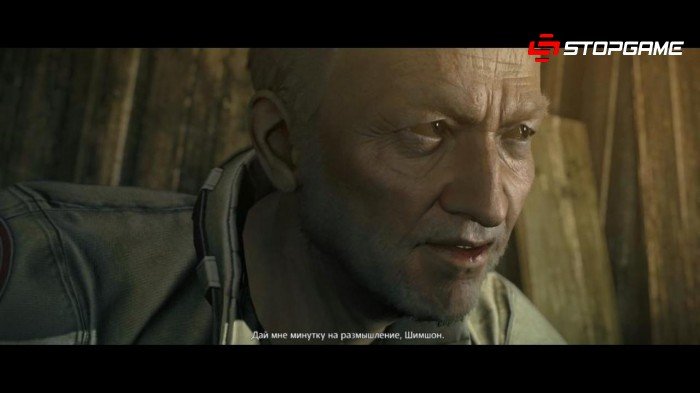
It's 1960. Germany won the war and now rules the world alone. America raised the white flag twelve years ago after the Nazis dropped an atomic bomb on its territory. The resistance has been broken, all its members have been captured and no one knows where they are being held. We go down to the basement to Keller, whom we found earlier in the trunk of the car. To the right of it, from a small stand, select the Golden Watch trophy. From the closet in the corner we take out an apron and an increase in health or armor, and from a drawer of the table - glasses and a letter from Roman. Taking a chainsaw in hand, Keller will throw himself at us with a knife. Quickly and often we press the shot button to calm down the prisoner. Under threat of death, he confesses that resistance fighters are being held in Berlin's Eisenwald prison.
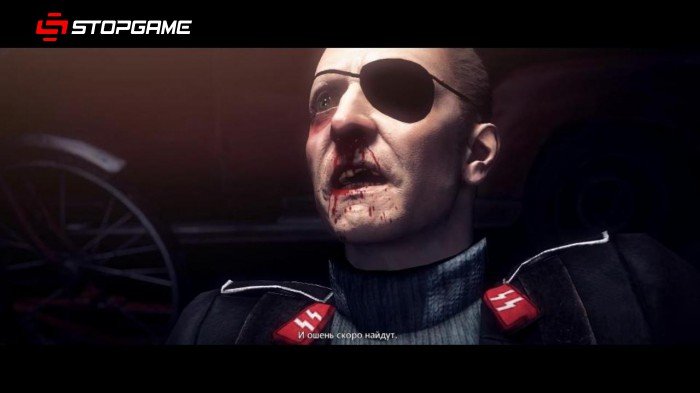
Friedrich Keller.
Roman and Olenka kindly agreed to take us to the German capital. Arriving in the eastern sector, we go down into the pit on the left side and through the pipe we pass into the sewer. In the corner, between the door and the next chimney, lies a fragment of the Enigma code - we select it. Moving through the corridor, we pick up the pistol from the stool and get out, having dealt with the enemy in the passage. Having turned around, we go up the stairs and, having watched the officer, we neutralize him. Having reached a small shed on the left side, from one side wall we remove a fragment of the Enigma code, and from the other - from the gap in the lower left corner we take out the golden trophy “Golden Egg”. Having made our way into the barracks building, we rise to the second floor and take the map from the wall. We select a fragment of the Enigma code from the device on the table, neutralize the second officer and clear the entire sector from the remaining enemies. We return to the car and reach the platform blocking the way under the bridge.
We go into the left tower, we destroy the Nazis and in the room on the right from the cable drum we select a fragment of the Enigma code.
There is a short way to the 1st floor for the Wyata line. Having broken open the door, we go down the stairs and deal with the enemies. We penetrate into the through ventilation shaft opposite the stairs and take away the increase in armor from there. After crossing the bridge, we break open the second door.
Fergus line. We activate the elevator on the left side of the tower, climb it to the 2nd floor and select the health increase located between the wall and the cable drum. Looking at our feet, we move along the bridge to the right tower, go down to the 0th floor, and then through the hatch ("F" on the map) to the 1st.
Having neutralized two opponents, we go down the stairs and, passing under it, we go to the left. The safe path will lead us straight to the officer. We deal with the rest and go to the wall cells. In the ajar cell 43 there is a fragment of the Enigma code. Another fragment can be found in the car on the floor of the passenger seat in the room with the platform. We go upstairs using a lift or ladder, and activate the gearbox platform lever. We leave the tower through the opened door on the left side, simultaneously destroying the enemies.
After moving to the western sector, we go to the right building and neutralize the enemy there. We deal with the enemies by the road and get to the very last building on the left side. Having removed the dog at the entrance, we will observe the officer through the window. As soon as he turns away, we go inside and carry out neutralization. We pass to the end of the room and from the table on the left side we select a fragment of the Enigma code. Returning to the previous building, we remove the turret from the machine and, having gone down, we shoot from it the metal hatch hidden behind the box, between the stairs. We go inside, pick up the Golden Medallion trophy from the curbstone and at the same time replenish the supply of electric grenades. Returning to the car and about to leave the area, two large security robots suddenly appear. We paralyze them with electric grenades and quickly shoot them from stationary turrets. Enemies release electrical spheres that detonate after a few seconds, thereby incapacitating turrets for a short time. Therefore, when the grenades run out, we remove the turret from the machine and use it as a portable weapon. Having won, we climb into the trunk and, having reached the station, under cover we are placed on the train going to Berlin.
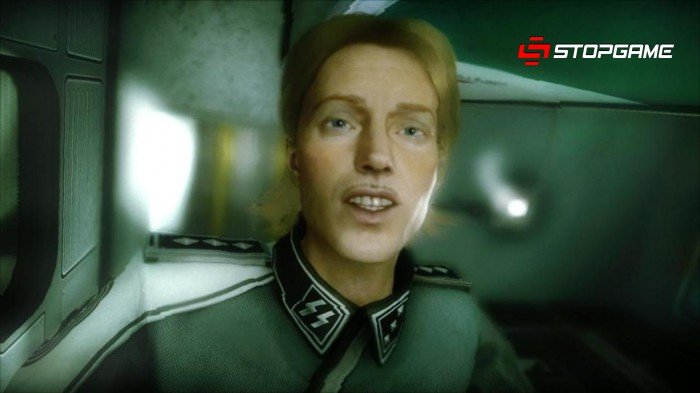
During a night out for coffee, we will be stopped by Obersturmbannführer Engel in the company of his charming companion Bubi. We put the tray on their table and sit down opposite. Engel came up with her own test to identify the purity of Aryan blood. We select any cards, after which we pick up the tray and go to the compartment car. From the slightly open cabinet on the left side, we take out the Golden Doorknob trophy. We return to our compartment with Anya, passing to the end of the car.
Chapter 4: Eisenwald Prison
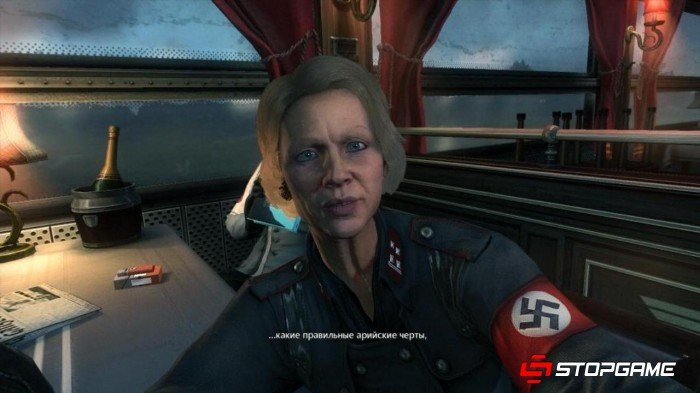
Irene Engel.
Prisoners are regularly brought to prison, where they are tortured in every possible way, "breaking" both physically and mentally. The prison transport is the only way to get into Eisenwald. We leave on the balcony and, moving along the cornice, we get to the next room. We take away Erdmann's letter from the coffee table. After going to the end along the cornice, we go down the drainpipe and get inside through the hatch. In the room, we remove the battery from the generator and insert it into the laser workbench lying on the table. We go up to the second floor, charge the cutter through the charging station on the wall and cut out a closed figure (for example, a circle) on a metal grid without releasing the shot button. Thus, having cut two rails, we get out into the room and cut the rails of the compartment to the right of the window. Jump over the box and pick up the Golden Frame trophy. On the ground floor, in the compartment near the stairs, there is the Golden Dish trophy. We open the window, run up and jump over to the Gestapo building.
We penetrate inside through the window on the right side, catch up with the guard and neutralize him. Carefully peering into the room, we observe the movements of enemies and kill them, waiting for the right moment. We take the card from the board, and from the filing cabinet on the right side - the folder. We place the folder in the drawer of the filing cabinet at the opposite wall (between the aisles), go down to the secret room and select the fragment of the Enigma code from the table. " We deal with the guards in another corridor and the Kampfhund in the operating room. We get to the office, neutralize the officer and select a fragment of the Enigma code from the table. Having got out through the window, we follow the prisoners along the ledge to the left side to the prison transport.
We get off the parked transport, go up higher and go to the end to the left. We climb up the stairs, go to the right and, turning the corner, we rise even higher along the next staircase. Moving to the other side, we neutralize the guard. From the conversation of the guards, it becomes clear that the prisoners from the resistance are being prepared to be sent to block B-2. We charge the cutter through the charging station on the wall and cut the chain on the door, concentrating the laser on one point for a few seconds. We go down the stairs and jump down. We are afraid of the turrets, if necessary, quickly running past them, or cut the fences. The guards are slow and less dangerous due to their lack of firearms. If we are noticed, then in close combat we try to parry the first blow by pressing the knife strike button.
Having penetrated the building, we turn around and run away from the panzerhund. We roll under the pipes and quickly cut the chain of the floor grille, focusing the laser on one of its points. Sitting down, we get out into the corridor and cut the metal mesh on the left side. We go downstairs, take away a fragment of the Enigma code and go back. We neutralize the only guard in the corridor, go up the stairs and go all the way forward. We climb into the toilet through a small lattice and silently eliminate the peeing enemy. At the fork in the corridor, we turn to the right and silently deal with sleeping opponents on the chair and on the upper tier of the bed. We take the key from the metal box on the wall, and the card from the table. Returning to the corridor, we turn right and kill the dog. We get to the observation room, neutralize the officer and select a fragment of the Enigma code from the table. We unlock the door at the end of the corridor and go to the coal warehouse.
We get down lower, we pass along the left bridge and remove the battery from the generator. A new improvement adds a firing mode for the cutter. We go downstairs and carefully examine the pile of coal, which contains the "Golden Nugget" trophy. We rise back to the upper central bridge, go to the other side and get out to the already familiar place, where the panzerhund is still located. We quickly run along the right side and cut the chains of the fence. There is a charging station nearby - we charge the cutter if necessary.
Probst Wyatt.
Having reached the prison block B-2, we kill two guards in the central room and use the elevator there. Climbing upstairs, we open the cell door and neutralize the enemy. We cut the chains of prisoners and communicate with Fergus (or Wyat). Meanwhile, a group of armed Nazis is heading towards us. While the allies hold the door, we cut the chain of the hatch above the door and climb into the ventilation shaft. Having reached the observation room, we kill the officer and take away his weapon. We collect first aid kits, armor and ammunition. We pull the lever to the right of the door, shoot enemies in the back and help Fergus (or Wyat).
Fergus line. In the observation room, simultaneously press two buttons, thereby opening all the cameras in the block. Sitting down, we pass through the half-open door and begin to break through to the lower level, using the fence as a cover. We destroy automatic turrets from conventional weapons. Panzerhund, trying to climb the stairs, will fall down and block the passage. We pull the switch to turn off the electricity supply and run after our partner.
Wyatt Line. We go down the elevator to the right of the observation room and quickly rush after our partner so as not to fall into the jaws of a mechanical beast.
While the partner opens the gate, we must cover him. We use a few shelters between the nets and shoot enemies approaching from the flanks. We also promptly destroy the turrets and comb the area for ammunition, first aid kits, armor and grenades. Having moved to the opposite building, in the central room fenced with gratings from the table we select a fragment of the Enigma code. We rise to the second floor, go into the second room on the right and take out the Golden Helmet trophy from the cabinet. We pass to the end along the corridor, go up the stairs and pick up a fragment of the Enigma code from the table. Having got out outside, we break through to the car and on it we pass through the building. After an unsuccessful landing, we quickly cut the chain of the hatch and go down into the sewer system. Passing forward, we go upstairs and hide from pursuit in a car prepared in advance by Anya.
Chapter 5: New Home
Kreisau's headquarters is a resistance hideout located right under the noses of the Nazis. We jump from the bridge into the fountain, swim to the hatch and use the cutter to cut the grate chain. We open the hatch, swim inside and get to the very shelter.
In the corner room we use the workbench and take away the increase in armor. At the request of Caroline, we go to Klaus for a folder with the "Whisper" project. We go up to the second floor, go into the first room and talk with Klaus. According to him, he left the folder in a drawer in Caroline's office. The next room belongs to Max, in which there is a treasured folder with the "Whisper" project in a wall cache. There are two ways to get the folder, the most obvious of which is to pick up the pry bar from the workshop on the third floor and open the cache with it, which will cause Max's anxiety.
The third room belongs to us: after taking a nap on the bed, we pick up an increase in health from the bedside table. In the next room from the floor we select the plate. We go back down to the first floor and wait for Caroline to leave her office. After going inside, from the box in the corner we select the map and remove the poster from the wall, thereby gaining access to the secret room. We climb through the upper lattice on the left side, we get to our room and from the floor near a small passage we pick up the Golden Vase trophy. We extract the folder from the wall cache (if we have not done this earlier), jump over the boxes and return to Caroline.
Chapter 6: London Science
London, England

Bobby Bram.
The "Whisper" project, developed over many years, is a unique prototype - a helicopter invisible to radars and silent in flight. Three prototypes are in a research center called London Science. Bobby Bram, with forged documents, agreed to take us to our destination. After dropping us off near the entrance, Bobby drives into the building in a car packed with explosives. After passing along the right wall, we will get out to the illuminated area, where next to the officer's body there is a fragment of the Enigma code. Returning back, from the wreckage on the crushed car, we jump over to the pedestal of the collapsed statue and pick up the trophy "Golden plate from the statue." Moving along the path starting from the illuminated area slightly to the left of the pedestal, we scatter and make a slide under the rubble. Having cut the metal mesh with a cutter, we go forward a little, and then quickly back up. After the appearance of the panzerhund, we turn around and go left. At the next fork, we turn left, we pass through the car and on the run we carry out a slide under the rubble on the right side. Continuing to run, we make the last tackle and finally get rid of the mechanized beast. Moving forward, we silently neutralize the wounded officer. Next, we deal with the soldier, select the machine gun and collect ammunition for him. Faced with a robot guard, we shoot his glowing eye. If necessary, we paralyze the enemy with electric grenades scattered across the territory. At the wall in the northeast (on the map), surrounded by debris, is a fragment of the Enigma code.
After entering the building, we throw a couple of grenades to the opened gate on the other side. In the room on the left in the safe there is a health increase. There is also a fragment of the Enigma code on the chair. We rise to the second floor and keep the defense in the corridor on the right side. Having dealt with all, we move to the other side and penetrate into the ventilation shaft through the ceiling hatch in the utility room in the southwest (according to the map). After going to the grate, we pick up the Golden Knife trophy. Having turned around, at the fork we turn left and jump down. We go down the central staircase and from the wall showcase opposite we pick up the Golden Decanter trophy. In the room to the left of the gate, we break open the locker and get an increase in armor out of it.
We open the gate, holding the handle, and go up to the control room above the lunar dome, simultaneously destroying the annoying drones and soldiers. From the control panel, select a fragment of the Enigma code and pull the lever. Descending lower, we move along the fence to the satellite from the outside and with the help of a cutter we saw the chain on which it is held. We use the satellite as a crossing, we pass behind the wall and move forward, dealing with opponents. Having reached the grate, we cut the chain of the hatch on the wall on the left side with a cutter. Having penetrated into the elevator shaft, we wait for the second cabin to collapse and jump onto it with a running start. Grabbing the rope, we destroy a couple of drones and a soldier and go upstairs. We open the hatch and, without leaving the counterweight, shoot four safety brakes located at the corners of the elevator car. Moving upstairs, we pass to the next hatch and go down to the laboratory.
Scientists have been deciphering the Daat Ikhud artifact. We transfer the data of the manuscript to Anya and collect five parts of the artifact from two tables. Also on one of the tables is a fragment of the Enigma code. There is a map on the wall opposite another table. We jump onto some object and cut two chains with a cutter that hold the partition inside the chamber. Click on the button to start the test. We penetrate into the camera and take away the lasercraftwerk, capable of cutting through thin metal hatches and boxes. We cut out the hatch in the wall, we get out into the elevator shaft and go up the stairs on the left side. Turning around, we cut out the hatch, we pass to the end along the ventilation shaft and pick up the Golden Flask trophy. Returning back, we shoot the brakes of the elevator car and move to the hatch through the pipes on the left side.

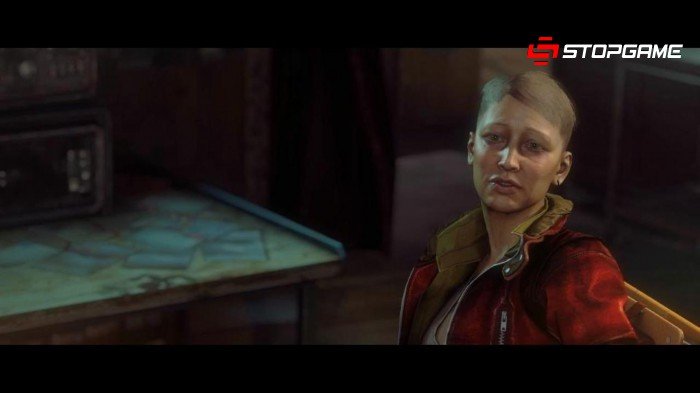
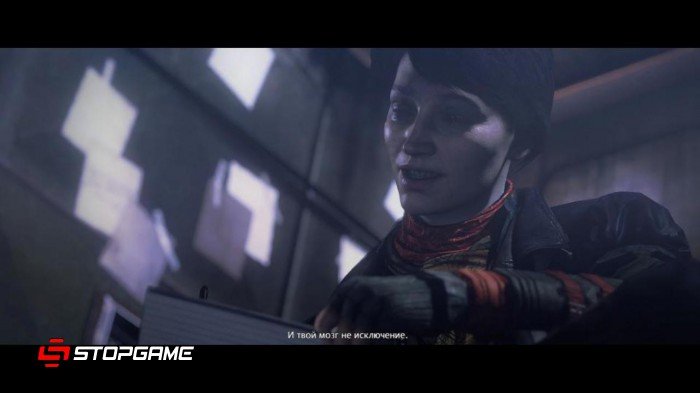
Anya Oliva.
Having made our way into the hangar, we crouch down and go to the right and neutralize the soldier. In the room behind him you can find ammunition for the pistol. We eliminate the officer standing on the central platform with a well-aimed shot from a pistol with a silencer. Continuing along the wall, we get as close as possible to the second officer, so that it is easier to aim and make a shot. In the room behind the officer there is an improvement for the lasercraftwerk, which allows you to shoot in automatic mode, and a fragment of the Enigma code. One way or another, having entered into a battle with robots, an alarm will be triggered and reinforcements will arrive in the hangar. The last enemy will be a heavy robot, which differs from the security robot in stronger armor and powerful weapons, but still with the same weak point - the head. In open spaces, we will practically have no chance, since the enemy's superlaser cannon does serious damage. We use stationary machine guns in helicopters in combination with electric grenades, preliminarily stunning the robot with them. If you run out of ammunition for weapons, then a lasercraftwerk will be an excellent replacement - we charge it through the charging stations on the side walls of the central platform. Having won, we take a fragment of the Enigma code from the box under the southwestern (on the map) helipad.
We go up the stairs inside the compartment, from which the heavy robot escaped, we pass along the ventilation shaft and get out into the control room, having cut out the hatch with a laser craftwork. We open the hangar gates, pick up a fragment of the Enigma code from the table in the middle of the room and go downstairs already on the elevator. We get to Caroline on the helipad, transfer her to the cockpit of the nearest helicopter and return to the headquarters.
Chapter 7: Mystery
Anya managed to decipher the manuscripts we obtained from the laboratory, which describe the creation of "super concrete", which is the main building material of Nazi structures. Of interest is also the encrypted list of the Polish members of Daat Ikhud during the war years, which must be compared with the official German lists. Our task is to get a piece of "super concrete" and look for German lists in the archives. From under the pillow on the bed we get Bobby's letter. We pass into the corner room, use the workbench and take away the increase in armor. Trying to open the archive door. Tekla will tell you that Fergus (or Wyatt) may have the key. We rise to the second floor, go to our room and, having slept on the bed, we select an increase in health from the bedside table. We will visit Fergus' (or Wyatt's) room on the same floor, take the key and, going back downstairs, unlock the archive door. Going inside, we pick up the German lists from the table.
We leave the building, get out into the hangar and get to the most distant helicopter. There is a moldy area of concrete next to it. To saw off a piece, you need a circular saw, which lies in the corner on the left side. Trying to remove it from the boards, we fall into the sewer. We pass to the dead end, destroy the turret and go around the grate on the right side. On the wall, to the right of the doorway, there is a charging station - we charge the lasercraftwerk. Having got out into the room, we take the plate from the bottom shelf of the rack. We pass through the gap in the wall, we turn to the right and, having reached the dead end, we select the improvement for the lasercraftwerk. Now shots hitting surfaces will be reflected and continue to fly, albeit with a weaker force. We turn around and go in the opposite direction. We destroy the next turret, cut the chain on the door and take the double-barreled gun and ammunition from the rack. We get to the drain pit, simultaneously dealing with the drones. We stand in front of the broken section of the fence, accelerate and make a jump. Having landed on the pipe, we pass forward, go up the stairs and pick up the Golden Ashtray trophy from the barrel. Returning back in a different way, we go up the stairs a little further from the pit and get out into the hangar. We cut off a piece of concrete with a circular saw, return to the headquarters and go up to Max's room. After examining the drawing on the wall, we will have an additional task - to find Max's toys. The first is marked on the map and is in the hangar, the second is on the bookshelf in the archive, the third is on the table in Caroline's office, the fourth is on the floor in a secret room behind the wall of Caroline's office. We return to Anya with the finds.
Chapter 8: Camp Belitsa
The disadvantages of "super concrete" are loss of strength over time and the formation of mold. Seth Roth, a member of Daat Ikhud, "refined" the composition of the concrete by adding limestone, which is currently being mined by prisoners from the Belice concentration camp in northern Croatia. In 1947, Seth was arrested and later sent to the same concentration camp, where he may be to this day. Of course, we will have to infiltrate the camp and find a member of Daat Ikhud.
The concentration camp in Belitsa is ruled by Engel and Bubi, whom they have already met on the train. Bubi almost recognized our face, but fortunately he did not remember it that way. Nevertheless, we, as the strongest harmonious person, will be separated from the main stream. We place our hand on the device and get a tattoo in the form of numbers and a stripe "B6". We get to the next room, where four more prisoners are working under the strict guidance of the guards. Standing behind a concrete mixer, we communicate with Bombato. We ask him about Seth Roth and find out that he is being held in block "B4", and you can get there only with the appropriate patch. Milo has one and he gladly agrees to change uniforms if he informs him that his wife is in our block. First you need to distract the guards by breaking the concrete mixer. We pull the right lever, rotate the left handle and press the button in the middle. Hit the button again, then crouch down and pick up the part that has flown off. We throw it into the concrete mixer, pull the right lever, rotate the left handle and press the button. After the breakdown, we negotiate with Milo and exchange robes with him.
Due to the absence of repairmen, our work has been completed for today. We leave the factory, get to the barracks and go inside. We interact with the prisoner lying on the first bed in the left row, for whom the medicine is required. On the last bed in the same row, lies another prisoner, who is being looked after by Seth Roth. He agreed to reveal the secrets of "Daat Ihud" if we help arrange a sabotage, thereby freeing all the prisoners. Seth designed a robot controller that wouldn't work without a detron battery. The missing part can be found in the commandant's workshop, which is located in the sixth block. To get there, you will have to disable the automatic turret from the guard barracks. To the right of the main entrance to the barracks there is a hatch - we go to it. Let's talk with the prisoner standing near the tree. She will ask you to kill "Knife" - a guard who deals with his victims in a particularly cruel way. We open the hatch, go inside and go all the way forward. We select a fragment of the Enigma code from the container. In the next room we will be attacked by the "Knife". After several stabs, we will lose consciousness and find ourselves among the corpses. We quickly remove the knife and get out of the oven.
Silently neutralize the dog and the guard. We go to the left, we deal with one more enemy and, again turning to the left, we take the map from the wall. In the next room there will be another guard - we will neutralize him and go back. We pass to the stairs, go upstairs and cross the bridge, along the way having dealt with the guard. We get out into the corridor, turn right and go into the medical room. We take medicines from the table, and from the lower shelf of the cart - a fragment of the Enigma code. Continuing to follow the corridor, we get to the "Knife" and silently kill him. We take a fragment of the Enigma code from the top shelf. We go to the control room, neutralize the guard, take out a fragment of the Enigma code from the box and turn off the automatic turrets. After leaving the barracks, we take the award in the form of the Golden Dagger trophy from the black prisoner. We will also look into the barrack and find that the prisoner has died. We turn to his wife and receive a letter from Christa. We leave for Seth Roth, located near the entrance to the factory.
We proceed to the implementation of the second part of the plan. Having penetrated the factory, we move through it to the sixth block. We rise along the scaffolding to the uppermost floor of the commandant's office and get inside through the balcony door. Although the guards are unarmed, we try to act silently. From the box in the left room we take out a fragment of the Enigma code. On the right is Engel's office, we take the sheet with the code from the desk drawer, remove the picture from the wall and, having opened the safe, take out the Golden Pistol trophy and a couple of knives. We go down to the second floor and, moving squatting, we eliminate enemies without unnecessary noise. In the corner at the other end of the room there is a locker, from which we take a fragment of the Enigma code. We go down to the first floor and we clean it from the guards. From the cart, leaning against the stairs, we select a fragment of the Enigma code. On the bedside table, behind the table, there is the Golden Bust trophy - we take it away. Through a small room we go down to the workshop, deal with two guards and from an open cabinet, diagonally from the electrical panel, we get a fragment of the Enigma code. Interaction with the electrical panel will result in electric shock.
The Nazis, led by Frau Engel, came running to the noise. By her order, all the prisoners of the fourth block, including us, were sent to be torn apart by a car. We give the battery to Seth and observe how the robot deals with those to whom it was supposed to obey. Having taken possession of the colossus, we return to the camp, scattering everyone in our path, using the built-in machine gun and rocket launcher for this. Having reached the destination, we land Seth on the roof and continue to suppress enemies with fire while the prisoners escape. When finished, we get out of the car and go into the building. From the desk drawer in the room on the left side we take out the Golden Mask trophy. We get into the truck and leave the camp.
Chapter 9: New Tactics
Daat Ikhud is an ancient secret community, united by hundreds of refuges around the world, in which they were engaged in the invention of technologies of all stripes, from simply unusual to truly magical, ahead of modern progress for centuries to come. The Nazis found one of these shelters, gained access to unique developments and, accordingly, thanks to them, they won the war. Seth Roth said that in the depths of the Atlantic there is a large refuge and to get to it, you will have to take possession of a submarine.
Seth will fix the tunnel glider, but for this he will need a welding machine. From the locker located between the beds we take out Charlotte's letter. We go into the corner room, use the machine and take away the increase in armor. We go to the archive and communicate with Anna, who is sitting on the floor outside the door. She has lost her ring and cannot find it in any way. We go up to the second floor, go into our room and, having slept on the bed, we pick up an increase in health from the bedside table. We rise to the third floor and take out the lost ring from the toilet bowl in the toilet stall in front of the workshop. Returning it to Anna, we get the Golden Vase trophy. We leave for the hangar, go to the distant helicopter and learn from Fergus (or Wyatt) that the welding machine has fallen into the water. We return to the headquarters room and ask Bombat, who is sitting on the chair, to provide access to the door.
After going downstairs, we cut the hatch with a lasercraftwerk and jump down even lower. Having picked up the welding machine, we swim to the end of the pipe and float to the surface. We go up the stairs on the right side, charge the lazekraftwerk if necessary and, after scattering, jump over to the next platform. Having passed to the edge, we turn around and look up. The ladder is kept on a chain - we shoot it with a lasercraftwerk. Climbing upstairs, turn right and select an improvement for the prototype. We get to the hangar, cut the chains on which the containers are suspended, and be sure to look around in search of first-aid kits and armor. By pulling the lever, two robots will appear. We keep at a distance from them and actively hide behind the containers, at the same time recharging the lasercraftwerk through the stations inside them. Having passed through the opened gates, we turn to the left and, having gone up two stairs, we pick up a plate from the floor. Having reached the closed door, we saw through the hatch on the right side with a lazekraftwerk and we make our way inside. A chain is visible behind the grate on the left side - cut it and return to the door. Having got out into the archive, we refer the welding machine to Setu. We take away the note and give it to Anya.
Chapter 10: Berlin Catacombs
Caroline Baker.
Beneath the sewers, in the Berlin catacombs, is a huge complex of the central Nazi arsenal. The path to it lies through flooded tunnels, which can only be overcome on a glider designed specifically for repair work at depths. Using the device, we immerse ourselves in the water and swim through the first tunnel. Having reached the gate, we dismount from the glider and cut the chain with a lasercraftwerk. Returning to the glider, we swim on it through the gate and, without changing the depth of the dive, we swim up to the rock on the left side. We again get off the device and pay attention to the air bubbles coming out of the pipe. There is a passage that will lead to a cave. On the cable drum near the left mattress is the Golden Book trophy, on the floor near the right mattress is Ingrid's letter. A little further on the table we will find a fragment of the Enigma code. We jump into the water, sit down in the glider and swim to the next gate. The chain holds them on the other side, so we leave the glider and swim to the other side through a small passage below. Having cut the chain, we return to the glider and on it we swim through the tunnel at the top, eventually reaching the surface.
After passing through the next tunnel, we rise along the stairs. We switch the handle and, after waiting until the section of the water wheel with the missing blade is at the bottom, release it. Having sailed through both wheels, we pick up the "Golden Cove" trophy from a small non-flooded area on the right side. We pass through the pipe between the wheels, plunge into the water and at the bottom, approximately on the right side, find the safe - break it open and get an increase in health. We return to land, climb the stairs and get to the control room. We select a map from the barrel, switch the handle and wait for the tank to fill. Opposite the stairs, now flooded, there is an entrance to the room where a fragment of the Enigma code lies on the box. On a glider we swim through the second wheel and pipe. Take the Golden Lantern trophy from the room on the left. Inside the pipe in the corner, we will find the Golden Snake trophy.
Focusing on the map, we get to the platform. We jump down and dive into the water. We cut the chain on which the mine is held and wait for it to float to the surface, hit a wooden barrier and explode. Another mine is located near the wall on the right side. We also cut the chain and swim into the tunnel after the mine. We get out of the water onto land on the left side. We select from the box a fragment of the code "Enigma", break open the door of the utility room and take the increase in armor from the rack. Leaving this tunnel, we swim into the next one. We leave the water to land on the left side and take a fragment of the Enigma code from the rack. We saw the chain on the door, we jump down through the gap in the large round floor grate and, having reached the stairs, we go upstairs. We take a fragment of the Enigma code from the rack, go to the next room and pick up the Golden Moon trophy from the floor. We jump over the boxes over the grate and use the elevator to go up to the armory.
Between the boxes there are improvements for the lasercraftwerk. We cut the metal mesh, get out to the railway tracks and get to the platform. Where it begins, under the stairs there is a fragment of the Enigma code - we select it. We slowly eliminate two soldiers, an officer and a Kampfhund. The second officer moves along the tracks. We track down and neutralize him, as well as the remaining opponents. Inside, on the first floor of the central block, the walls of which are marked with numbers 1, 2, there is a fragment of the Enigma code on the rack. Where the dog lay, there is a handle - switch it and open the gate. Having dealt with the super soldier, we comb the territory and collect all the useful items that we can find. We re-open the gate and get to the control room of the central block. We select a fragment of the Enigma code from the panel, click on the button in the corner on the left side and prepare for the Nazi offensive. We are in no hurry to go down, as it is much more difficult to fight in open space. Having dealt with all, we hijack the train and deliver it to the allies. After unloading a number of boxes with weapons, we will be hidden inside the torpedo and sent straight to the submarine.
Chapter 11: Submarine
Klaus Kreutz.
Having got out of the torpedo, we neutralize two enemies on the first floor and three on the upper bridge, including the officer. We leave the torpedo compartment and take the map from the wall in the corridor. Passing into the living compartment, we turn left and break open one of the doors. Previously, of course, we clean up the compartment from enemies. There is a hatch on the common wall of the rooms, which is cut by a laser craftwork. In the right room on the bunk lies a fragment of the Enigma code, and on the table is the Golden Letter Opener trophy. In the left room there is an improvement for the lasercraftwerk - an automatic sight that allows you to hit several enemies at once or one, but at the same time on different parts of the body. In this case, the charge of the lasercraftwerk will be consumed much faster. We leave for the cabins: in three of the six we will find two fragments of the Enigma code and the Golden Tray trophy.
Submarine captain Anton Krieger is aware of our presence and offers to surrender. We go down the stairs, open the door and quickly run across to the left side. Immediately two fighters of the firing squad at the ready with shotguns loaded with ricochet shrapnel will try to stop us. Shrapnel has excellent bounce off surfaces, making it highly effective against enemies hiding around corners. There is a charging station on the wall, so using the sight, we deal with the enemies from the laser craft. Having destroyed the arrived reinforcements, we go up the stairs, we pass to the end through the pipes and, having cut the metal hatch, we go down.
All submarine forces are sent to stop us. For the first time, you can hide in the room on the left side and, sitting down, control both passages. Then you still have to get out, since you will need ammunition and other useful items. We rise to the top floor and hold the defense, destroying enemies as they arrive. On the control panel, to the left of the chair, is a fragment of the Enigma code - we select it. We go to the wheelhouse, we pass into the room on the left side and from the rack we take away another fragment of the Enigma code. We cut the chains of four buoys and communicate with Caroline on the radio.
The submarine "Hammer of Eve" is equipped with nuclear weapons. The captain took the encryption keys with him to the grave, so the only way to get them is to visit the lunar station, where the keys are stored on a physical medium. The team at headquarters is already actively developing a plan to penetrate the space object.
Together with Set, we plunge into the depths of the Atlantic Ocean and find a passage to the Daat Ikhud refuge. Going inside a huge capsule, we press the button. We move to the other side and take the elevator to the main hall of the shelter. After fiddling with the console, Seth will raise the bridge. The electromagnetic field has ceased to function, so you will have to manually charge the coils to get to the upper platform. We approach Seth and build a special prism into the lasercraftwerk. Moving to the center, we turn left 90 degrees, swim across to the pillar and pick up the Golden Skull trophy. Returning to the center, we shoot at the hexagonal coils (starting from the bottom) and at the same time we rise along the resulting steps. We do not hesitate, as the steps will disappear after some time. We try not to miss a single coil, otherwise you can fall down at the most inopportune moment. The laser craft is also charged from these coils. Having reached the platform, we press the button to lower it. Press the button again when the comrades move to us.
Once in the storage, we collect the trophies "Golden chamber pot" (on the triangular shelf), "Golden toy robot" (under the triangular shelf opposite), "Golden crown" (on the gear, slightly to the right of one of the wall columns). We also select the item located on the part slightly to the left of one of the columns. On the wall there is a pyramid of details corresponding to the details in the grooves of the wall columns. We activate by starting with the part at the top of the pyramid and ending with the parts at its base, moving down from left to right. After each correct activation, the recesses will be filled with bright light. Next, we open the notch in the sixth column and take away the improvement that appears on the right side for the lasercraftwerk, which will constantly charge the prototype. We insert the previously found item into the device near Fergus (or Wyatt).

A scientist participating in the Skull Super Soldier Program prepares to be sent to the lunar station. At the moment, he is in a military high-speed train, the route of which lies through the Gibraltar Bridge. If we intercept a train, kill a scientist and steal his documents, then we will have a great chance to visit space.
Chapter 12: Gibraltar Bridge
Armed with Daat Ikhud technologies, we go to the bridge and drop the “rotation spindle” from the helicopter. Before disembarking from the helicopter, we select the map from the seat. We pass to the other end of the carriage, go inside and shoot two opponents. We collect a bunch of useful items, including an improvement for the machine gun - the rocket launcher. In the next car there is a rocketman - we deal with him from a rocket launcher. We also destroy the automatic turret, which is fixed on the roof of the carriage that has fallen to one side. Having got out of the car, we immediately turn to the right and we pass along the metal beam. The body of a soldier, to whose hand a suitcase is attached, half protrudes from the window. We cut the chain and take away the Enigma code fragment. Returning back, we rise along the next car and we penetrate into it through the side door. We leave outside on the other side and go down to the lower carriage. Having run up, we jump over to the bridge and we pass to the tower on the left side. We rise to the very top, pick up a fragment of the Enigma code from the floor and jump down with a running start. We return to the car, from which we jumped to the other side of the bridge, and we penetrate inside. A little before reaching the exit, we crouch down and move to the left and go in the opposite direction. We select a fragment of the Enigma code and leave the car.
We go around the car on the right side and near the support we will find a fragment of the Enigma code. We pass from one carriage to another and from the floor near the broken side wall we select a fragment of the Enigma code. We rise to the roof and take away the sniper rifle from there. We destroy the automatic turret and enemies located in the car opposite. Then we go through this very car and from the ground we pick up the trophy "Golden Soldier". Returning to the carriage, we rise to the second floor and through the hatch we get out onto the roof. We pass along the beam to the neighboring carriage, cut the metal mesh and, climbing to the topmost box, we jump onto the lattice at an angle from the left side. We pick up the Golden Compass trophy from the box, leave this carriage and get into the next one, which is in a hanging position. We jump lower and lower, simultaneously cutting the metal nets. Outside, we will face a lot of enemies. First of all, we deal with the super-soldier, then to take possession of his weapon and shoot weaker opponents. From the chamber of the car, from where the super-soldier escaped, we take away the Golden Rabbit trophy. Having cleared the territory, we rise to the surviving section obliquely from the carriage and from there we jump onto the carriage itself with a running start. On the beams we get to another surviving site, where we will find a fragment of the Enigma code. Returning back, we go into the building of the checkpoint, go up the stairs and deal with the remaining enemies. We break open the door with the master keys and take the armor improvement from the control panel. We go down a little lower, cut the floor hatch and get inside.
First of all, without getting off the ventilation pipe, we hit the super-soldier with a powerful aimed shot and, if necessary, quickly finish him off. We kill two more soldiers and, going downstairs, we collect a large number of useful items, including those in the boxes. Inside the first box, on the shelf to the left of the gate, there is a fragment of the Enigma code. We go down to the intermediate landing, turn left and go down from the ventilation pipe. Having dealt with the enemies, we go outside and, turning to the right with a running start, jump over the gap. The partner will arrive just in time to help and relieve us of the super-soldier. Again, we run up and jump into the helicopter. The pilot will take us closer to the car with the scientist.
Using the turret, we shoot the approaching enemies. After disembarking from the helicopter, we go into the room on the right side. There is a fragment of the Enigma code on the safe - we select it. We also break into the safe and get an increase in health from it. We get to the failure, go down through the carriage and destroy the rocketman. We penetrate into the carriage, which is in a hanging position, carefully jump from one seat to another and take away the documents of the dead scientist.
Chapter 13: Lunar Station
The shuttle from London Nautica delivered us safely to the lunar station. After leaving the shuttle cabin, we move through the terminal and go through the standard X-ray procedure. We make our way into the luggage compartment along the conveyor belt. On the tape, on the other side of the X-ray scanner, is the Golden Cane trophy. We take the equipment from the suitcase and, having contacted Caroline and Anya, we receive instructions on further actions. Continuing the movement along the conveyor belt, we will eventually stumble upon a box - we cut it with a laser crafting machine and get an increase in armor. Returning to the compartment, we cut the metal wall under the glass and go into a small room. We press the button on the table and we take away the pistol. Having dealt with two space marines and an attack aircraft, we select their weapons or, to be more precise, an improvement for a sniper rifle. The modified weapon is charged through the same charging stations as the lasercraftwerk. Also, ammunition can be obtained in the old fashioned way - from the bodies of killed enemies.
After passing through the tunnel, we move forward clockwise, silently neutralizing the paratroopers and officers from a pistol with a silencer. At the north stairs there is a turret, to the right of which there is a map on the rack - we take it away. Having cleared the territory from enemies, we leave through the eastern gate and go down the stairs. Continuing to act without attracting attention, we deal with the paratrooper in the corridor and two sleeping officers in the rooms. On the toilet in the toilet, opposite the bed in the left room, there is a fragment of the Enigma code. Finally, we destroy the super-soldier and leave the living compartment through the ventilation system.
Having made our way into the laboratory building, we deal with the paratroopers and from the lower shelf of the table in the second room we take a fragment of the Enigma code. Next, we go through the disinfection procedure, kill the enemy on the first floor and pick up the Golden Face Mask trophy from the nightstand in the center. We go up the stairs and, moving clockwise, silently neutralize the enemies one by one, including the officer. Inside the premises there is the second officer - we kill him and from the table, to the left of the common passage of the second and third rooms, we take Dieter's letter. We go down the ventilation shaft in the last room to the lower floor.
We select a fragment of the Enigma code from the table in the corner of the adjacent room, we pass through the red tunnel and go down even lower along the next ventilation shaft. We put on the spacesuit, go to the airlock and click on the button on the right side. Moving along the path, we will soon encounter three drones. After destroying them, we pick up the trophy "Golden fragment of a meteorite" lying near the boulder under the slope. We go down the next slope, jump over to the island on the right side, and then to the platform. Having made our way into the command module, we go to the right and pick up a scalpel from the table, with the help of which we get rid of the mark on the hand stuffed in the Belitsa camp.
We go through the room on the left side and get out into the corridor, along the way taking a fragment of the Enigma code from the table. To the right of the gate there is an entrance to the ventilation system, which will lead us to the living room. From it we move to the other side, go up the stairs and sequentially eliminate two officers from a pistol with a silencer. In the absence of ammunition, we act more prudently, since the attack aircraft cannot be eliminated imperceptibly. We deal with the rest of the enemies and use the elevator, which is at the other end. Destroying enemies, we rise to the uppermost ring. Focusing on the map, we get to the area between the eastern and southeastern connections and from the white stand we select a fragment of the Enigma code. We leave the territory through the gate in the north and go through the tunnel to the cleaning block. We go to the server room, print out the codes for the launch of nuclear missiles and destroy the arrived reinforcements.
We take away a fragment of the Enigma code from the large round table. There is a safe to the left of the door - we break it and get an increase in health. We get down into the ventilation system through the floor hatch in front of the door and, having made our way through it, we kill two paratroopers. We cut a thin metal wall, go down and deal with several enemies. Having made our way through the ventilation shaft, we go down the escalator to the platform. We select the trophy "Golden bottle", which is behind the red bag, and on the train we move into the hangar.
Thanks to the efforts of the security robot, we were unable to reach the final point of the route. We get out of the car through the floor hatch and on foot we get to the station, and then to the terminal. We go down into the hangar, after a while two super-soldiers will get out of the shuttle. There are charging stations on the walls, which will allow unlimited use of the power of the laser craft when shooting in aiming mode. We step aboard the shuttle and go into the cockpit.
Chapter 14: Return to London Science
After an unsuccessful landing, we sit down and sit behind cover. When the shuttle is about to collapse from the bridge, we get out of it with a running start. Having burst into the building on the cable, we will neutralize the officer as soon as possible, who will rush away from the bar on the right side. Slowly but surely, an attack aircraft will approach us, so it won't be possible to sit in one place for a long time. If necessary, we run across to the bar, where there is a charging station on the wall. To the right of the window through which we burst inside, there is a box on the bench - we get out of it a fragment of the Enigma code. We get out through the gap in the wall on the other side. We cut the chain from one of the sides of the flooring, go down and get to a similar flooring, held on by chains. We go to the concrete area on the right side, pick up the Golden Bracelet trophy, which lies directly under the drainpipe, and cut the nearest flooring chain. With a running start, we jump down and make our way into the building.
Climbing the stairs, load the sniper rifle and deal with the enemies. In the room on the right from the table we select a fragment of the Enigma code. We interact with the picture hanging on the wall and from the top shelf in the secret room we take out the Golden Soccer Ball trophy. Depending on the line, break open the door at the end of the corridor or the control panel in the room to the left. In the first option: we get out into the elevator shaft, jump down to the lower cabin and penetrate into it, cutting out the hatch with a laser craftwork. In the second option: we call the platform, along which we pass to the right, we get to the premises and, having cleared it of enemies, we go down the stairs.
Having shot down the helicopter, we select the map from the kitchen counter. Among the debris in the corner, to the left of the collapsed floor, lies a fragment of the Enigma code. We go down to the second floor, deal with the opponents and select from the floor a fragment of the "Enigma" code to the right of the blue tarp near the southern (on the map) wall. We jump down the wreckage, reach the first floor and clean it from enemies. From the drawer of the filing cabinet at the southern wall we take out a fragment of the Enigma code. We get out and along the scaffolding we get to the platform, on which we go down to the construction site.
From the giant London monitor, which is dozens of times larger than us, we are actively hiding in the sewers, where we also replenish the charge from the lasercraftwerk and a sniper rifle. Preparing to hit us with a laser, the enemy will open an eye - quickly shoot at him. Then the London monitor will set in motion a rocket launcher (three guns in each hand) - we immediately destroy one of them. Further, having finished with the rocket launchers, we begin to act more aggressively. Being as close to the enemy as possible, once again shoot in the eye and, as soon as possible, having run under the robot, shoot the engine at point-blank range. Do not forget about the turrets - we destroy them or hide behind the numerous pipes on the site. Having won the victory, together with Klaus we leave for Berlin.
Chapter 15: Roundup
Nazi soldiers, led by the miraculous surviving Frau Engel, found refuge and captured almost all of our friends. Having unsuccessfully flew into a drained fountain by car, the enemy shoots Klaus and the next in line could be us, but Max, who appeared in time, saves us from this fate. We are gathering ammunition, fighting off a couple of soldiers and drones. When Max opens the hatch, we run inside and get to the headquarters. Silently neutralize the officer and two soldiers. Having dealt with the stormtrooper on the second floor, we go into Max's room and pick up Max's letter from the floor. In Klaus's room, there is a trophy "Golden Shoe Spoon" on the table - we take it away. We rise to the third floor, we destroy one more attack aircraft and, having passed through the workshop, we cut the chain of the ventilation shaft lattice.
Moving along the mine, we will meet Tekla, who resigned herself to her fate and bravely killed a couple more fascists before she was shot. Having got out into the sewer, we collect useful items scattered along the fence. First of all, as soon as possible, we destroy two super-soldiers and only then the fighters who have come running. We go up the stairs and along the ventilation shaft we get to the hangar. Caroline literally found a second life thanks to her power armor. After getting rid of the security robots, she will deal with the return of the helicopter. We collect armor, kill two soldiers and a panzerhund, against which only the grenade launcher and lasercraftwerk are effective. The enemy is fast and strong in close combat, so we run less in open spaces. Having won the victory, we sit down in the helicopter and leave the shelter.
Chapter 16: Return to Skull Fortress
The operation to free friends is urgent. The plan is simple: get close to the fortress on a submarine, smash the wall with a cannon and get inside. We pass through the airlock, interact with the control system and, surfacing to the surface, shoot at the complex with a "spindle of rotation". The proven technology has done an excellent job. Having independently swam to the shore, we dive into the water and pick up the Golden Spatula trophy, which lies to the left of the stairs. Having climbed the shore, we go inside and collect useful items. Having reached the exit, namely the broken wall, we take the Golden Armor trophy from the corner chamber.
We pass to the end along the corridor, we go into the room and from the drawer of the filing cabinet we take out a fragment of the Enigma code. There is a card on one of the tables - we pick it up. Having cleared the hall, we go down to the courtyard and deal with numerous enemies. We try to take a place behind the turret as soon as possible to make it easier for ourselves. Click on the button in the center on the concrete block. Almost before reaching the opened door, from the container on wheels near the column we take out the "Golden Teapot" trophy. Once inside, we continue to exterminate the Nazis. From the farthest bench in the center of the hall we select a fragment of the Enigma code. We go down the stairs, open the gate, hold the lever for a while, and get to the laboratory. From the table at the left wall we take away a fragment of the Enigma code. Climbing the stairs in the next room, we are attacked by Booby. Overpowering the action of synthetic titanospasmin, we bite the offender's neck when he leans towards us. We kill Booby or leave him alive.
We go up the stairs, get to the elevator and go down to the cameras on it. We go to the right and find friends. Together with them we again use the elevator and, getting stuck between the floors, we help Bombato, Seth and Ana to go upstairs. The elevator will start working at the most inopportune moment, taking us straight to the Skull. For many years, the general kept the brains of his test subjects in capsules. A capsule with contents belonging to Wyatt (or Fergus), he builds into a prototype robot, to which he gives the only instruction - to destroy us. We quickly press the button and go outside.
Max Hass.
We destroy wooden boxes, take out of them electric grenades and quickly move to the armored glass at the other end of the territory. After hitting the enemy with a grenade, he will be immobilized for a couple of seconds - during this time we must have time to run up to him from the front and remove the capsule with the brain. Having eased the suffering of Wyatt (or Fergus), we hide behind the glass and cut a metal mesh behind our back. If you inflict enough damage on the enemy, then he will stop attacking us and will start restoring his electric shield. Taking advantage of these pauses, first of all we go through the net and take equipment from the weapon cabinets, including armor and first-aid kits, and rush to one of the sides. We quickly move along the metal grid, collecting useful items, we reach the stairs and, having risen higher, we continue to run forward. Having reached the anti-aircraft gun, we direct it into the sky and fire a shot at the airship. Similarly, we get to another anti-aircraft gun and with the help of it we destroy the second airship. We shoot the enemy until lightning strikes him. Returning to the site, we get to the building from where we left, and we saw the boxes on the right side of the entrance. One of them contains the Golden Pot trophy.
We go down from the center and continue the fight with the Skull. In a limited space, we try to stay away from the enemy and collect all sorts of useful items. We expose ourselves to the Skull's fire as little as possible, use the cover wisely, and shoot ourselves as much as possible. There are plenty of charging stations here to charge the lasercraftwerk and from it hit the enemy with powerful aimed shots. Having weakened the fur, we approach it, remove the Skulls from the cockpit and strike with a knife. After waiting for the allies to leave the fortress by helicopter, Blaskowitz will signal for a nuclear attack.