Read the article on how to drop a photo from a phone to a computer. A simple step-by-step instruction for transferring pictures to a computer from a smartphone.
Some users only store their photos on a smartphone. It is not right! What happens if the device gets lost or breaks? In this case, there is a risk of losing precious pictures. It is better to store images on a PC. Here, there is more free space, and the failure of a hard disk is a much more rare occurrence. But how to send a photo from a phone to a computer? Let's find out the answer to this question.
A brief overview of the possibilities to copy photos from phone to computer
If you think about it, then the photo from the phone to the computer can be copied or transferred in many ways. Here are just the most popular ones:
- Transfer via USB cable;
- Sending wirelessly (Wi-Fi and Bluetooth);
- Use of cloud services (Google Drive and others);
- Email;
- Installing a memory card in a card reader;
- Application of a special application (for example, Airdroid);
- Social networks.
And these are only the most famous ways to transfer photos from a phone to a computer. Experienced programmers will tell you about creating your own FTP server on your computer, uploading photos to a special hosting or some other sophisticated methods. We will tell you about those methods that are most easily implemented. At the same time, we will talk about how to transfer photos from a phone to a computer step by step - even novice users who only received their smartphone for the first time will be able to understand everything.
Using a card reader to copy photos to a laptop
This method of image transfer is now less and less used.
Firstly, not all modern smartphones have a memory card slot, and in some cases the amount of internal memory is quite sufficient for everyday needs.
Secondly, the microSD tray can be opened with a special paper clip, which is far from always at hand. In a word, this method is applicable more for rather old smartphones than for new devices.
Please note that using a card reader does not make sense if the Camera application saves pictures in the internal memory. That is, first you need to select "Removable storage" or "Memory card" in the "Camera" settings.
The method is most relevant for owners of laptops. Portable computers have a built-in card reader - you only have to get an adapter with microSD to SD. As for desktop computers, both external and internal card readers are issued for them, the cost of which rarely exceeds 500 rubles. Many models support the installation of a microSD card without any adapter. Finally, there are tiny microSD adapters that plug into a USB port.
If the computer got access to the memory card, then he will immediately offer to use the "Explorer" to view the contents of the external drive. Also for this purpose, you can run any other file manager (for example, Total Commander). You should search for photos either on the DCIM / Camera path or in the Pictures folder. Then it remains to copy or move them to any folder convenient for you on your computer’s hard drive.
Using bluetooth

Another good way for laptop owners. The fact is that almost all laptops have a built-in Bluetooth module, while desktop computers most often cannot boast of this. However, even a home PC can be made to understand the Bluetooth signal - for this you will need to purchase the appropriate adapter or, if the means allow, an expensive motherboard with support for this technology.
So, how to take photos from phone to computer via Bluetooth? It all depends on the specific smartphone model, the type of Bluetooth connection and the operating system that is installed on the PC. Let's take a look at the user's actions using the example of a Windows 10 laptop and a smartphone with a green robot on board.
- First you need to activate the "blue tooth" on both a smartphone and a computer. On Android, just click on the corresponding icon in the notification panel. In Windows 10, to activate Bluetooth, you need to proceed to the network connection settings.
![]()
- Next, the phone and computer are paired. In for this you need to right-click on the Bluetooth icon in the tray, and then click on "Add device." A list of gadgets that have the “blue tooth” now activated is displayed immediately. Click on the network name created by the Bluetooth module of the smartphone. The access code will be displayed on the computer and phone screens. You can not change it - it is enough both there and there to click the “Yes” or “Pairing” button. After that, the smartphone should appear in the list of connected equipment.

In the case of using a Bluetooth adapter, the process of sending photos may be slightly different. Here it all depends on what kind of program for controlling the adapter you install. If you are having difficulty connecting or receiving files, then read the instructions that are usually present on the official website of the application developers.
Please note that the speed of file transfer via Bluetooth leaves much to be desired. If you are going to transfer the archive of photos weighing 1 GB, then it is better to consider other options, otherwise it may take several hours.
Using a USB connection

How to transfer photos from phone to computer the fastest? Perhaps with a USB cable. This method makes the most of the possibilities. In low-cost and mid-budget smartphones, they are limited to USB 2.0 technology, while flagships can use USB 3.0 or even USB 3.1. Be that as it may, and transferring even a multi-gigabyte archive of photographs should not take much time.
Many people ask, “How do I transfer photos from my phone to my computer?” due to the fact that the connection to the PC is not carried out. That is, the computer does not respond at all to the cord inserted into the USB port, on the other end of which a smartphone is connected. It would seem that the device should be defined as an external drive? In fact, modern versions of Android support many USB modes. By default, most often, the one that is needed to transfer files is not launched at all.
When you inserted the USB cable into the computer, pay attention to the display of the smartphone. Most likely, a message was displayed on it with a proposal to allow access to data on the phone. Click the "Allow" button. After this, an instant reconnection will take place, after which a window with actions that can be performed with the identified device will pop up on the computer. Here you need to open the "Explorer", and then find the folder with photos. Usually they are on the DCIM / Camera path in the device’s memory or on a microSD card. Next, copy or transfer the desired image to the hard drive of your computer.
Please note that the message may not appear on the smartphone screen. In this case, you should look for it in the notification panel. Well, in the most advanced cases, you will have to go to Settings and look for the cause of the problem there.
Cloud storage

The modern world means constant use. In the end, some clients of such services are installed by default on the smartphone, not allowing themselves to be removed. So why not think about how to download a photo from your phone to your computer using the "cloud"? Most often, images are transmitted this way unchanged - they store all the tags, including geographical marks. Photos can be compressed, deteriorating in quality, only when using Google Photos and the corresponding active item in the application settings. If you want to transfer images to a computer, then it is better to use the following cloud storage:
- Dropbox is a great option that will not work only if you have a huge archive with photos weighing 10 GB or more;
- Yandex.Disk - storage with servers located in Russia, which provides high speed upload and download;
- Google Drive - an option from the creators of Android;
- Microsoft OneDrive - storage from the creators of Windows and the famous office suite.
To interact with the cloud service, you need to install its official client. However, it can already be preinstalled by the smartphone manufacturer. Also, some file managers, for example, Solid Explorer, can work with cloud storage.
To upload photos to the "cloud" you need to go to the application. Further actions vary depending on the selected service. Most often, just click on the folder where you want to upload photos, and then click on the "Upload files" button. Next, you will be asked to choose a method for selecting images, the most convenient of which is the "Gallery". That's all, it remains only to mark the photos and click the "Download" button.
When the process is completed, you will need to open an Internet browser on your computer and go to the site of the selected cloud storage. Here you should log in and go to the folder with photos. Then it remains only to tick off each of them, and then click the "Download" button.
If the computer is not yours, then in the mobile application you should make the folder with photos public (provide general access). So you get a link to this folder, which should already be sent to the owner of the computer. So he will be able to download images without having to see the rest of the contents of your account.
In words, this process of transferring photos seems very long. But actually, for the most part, it depends on the speed of your Internet connection.
Social network
Not the best way to transfer images from a smartphone to a computer. However, many people are so used to social networks that they begin to use them for this purpose. The essence of the method is simple: just go to the "Photos" section, create a new album, and then upload images to it from your smartphone. Easy? Yes. Is this the best way? Not.
If you are thinking about how to reset photos from phone to computer in their original quality, then this method is definitely not for you. The fact is that many social networks compress the received photos, because of which the detail suffers. Also, almost all tags may disappear from the picture - in the future you will not know the date of shooting, nor what device was used for this, nor other characteristics of the image.
Problems will arise when downloading photos to a computer. The algorithm of your actions will be too complicated. You will have to first open the image, then click on the “Open Original” button, then right-click on it and select “Save Image”. If you need to save a couple of photos this way, then this will not be a big problem. And if a couple of hundred?
When creating an album, do not forget to set its visibility only for you in the privacy settings. Otherwise, all your friends or even all other users of the social network will see the added images.
The above disadvantages are for Vkontakte. But Facebook has certain problems. Not to mention the fact that they are constantly used by fewer visitors to our site. And the Facebook mobile client is not the best example of energy saving.
How to transfer photos from phone to computer using Wi-Fi
Now almost every smartphone owner has his own. That is, the device has access to a home Wi-Fi network. It is logical that a person begins to think about how to send photos from a phone to a computer through this same network. Can this be done at all? In fact, the Wi-Fi network was created by default to provide the device with Internet traffic. But, if such a desire arises, with its help you can perform other actions. It’s enough to recall smart TVs that can be controlled using a smartphone located on the same Wi-Fi network. It’s easy to guess that it’s also possible to transfer files from a smartphone to a computer via Wi-Fi.

To organize sending photos, you will have to get a special application designed to synchronize your smartphone and PC. For example, you can download Airdroid. You can use this program for free, but with the regular transfer of a large number of photos, the creators will ask you to issue a paid subscription. If you don’t like it, then you can try other applications of this kind in business - there are a lot of them on Google Play.
What is the essence of the work of such programs? On the smartphone, the service client is launched. It displays a special URL that must be entered in the computer’s Internet browser. Sometimes an additional password is prescribed. Everything, the connection is established! In the case of Airdroid, you will see all the notifications coming to the smartphone, as well as get the ability to send SMS messages. You can also get the contents of some folders, including the one containing the photos.
This is a very convenient way, and images via Wi-Fi are transmitted several times faster than via Bluetooth. However, each time you have to drive a special URL into the browser, which can change every few days. Of course, Airdroid allows you to create a special permanent address that is tied to the developer's server, but this function is available only to owners of paid subscriptions.
USB router

Another method associated with a Wi-Fi network. It can only be used by those whose router has a USB port. This usually means that you can connect an external hard drive to the device, essentially organizing your own cloud storage. How to do this - you can find out on specialized sites dedicated to your router, or from the instruction manual. Be sure to use the SMB protocol. If the router supports only DLNA, then this option will not work, since this technology supports viewing media files, but not downloading new files.
You can see the contents of an external hard drive on a smartphone through special applications. In particular, Solid Explorer can identify the local storage already mentioned above. With it, you can create a folder with any name on the external hard drive and copy to it those photos that you need to see on your computer. Next, you go to your PC and open Explorer. Here you need to go to this very hard drive, which will be located in the "Network Placement" section. All that remains is to go to the created folder and transfer the photos to the computer. However, this can now not be done - you can work with those files that are located on the drive connected to the router. If you want a detailed discussion of the topic of "home cloud" - write about it in the comments!
You can work with photos through Total Commander. For this file manager to "see" the network storage, you need to perform simple manipulations:
- Press the “Menu” button located in the top line;
- Select the option “Map a network drive”;
- Select the appropriate drive letter and click the "Browse" button;
- Select the folder on the network storage that will open by default;
- Click the OK button.
That's all, now you will always have access to an external hard drive!
A banal, but still working way. To use it, you need the fact that you have two email addresses. The method is to transfer photos from one address to another. For example, on a smartphone, you can use the “box” on Gmail. Images will be sent by e-mail created on Yandex. That is, on the computer it will be necessary to go precisely to Yandex.ru - a letter with photos will come here.
Unlike social networks, e-mail does not compress photos, leaving them in their original form. All tags are also saved, which then simplifies sorting. A letter from one “box” to another comes almost instantly, although exceptions to this rule sometimes do happen. For the most part, the speed of transferring photos to a computer with this method depends on the speed of the tariff to which you are connected.
USB stick

And how to transfer photos from a phone to a computer using a USB flash drive, can this be done? This method of copying data is quite feasible if your smartphone supports OTG technology. You can clarify information on this subject using the OTG Checker application. You can insert a flash drive into the smartphone’s connector using the OTG adapter - you can purchase this “cord” literally for 100 rubles.
A flash drive with the support of OTG technology is detected almost instantly. You can copy the necessary photos to it using the preinstalled file manager or some specialized application. When the process is completed - you just have to get the flash drive and insert it into the USB port of the computer. Then you can use Explorer or any other file manager.
Conclusion
As you understand, there are many ways to transfer photos and other files from a smartphone to a computer. If earlier it was easiest to do this using a traditional USB connection, now we recommend using cloud storage. For example, you can create a folder called “Temporary files” in Dropbox by dropping photos there. And you can even set up constant synchronization - in this case, the images will be thrown into the "cloud" after each use of the "Camera" application. On the computer, you don’t need to install anything - there are enough Internet browser capabilities.
And how do you transfer photos to a computer? Or do you prefer to store all the pictures on your smartphone? Share your thoughts in the comments.
How to take photos from phone to laptop or computer? It all depends on the capabilities of the computer and the compatibility of the phone.
If you need to take a photo from a modern Android smartphone (touch phone) onto a laptop with a Windows operating system, there are no problems. In modern technology, everything is standardized.
If the task is to drop the photo from the phone of an obsolete model to the computer, the procedure is very complicated. The difficulty is that the computer recognizes the old phone in the form of a flash card, on which lies a folder with photos. If this succeeds, the task is solved quickly.
A more complicated case is when the phone is completely “ancient”. For example, an old Nokia, where you need to install a special program Nokia PC Suite. A disk with this program, like a special cable for connecting to a computer’s USB contact, must be sold either with the phone or separately.
The main thing is to buy an additional cord and download a software application from the Internet. But it requires computer experience.
If at least one of the computer savvy people is nearby, it’s easier to ask for help. If not, you will have to drop the photo from the phone to the laptop yourself.
By the way, there are a lot of YouTube tutorials on this topic, and if this step-by-step instruction doesn’t help, watch the tutorial video.
How to take a photo from an Android phone to a laptop
Step # 1
First, make sure you have a wire that you can use to connect your phone to your computer. There is nothing to confuse here, so do not be afraid of experiments. Often the phone cord has:
- miniUSB or microUSB connector on one side (for telephone);
- uSB connector on the other hand (for computer or laptop).
Inspect the charger for the phone well. Often such a wire is simply inserted into the head of the adapter. If the cord is pulled out of charge (where the plug is), then this is the wire you need
Step number 2
We connect one end of the wire to the Adnroid phone, and the other - insert into the laptop. If everything is correct (and it’s simply impossible to make a mistake here), the robot icon and the message “USB storage device” appear on the phone screen, below the “Turn on USB storage” button. Click on this button.

If an information message appears - confirm “OK”
Step number 3
If the connection is successful, the Android robot turns red, orange. At the same time, startup starts on a computer or laptop. In our screenshot, autoload worked for the main memory of the phone and for the USB flash drive. Therefore, we see 2 windows of startup messages.
In both windows, select "Open folder to view files." If you have only one startup window, everything is fine. Choose the same options.

Step 4
Let's say that everything went well and you got to this point. Then you will see the open memory dad of your Android phone. There are tons of subfolders here, but we need to find exactly where the photos are attached.
Even purely theoretically, we can assume that the photographs will be placed in folders like:
- Picures
- IMAGES
- IMAGES
- MY PHOTOS
- Myfoto
- Camera

A simple method of "tyka" (trial and error), look in such folders. Most likely, your photos will be in them. If there are subfolders in these folders as well, follow them all.
Do not be afraid - do not cause any harm to either the telephone or the computer. Feel free to study the contents of your phone or its SD flash drive.
So, in our case, we found the folder with the necessary photos in the DCIM directory
- Camera. " Most likely, you will have it in another place. Finding where your photos are saved is the most difficult stage of the entire operation.

Step number 5
When you find your photos in flash memory, select the ones you want to copy. If you need to copy everything, select all the photo files.
To select all the files in the folder, there is a key combination Ctrl + A (where A is the English letter). You can also select files with the mouse.
After highlighting, it remains ON THE SELECTED AREA to press the right mouse button - select "Copy".

Step 6
In the next step, you need to choose a place to save photos on your computer. To take photos from your phone to a laptop and not to confuse all the files, you need to either create a new folder or select an existing directory for inserting new photos.
In the selected computer folder, click the right mouse button - select the "Insert" option. In the screenshot we created a special folder on drive “C”, which was called “Photos from the phone”

Windows may also ask you to confirm your decision. You have to agree with him.
IMPORTANT: after the copying operation is completed, it is very important to return to the Android phone and click the "Disconnect USB drive" button there !!! If for some reason you cannot disconnect the device from the computer, it is better to turn off the computer / laptop and only then remove the cords and pins of the connectors.
IMPORTANT: we strongly do not recommend pulling the connecting cord from the phone or computer while copying or opening files! So you can damage the device’s memory and lose all the photos, videos, contacts, music and other files permanently. In the worst cases, you can even break the SD drive.
In conclusion
In this step-by-step instruction, we examined the question of how to drop a photo from a phone to a computer with the most favorable conditions. In practice, you can encounter a lot of difficulties. Solving problems is worth it as they arise. This article came out general, generalized, since for each small detail here one could write a separate step-by-step instruction or even a whole book.
Alternative solutions:
- You can also take photos from your phone to a laptop using BlueTooth.
- Transfer photos to e-mail, and then download to a computer.
- Attach a photo to documents of the VK social network, and then download them to a laptop.
- Download files from cloud storage, through Yandex Drive or Cloud Mail or Google Profile.
- Drop the photo from the phone to the computer using the pulled out flash card and computer card reader.
- Drop a photo from your Android phone through an external USB flash drive and a special cable ("Dad - microUSB" "MOM - USB").
- Throw the photo through a friend or acquaintance. You send your photos to a friend, and he already throws them off through the USB flash drive to you.
- Ask a neighbor or look at any computer service or game club, Internet cafe to help you
MASS OPTIONS ... - watch the video:
The development of information technology has significantly changed the life of modern people. Previously, photographs were taken for a long time, on special paper. These images have been replaced by an electronic look. It allows for a variety of computer media, if necessary, you can print a specific photo. It is very comfortable. The bulk of the images are now stored on PCs or laptops. Next, we will talk about how to take pictures from a phone to a computer. What should everyone know about this process? What techniques will help bring the idea to life?
Photo Tools
It is important to pay attention to the fact that the development of modern technologies allows you to take pictures using a variety of devices. From them, you can transfer images to a computer at any time. The procedure as a whole will be the same for all devices.
You can take pictures:
- to the telephone;
- using a tablet;
- by photo or video camera;
- through the webcam.
As already mentioned, the process of transferring pictures to a PC is similar in all cases. Even a novice user is able to cope with the task.
Transmission methods
How to take pictures from a phone to a computer? There are several scenarios. The user can choose the appropriate method for solving the problem.
To date, the transfer of images from mobile devices is available:
- using a wired connection (in practice it is most often used);
- wirelessly.
In the first case, it is proposed to use a device on which there are photographs, like a flash card. Nothing special or incomprehensible! Next will be described in more detail about each method.

What is required
How to take pictures from a phone to a computer? The user must first select the type of device synchronization. The inventory necessary for the implementation of the idea will depend on this.
For a wired connection you will have to take:
- mobile device;
- a wire with a USB connector (usually it is included with the device).
Wireless connection is mainly used on smartphones or tablets. The following items are necessary for him:
- a gadget that contains photos that support wireless
- pC application for synchronizing devices via Bluetooth;
- special Bluetooth adapter (usually not needed for laptops).
Wired connection
How to throw pictures on a computer? If you use a wired connection, you can bring the idea to life on any gadget. In such circumstances, the device is used as removable media.
To transfer photos from a mobile or camera to a PC, you need to:
- Turn on your computer and gadget. Wait for the full load of both devices.
- Connect one end of the USB cable to the mobile device and the other to the PC.
- Wait a bit. Especially if this is the first connection. The operating system recognizes the connected device.
- Go to My Computer. There, in the "Other" or "Devices with removable media" section, a new icon will appear with the name of the gadget on which the photos are stored.
- Double click on the corresponding picture. How to drop a photo from a camera to a computer? Or, for example, from a mobile? To do this, you will have to find the folder in which the captured images are saved. On tablets and smartphones, most often the desired section is located in Pictures / Camera.
- Open the folder where the images are stored. Select the necessary documents with the cursor and drag them to the place of saving on the PC. It is recommended that you create a separate folder for this purpose in advance.
That's all. Now it’s clear how to transfer the photo from the camera to the computer. You can use one more trick. It speeds up the process and imports all images to a PC at once.

To do this, you have to:
- Connect a smartphone or tablet to a computer using a wire.
- Go to My Computer.
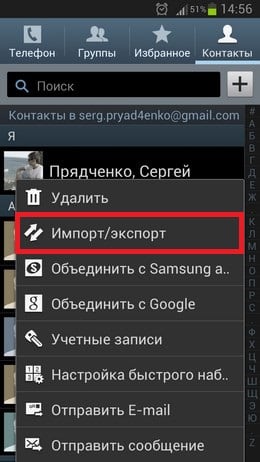
- Right-click on the connected device. Select the menu item "Import images and videos."
- If necessary, put a mark in a special field on the screen that will be assigned to all transferred documents.
Files are saved in Windows in the root folders "Video" and "Images". They are located in the "Libraries".
Without wires
How to transfer photos from a phone to a computer via Bluetooth? This method is not very popular, but you need to know about it. The process boils down to the following algorithm:
- Connect the Bluetooth receiver to the computer. On laptops, just turn on the appropriate function.
- Install a special driver program for the connected device.
- Turn on Bluetooth on your smartphone or tablet.
- Open the program and find the desired gadget in the list of available devices.
- Select "Synchronize" in the function menu. Sometimes this inscription may have a different shape, but its meaning will not change.
- Go to the device on the PC. To do this, double-click in "My Computer" on the connected device. Some programs for working with "Bluetooth" allow you to immediately go into the contents of the gadget.
- Find the photos you need to save.
- Select the necessary documents. Drag them to the designated place on the PC.

Now it’s clear how to take pictures from a phone to a computer in one case or another. Everything is easier than it sounds! Similarly, you can use Wi-Fi technology.
A large number of photos and videos take up a lot of space in the device’s memory or SD drive. Also, there is a risk of losing the phone, and with it all valuable photos.
Therefore, from time to time, photos need to be transferred from the phone to the computer.
This is done quite simply, but many users, especially adults, may experience difficulties. To prevent this from happening, below in the article, I will give step-by-step instructions.
How to take photos from phone to computer, laptop via USB cable
1. Connect the phone to the computer throughUSB cable.
2. When connecting for the first time, you need to wait some time to synchronize and install the drivers. While on the computer, the "AutoPlay" window does not open.
3. If the autorun window does not appear, then you need to change the priority of using USB, to do this, lower the shutter on the phone, and click on the "USB Charging" item (on different phone models, the item name may differ). 
4. In the window that opens, click on the "File Transfer" item.
5. Now that the "Startup" window has opened on the computer, go to the "Open device to view files" item. 
6. Since by default, photos are saved in the internal memory of the phone, go to the internal drive.
7. Find the folder DCIM and go into it. 
8. Now, we need to go to the folder Camera it contains all our photos.
9. Select the photos that need to be transferred, then copy them. 
10. Paste the copied photos into a folder, preferably not on the system drive.
Now you know how to transfer photos from a Xiaomi phone to a computer, laptop. This method is suitable not only for Xiaomi phones, but also for other models, such as Samsung, Meizu, Huawei, Honor, ASUS, Alcatel, Nokia, ZTE, etc.
Android smartphones or tablets are a convenient tool for creating media content, in particular, drawings and photos. However, for finer processing, a PC is indispensable. In addition, from time to time it is necessary to make backup copies of the contents of the internal drive or memory card. Today we will show you methods of transferring photos from a smartphone (tablet) to a computer.
There are several methods for transferring photos to a PC: the obvious cable connection, wireless networks, cloud storage, and Google Photos. Let's start with the simplest.
Method 1: Google Photos
Replacing the outdated and now closed Picasa service from the Good Corporation. According to users - the most convenient and easiest way to transfer photos from a phone or tablet to a PC.
- After launching the application, connect the account into the space of which the photos will be uploaded: the account must match the one to which your Android device is connected.
- Wait for the photos to sync. By default, only images located in the system folders for photos are downloaded.

You can also synchronize photos or pictures manually: for this, go to the tab "Albums", tap on the desired one, and when it opens - move the slider.
Unsynchronized albums can easily be distinguished by the crossed out cloud icon at the bottom right. - On your computer, open your favorite browser (for example, Firefox) and go to the address.

Log in to an account that is synchronized with the service. - Go to tab "A photo". Select the desired image by clicking on the checkmark in the upper left.

Having selected, click on the three dots in the upper right. - Click "Download".

A standard file download dialog box opens, in which you can download the selected photos to your computer.


Despite its simplicity, this method has a significant drawback - you must have an Internet connection.
Method 2: Cloud Storage
Cloud storage has long been firmly established in the everyday life of modern users of both computers and mobile gadgets. These include Yandex.Disk, Google Drive, OneDrive and Dropbox. We will show the work with cloud storage using the example of the latter.
- Download and install the Dropbox client for your computer. Please note that to use this cloud storage, as well as for many others, you will need to create an account in which you need to log in both on the computer and on the mobile device.
- Download and install the client application for Android.
- On your phone, enter any file manager - for example, ES File Explorer.
- Proceed to the catalog with photos. The location of this folder depends on the camera settings - by default it is a folder DCIM at the root of the internal storage "Sdcard".
- Long tap to highlight the desired photos. Then click "Menu" (three dots in the upper right column) and select "Send".
- In the list that appears, find the item "Add to Dropbox" and click it.
- Select the folder where you want to put the files and click Add.
- After the photos are uploaded, go to the PC. Open up "My computer" and look left at point "Favorites" - it defaults to quick access to the Dropbox folder.

Click there to go there. - While in Dropbox space, navigate to the folder into which the photo was uploaded.


You can work with images.
The algorithm for working with other cloud storages is not much different from that in the case of Dropbox. The method, despite the apparent bulkiness, is very convenient. However, as with Google Photos, a significant drawback is Internet dependence.
Method 3: Bluetooth
About 10 years ago, downloading files on Bluetooth was very popular. This method will work now: all modern gadgets on Android have such modules.
- Make sure your computer or laptop has a Bluetooth adapter and, if necessary, install the drivers.
- Turn on Bluetooth on the computer. For Windows 7, the algorithm is as follows. Go to "Start" and select "Control Panel".

IN "Control Panel" click on Network and Sharing Center.
In the menu on the left, select "Change adapter settings".
Find the icon with the Bluetooth icon - usually it’s called “Bluetooth network connection”. Highlight and press “Turning on the network device”.
Done, you can proceed to the next step.