Hello all friends!
If you care about the fast operation of your computer, then at least every three months you need to carry out a global cleaning of the system from various types of garbage. If you don't do this, your computer will simply slow down.
After using your computer for a long time, a lot of garbage accumulates. By getting rid of it, you can free up gigabytes of free space on your hard drive. Let’s clear the disk of garbage in three steps. This article is for beginners. Use it and you will really notice the difference BEFORE and AFTER cleaning your hard drive. The most interesting thing is that we will get rid of the Temp folder. Learn more about it:
Step 1) cleaning your computer from junk - manually
Cleaning the system drive “C” in Windows 7 is a fairly simple procedure, but before using the programs, let’s prepare our computer. For this we will use standard means systems. Let's go to " Start» —>» Computer"and we see our disks. Point the mouse at drive C and press the right mouse button. Go to properties and run disk cleanup.

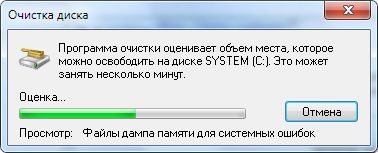
The cleaning program will start, it will evaluate the volume, and prepare the files for deletion.
Attention! If you are cleaning the disk for the first time, this may take a long time, up to several hours. Therefore, for especially “Neglected Patients” it is necessary to perform cleaning at night.

We check all the boxes before cleaning. Look in the trash, maybe you still have the files you need there.
 Don't forget to go to the Advanced tab, where you can remove unnecessary programs and restore points.
  Click " OK"—> « Delete files» unnecessary garbage has been removed. The preparation of the system is completed, let's move on to the “heavy artillery” - we will use a powerful program to remove residual debris.
Step 2. CCleaner - continue disk cleaning
We continue cleaning. And a cool program called CCleaner will help us with this. This is the most popular utility among garbage cleaners. Download the portable (portable version does not require installation) program. The download will start automatically. Launch the program, click " Analyze" (Analysis), after scanning " Run Cleaner“(Cleaning). The program language changes like this: Options» —> « Settings» —> « Language» —> « Russian«.
 You can also clean the registry, I think you’ll figure it out - the interface couldn’t be simpler. Let's move on to the next step.
Step 3. FreeSpacer - completely clean your computer disk of debris
The program is called FreeSpacer and install it on your computer. I'll say a few words about this wonderful program.
I have been using FreeSpacer for a very long time, what I like about it is that it has no complicated settings, it all comes down to two actions: search and delete, it is distributed free of charge and does not delete anything unnecessary. I also want to say about its effectiveness; it removed my friend’s 20 gigs of garbage and that's not the limit.

Launch the program and click " Search.» There should be no other programs or background applications running on the system.
Utility cleanmgr.exe is standard software of operating systems Windows family and is designed to clean disks from unnecessary files in order to increase free disk space. It can be launched through the main menu – “Programs” – “Accessories” – “Utility” – “Disk Cleanup”, through the context menu of disk properties, or in the command line (Run dialog). If no parameters are specified on the command line, the utility goes into interactive mode, waiting for user actions.
For help using CLEANMGR, run the command:
cleanmgr /? or cleanmgr /usage
The help contains the most minimal level of information, without any examples:
To get the maximum effect when cleaning up the disk, the utility must be executed in the context account administrator.
Command line options:
Sageset:n- setting a set of disk cleaning parameters with an identifier n to further perform this disk cleanup option using the parameter Sagerun:n.
. Sagerun:n- performing disk cleanup with a pre-prepared setting specified by the identifier value n.
/Tuneup:n- this parameter is similar to the parameter Sageset:n.
/LowDisk- the utility displays the Disk Cleanup tool window with checkboxes selected for all possible cleaning options. If you are running as administrator, then the “Clear” button system files” is not displayed and not only user data is cleared, but also system data, without any additional actions, after clicking the “Ok” button.
/VeryLowDisk- similar to the /LowDisk key, but disk cleanup is performed immediately, without dialogue with the user. .
/Setup- used to clear the disk of data previous Windows saved when reinstalling or updating the system. If, for example, you upgraded your Windows 8.1 to Windows 10 or reinstalled the system while preserving user data, then the command cleanmgr.exe /SETUP will remove all files of the previous system and data from the directories used for installation - C:\Windows.old, C :\$Windows.~BT, C:\$Windows.~LS, $Windows.~WS, C:\ESD\Download, C:\$INPLACE.~TR. The cleanup command with the /SETUP switch must be executed with elevated privileges. The results of program execution are saved in log files setupact.log And setuperr.log catalog C:\Windows\System32\LogFiles\setupcln. Instead of a parameter /Setup can be used /Autoclean.
/D drive letter- perform cleanup for the specified disk. If the parameter is not specified, the disk is selected manually.
Disk Cleanup settings are stored in the registry key
HKLM\Software\Microsoft\Windows\CurrentVersion\ Explorer\VolumeCaches
Examples of use.
cleanmgr /sageset:1- create a set of disk cleanup parameters with ID 1.
cleanmgr /sagerun:1- perform disk cleanup with a set of parameters specified by identifier 1.
cleanmgr /verylowdisk- perform maximum cleaning of the system disk without dialogue with the user.
cleanmgr /d D:- clean up disk D:
When running Disk Cleanup with administrator rights, it is possible to delete all shadow copies of a volume except the last one, which can significantly increase the amount of free disk space. Why go to the “Advanced” tab?

In Windows 7 and later, shadow copy data not only contains system restore points, but also represents an almost complete copy (snapshot) of the entire disk. These copies are stored in a specific format in system folder System Volume Information, and represent base snapshot files and subsequent snapshot files reflecting changes file system in relation to the base image. Shadow copies are created periodically by a special scheduler task, or when installing or uninstalling programs. There can be from several to two dozen such copies, depending on the size of the part of the disk space allocated for system protection, and each of them can be a snapshot file ranging in size from several hundred megabytes to several gigabytes. Therefore, it is the cleaning mode with additional removal of shadow copies that provides the maximum increase in free disk space.
To work with shadow copies of volumes, you can use the utility command line VSSADMIN
During its work, the operating room Windows system 7 accumulates a lot of garbage and unnecessary files. This is usually a consequence of system updates, unpacking archives and browsing the Internet. The system itself has standard utilities for removing junk, but they do not start automatically and periodically you need to clean it manually.
Manually deleting temporary files via the command line
Removing unnecessary files and directories from hard drive is done using the internal command "DELete". This can be done either from operating system, and when starting the computer when Windows 7 is not yet loaded.
To delete an individual file, enter the “DEL” command and the file name. To delete a group of files (for example, all temporary files that have the TMP extension), you can use the wildcard character: “DEL *.TMP”.
To delete temporary files via the command line, do the following:
- Click on the "Start" button, enter "cmd" in the search and launch the command line.
Launch the command line via Windows search
- In the window that appears, navigate to the root system of the disk using the “CD..” command. Two dots indicate a higher-level directory, and one dot indicates the current one.
Navigate to the root system of the disk using the "CD.." command
- Enter the command “DEL C:\WINDOWS\TEMP\*.TMP” or “DEL C:\WINDOWS\*.TXT” and then confirm the deletion.
Enter the command “DEL C:\WINDOWS\TEMP\*.TMP”
In the same way, you can delete unnecessary directories, but instead of the “DEL” command, “DELTREE” is entered.
Using DOS wildcards - simple, but powerful and dangerous. This method requires precise knowledge of the location of files and directories - it is not entirely suitable for untrained users.
If you are not using any of the file shells in which directory files are visible, it is recommended that you view their listing with the “DIR” command before deleting files. For example, if you intend to delete all files from TXT extension, before entering the “DEL *.TXT” command, you should play it safe and view them with the “DIR *.TXT” command.
Manually clearing the Temp folder
In the Windows 7 operating system, there is a separate folder for storing temporary files. It contains files and directories that remain after installing programs, unpacking various archives, and surfing the Internet. To remove them, do the following:

You can also get to this folder as follows:

Removing unnecessary files using the Disk Cleanup utility
Disk Cleanup is a program built into the operating system that removes unnecessary junk from your computer. With its help, you can find many files that have not been used for a long time. Removing them will increase the efficiency of your computer. All temporary and unused system files will be deleted and the recycle bin will be emptied.
To start cleaning, do the following:
- Open the Start menu and click on All Programs.
Expand "All Programs"
- Go to the "Accessories" folder, then "System" and run the "Disk Cleanup" utility.
Run the Disk Cleanup utility
- Select the disk to clean and click OK.
Select the disk to clean
- Mark the items you are interested in and click OK.
Check the items you are interested in and click OK
You can also access this utility in the following way:

Removing unnecessary programs using a standard utility
Besides system garbage, long-forgotten programs or virus software may be installed on your computer. To remove them, do the following:
- Open the Start menu and go to Control Panel.
Open Control Panel
- Click "Uninstall a program."
Click "Uninstall a program" when categorized
- Click on the program you don't need right click mouse and select "Delete".
Remove all unnecessary programs
- After regular deletion, go to the Program Files park on drive C and erase the belonging remote application folder, if it is there.
Overwrite the remaining folders
How to clean a disk of junk on Windows 7 using third-party programs
With the help specialized programs You can clean your hard drive most effectively, achieving maximum performance gains on your computer.
- Wise Care 365;
- Glary Utilities;
- 360 Total Security;
- Your Uninstaller.
You can easily find all the above software on the Internet.
Wise Care 365
Wise Care 365 is free and paid versions. It cleans the registry, local disk, allows you to edit startup, optimizes the operation of many applications and the operating system itself. If you use it constantly, you can avoid various crashes and freezes on your computer.
- Launch the program and click the "Check" button.
Immediately after starting the program, run a system scan
- After completing the check, proceed to correct all errors found.
After receiving the scan results, correct any errors found
- Go to the “Cleaning” tab and click on the big green button in the “Registry Cleaner” section.
Click on the "Cleanup" button to heal registry errors
- Now open the “Deep Cleaning” section and run a scan.
Click "Scan" under "Deep Cleaning"
- Then click “Cleanup” to fix any errors found.
Once the deep scan is complete, click "Cleanup"
- Go to the “Optimization” tab and start defragmenting your hard drive.
Run hard drive defragmentation
- Now disable autorun programs in the appropriate section.
Disable startup programs
Glary Utilities
Glary Utilities comes in free and paid versions. This program cleans and restores the registry, analyzes disk space, deletes temporary files, defragments the disk, and also has many other functions.
- Launch the program, go to the “1-Click” tab and click “Find problems”.
Go to the 1-Click tab and click Find Issues
- Wait until the scan is completed, go to the “Modules” tab and click “Erase traces”.
Click on "Erase traces"
- Wait until the analysis is completed and click “Erase traces.”
Click "Erase Traces"
- Mark the required items in the left panel and close the window. Then restart your computer.
Mark the items that interest you and close the window
360 Total Security
360 Total Security is free antivirus program, based on the Avira and Defender engines. This program does not conflict with other antiviruses and has a number of additional advantages. It allows you to clean the system of unnecessary files, optimize startup applications, search for vulnerabilities, compress the disk, and can generally speed up your computer.
- Immediately after starting the program, run a system scan.
Run a system check
- Once errors are found, click "Fix".

During the use of the operating system, many files accumulate on the hard drive that are no longer used, but still remain on the disk, gradually decreasing in size free space and ultimately lead to “brakes” of the system. To reduce the number of unused files on your hard drive to free up disk space and improve computer performance, use the ". It deletes temporary files, cleans out the Recycle Bin, and removes many system files and other unused items.
To run the program, press WIN+R and enter the command cleanmgr and OK
Now select the disk you want to clean. This is usually drive C.

In the window that opens, click the button for more complete cleaning disk. In the Disk Cleanup: dialog box, select the one you want to clean up again. hard drive and click OK. Will appear in a new window new tab « Additionally».

The next step is to select the checkboxes for the types of files you want to delete and click OK. In the message window, click the button

Tab " Additionally» is available when you select to delete files from all users on the computer. This tab contains two additional ways, allowing you to free up even more disk space.

Programs and components. Opens Programs and Features in Control Panel, where you can remove unused programs. The Size column in Programs and Features shows how much disk space is used by each program. You can also remove unused Windows components there.
System Restore and Shadow Copies. Deletes all recovery points from the disk except the most recent one. System Restore uses restore points to return system files to a previous state. If your computer is running smoothly, you can delete earlier restore points to free up disk space. In some editions of Windows 7, restore points may include previous versions of files, called shadow copies, and images of archives created with Windows archiving CompletePC. These files and images will also be deleted. To receive additional information about system restore, search for keyword"System Restore" in the Windows Help and Support window.
Automatically launch Disk Cleanup according to a schedule
To create automatic start program "Disk Cleanup" press WIN + R and enter the command mmc.exe taskschd.msc and OK

This command starts the Task Scheduler. Job Scheduler is an MMC snap-in that allows you to schedule automated tasks that run at a specific time or when certain events occur. The Job Scheduler contains a library of all scheduled jobs, allowing you to quickly view and easily manage jobs. From the library you can start, disable, change and delete a task.
Now we need to create a new task. On the menu Action select item. The New Simple Task Wizard dialog box opens.

A window will open Wizards for creating a simple task. Enter the name of the task and, if necessary, a description. Click next.

The next steps are clear and simple. Choose a schedule for this task. When the schedule is set, the program launch window will appear. Click Next. In the new window click Review

In the window that opens, find the field File name and enter cleanmgr.exe and click Open.


The last stage of creating a task.

All. Now you can view the properties of the task. Change the schedule, enable or delete a task.

This completes the creation of a schedule to run disk cleanup.
The article provides seven ways to solve the problem of insufficient free space on system disk Windows, both using built-in system tools and third-party utilities.
Thirteen years ago, when the Windows XP operating system appeared and instantly gained popularity, no one was particularly worried about the size of the system disk. 20-30 GB on disk "C" was enough to install both the system itself and for software. WITH the advent of Windows 7 PC owners for the first time were massively faced with the problem of lack of space on the system disk - this operating system itself occupied about 10 GB, and the same amount was absorbed by programs, being registered and constantly updated. The 20-25 GB system disk filled up very quickly. And many even had to resort to repartitioning their computer disks in order to increase the system disk at the expense of another disk.
To ensure that there is always enough free space on the system partition, it must be kept clean and tidy and periodically monitored to see if it is cluttered. If Windows reports that there is not enough free space on the system disk - usually on drive C - it's time to clean it up. Let's look at 7 ways to clean your system disk below: installed Windows 8.
Before you start cleaning up your disk, you need to remember how much free space you have on your disk. at the moment. In the future, this will allow you to evaluate the effectiveness of the work done by comparing the initial and final figures.
1. Removing unnecessary files from the system disk
First, you need to check whether files are stored on the system disk that, in principle, may not be stored there - these are media files, folders with documents, disk images, program installation files, etc. All this can be transferred to a non-system drive; moreover, it is even recommended that all important files be stored on a non-system drive (D, E, etc.), so that if an unexpected system failure occurs and it has to be reinstalled, this data were not destroyed during formatting of the system disk.
As a rule, all files downloaded from the Internet are stored in download folders assigned by default by browsers on the system drive. To prevent the system drive from becoming cluttered with downloaded files in the future, you need to assign a different folder for downloads in the browser settings, but on a non-system drive.
Under no circumstances should you transfer system files to another drive, which means that Windows folder you'd better take the tenth road.
To search for media files and documents, you can use Windows Search and set search criteria for the desired file types within the system drive.
Check the found files additionally, cut out the ones you need and paste them on a non-system drive using context menu, and simply delete unnecessary ones.
Remove all those programs and games that you do not use. As a rule, after removing large resource-intensive games, quite a lot of space is freed up. To correctly remove software and clean the system from remaining traces, use special software - uninstallers.
Here are some popular uninstallers:
- Your Uninstaller;
- Soft Organizer;
- Revo Uninstaller.
3. Windows Disk Cleanup service
The Windows operating system is equipped with a standard service that analyzes the space on the system disk and identifies files that can be deleted to free up space without causing harm to the system.
In Windows 8 Explorer, open “My Computer” and open the context menu on the system drive. At the end of the list, click “Properties”, and in the window that appears, click the “Disk Cleanup” command. In the “Disk Cleanup” window, check the boxes next to the files that you want to delete - Recycle Bin files, temporary files from Temp folders, temporary Internet files, etc.
Then click “Clean up system files.”
4. Manually cleaning Temp folders
If the system disk is not periodically cleaned, in the temporary file folders “Temp” for long time can accumulate up to 5-6 GB. And the Windows Disk Cleanup service, as a rule, deletes only some of the files from these folders. Temp folders can be cleaned manually by completely deleting their contents.
What is the “Temp” folder for in general? Temporary files are stored there that Windows and various programs installed on the computer create for their work. Most of these files become unnecessary over time because they are not used in work.
The "Temp" folders are hidden and the easiest way to get to one of them is using the standard Windows Explorer, or popular file manager Total Commander, since most assemblies of this program have a pre-installed “Hidden Items” button on the toolbar. It displays all hidden files and folders on the system. Click this button and open the root folder of the system in Total Commander and find the “Temp” folder there:
You can open the “Temp” folder in the same path in standard Windows Explorer, but before that you also need to configure the display of hidden folders.
In Windows 7, click the Start button, then Control Panel, then Appearance and Personalization, then Folder Options. In Windows 8, you can get to the “Folder Options” section directly from the “Control Panel”.
In the “Folder Options” window that opens, immediately go to the “View” tab and check the “Show” option in the additional parameters. hidden folders, files and disks."
Then click "Apply" and "OK".
In the “Temp” folder, select all existing files and press “Shift + Delete” so that the files are completely deleted from the computer, bypassing the “Trash”.
But there is more than one “Temp” folder on the computer: in addition to the one located in the Windows root folder, another “Temp” folder can also be found in user files on the system drive:
C:\Users\Windows Account Name\AppData\Local\Temp.
You can follow this path in a file manager or Windows Explorer, but it will be much easier in address bar Explorer, enter the command %TEMP% and press the Enter key.
Select all the files that are there and delete them.
Not all files from this “Temp” folder will be deleted, some of them may be currently used for the operation of the system and programs, so just skip them.
To increase the loading time of Internet pages, browsers, when accessing a server on the Internet, first check the cache - a place on the system disk specially allocated for storing previously visited web pages, pictures and other elements of Internet resources. And if there is a copy of this data in the cache, then the browser downloads it from the cache, and not again from the server.
To periodically receive updated data from servers, ideally the browser cache should automatically clear itself from time to time, but this is not always the case. Sometimes, after active Internet surfing, a fairly impressive amount of unnecessary data remains in the cache, and it must be periodically cleared manually. To achieve this, browser developers provide special function clearing cache manually.
In most browsers, this function can be accessed by entering the key combination “Ctrl + Shift + Delete”. However, you can separately clarify how to clear the cache of your particular browser, or use special programs for cleaning the system, which will be discussed below.
Clearing your browser cache will free up a certain amount of space on your system drive.
The software market today provides huge amount programs designed for comprehensive cleaning of Windows OS. This includes cleaning the Recycle Bin, temporary system files, and installed programs, and browser cache.
The most popular program of this kind is CCleaner. It is free, minimalistic, nevertheless - it offers necessary functions to clean the operating system of unnecessary files and optimize its registry.
Among CCleaner's analogues there are also more functional solutions - for example, System Cleaner, Neo Utilities, System Optimize Expert, TuneUp Utilities and other programs.
You shouldn’t place too much hope on such a program plan. Like the Windows Disk Cleanup service, they can also remove only a portion of unnecessary files. Therefore, if the need to increase space on the system disk is urgent, it is better to additionally clean the “Temp” folders manually.
Hibernation mode is a mode of reduced power consumption in which the system goes into a sleep-like mode, but at the same time everything open files and running programs are saved on the hard system drive in a separate file. Hibernation mode is designed for laptops to extend the lifespan battery life without recharging the battery. But Windows automatically creates a file to store data in hibernation mode no matter what computer device you are using, and the size of this file is several gigabytes.
To see the hibernation file when display is on hidden file ovs and folders, open the system drive in a file manager or Windows Explorer window. Find the “hiberfil” file with the “.sys” extension among the hidden ones.
If you are using a desktop PC and not a laptop, you generally do not need hibernation mode. And you can delete it to free up space on your system drive. And when working with a laptop and periodically using hibernation mode, you can transfer the “hiberfil” file to another non-system drive.
You won’t be able to get rid of the “hiberfil” file so easily with the usual “Delete” context menu command, since it is protected by the system. But it can be removed using the command line.


