Often, users of computers running Windows 7 encounter operating system health problems. Computer problems usually appear when it slows down and programs do not open. Also, the computer may not start at all or do it every other time.
The reasons that cause problems in the performance of the operating system can be very different. For example, if a computer gets virus, it can damage system files. Also, difficulties with the PC may appear during installation. low-quality software, which can damage the structure of system files. To solve the problem with the health of a computer on Windows 7, you need to roll back to the previous restore point.
To protect the OS in Windows 7, restore points are used that the system periodically creates. Essentially, restore points are previous state of Windows 7 system files. To help the Windows 7 PC user, we have prepared a material that will describe the detailed system recovery process in various ways.
Recovery in the loaded seven
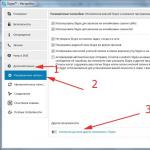
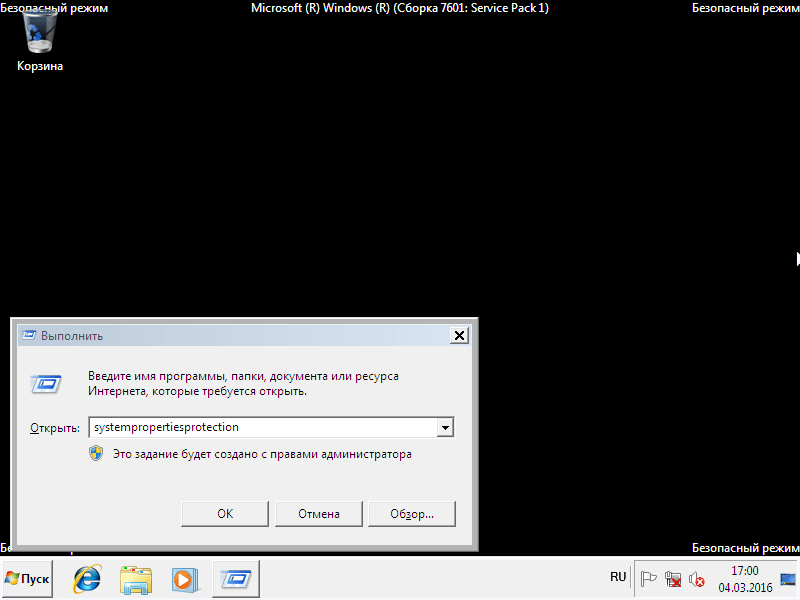
If your Windows 7 computer boots, but the system is not stable, then it's time to roll back to a previous restore point. First of all, we need to get into the window in which you can call up the system recovery options. To do this, open the program "" by pressing the key combinations Win + R, through which we enter the following command: systempropertiesprotection
A window should open before us. Properties of the system» tab « System protection". You can also get to this window in the standard way through the menu " Start". The next step is to press the button Recovery….
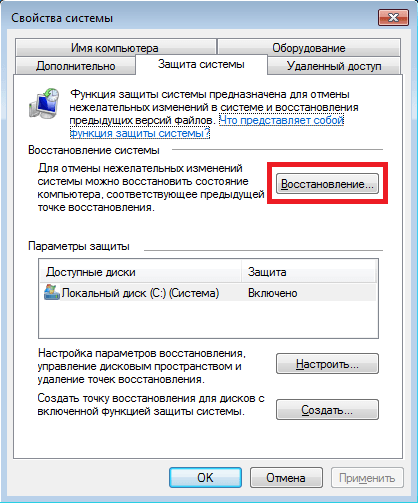
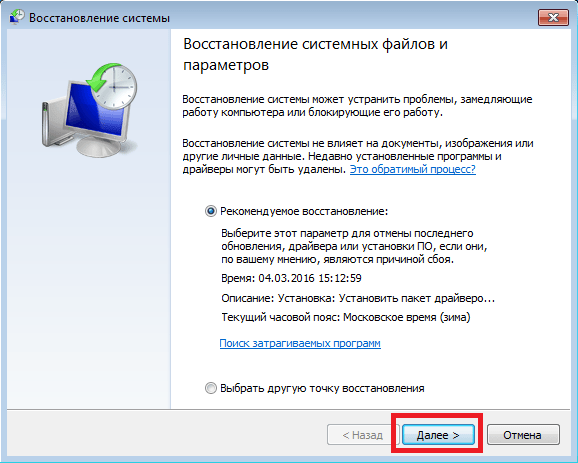
After clicking, the System Restore window will open. It will prompt you to restore the system using the recommended access point or choose another one. We will stop at recommended restore point.
This window requires confirmation for the selected restore. To confirm, press the button Done.
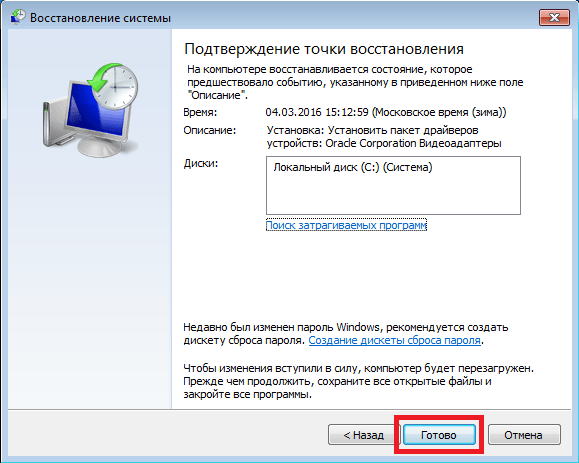
This button will bring up a message warning that after the restore procedure it will be impossible to return to the previous parameters of the seven. By clicking on the Yes message, we will start the Windows 7 system restore.
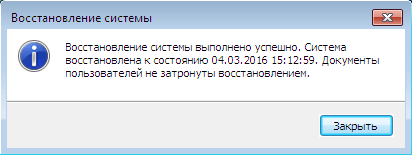
If the process of returning to the previous state occurred without errors, then a corresponding message will be displayed.
If you are unable to roll back to the previous settings using the recommended point, then you should select the point that was created later than the selected restore point Windows 7 systems. I would also like to note that to perform this operation, you will need special privileges. That is, when you log in, you must select an account admin and enter a password for it.
We return the computer to working capacity at OS startup
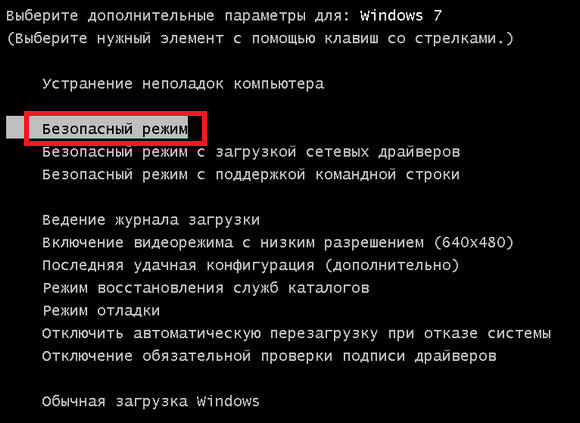
In case your PC is running seven at all is not downloading, then you can start the operating system in safe mode. After the BIOS start window appears, press F8 on the keyboard (for laptops there may be another key, for example, Del or one of the function keys). This action will cause menu of alternatives seven downloads.
In this menu, select the item " Safe mode”And continue by pressing Enter, after which the system will start in safe mode.
If the system has successfully started in safe mode, then start the recovery of the seven, as shown in the previous example. In this mode, for maximum security many features disabled OS, including the Windows Aero graphical interface. This is how the running program "" with the command " system properties protection” on a system running in safe mode.
We return the computer to working capacity using the installation disk or bootable USB flash drive
If the two previous examples do not help you, then you will need to restore the seven installation disk or flash drive. For computers that do not have an optical drive, you need to use a bootable USB flash drive with the OS. A bootable USB flash drive can be created using special utilities. The most popular utilities for this purpose are Windows USB/DVD, Download Tool And Rufus.
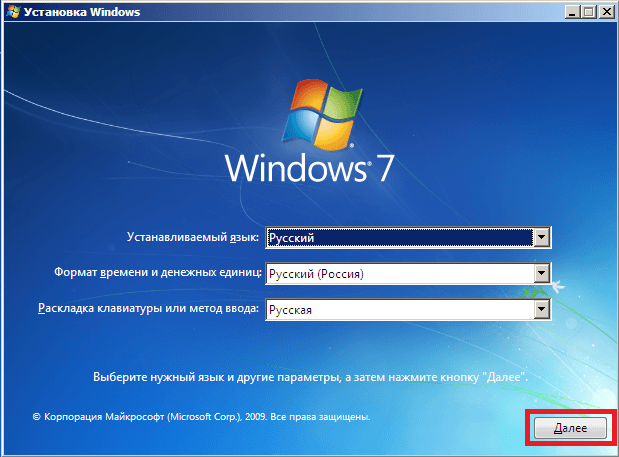
Boot from the installation disk or via a USB flash drive. In the start window of the installer, click the Next button and proceed to the next window.
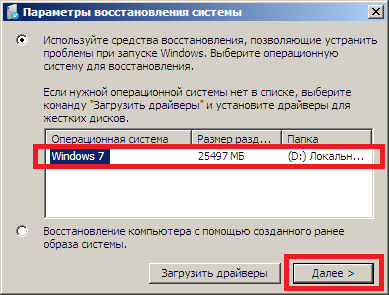
 After searching, select the OS you want to restore and click Next.
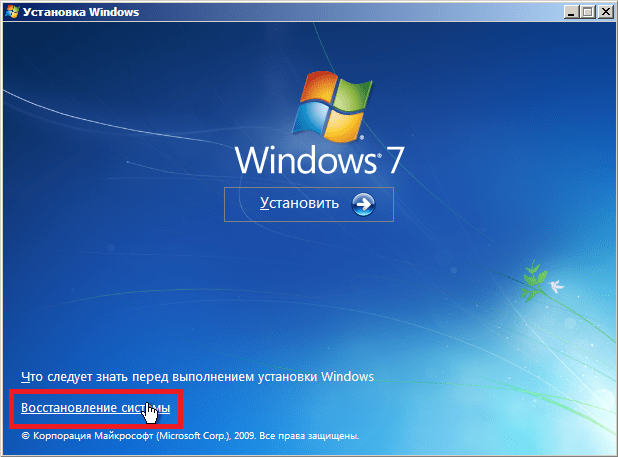
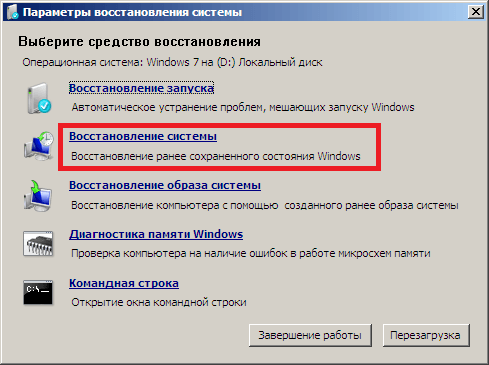
In the window that appears, select the same item " System Restore».
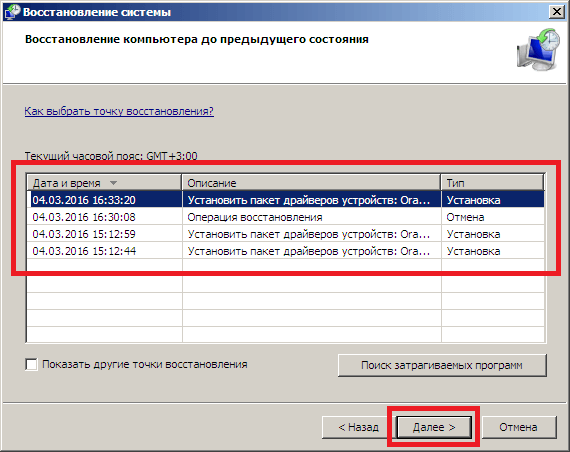
This action will launch the seven recovery utility. In the utility, click the Next button. This action will take you to restore point list. We choose a suitable point and continue.
A window will appear in front of you, as in the first example. Therefore, we press the Finish button and respond to the message, after which we will start the recovery.
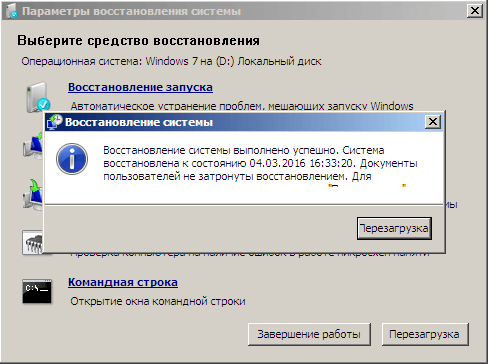
After a successful rollback to the previous state, you will receive the following message.
Windows 7 Disaster Recovery with Antivirus
If your PC is infected viruses, interfering with the correct operation of the computer and the first three examples considered do not help you, then a good way to restore in this case would be an anti-virus life disk from Dr.Web. With this disc you can clean the system from all kinds of dangerous software. In addition to cleaning, Dr.Web LiveDisk can disinfect infected objects, which are necessary to restore Windows 7.
The Dr.Web LiveDisk image can be used both for recording onto an optical disc and a flash drive. To use Dr.Web LiveDisk on a USB drive, you need a special program. You can download the program for writing to a USB flash drive and the image itself on the official website by going to the page www.freedrweb.ru/livedisk.
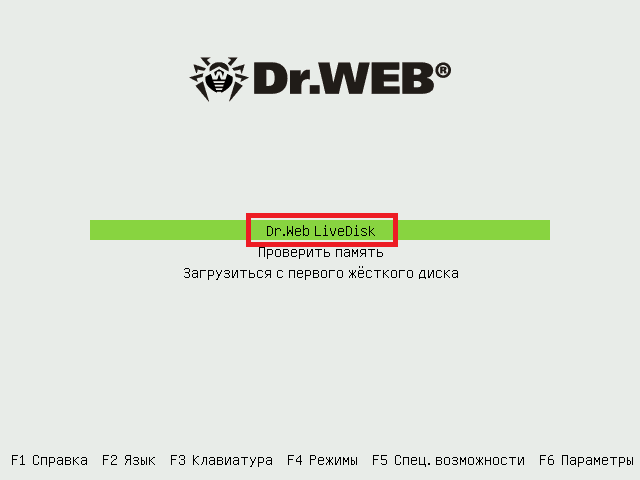
Let's start the recorded image on the disk, setting it in the BIOS as the first boot.
In the start window of the bootloader, select first item Dr.Web LiveDisk and press Enter. These actions will start downloading Dr.Web LiveDisk.
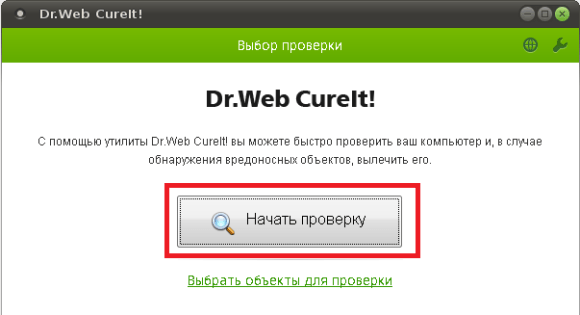
 After downloading Dr.Web LiveDisk, we will get a full Linux-based operating system. As it was written earlier, the main purpose of Dr.Web LiveDisk is to clean and cure of virus software. Therefore, antivirus is built into this OS. Dr.Web CureIt!. This antivirus is launched along with the OS.
Let's click in Dr.Web CureIt! button Start scan, which will start scanning, cleaning the system and disinfecting viruses.
After verification, Dr.Web CureIt! delete or disinfect infected objects.
Since there will be no more malicious code in the system, you can safely restore the system in three ways, which are described above.
If after checking the system files you cannot restore the Windows 7 system, then the only reasonable solution is to make a full backup of the information and reinstall the system again.
How to make a system image in seven
Another recovery feature in Windows 7 is creating a system image. In this image, you can save all the information on the hard drive, including the operating system. By restoring in this way, you will receive an OS with the same parameters as on the day the image was created.
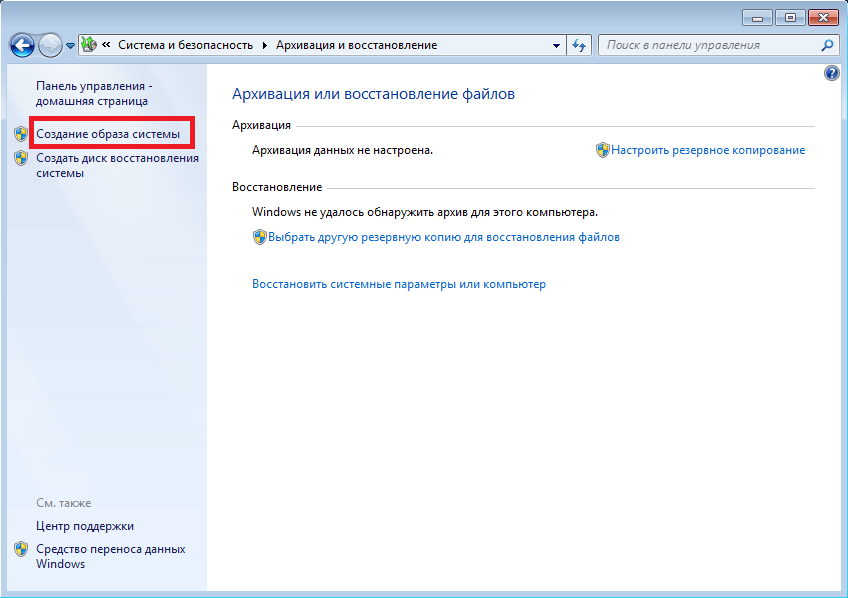
Run " Control Panel' and go to the tabs ' system and safety», «»
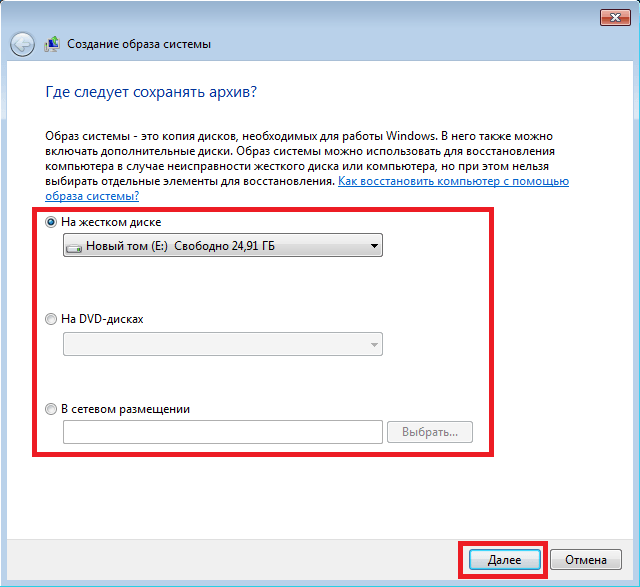
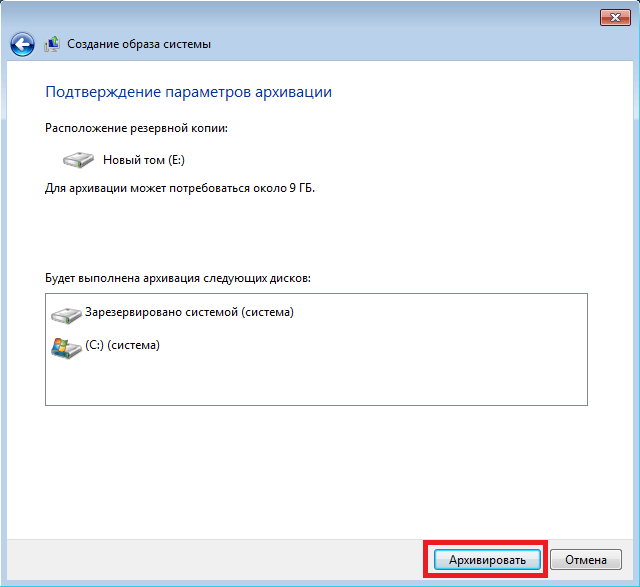
In the window that opens for creating an image, specify the location to save it and click Next.
In the window that appears, it remains only to click the button Archive, which will start the process of creating an image.
 You can restore the created image with Windows 7 and all information on local drives using the installation disc. The principle of recovery is shown in the second example, only when choosing a recovery method, you need to select " Restoring a system image” and specify its location on the saved drive.
Alternative methods for restoring the Windows 7 operating system
In addition to the standard recovery methods, there is an alternative software that does the same function. The most interesting solution that allows you to restore the system is the program Acronis True Image 2016. This is a proprietary software package from Acronis.
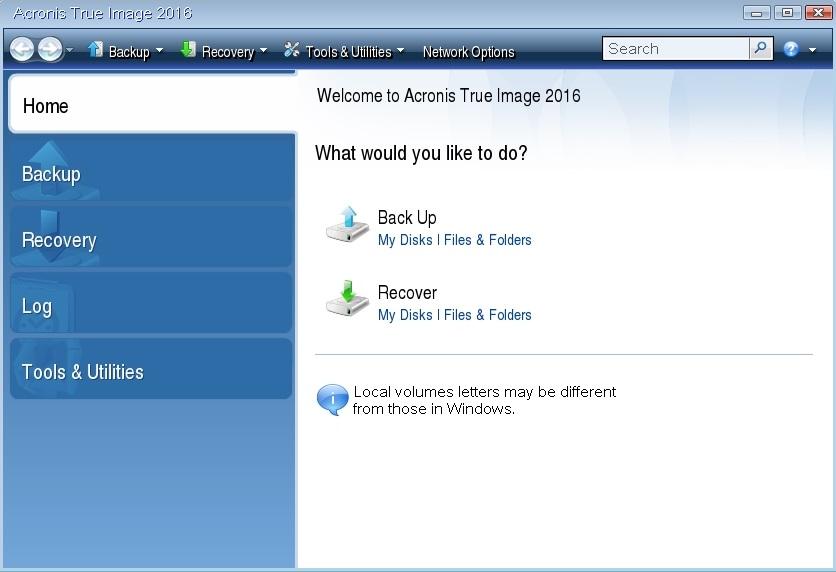
First of all, let's download and launch Acronis True Image 2016 from the shortcut on the Desktop. When launched, the program will ask for a username and password.
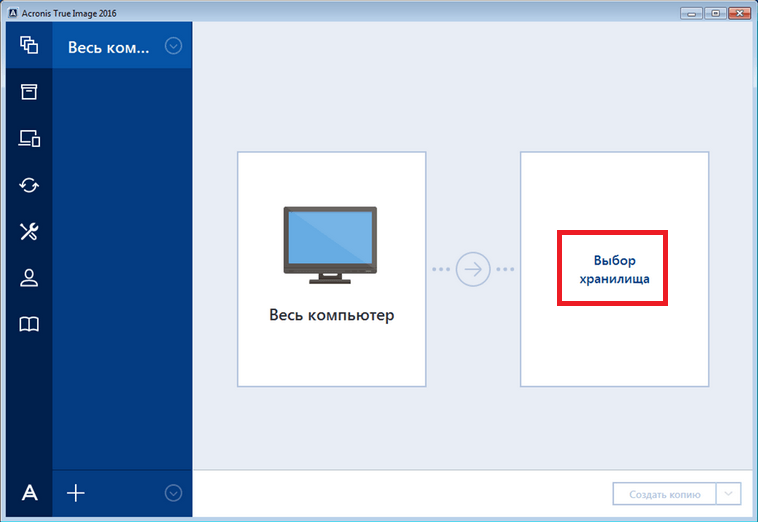
Now let's set up Acronis True Image 2016 so that he can do full disk backup with Windows 7. This setting should be done immediately after installing the OS, so that in the process of using Windows, you can restore functionality from several backup copies of the system created in a certain period of time. So let's get started with the setup. To do this, select the type of storage by clicking on the link "".
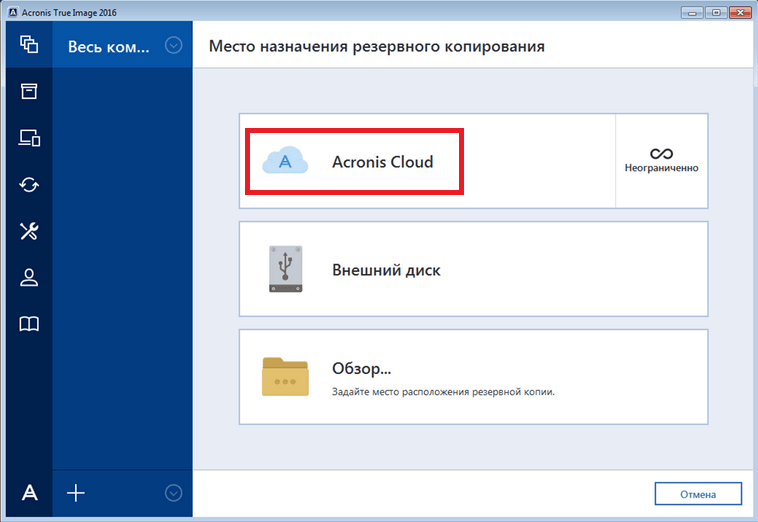
In the window that opens, select the storage " Acronis Cloud».
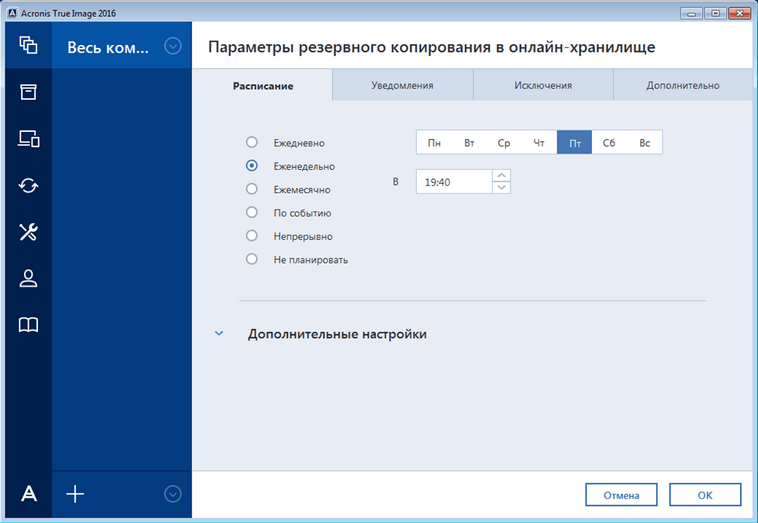
 Now let's create a schedule for our backups. To do this, press the button " Options” and go to the storage settings settings. On the first tab, select the schedule you like for creating backups of our system.
As you can see, the entire computer is selected as the backup source. Therefore, in the schedule set by us, a backup copy of the system will be created in the cloud storage " Acronis Cloud».
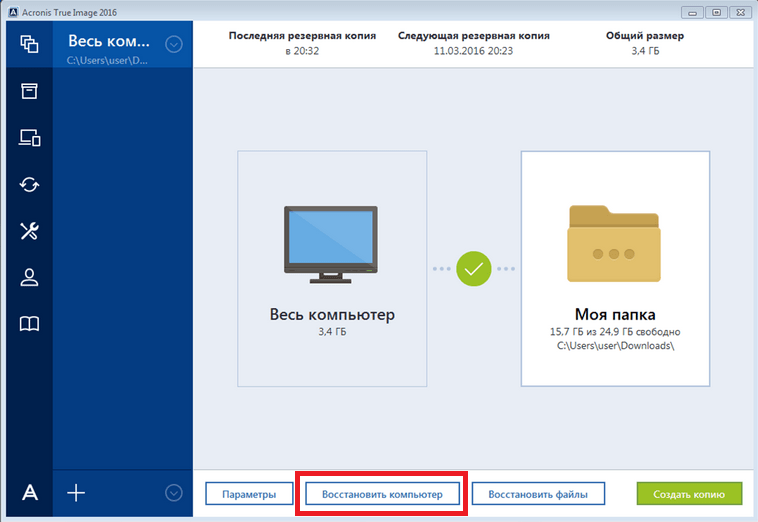
For an example of recovery, let's take an archive copy not from the Acronis Cloud cloud storage, but from the hard drive. If a backup was created on the computer, then Acronis True Image 2016 he will find her.
So we press the button Repair your computer, after which the program will completely restore the system to the state that it was when the backup was created. Also, if you are unable to start Windows 7 on a computer, Acronis True Image 2016 there is a boot image for this that can be burned to disk.
 You can download this image on your account page. You can get a password and login on the official website www.acronis.com. The principle of the bootloader is the same as with the desktop version. Load disc from Acronis True Image 2016 on the computer, you can set it in the BIOS first when booting.
From the example it turns out that the utility allows full control over the creation of PC recovery copies and back up your entire system to the cloud.
Acronis True Image 2016 boot disk example
To start a disc Acronis True Image 2016 when starting the system, you must set the boot mode from the optical drive to the first in the BIOS. For example, for the MSI A58M-E33 motherboard, these parameters in BIOS mode look like this.
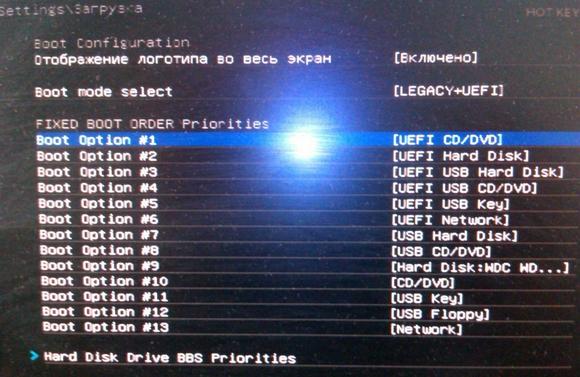
Another way to boot is to use hotkeys to call up the BIOS boot drive menu. For example, for the MSI A58M-E33 motherboard, the hotkey is the F11 button. By pressing this button, we will launch a special mode in which, when the system starts up, drive boot menu in BIOS.
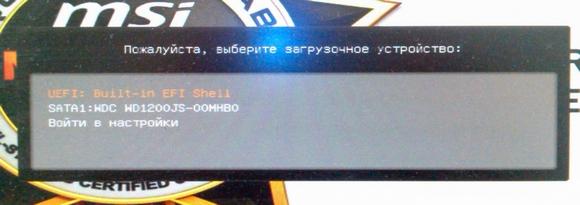
After booting from the Acronis True Image 2016 disk, we will get to such a menu.
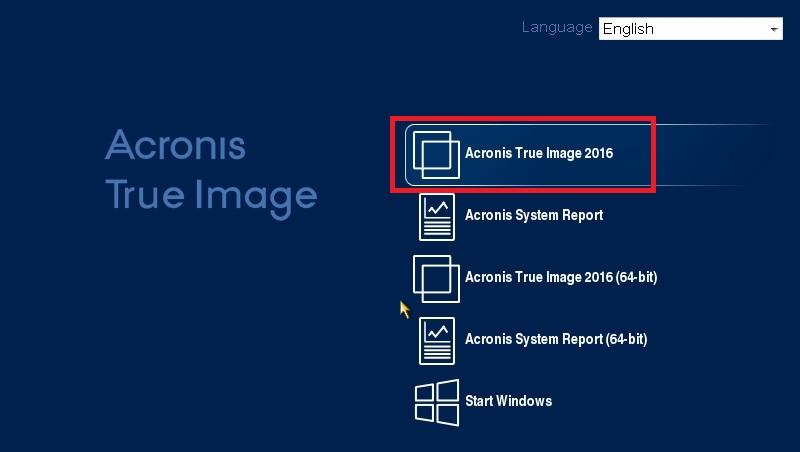
In this menu, select Acronis True Image 2016, after selection, the program will start.
The example shows that starting the boot disk Acronis True Image 2016 using the desired BIOS mode is not at all complicated.
Summing up
In this article, we have analyzed almost all the methods and parameters system recovery. We also looked at ways to restore the seven with alternative software and with the help of an antivirus. Which way to choose to restore Windows 7 depending on the situation is up to you.
Summing up, I would like to note that they mainly disrupt the operation of the OS viruses and experiments with different illegal software. Therefore, so that you do not have to constantly restore the system, use only proven and licensed software, and also use reliable comprehensive anti-virus protection.
I would also like to note that the considered examples in the material will work not only on Windows 7, but also on more modern operating systems, such as Windows 8 And 10 . And we, in turn, hope that our material will allow you to properly restore Windows 7 and you can say with confidence that I can do system restore.