Overheat - One of the three most common "ordinary" problems of all laptops. It happens due to the fact that the cooling system of the laptop over time is clogged with dust, preventing the output of hot air from the case.
If your laptop after some time after switching on, it starts to warm much, noise, slow down, or even turn off sharply - all these are messengers that you urgently need to clean your laptop from dust And change thermal.
You can contact computer service, and you can try to make prevention alone.
All that is needed - a couple of simple, accessible tools, and some share of accuracy and care. Well, some kind of algorithm for action when disassembling a laptop, which I clarify for you in this article on my computer blog.
Overheating begins to manifest after 1-5 years of using a laptop, depending on the model and conditions of use. But, sooner or later, it will come, because over time on the laptop fan slowly, but the layer of cosmic dust is correctly copied.
I will try to make your subjective Top Warning Laptop Models:
- HP, especially models, DV6, G7
- ASUS.
- Acer.
- Sony
- Lenovo.
- Samsung
- Dell.
- Toshiba.
I already wrote an article about, as well as how quickly and for free.
We will assume that you are already diagnosed overheating problem.That is, they made a temperature test, and found out that under load the temperature of the processor and the video card of your laptop rises to 90 or more degrees.
But it was all the theory and diagnosis. Now we are practicing and directly repaired - disassembling and cleaning a laptop from dust with their own hands.
Disassembling a laptop - Not such a simple task, as it may seem at first glance, a person who never "revealed" his laptop.
If in most system units, to access "internships" you need to unscrew 2 screws and move the lid, then everything is much more complicated in laptops.
There are many manufacturers of laptops, and every hundreds of different models, and they all understand differently. Somewhere you only need to remove the bottom cover. For example, this is how things are. And somewhere to get to the motherboard and remove the cooling system for cleaning and replacing the thermal paste, you need to fully disassemble the laptop housing, "before the bolk".
But common algorithm when disassembling a laptop, as a rule, always the same. If you briefly, you need to unscrew all the screws, disconnect all the loops, connectors, and open all the latches.
How to independently disassemble any laptop and clean it from dust - universal instruction.
Below, I drew a laptop device with the designations of all parts, whatever you need to navigate when reading this article.
1. Disconnect the battery
First of all - always disconnect the battery. Disassembling a laptop under voltage, can handle your laptop randomly damaged to the motherboard. Therefore, the first thing I pull it out.

On some laptops, the battery is inside the housing, such as. Before it is turned off, be careful in doubly, whatever do nothing.
2. Unscrew all visible bolts on the bottom.
Pay attention to their length and thickness. If they are the same - you can not steam. If some come across longer than / shorter - remember / sketch where they were twisted.

3. Remove all covers on the bottom, and unscrew all bolts under them
 We remove all the small covers on the bottom of the laptop (RAM, hard disk), unscrew all the screws, fold them in the next bunch. Disconnect all connectors if any.
You may not have such lids, it can be solid below. Do not scare - go to 5th step.
4. Disconnect the Wi-Fi module, hard disk, RAM, DVD.
To disable the Wi-Fi module, first remove 2 antennas from it, pulling them perpendicular to the module. Remember where it was. Then unscrew the fastening bolt and pull the module from the slot.

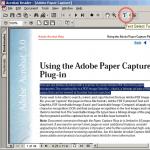
By revealing the hard disk, we look at how it is connected. You can remove it, or by moving away from the connector, or turning off the flexible wiring by pulling it.

RAM, as a rule, not necessarily remove. But you can remove, and clean her contacts with the eraser.

At this stage, you can most often remove the DVD-ROM, slowly pulling it.

The removable keyboard is easy to distinguish - it is like "block", i.e. It does not constitute one entire body.

If you were convinced that your keyboard is sewn into the top of the laptop housing (Sony, ASUS 500 series) - go to step 8.
6. If the keyboard is removed - remove it.
Do not forget that from the keyboard to the motherboard laptop goes plumeSo after the removal, do not rush to pull it, and first lift and disconnect this loop.

Most often to remove the keyboard It is necessary to carefully pose it with a mediator or a spatula, and break off all the snaps around the perimeter.

It happens that before this you need to take off panel OU or under the clave.

On some laptops you can wait for another unpleasant surprise - the keyboard is additionally keeping on glue. In this case, we carefully use it with a ruler / blade / divert, and, gradually lifting, we spare.

7. Remove all visible bolts under the keyboard, take out all the loops and connectors.
There are several basic types of loops. All of them are dismissed in different ways. Some are lifted, some are coming up, some are drawn.
I will try to systematize them in one of the following articles on the site.
Sometimes at this moment you will need to pull the long wiring from the Wi-Fi adapter through the case.
8. Gently "open" the laptop on the side of the perimeter, and remove the top cover
For me, it is most convenient for this to use a guitar mediator, preferably thickening - 0.8-1 mm.

Also, sometimes, cuts the blade:

Having passed on the perimeter by the mediator and folding all the latches, carefully trying to raise the lid. If you do not succumb to - once again check, whether all the screws are unscrewed. If you still do not give in - check again.
Forces not need to apply! And not a rejected screw often turns out to be imperceptible to the housing, or hidden under the rubber rack on the bottom of the laptop.
The motherboard can be attached to the bottom of the laptop housing (most often) and to the top (so make Sony Vaio). Be careful and not rushing.
9. Unscut the remaining screws and disconnect the connectors, take out the motherboard
We look at which loops go to the motherboard, pull them all.

Sometimes, to relieve the motherboard, you have to completely unscrew and remove the top of the laptop with the screen.
10. Remove the cooling system from the board
Radiator screws are usually marked with numbers - unscrew and spin in order of these numbers, so that it would accidentally damage the chip overcast.
We work here very carefully - the screwdriver can easily slip and knock down any element on the motherboard.

Having unscrewed all the bolts, carefully referring the cooling system, if not going - you can slightly turn in its plane. We try not to break the thermoseries if they are.
11. We disassemble and clean the laptop fan from dust
Actually this is the most important stage disassembly laptop. It is now, actually "cleaning a laptop from dust" will happen
Usually, to disassemble the cooling system, you need to unscrew a few small cogs on it, and tear the piece of fabric / scotch, "byverting" the fan outward.

We see dust-accumulated on the grille - we remove it with a brush, blow it. Congratulations! The laptop is cleaned) But this is not all.
12. We remove the old, smear a new thermal
We delete the old thermal path with the places where it was, on the chips on the motherboard, and on the cooling system. Remove the thermal column can be a dry napkin and cotton chopsticks. If there is, you can moisten them in the alcohol, at the same time and inside accept ????
Often, instead of the thermal paste you can see the thermal staples. It is very desirable if they remain integer - find them quite difficult for sale, only to order. If this gum broke hard - most likely it is already "non-working," will have to look for it and change it. Either smear the thermal stroke layer. But I do not recommend that you do. Change! Usually, thermal blocks put on elements that do not have a temperature sensor and overheating sensor, and your laptop can suddenly "die", while showing the normal temperature on the processor and the video card.
Smear a new thermal accelerant. How to smear? Maximum thin layer. The thermalcase is not needed in order to close the entire surface of the chip, and to smooth out the irregularities of the surfaces.

I will write a short review in one of the following articles on the site about various thermal courses.
A B. this video On my channel on YouTube you can see how you need to apply the thermal path on the example of the Pavillion G6 laptop.
13. Collect in reverse order.
We collect - just as they disassemble, carefully checking at each stage, whether all the connectors in their connectors. In theory, there should be no "extra, empty" (but they can be).
It is desirable that there are no extra bolts, but if it remains - not scary! ???? The main thing that the bolts would be circled in the loop area - otherwise the laptop will fall apart.
14. Make the temperature test - rejoice! ????
The thermal paste is necessary for some time to evenly crush under the pressure of the plate. So its maximum efficiency is achieved after a couple of days of using a laptop.
Tips, subtlety when self-disassembling laptop
- Collect screws from each stage of disassembly with separate heaps - so you will not be mistaken what kind of cords from where, and you will not remain unnecessary.
- Take advantage of the Internet - almost every, or similar, laptop model There are detailed photos and video instructions on disassembling!
- Do not apply forces - if something "doesn't go," 10 times recheck, if you are unscrewed, disconnected. In case of doubt - lear on the Internet.
- Be careful and neat, do not hurry.
RESULTS
So, from this article you have learned how to independently disassemble and clean your laptop from dust.
For the first time, perhaps it will be complicated, but in the second, I assure it is much easier! After all, neural connections in your brain will already be established. ????
Good luck to all! The questions remained - ask! ????