In general, I don’t know if this article can be useful to someone, since transferring files to the phone usually does not constitute any problems. Nevertheless, I undertake to write about this, during the course of the article I will talk about the following things:
- Transfer files over the wire via USB. Why files are not transferred via USB to the phone in Windows XP (for some models).
- How to transfer files over Wi-Fi (two ways).
- Transferring files to your phone via Bluetooth.
- Sync files using cloud storage.
In general, the outline of the article has been outlined. Read more interesting articles about Android and the secrets of its use.
Transferring files over Wi-Fi is possible in several ways - in the first, and perhaps the best of them, the computer and the phone must be on the same local network - i.e. connected to the same Wi-Fi router, or you should enable Wi-Fi distribution on the phone, and connect to the created access point from the computer. In general, this method will work over the Internet, but in this case registration will be required, and file transfer will be slower, since the traffic will go through the Internet (and with a 3G connection it will also cost a lot).

Access Android files through a browser in Airdroid
Directly to access the files on your phone, you will need to install the AirDroid application on it, which can be downloaded for free from Google Play. After installation, you can not only transfer files, but also perform many other actions with the phone - write messages, view photos, etc. Details on how this works I wrote in the article.
In addition, you can use more sophisticated methods to transfer files over Wi-Fi. The methods are not quite for beginners, and therefore I won’t explain them too much, I’ll just hint how else this can be done: those who need it themselves will easily understand what they mean. These methods are:
- Install FTP Server on Android to access files via FTP
- Create shared folders on the computer, access them using SMB (supported, for example, in ES File Explorer for Android
In order to transfer files via Bluetooth from a computer to a phone, simply turn on Bluetooth on both, also on the phone, if it has not been paired with this computer or laptop before, go to the Bluetooth settings and make the device visible. Further, in order to transfer a file, right-click on it and select "Send" - "Bluetooth Device". In general, that's all.

Transferring files to your phone via BlueTooth
On some laptops, programs can be pre-installed for more convenient file transfer via BT and with more features using Wireless FTP. Such programs can also be installed separately.
Using Cloud Storage
If you are not using any of the cloud services, such as SkyDrive, Google Drive, Dropbox or Yandex Disk, then it’s time to - believe me, this is very convenient. Including in those cases when you need to transfer files to your phone.
In the general case, which is suitable for any cloud service, you can download the corresponding free application on your Android phone, run it with your credentials and get full access to the synchronized folder - you can view its contents, change it or download data to yourself on telephone. Depending on what specific service you use, there are additional features. For example, in SkyDrive you can access from your phone all folders and files on your computer, and in Google Drive you can edit documents and spreadsheets stored in the storage directly from your phone.

I think these methods will be enough for most purposes, but if I forgot to mention some interesting option, be sure to write about it in the comments.
If you often transfer files from your Android smartphone or tablet to a computer, and vice versa, then you are most likely doing this via a USB cable. Today I will talk about the way files can be transferred. (photo, video, music) to a phone from a computer (and vice versa) via a Wi-Fi network, through a router.
We will get full access to the files on a smartphone or tablet and we will be able to copy, delete, create new files, as when connecting to a computer via cable. Only in our case, we will be connected by air, without wires. And the connection will be configured via FTP.
All you need is a mobile device on Android, a computer, or laptop, and a router. A computer and a phone must be connected to the same router. We connect Android via a Wi-Fi network, this is understandable, and a computer can be connected both via cable (LAN) and Wi-Fi.
On the phone or tablet, we will use the program "ES Explorer" to start the FTP server (this is done in a few taps), and on the computer we’ll connect to the FTP server, which we will launch on Android. And that’s it, you can transfer files. Please note that you will not have access to files that are on the computer. And there will be access only to files on a mobile device, as to a drive. If you want to access files on your computer, you need to configure a local network. Some information is in the article.
Configure FTP connection between Android device and Windows
Before proceeding to the setup, you need to decide whether you only want to establish such a connection sometimes, and after each disconnection and connection of the smartphone to the router, enter a new address on the computer, or you will often use an FTP connection and want to create a connection to your devices on the computer. That would then just run the server on a mobile device, and immediately watch the files on the computer.
If you want to create an FTP connection to your Android device on your computer, and do not enter the address every time, then you definitely need to reserve a static IP address for your phone (tablet) in the settings of your router. So that the router for your device always gives the same IP.
On different routers, this is done in different ways. Later I will definitely prepare a separate instruction for different routers. Here, for an example:
We go into the settings of the router, and on the main page click on the "Clients" tab
Next, click on the device for which you want to reserve an address, put the switch opposite the "MAC and IP address Binding" to "ON", and click the "Apply" button. Everything is ready, now our phone, in my case Lenovo, will always receive the address 192.168.1.178.
We start the FTP server on Android through the program "ES Explorer"
Perhaps there are other programs for these tasks, but I did not even check. Everything works fine through ES Explorer. Anyway, I think this file manager is the best for Android.
If you don’t already have ES Explorer installed, install it through the Google Play Store. You can install directly from the device. Here, I give another link: https://play.google.com/store/apps/details?id\u003dcom.estrongs.android.pop&hl\u003den.
Update: ES Explorer is no longer on Google Play. You need to search and download it from third-party sites in the form of an .apk file. But at your own peril and risk.
Next, launch the "ES Explorer". Open the menu (swipe from left to right), and select "Remote Access." Under the "Status" should be the name of your Wi-Fi network. Click on the button Enable.
The address that we will now enter on the computer will appear.

This completes the FTP setup on Android. If you click on the button in the form of a “gear”, the settings will open. There are not many of them, but they are useful. For example, you can disable server shutdown, after closing the program, you can configure the port, set the root folder, change the encoding. See more information on the settings under the spoiler.
There is an account setup. By default, an unsecured FTP server is created with anonymous access. If desired, you can specify a username and password, which then will need to be specified when connecting to a computer. But this is optional. And yet, there is a "Create Shortcut" item. After clicking on it, a shortcut will appear on the desktop, with which you can start the FTP server with one click.

Go to the settings on the computer.
We connect from a computer to a phone or tablet via Wi-Fi
I checked the connection from a laptop to Windows 7 and Windows 10. If you have Windows 8, everything will work the same way. The laptop opened the FTP server that was running on the smartphone without any problems, and I got full access to the files and could manage them.
Everything is simple here. Open the explorer on the computer, or go to "My computer", "This computer" (in Windows 10), and in the address bar enter the address that appeared in the program "ES Explorer" on the mobile device. I have this "ftp://192.168.1.221:3721/". You will likely have a different address.
Watch carefully, enter without errors. As you type, click Enter. You will remove all the files of your mobile device. In Windows 10, everything is exactly the same.

Now you can manage files: copy them from your phone to your computer, and vice versa. Delete, move, create folders, etc.
But, if you close the explorer window, you will need to enter the address again, which is not very convenient. Therefore, you can create a connection to the FTP server in Windows. After that, the folder of your device will appear, opening which, you will immediately access the files. Provided that the server on the phone is turned on.
You can connect to FTP using the standard Windows tool. If for some reason the standard tool does not suit you, then you can use third-party programs, for example, the "FileZilla" client.
Create a permanent folder with FTP connection to the smartphone
Note! This method will work only if you reserved a static IP address for your mobile device in the settings of the router.
Go to the explorer ("My Computer"), and click on the "Connect a network drive" item.

On Windows 10, this step looks a little different:


Another window will open in which we click "Next". In the next window, double-click on "Choose a different network location."

A window will appear with the account settings. If you did not specify a username and password in the "ES Explorer" program, then leave a checkmark next to "Anonymous Login", and click "Next." And if you asked for data to connect, then specify them.

In the next window, you need to specify a name for the network connection. I wrote something like "My Lenovo." You can specify any name, and click "Next". In the last window, click on the "Finish" button.

A folder will open immediately with the files that are on your Android device. A shortcut to this folder will always be in Explorer. And the files in this folder will always be available when the FTP server is enabled on the mobile device (remote access).

When you want to upload a song to your phone, or see a photo, just turn on "Remote Access" on your mobile device and go to the folder we created.
Is it possible to connect a laptop to a phone via Wi-Fi, but without a router?
Yes you can. If you don’t have a router and you want to transfer files between your Android mobile device and your laptop wirelessly, then you can configure it a little differently. Rather, the settings will be exactly the same, just the connection needs to be organized in a different way.
If it is not possible to connect via a router, then you need to organize a direct connection of the laptop with a mobile device. To do this, it is enough to start the distribution of Wi-Fi networks on the phone. It seems to me that every smartphone can do this. This function is called differently. Something like "Access Point".
Launch an access point on a smartphone (you don’t even need to turn on the mobile Internet so that the laptop does not gobble up all the traffic), and connect our laptop to this access point. Further along the standard scheme that I described above. Everything works, checked.
Afterword
If you do not often connect to your mobile device to share files, then of course you can use a USB cable. But, if you often need to copy something, then the method described above definitely deserves attention. We click on the icon on the mobile device, and on the computer we immediately get access to the files. It’s convenient.
How do you use this connection? What are the pros and cons? Share your experiences in the comments, and of course ask questions.
We continue to experiment with wireless connections. Today I’ll tell you about one more trick, namely how to quickly and without strain transfer a file from a computer to an Android phone via WiFi. Well, for example, I wanted to quickly drop a photo, video or favorite music - you need to disassemble the phone, get the micro SD flash drive from there, look for an adapter for the computer, etc. Or connect it to your computer via a USB cable, which always lies somewhere. And then configure it as a drive - you know, that’s a gimmick.
Application to send data from Windows to Android
So, it is possible to transfer any files and data - videos, photos, music, books and so on - from your phone to a computer or laptop easily and simply. Owners of the iPhone or Xiaomi are more fortunate in this regard, since by default applications such as (the former MiDrop) are installed in their shell.
But for the “naked” Android there is one interesting and uncomplicated program for a simple user - WiFi File Transfer. To quickly exchange files between a computer (laptop) and a smartphone (tablet), both of them must, of course, be inside the same local network. We find the program in the Play Market by name, install and launch it.
In the program window, click on the "Start" button and get a link to the IP address that is set for your phone or tablet.

We copy it and open it in the computer browser. My address looks like 192.168.1.88:1234. We go through it and get to the html page, which is a complete directory of all the files and folders on the phone - both on the internal memory and on the SD card. and we have full access to them - you can copy, move, archive and delete.

The right column displays information about the amount of space used, as well as the battery indicator of the phone. You can play with all these files, but now we are interested in the question - how to transfer the file to the phone via WiFi?
Transferring files from a computer or laptop to an Android smartphone
To do this, first go to the directory in the main window where we want to download the file, and then again look at the right column and click on the "Select File" button to transfer one file to the phone or "Select Folder" to transfer an entire folder at once.

Select the desired file on the computer - it will be added to the job queue.
![]()
Next, click "Start Download" and wait for the process to complete. After completion, the page will reload and you will see the document just transferred in the list of files in the main window. Here you can directly rename it “without departing from the cash register”.

Now you can return to the phone, click the “Stop” button and check if this file really is on the phone. From the screenshot below, everything is clearly visible. By the way, the picture was a screenshot of the page of my site with an attendance counter, which shows the number “7900” - that is how many people went to the blog on January 2 — great news, the ranks of our friends are steadily replenishing!

Here is such a good application, with the help of which, by the way, you can easily transfer large files to your phone, and at a fairly large distance of the WiFi network, which can not be said about Bluetooth.
There is also another way of cross-platform transfer of photos between different gadgets through, but I will write about it another time.
Modern technologies greatly simplify our lives. Already today, users can transfer files over Wi-Fi. In doing so, you get a higher communication speed. Moreover, every modern gadget, whether it’s a smartphone, tablet, laptop or netbook, is equipped with a Wi-Fi wireless adapter.
File sharing
As you already know, this type of connection has a large coverage radius and high connection speed. Nowadays, there are several ways to transfer files over a Wi-Fi connection:
- With the help of special applications that provide access to your folders and content.
- If we are talking about computers, then you can create a home or virtual network and open access to the necessary folders for all members of the group.
How do these options work? Everything is quite simple. It is worth noting that the first method is focused on mobile gadgets, such as smartphones and tablets. Notebooks are not yet equipped with Wi-Fi Direct technology. But soon it will probably be fixed.
So, let's look at all of these file transfer methods in more detail.
How to use Wi-Fi Direct
Everything here is very simple and intuitive. First of all, you need to go into the device settings. Let's consider further actions on the example of a Samsung S4 smartphone with the Android 5.0.1 Lollipop operating system. So, go to the menu and find the “Settings” shortcut, which looks like a gear. Go to the “Connections” tab and select the “Wi-Fi” section.
Now turn on the adapter. To do this, move the slider located in the upper right corner to the "On" position. A list of available connections appears below.
Now press the "Menu" button, which is located to the left of the mechanical "Home" button. An additional menu will open, in which you should select "Wi-Fi Direct". The same actions should be performed on another device (to which you want to send the file).
After that the search will begin. Below you will see a list of devices on which Wi-Fi Direct is also enabled.
You just have to select the desired connection from the list. Just click on it with your finger and the gadgets will automatically pair.
After that, you need to find the file you want to transfer. Press and hold your finger on it until an additional menu appears.
Select "Send via."
In the window that appears, simply select “Wi-Fi Direct”.
You will automatically be taken to a menu where all smartphones and tablets with the function turned on will be displayed. Your task is simply to select the desired connection and click the “Finish” button. Now it remains to wait until the file transfer is completed.
As you can see, transferring data over Wi-Fi between Android devices is very easy and simple. But not all gadgets support the technology described above. Moreover, what to do if you need to transfer content from a tablet to a computer or vice versa?
In this case, you will have to use one of the applications that open access to the necessary data.
What is Wi-Fi Direct: Video
File Transfer Using a Special Application
There are a lot of similar applications. Moreover, they all work on the same principle. At the same time, programs for transferring files over Wi-Fi can be divided into two groups:
- Direct transmission.
- Sending data through the server.
The most common and simple program for direct file transfer is an FTP server.
This is a free application that can be downloaded from the Play Market (Google Play). Using it is very simple. Run the program on the smartphone from which you want to transfer the file.
In the center of the screen you will see a big red button, on which will be the inscription "Press the button to start the server." Push it.
An IP address will appear on the screen, which you must enter in the search bar of a browser or in Windows Explorer (My Computer).
After that, you will see all the folders and files of your smartphone, which are specified in the application settings. As a rule, by default, the program shares the internal memory of the smartphone (tablet). But you can share a specific folder or the entire flash drive.
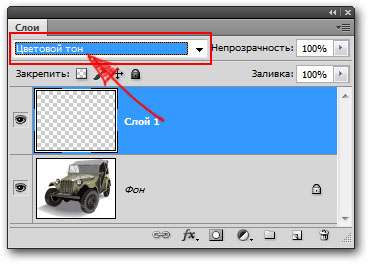
This is done as follows. Open the FTP server program. Click the wrench icon in the upper right corner. Find the line "Home Directory".
Click on it. Next, select a folder or another directory, for example, a USB flash drive. After that, close and reopen the application. Press the button to start the application and connect to the device via Windows Explorer or a browser (you already know how to do this).
After connecting, you can copy files both from a tablet (smartphone) to a computer, and in the reverse order - from a smartphone to a PC. There are other similar applications, but they all work on the same principle, so you can deal with them without much difficulty. The application works directly, without the use of servers and cloud storage.
File Transfer Using AirDroid
Everything is simple here. You need to install the AirDroid app on your smartphone (tablet). You can download it on Google Play absolutely free. After starting the application, you will have to go through a simple registration.
Then on your computer, open a browser (any). In the search bar, enter the website address: web.airdroid.com. A window will appear on the screen, which is divided into two parts. On the left you can enter a username and password. On the right is a QR code. We need exactly a QR code.
Now on the phone in the AirDroid application (after registration) you will see the line (at the very top) "Go to the address". Below is the link, and to the right of the link is the QR code icon. Click on this icon.
Now just point the gadget's camera at the QR code that appears on the computer screen.
Devices will automatically connect and you will be presented with a menu for managing and interacting with devices.
To download the desired file from the tablet to the computer, simply click on the “Files” shortcut. Select the desired document or folder and click "Download."
To send content from a computer to a smartphone, look at the right side of the menu in the browser. You will see the line “Download to ...” and then there will be a path where the file or folder will be saved. You can change this path at your discretion.
Below you will see the words “Drag files here.” If you drag the necessary documents into this window, they will be downloaded to the Android device.
But to the right, you can click the "Send File" or "Send Folder" button. A window will open in which you just need to select the desired content. Select it and click "Open." Everything will be loaded into the specified directory.
As you can see, Wi-Fi data transfer is easy. Just remember that both devices must be connected to the same Wi-Fi network. To do this, you must have a router or virtual network configured.
How to transfer files over Wi-Fi: Video
I work as a private computer master. I have been professionally repairing computers for more than 12 years, as an amateur since the 90s.
For two years he worked as the head of a service center specializing in connecting subscribers to the Internet and computer help.
Connecting your phone to a computer via wifi can significantly save expensive 3G traffic and create your own wireless network even without access to a router. And in this article we will look at how to distribute wifi from a computer to a phone, and also touch on the technical features of such a non-standard Wi-Fi network.
Of course, distributing wi-fi from a computer to a phone without a router is possible only when the PC has its own wifi adapter. This issue is discussed in more detail in the articles. and.
So, among the most common ways to connect your phone to a computer via wifi, you can note the creation of a Wi-Fi connection using Windows and using the command line. By the way, the computer here acts not only as an access point, but also as a repeater.
How to distribute wi-fi from a computer to a phone through the Windows 7 interface?
To begin with, we’ll analyze the option of connecting via wi-fi using Windows 7: this is the most simple and universal way to create a network between a computer and a phone.
Note that the names of folders and files for other versions of Windows may be slightly different.
- - To transfer files from a computer to a phone via wifi, the PC must have an active Internet connection;
- - Create a new connection "Wireless network computer-to-computer";
- - Fill in the network name (for example, let's call it “MyNewNetwork”), (WPA2 - PSK) and the key (create a password) for the created network, and click “Save Settings” - “Next”;
- - Click on “Enable connection sharing.” This completes the transformation of the computer into an access point. In the "Sharing Options" section, set "enable" on all the required items

Now from your phone, search for available wifi points, find the network you created ("MyNewNetwork") and connect to it by entering the security key.
How to distribute wi-fi from a computer to a phone via the command line?
To distribute the Internet from a computer to a phone via wifi:
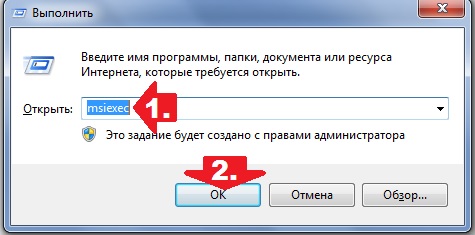
Open the "Command Prompt";


Enter "netsh wlan set hostednetwork mode \u003d allow ssid \u003d wifi phone key \u003d 000000 keyUsage \u003d persistent" (accordingly, all commands are entered without quotes);

- - a notification appears about the successful placement of the network you created ("MyNewNetwork");
- - in the “Device Manager” (“My Computer” - “Management”), a device called “Microsoft Virtual WiFi Mini-Port Adapter” will appear;
- - click on the created connection and open “Property” - “Access”;
- - set both parameters for sharing and select a new connection in the list.

To turn on the network, open Command Prompt again and enter netsh wlan start hostednetwork.
This command must be entered each time the computer is turned on - thereby you determine when to provide access to your network.
To disconnect - "netsh wlan stop hostednetwork".
To change the name or password - "netsh wlan set hostednetwork mode \u003d allow ssid \u003d" WifiNewName "key \u003d" New password "keyUsage \u003d persistent".
To recover the password, “netsh wlan show hostednetwork setting \u003d security”.
In addition, to simplify the connection of the phone via wifi to the computer, you can make a mini-utility that will contain a command to start the network:
Open Notepad or the Notepad ++ editor, enter the command to start the network;
Save the file with the extension .bat, in the column "File name", for example - new-wifi.bat;

After saving the program, to start the network, just open this file.
For .bat files, and in particular .vbs, the included English keyboard layout is required.
However, such a network has a significant drawback: the computer will distribute wi-fi to the phone and other devices only in the "active" mode of operation, but the network will become unavailable, even if the PC simply goes into sleep mode. Therefore, it is recommended to immediately turn off the Hibernation mode.
How to connect a phone to a computer via wifi: automatic network mode
You can also configure automatic turning on and off the network if the Internet needs to be distributed for a limited time.
Create 2 .bat files: one with the power on command, and the other with the power off, respectively. For this:
- - “Start” - “Control Panel” - “System and its maintenance” - “Administration” - “Task Scheduler” (or maybe “Scheduled Tasks”);
- - Set your task for each file (on / off): for example, you will have Internet distribution every day from 12:00, and the second file with a shutdown will be launched every day at 16:00.
Sometimes the error “Could not connect to the network ...” occurs or it just goes “permanent” without access to the Internet.
The reason that wi-fi does not work on the phone (but it works on the computer) may be:
Blocking Connection by Windows Firewall

Block connection by antivirus.