Much, including the profession, is now built on mental and computer activities. But far not only graphic designers need common knowledge of work in Photoshop, to which filling belongs.
Fill is a tool present even in the simplest graphic editors (Paint), and in professional programs for drawing and editing (Paint Tool SAI, Adobe Photoshop). She is changing hue or transparency selected area on a virtual canvas. The difference from the brush is in the automation of the action, uniformity and uniformity of the coating.
Fillings come in four types:
How to fill
The first thing to do is create a new document. When you hover over the button " File"In the upper left corner, a menu opens with the item" Create". A panel opens with a choice of canvas sizes. After selecting the sizes, a white or transparent canvas appears. 
The fill is in left side menu with other tools and resembles a can of paint. At the very bottom of this menu is a mini-panel with two selected colors. After setting these shades, you can select the desired tool.
You can also use hot keys for filling:

The appearance of Adobe Photoshop may vary depending on its version, but the default tools are on the left.
Color fill
To fill a specific object, shape or layer with color, you need to move cursor on this item, and click the left mouse button.
To fill the whole background in Photoshop in one shade, you can click on any part of the canvas. If the initial (zero) layer is heterogeneous, for example, a picture is shown on it, you will need to create a new layer on top of the background and fill it in the same way.
In some versions of Adobe Photoshop, fill and vector have their own icons. In others, they combined into one and provide a choice by directly clicking on them. They are usually shown with a gradient icon.
Gradient
To work with a gradient, first on the already mentioned tone bar two are selected. The vector will go from the first (top) to the second. Pushed gradient icon. Clamping the left mouse button on the selected area is a line that sets its path. After the button is pressed, a gradient appears with the specified direction, from the first color to the second. 
Transition one color to another will occur only along the length of the given line. The shorter the line, the sharper the transition, and vice versa. Adobe Photoshop has predefined tone sets for the gradient. You can open the panel with them by clicking on gradient palette. It is located approximately under the edit button. Next to the gradient palette, you can choose its type: linear, conical, rhomboid, mirror, radial. To the left of the menu with gradient types, you can set the opacity from zero to one hundred percent.
Pattern
The use of texture is not much different from the main color fill. The desired tool is selected. In the top menu you can choose than fill the selected area canvas. It could be main hue (color in the upper square of the tone selection) and regular. To fill the layer with texture, you need a regular color. After selection, a menu with textures becomes available. It is located to the right of the hue setting screen, in the top line.
On the texture selection panel, not all patterns are displayed, but only used set. Sets can be changed by clicking on the arrow on the right, and optionally download. 
How to fill the selected area
You can select an area in Adobe Photoshop with a couple of mouse clicks. IN toolbars, at the top, is the selection tool. When you click on it, you can choose either " Quick selection"Or" Magic wand». 
When you click on the quick selection button, you are offered a choice of brush, its size. Next, the user clicks on the areas that need to be selected. What is not automatically selected is further manually selected.
Convenient for uniform color of the object. The tolerance is adjusted at the top. It means the number of characters selected by the wand. The greater the tolerance, the more pixels will be considered an instrument of uniform tone. 
To fill in the selected area just select the shades, patterns, texture or direction of the gradient and click on any part of the selected area.
You can also select the selected area. fill with content. In this case, the selected area will be smoothly filled with adjacent sections of the photo.
To do this, after highlighting, go to " Editing» — « Fill selected area". In the window " Fill layer"In the list of" Use"Indicate" Content Based».

Creating a layer fill is a very often used method in Photoshop. It is used both when creating a new layer, and in various edits of one of the current layers. Despite the sufficient obviousness of the method, novice users may experience some difficulties with its implementation. In addition, in various situations, the filling procedure may have its own characteristics and variations.
Types of fills in PhotoshopIn the standard package in Photoshop, various types of fillings can be used:
- solid uniform color;
- gradient;
- pattern.
Fill Execution
- In order to perform a simple color fill, select the area that will be filled with color, activate the Paint Bucket Tool in the main toolbar, select the main color and left-click inside the selected area. As a result of the specified action, it will be filled with the selected primary color.
- To perform a gradient fill, also select the fill area on the image. After that, activate the Gradient Tool in the toolbar, select one of the predefined sets of the gradient fill used. If necessary, fine-tune the settings for the selected set. Specify the shape and mode of the gradient, and then indicate the direction of the gradient vector inside the selected area. To do this, position the cursor at the starting point, hold down the left mouse button, move the cursor in the selected direction and release the left button. As a result of this action, the selected area will be filled with a gradient fill in accordance with the preliminary settings you made.
- If it becomes necessary to fill with a pattern from the main menu, go to the following path “Layers” - “New fill layer” - “Pattern” (“Layer” - “New Fill Layer” - “Pattern”). Click the “OK” button in the window that appears. As a result of this action, the selected area will be filled with the last fill-pattern that you created. If you have not created such a fill, then first you need to do the following.
Create a new document. It is desirable that in this case his image had a square shape with the same values \u200b\u200bof height and width. This will ensure that in the future, when using them as patterns, uniform filling of the source images. Create your own pattern or copy it to images from other sources. Select the image area using the Rectangular Marquee Tool. From the main menu, go to the path “Edit” - “Define Pattern” (Edit-Define Pattern). In the window that opens, assign a name to the new pattern and click the "OK" button. The fill pattern is created and ready to go.
Welcome to the Start-Luck Blog. Today we will continue to study Photoshop. This topic will be of interest to photographers, designers, illustrators and anyone who wants to master the graphics package. We’ll talk about how to fill the layer with color.
I decided to pay attention to this because I noticed that many beginners, and those who have been working in graphics for a long time, filling in layers, spend more time on this than they should.
For example, artists, sometimes simply paint each layer with a brush with their color. But you must admit, when you need several options for a background or background for a photograph, you don’t want to spend hours just looking for a background color.
And if you take into account that the contours in the photo are very difficult to accurately brush around, then this tool is clearly not suitable for us. I will share with you the way that I use. It seems to me optimal, suitable for both simple images and complex photographs.
By the way, if you are a novice web designer, I highly recommend paying attention to the resource netology.ru . This university has a course " Adobe Photoshop: Basics for a Web Designer ". What is it good for: training is conducted by practicing experts who know everything about. Training is divided into theory and practice, lectures are held in the afternoon. This is especially convenient if you work and study. The process of submitting knowledge is divided into stages, from the basics to creating a website layout.

In a short period of training, you will receive skills that will help you. If you studied on your own, the first fruits of your labor would appear much later. I am a person working for the result. The blurry prospects that I will ever learn something do not please me. I believe you too, and the courses will help you achieve your final goal in a short time. You will be able to work and get paid for it.
Tools for work
We are a little off topic, and now I propose to return to it. As always, my work is done in the CC version of the program. You can work with the version that you have. There will be no particular differences in the interface, so there should not be any difficulties.
For work, I need a picture, it is better to choose the one on which the image will be of a simple form. For the first time, a picture with a ball is quite suitable. If you want another object that you enjoy working with.

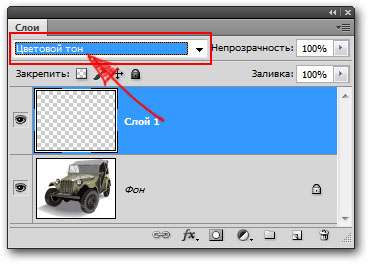
I will paint the background white in hot pink. I think the blue and white ball will stand out against such a background. Again, you are free to choose your favorite color and not limit yourself to anything. Open our picture in Photoshop, use the Quick Selection tool in the sidebar, and select the object.
Highlighted - excellent! After that, in the top line, select the selection. In the drop-down menu, look for "Refine Edge".

We have a window, we need.

Now carefully look at the screenshot and do everything, as indicated on it. Then print to.

As a result, we see the ball on a transparent layer. But it is impossible to fill it yet. To fill, create a new layer.

Painting
And now we can go directly to the fill. We take a ladle ("Fill") on the toolbar, select a color. With us, as you recall, pink can be filled with black or white only if you fill it with white, the result from the source will not be any different.

The settings panel should look like this. Shift + Backspace will help bring up the fill settings.

Click "fill" on a new transparent layer. We get the result that we needed.

In addition to everything that I described, there is also. The tool in the panel on the left, next to the fill. The principle of operation is the same as with simple filling. Only the gradient allows you to create beautiful, interesting color transitions. What makes the painted layer more complex and rich.
In the first stages of the allocation of the ball, you could use the "" tool. In the right menu with layers, at the bottom there is a camera icon. This is the mask. You could click on it, and then paint the ball with a brush. After that, again click on the mask icon, return to normal mode, our ball is highlighted.
Graphics is important!
If you stumbled upon my article, you are probably interested in graphics. Everyone uses it in various fields. It is impossible to deny the influence of a beautiful picture on a person. Everything that we see, you divide into beautiful and ugly. This is how human perception works. For any of your business to work, beautiful and high-quality presentation is important. In internet marketing this is very important.

Therefore, I advise everyone to learn the basics of digital graphics. You will cultivate an excellent taste in yourself, learn to see the beautiful, and most importantly, you will learn how to create a graphic design that will work. Every activity has its own laws. There are a lot of them in web design: layout, color, tone and proportions. All this affects our perception, something attracts, and something repels. Study these laws and let them work for you.
I know many sites that boast a great business idea. But they have a repulsive design, it is faded, uncomfortable and completely does not fulfill its primary functions. And if you work on it, even just choosing the right background (I recommend reading it -), the information will be striking, and the user will not miss what this resource can offer.
On this I come to an end and say goodbye to you. To develop further, subscribe to my blog and tell friends about it.
I wish you success in any endeavors!
Hello readers.
After reading this article, you will know what the fill in Photoshop is and how to apply it. This will help you erase unwanted objects from images, create new shapes, frames on them, etc. Moreover, you can do this with just one color, or with a pattern, gradient, or tint of the existing background. We will analyze in detail the main methods.
Fill tool
 Let's start the training with a tool with the appropriate name specially created for our purpose.
It occupies one cell with another - "Gradient", which we will talk about later.
Therefore, if you did not find the first one right away, click on the arrow next to the second or right-click on it.
This tool is used to fill in one color or patterns. How to work with him?
- Open the image and duplicate the layer using the keyboard shortcut Ctrl + J.
Do you know how to select an area? Use the Rectangle or Magnetic Lasso tools to do this.

- At the bottom of the toolbar are 2 squares one after another. The first - means the main color. Click on it to select the one you need.
- Bring the bucket to the selected area and left-click once. It will fill with the selected color. Want to fill part of the image with a pattern? Great idea, which is embodied as follows:
- On the top panel, under the Photoshop main menu, are the settings for the tool you have taken. Find a small window with an ornament. Click on the arrow next to it and select the one you like.

- To change the color of the original image to a pattern, just like in the previous case, click the cursor with a bucket in the selected area.
Gradient Tool
You already know where it is. Activate it and pay attention to the settings above:
Click on the arrow next to the long bar with the gradient image. A small window will pop up where you can choose the color and type of tool.

- Several icons located nearby determine its shape: it can be radial, angular, linear, diamond-shaped, etc.
- Try different effects from the “Mode” section, among which there is fading, soft light, dimming of the base, etc.
- Want to see the original image under the gradient? Play with opacity.
To apply the tool to the selected area, hold the left mouse button on one of its edges and drag it from the opposite side.
Fill or brush?
Do you need to remove an object from the image, as if it had never been there? In this case, the fill colors proposed by the program will not work, since the original background should remain. To solve this problem, you can go in two ways: use a spot recovery brush or fill with the content.
About how to do this I wrote in this note:
The first option should be used when the excess object in the photo is far from other objects in structure and color, and it is surrounded by many solid pixels, which will give a sample of the hue of a point brush.
By the way, you will also find it among other tools - it looks like a patch. To remove an unnecessary area, simply click on it with a large diameter brush without first selecting the object.
Here is what came before:

Here's what happened after clicking OK:

Are there any shaded places? Correct them with a small diameter spot repair brush.
Stroke
Do you want to frame the photo? Photoshop offers a simple option:
- “Rectangle” circle the photo, slightly departing from each side.
- Go to the “Editing” tab and select the “Stroke” command.

- In the window that appears, specify the desired color, width and blending mode.
- Click OK.

Thus, the part of the image that remains behind the selection will be filled with color.
http://o.cscore.ru/
Inspiration to you friends.
Come back to me for a new portion of useful Photoshop knowledge and more.
Very often when working in Photoshop you need to fill the selected area or the entire layer. And if masters and professionals do it with ease, then beginners may experience some problems in figuring out how to carry out such a task.
By the way, if you don’t know what is the difference between such concepts as opacity and fill in Photoshop, then the article at the specified address will help you figure it out without problems.
And now let's try to figure out how to make the fill anyway. That's why we wrote this article on the topic of processing photos in Photoshop.
Fill the selected area in Photoshop:
To select an area, select the Lasso tool (for this, press the L key on the English layout) or the Rectangular Region tool (M key).
Then make a selection and click inside this area on the right mouse button, after which you will need to select the “Fill” item:
Then in the new window you need to select the fill color, for this, in the drop-down menu near the “Use” item, you need to choose the main, background or color to choose:

When you select a color and click on the “OK” button, the selected area will be filled with the desired color.
Fill the entire area or selected using the Fill tool
First you need to activate the "Fill" tool, for this, press the "G" key on the keyboard, if the "Gradient" tool becomes active, instead of the "Fill", then press the key combination Shift + G.
Then select a color in the color palette, then select the area if you want to fill only part of the image or just click on the screen and this tool will work. That's all.
Photoshop background fill:
Not many even very experienced users know that you can change the background not only of the picture or its part, but also around the document. In Photoshop, the background is always gray around the open image. However, it can be easily exchanged for any other! All that needs to be done is to select a color in the window of the main color palette, then activate the "Fill" tool as described above, and finally hold down the Shift key and click on the gray background of the document.